Sterile processing
How every reusable instrument gets from the end of one case to the start of the next: cleaned, checked, wrapped, sterilized, stored and sent back, and how you know each step worked.
1Why it matters
Reusable instruments are used on one patient after another. Between cases, each one travels a loop: from the point of use to decontamination, then to inspection and packaging, through a sterilizer, into sterile storage and back to the OR on a cart. That whole loop is called reprocessing, and its goal is an instrument that is safe for the next patient.
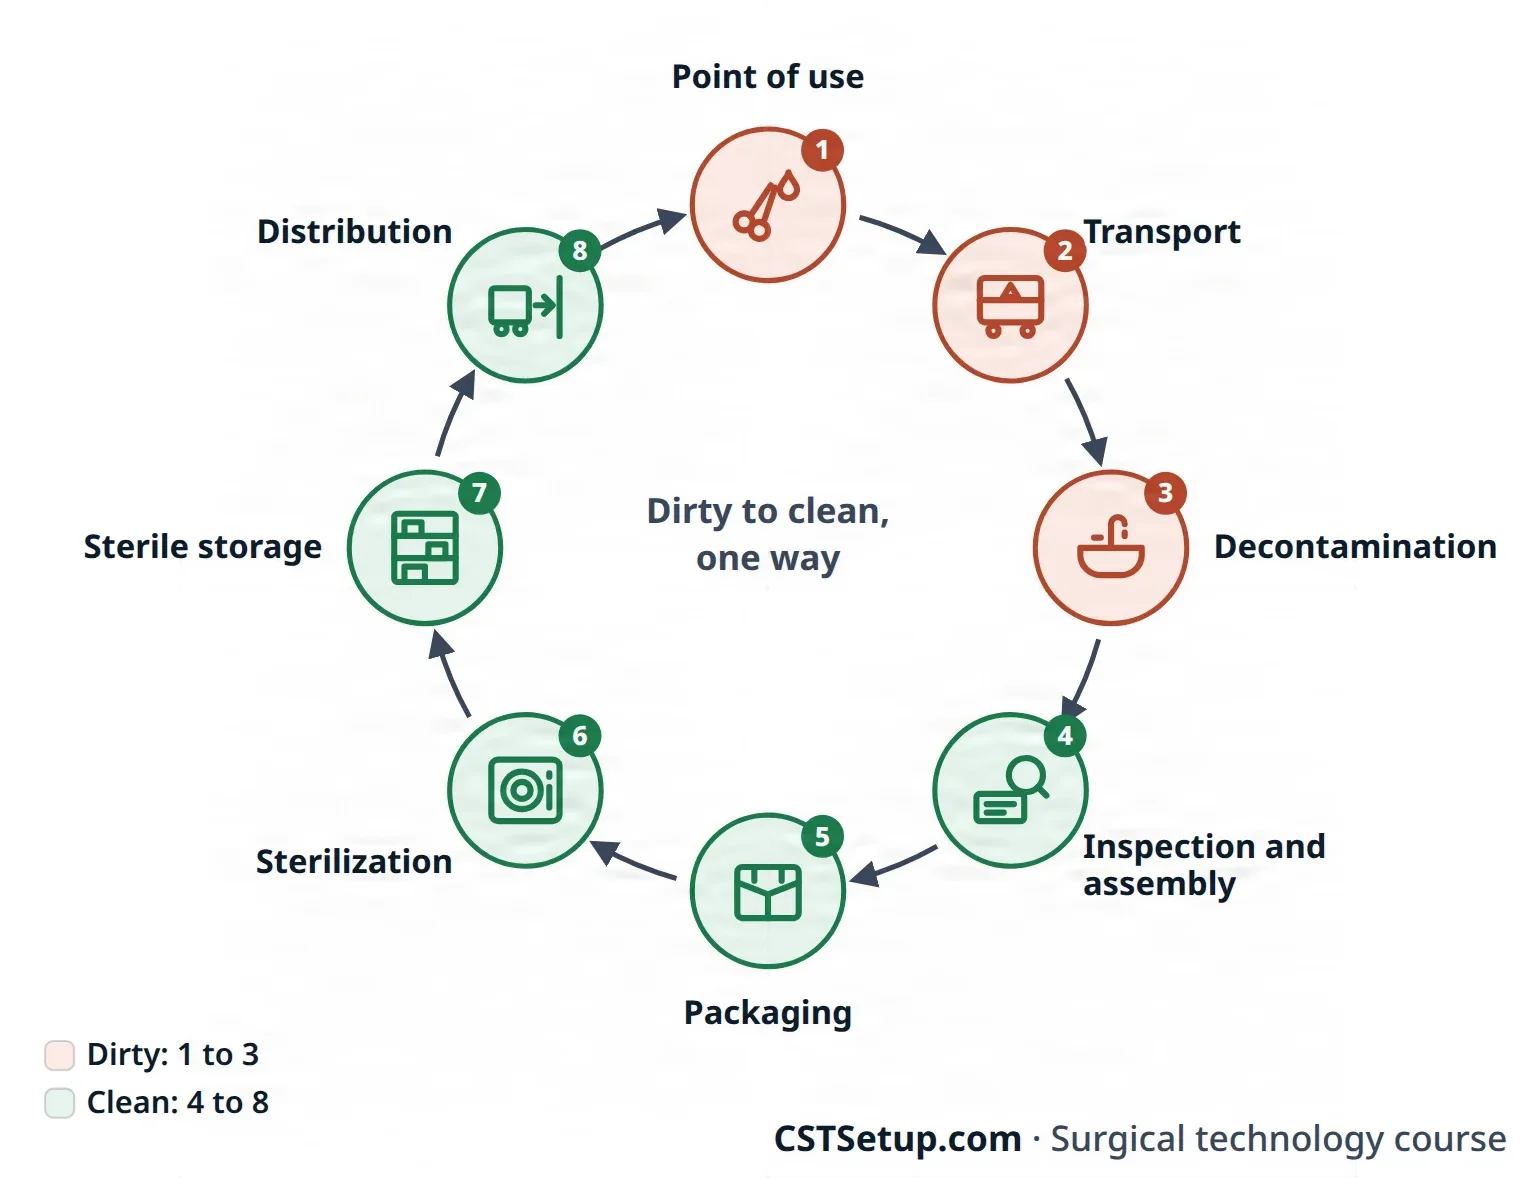
In large hospitals, sterile processing technicians run most of the loop in the sterile processing department (SPD), sometimes called central service. In smaller facilities, surgical technologists may do the work themselves. AST sees sterile processing as another job open to a CST. A facility may require extra training first, and AST recommends that a CST working there earn that field's own credential, such as the Certified Registered Central Service Technician (CRCST) offered by HSPA, the Healthcare Sterile Processing Association, which takes at least 400 hours of hands-on experience and an exam.
Even if you never work in SPD, you are part of the loop. You start the cleaning at the point of use, you prepare dirty instruments so SPD staff are not hurt, and you check each package and its indicators before its contents are used on the patient. A failure at any step can give a patient an infection.
This chapter follows the loop from start to finish. Microbes and how they cause infection are in chapter 10, the hospital's departments in chapter 17, the rules of asepsis in chapter 26, instrument parts and checking instruments during a case in chapter 24, opening packages onto the field in chapter 28, and breaking down the field, turning over the room and cleaning the OR itself, from damp dusting to terminal cleaning, in chapter 30.
2The words of sterile processing
These terms come up at every step, and on the cert exam.
- Bioburden: the number of microorganisms on an item before it is disinfected or sterilized.
- Biofilm: dense colonies of microbes stuck to a surface inside a slimy layer they make themselves. Biofilm is very hard to remove, and keeping soil from drying on instruments helps stop it from forming.
- Cleaning: removing soil with water, detergent and friction. An item is clean when no soil is left on its surface. Cleaning always comes first, because soil shields germs from everything that follows.
- Contaminated: having touched a possible or actual source of germs. A contaminated item is no longer sterile and cannot be used in sterile parts of the body.
- Decontamination: cleaning, and disinfecting when needed, to lower the bioburden and remove or destroy bloodborne pathogens, so an item is safe for staff to handle without gloves and germs are not passed on.
- Cavitation: the cleaning action of an ultrasonic cleaner, in which tiny bubbles collapse inward and knock soil loose.
- Chelation: the action of chelating agents in a detergent, which hold the minerals of hard water in solution so the detergent can work.
- Disinfection: killing most microbes on an object, but not all spores. A disinfectant is the chemical used, and it is meant for nonliving surfaces only. An antiseptic is a chemical used on skin or other living tissue, as in a surgical hand rub. Thermal disinfection uses hot water instead of a chemical, as in a washer-disinfector.
- Sterilization: a process that destroys all microorganisms, spores included. An item is sterile or it is not; there are no levels. A sterilant is the agent that does it, such as steam or a gas.
- Event-related sterility: a package stays sterile until something happens to it, such as a tear or moisture, rather than until a date passes.
- Medical device: any instrument, implant, piece of equipment, material or apparatus used to diagnose, treat or monitor a patient.
- IFU: a maker's written instructions for use. Instruments, cleaning chemicals and products such as instrument sprays come with them, and each is used and processed as its IFU says.
3The sterile processing department
SPD is laid out so that dirty items move one way only: from the decontamination area, to the clean preparation and packaging area, to sterile storage. The decontamination area is walled off from the clean areas so germs cannot drift into them.
- Decontamination area: restricted to the staff working there. Its air is under negative pressure, so air flows in and not out, with at least 10 air exchanges an hour. It is kept cool, 60°F to 65°F (16°C to 18°C), partly because staff wear heavy protective gear. Eyewash stations must be reachable within 10 seconds.
- Preparation and packaging area: where clean instruments are inspected, assembled into sets and wrapped. Staff there wear a clean scrub suit, a head cover and a long-sleeved jacket. Large sterilizers sit beside it.
- Sterile storage: under positive pressure, so air flows out when a door opens, with limited traffic.
Quality control runs through every step. It means checking, recording and reporting, both on the machines, such as sterilizers and washers, and on the people: whether each person follows the procedure correctly and stays protected while doing it.
Protecting yourself in decontamination
Everything that arrives in decontamination may carry bloodborne pathogens, so staff follow standard precautions and wear personal protective equipment (PPE) that fluid cannot pass through, as the Occupational Safety and Health Administration (OSHA) requires:
- a hair cover, and goggles or a full face shield with a fluid-resistant mask
- a fluid-resistant gown with sleeves, or a waterproof apron over a gown
- heavy utility gloves whose cuffs reach past the gown's cuffs and resist cuts
- fluid-resistant boots or shoe covers
An ordinary cloth scrub gown and thin exam gloves are not protection here.
4Point-of-use care
Reprocessing starts in the OR, at the point of use, during the case and the moment it ends. Blood and tissue left to dry are hard to remove, let biofilm form, and can pit and corrode the steel. Point-of-use care protects the patient who gets the set next, the instruments themselves, and the SPD staff who will handle them.
During the case
- Wipe blood off instruments with a sponge wet with sterile water, and flush suction tips and other hollow instruments with sterile water so they do not clog.
- Never use saline on instruments. Its chloride pits and rusts stainless steel.
- Wipe down equipment that cannot be soaked, such as cameras, light cables and power equipment, from time to time during the case when blood or body fluids get on it.
At the end of the case
The CST who scrubbed the case breaks down the field, because that person knows where every sharp is.
- Sharps: take off every disposable sharp (blades, needles) and discard it into the sharps container at the point of use. Put reusable sharp instruments, such as trocars, reamers and Gelpi retractors, in their own basin or puncture-resistant container so nobody has to reach in blind.
- Disassembly: take apart instruments with several parts as their IFU directs, and keep the parts together so none are lost.
- Open everything: open the box locks and ratchets of every ringed instrument, so the cleaning solution reaches every soiled surface. Do not thread them back onto a stringer.
- Delicate instruments: put them back in their own tray, and put heavy instruments on the bottom of a basin with light ones on top.
- Cords: coil light cords, power hoses and cables loosely, and keep them out of soaking basins.
- Keep it moist: place instruments in a basin of water with an enzyme detergent, spray or cover them with an enzymatic foam, gel or spray made for instruments, or cover them with a towel wet with water. Do not leave them soaking in enzyme solution for long, which can damage the finish.
- Everything goes back: every instrument opened for the case is reprocessed, used or not, because it may have been contaminated without anyone seeing.
- Tag for repair: mark damaged instruments with the facility's repair tag. They are still cleaned like the rest.
- Reposable parts: some robotic and endoscopic parts can be reprocessed a set number of times. Make sure they are not thrown away by mistake.
AST's 2018 guideline for breaking down the field puts the opened ratcheted instruments on a stringer at the end of the case.
Wet and open. Keep soil from drying, open every hinge, take apart what comes apart, and never use saline.
Transport to decontamination
Dirty instruments go to decontamination as soon as possible after the case, ideally to be washed within 20 minutes, because blood can begin to dry on them within minutes. Before they leave the room, suction off or discard the water or solution they soaked in, so it cannot spill.
They travel in a closed case cart or a covered container that is leak-proof and puncture-resistant, labeled with the biohazard symbol. Soiled items never pass back through the clean core.
AST's 2018 guideline for breaking down the field puts each basin of instruments in a bag with the biohazard label, so the soaking solution cannot splash in the case cart.
5Cleaning
Why cleaning comes first
Disinfection and sterilization only work on a clean surface. Soil can react with a chemical and use it up, or form a physical shield over the germs beneath it. Salt crystals left on a device can protect microbes even inside a sterilizer.
Numbers matter too: the more microbes there are, the longer any process takes to kill them all. Thorough cleaning lowers the bioburden and widens the margin of safety.
What affects cleaning
- The device: hinges, serrations, lumens and channels trap soil, and several parts must be separated before cleaning can reach every surface.
- Dried soil: dried blood is hard to remove, and dried soil must be rehydrated before enzymes can break it down.
- Water: hard water and impurities weaken cleaning chemicals and leave spots, so the final rinse uses treated water: distilled, deionized or reverse osmosis.
- Temperature, concentration and contact time: each chemical works only as its IFU directs.
The standards for this work come from the device makers' IFUs, AAMI (whose ST79 standard covers steam sterilization and ST58 chemical sterilization and high-level disinfection), AORN, AST, the CDC and the FDA. The Joint Commission accredits hospitals and checks that they follow these standards, and the ECRI Institute studies which devices and processes work best.
Detergents
Detergents loosen soil and hold it in the water so it does not settle back on the instrument. They contain surfactants, emulsifiers and chelating agents. Most do not kill germs.
- Enzymatic products break down specific soils: protease for blood and other protein, lipase for fat, amylase for starch. Keep them at or below 140°F (60°C) unless the label says otherwise; hotter water can cook protein onto the steel.
- Neutral pH detergents (pH 6 to 8) are the most common, and an enzymatic detergent with a neutral pH is the usual choice for instruments. They work on both organic soil (blood, tissue and fat) and inorganic soil (minerals), and are safe on aluminum.
- High-alkaline detergents (pH 8 to above 11) are very effective on organic soil such as blood, fat and oil, and lift more kinds of soil than any other detergent, but must be rinsed off completely and damage aluminum, copper and bronze.
- Acid products remove mineral scale and some stains, and are used carefully because they can damage steel.
- Machine detergents: washer-disinfectors usually need a low-foaming, free-rinsing detergent, because suds leave residue on instruments and can harm the machine, and ultrasonic cleaners use only detergents made for them.
Never clean instruments with saline, povidone-iodine, hydrogen peroxide or abrasive cleaners unless the instrument maker approves, and never mix two chemicals.
Unloading and sorting
In decontamination, open the cart or container carefully, because the contents may have shifted on the way. Throw out any disposable sharps, tray liners, indicators and disposable filters left inside, and take rigid containers apart, baskets and filter retention plates out, so each part gets cleaned.
Then sort everything by how it will be cleaned: items that cannot go under water, sharp instruments, heavy and delicate instruments, heat-sensitive items, containers, basins and cups, tubing and other hollow items, and anything that needs repair. Take apart what comes apart, and keep small parts such as pins, screws and gaskets together so none are lost.
Manual cleaning
Some items are cleaned by hand: delicate and microsurgical instruments, items with lumens, items that cannot go under water, anything whose IFU calls for it, and anything that needs hand cleaning before it goes into a machine. Hand cleaning is never done in a sink used for hand washing.
A manual workstation ideally has three sinks, used in order from dirty to clean:
- A wash sink of warm water, about 27°C to 44°C (80°F to 110°F), with detergent mixed to the right dilution.
- A rinse sink of plain or softened water.
- A final rinse sink of treated water, which prevents spots and leaves no residue.
How to clean by hand:
- Keep the instrument under the water while you brush, so contaminated droplets do not spray into the air.
- Brush hinges, box locks, serrations, teeth and tips, where soil hides.
- For a lumen, fill it with solution, then pass a brush that fits snugly and is long enough to come out the far end, several times. Flush the channel with a syringe or water gun, and push debris out of a suction tip with its stylet.
- Use soft brushes, ideally single-use. Reusable brushes are themselves cleaned after use, and worn ones are thrown out. Never use abrasive brushes, and use metal brushes only if the IFU allows.
- Rinse well, then dry lumens with filtered instrument air, which is free of oil and water.
- Pressure tools help: water irrigators flush lumens, instrument-air guns dry them, and a spray nozzle over a floor drain cleans bulky items that do not fit in a sink and the wheels of carts and other mobile equipment. Check that each tool works, and aim the spray away from people.
Items that cannot go under water
Power equipment, cameras, cables and many cords never go under water or under a running tap unless their IFU allows it. Wipe them with an approved solution on a clean, soft cloth, with extra care at the ends, where water does the most harm. Dark cords hide dried blood, so look closely, and check the cover for nicks or tears.
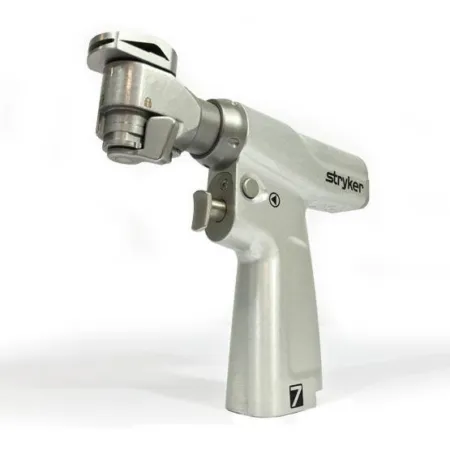
On power equipment, keep battery contacts and connection points dry; a battery, hose or cable kept just for decontamination helps. Saws and drills pack bone chips into their working parts, so they are flushed and brushed only as the maker allows.
Loaner instruments
Loaner sets are lent by a vendor or another facility. They are common in spine and orthopedic surgery, where the facility buys the implants but not the instruments. They may arrive wrapped and already sterilized. Never trust that: nobody knows how they were stored or shipped. They are cleaned and sterilized on arrival, and again before they go back. Facilities set a delivery time, typically at least 24 hours before the case, so there is time to do this properly.
New and repaired instruments are cleaned before they are sterilized too, because they carry metal dust and oils from the factory or repair shop.
Mechanical cleaning
The machines in decontamination are the washer-disinfector, the ultrasonic cleaner, the cart washer and, for flexible endoscopes, the automated endoscope reprocessor (AER), covered with endoscopes below. Machines clean more consistently than hands, do it faster and expose staff to less, but they do not replace hand cleaning for every item.
Washer-disinfector (also called a washer-decontaminator, or a washer-sterilizer when it adds a sterilization cycle). Works like a heavy-duty dishwasher, by impingement: jets of water and detergent strike the instruments and blast soil off. A typical cycle runs:
- A cool prerinse, sometimes with enzymes. Cool water keeps blood protein from cooking onto the steel.
- A hot detergent wash, sometimes with an ultrasonic phase.
- Rinses, then a hot thermal disinfection rinse.
- A lubrication rinse ("instrument milk"), then drying.
After a washer-disinfector, instruments are safe to handle.
Loading the washer:
- Open every hinge, take instruments apart, and put small parts in a lidded holder.
- Never overload the racks, and keep anything sticking up out of the spray arms' path.
- Separate the levels of a multi-level tray and take off lids, so the spray reaches every item.
- Put delicate instruments in small baskets with lids, so the spray does not knock them loose.
- Run basins and containers on a utensil cycle and instruments on the instrument cycle, which is longer.
- Keep electrical, battery and air-powered devices out unless their IFU allows. Heat-sensitive items need a cycle or method their IFU approves.
Quality assurance: review and initial each cycle's printout, run commercial cleaning tests as scheduled, inspect the racks and drain screens daily, and inspect and clean the spray arms routinely.
Ultrasonic cleaner. Sends 20,000 to 38,000 vibrations per second through a detergent bath. Cavitation bubbles collapse against the instrument and pull fine soil out of box locks, serrations and crevices that brushes miss. It cleans; it does not disinfect or sterilize.
- Remove gross soil first: protein soaks up the sound waves.
- Open every hinge, submerge every instrument, and fill every lumen with fluid. Use the machine's mesh trays and do not overload them.
- Run with the lid closed so aerosols stay in. Replace the water after each use, as AORN advises, and de-gas the fresh water each time it is changed. Clean the tank and check the drain for debris at each water change.
- Rinse instruments afterward to remove loosened soil and detergent.
- Never put in: lensed or fiber-optic instruments, chrome-plated or ebonized instruments, or items of plastic, rubber, wood, cork or glass. Some microsurgical instruments are also kept out. Do not mix stainless steel with other metals in one load, which can plate one metal onto another.
- Irrigating ultrasonic cleaners flush solution through lumens, useful for laparoscopic and robotic instruments. Quality is checked with commercial cavitation tests.
Some references still change the ultrasonic water only when it looks soiled or on a set schedule, and empty, dry and wipe the tank with 70% alcohol at the end of each day.
Cart washer. A large washer, like a car wash, for case carts, transport bins, rigid containers and basins. Carts go in empty: nothing is processed inside a cart. Its cleaning is tested regularly.
Specialty instruments
Complex instruments are hard to get clean, and each comes with its own IFU. Follow it step by step.
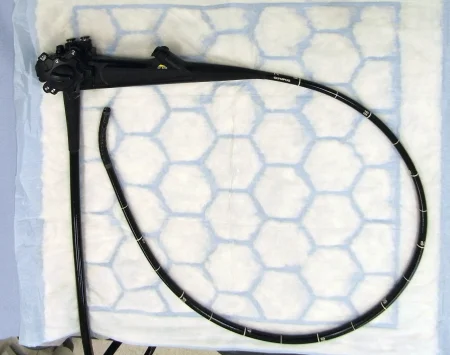
Flexible endoscopes. Their long, narrow channels, valves and ports trap soil and biofilm, and inadequate cleaning of flexible endoscopes has caused outbreaks of infection. Reprocessing follows set stages, and skipping one can undo the rest:
- Bedside pre-clean, right after the procedure: wipe the insertion tube with fresh detergent solution and suction detergent through the channels, so nothing dries inside.
- Leak test, before the scope is put under water. A leak lets fluid into the scope's inner workings. If the scope fails, reprocessing stops and it goes for repair.
- Manual cleaning under the surface of detergent solution: brush every channel that can be brushed, and flush every channel.
- Rinse and dry, so detergent does not weaken the disinfectant and water does not dilute it.
- High-level disinfection or sterilization, by hand soak or in an AER.
- Rinse and dry again, to remove chemical residue that could harm the patient, then store the scope so it stays dry.
Video flexible scopes capture the image with a camera and send it to the monitor as an electrical signal. If the scope comes with a protective water cap, the cap goes on whenever water could get into the scope.
An AER pumps detergent, disinfectant and rinse water through every channel on a timed cycle, flushes with alcohol and air to dry, and prints a record. It exposes staff to fewer fumes than a hand soak. It still needs the bedside pre-clean and manual cleaning first, and only scopes approved for that machine may go in. Its disinfectant is tested every cycle to make sure it is still strong enough, and each cycle is logged with the scope, the technician and the patient.
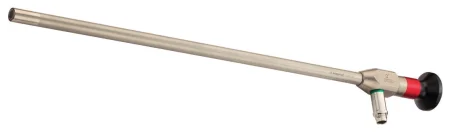
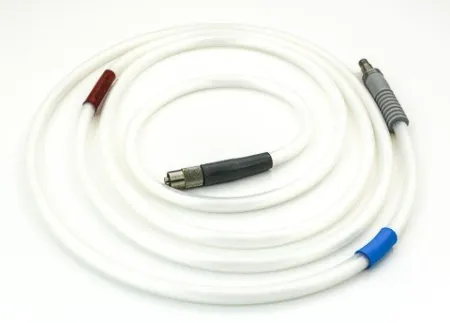
Rigid endoscopes, cameras and light cords. Open every stopcock and port, and take rigid scopes apart from the other instruments to clean them on their own. Clean lenses gently with a soft cloth and the cleaner the maker names, and report a cloudy lens, which can mean a leaking seal. Never put a lensed or fiber-optic item in an ultrasonic cleaner, and never let fluid into an electrical connection: cameras and light cords are wiped down unless their IFU allows soaking. Check the camera cable for cuts and nicks, because a damaged camera goes for repair, and if the cable has a water cap, put it on before the camera goes under water.
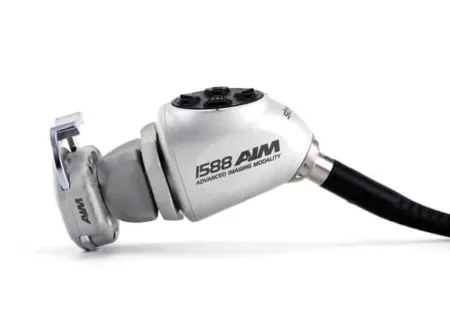
Laparoscopic instruments. Take them apart as their IFU directs, flush each port with detergent, and brush the shaft with a brush that fits. While cleaning, look for nicks in the insulation: even a small one can leak current and burn the patient. SPD checks insulated instruments with an insulation tester.
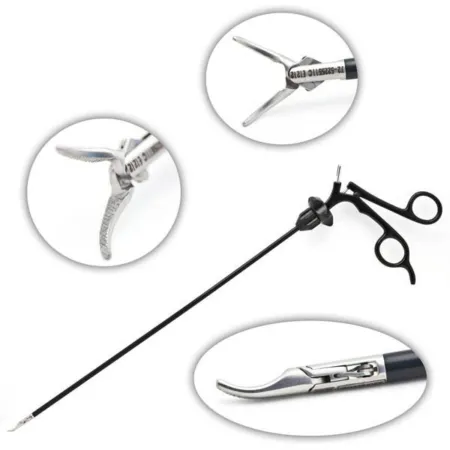
Robotic instruments. These follow long, detailed IFUs. Too much air or water pressure can damage them, and they are cleaned and flushed by hand even when a machine is used too. Many can be reprocessed only a set number of times.
Microinstruments. Fine instruments for eye, microvascular, and plastic and reconstructive surgery bend and lose alignment easily. Keep them apart from heavy instruments, clean them gently, use a delicate washer cycle if the IFU allows one, and check whether ultrasonic cleaning is allowed at all. Special trays with mats or pins hold them in place.
Eye instruments need extra care to prevent toxic anterior segment syndrome (TASS), a sudden inflammation inside the eye after surgery, often cataract surgery. It is caused by a noninfectious substance that gets into the eye, such as detergent or enzyme residue, viscoelastic left on an instrument, or soil left from poor cleaning:
- At the end of the case, flush the phaco handpiece, tips and tubing before you disconnect them, and put instruments straight into sterile water.
- During the case, wipe the instruments clean with a lint-free sponge and water.
- Use single-use brushes and syringes, the detergents the maker names, and plenty of rinse water. Never use an enzymatic detergent on eye instruments: traces of the enzymes can stay on them even after vigorous rinsing, and steam sterilization does not make them harmless.
- Inspect every instrument for residue before it is sterilized.
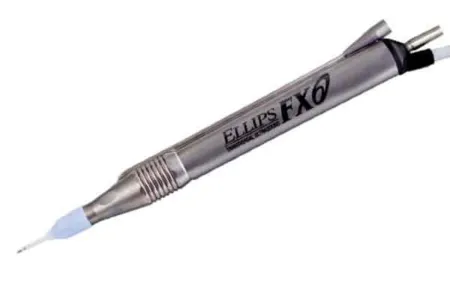
Checking that cleaning worked. Every item is inspected for soil after cleaning, under lighted magnification. A borescope, a thin camera, looks inside lumens, and swab tests can detect soil the eye cannot see. Anything still dirty goes back to be cleaned again.
Prion diseases
Prions are infectious proteins, not living cells. They cause Creutzfeldt-Jakob disease (CJD), a rare brain disease that is always fatal. Prions are highly infectious in brain tissue, the dura and the eye, and they resist the cleaning, disinfection and sterilization that kill every other germ.
When a patient with known or suspected CJD is scheduled:
- Infection prevention and SPD are told in advance, and the facility follows its prion policy, based on CDC, WHO and SHEA guidance.
- Single-use instruments are used whenever possible. Reusable instruments that touch high-risk tissue are often destroyed rather than reprocessed, and heat-sensitive items are avoided.
- Instruments are kept moist from the case to decontamination, because prions stick fast to dry steel. They are labeled as possibly contaminated, tracked to the patient, and cleaned in a washer as soon as possible.
- Reusable instruments then get an extended cycle, such as a prevacuum steam cycle at 273°F (134°C) for 18 minutes, or another method the guidelines name.
6Disinfection
The words of killing
The ending -cidal means "kills."
- Bactericidal: kills bacteria.
- Fungicidal: kills fungi.
- Virucidal: kills viruses.
- Tuberculocidal: kills Mycobacterium tuberculosis, a hardy germ with a waxy wall. A tuberculocidal product is stronger than one that only kills ordinary bacteria.
- Sporicidal: kills spores, the toughest living form of bacteria.
- Bacteriostatic: keeps bacteria from growing but does not kill them.
Germs differ greatly in how hard they are to kill. From hardest to easiest to kill with chemical disinfectants: prions, then bacterial spores, then hardy parasites such as Cryptosporidium, then mycobacteria such as TB, then small viruses, fungi, ordinary bacteria, and last the enveloped viruses such as HIV.
Levels of disinfection
- High-level disinfection kills all microorganisms except some bacterial spores.
- Intermediate-level disinfection kills mycobacteria, bacteria, most viruses and fungi, but not spores.
- Low-level disinfection kills most bacteria and some viruses and fungi.
The Spaulding classification
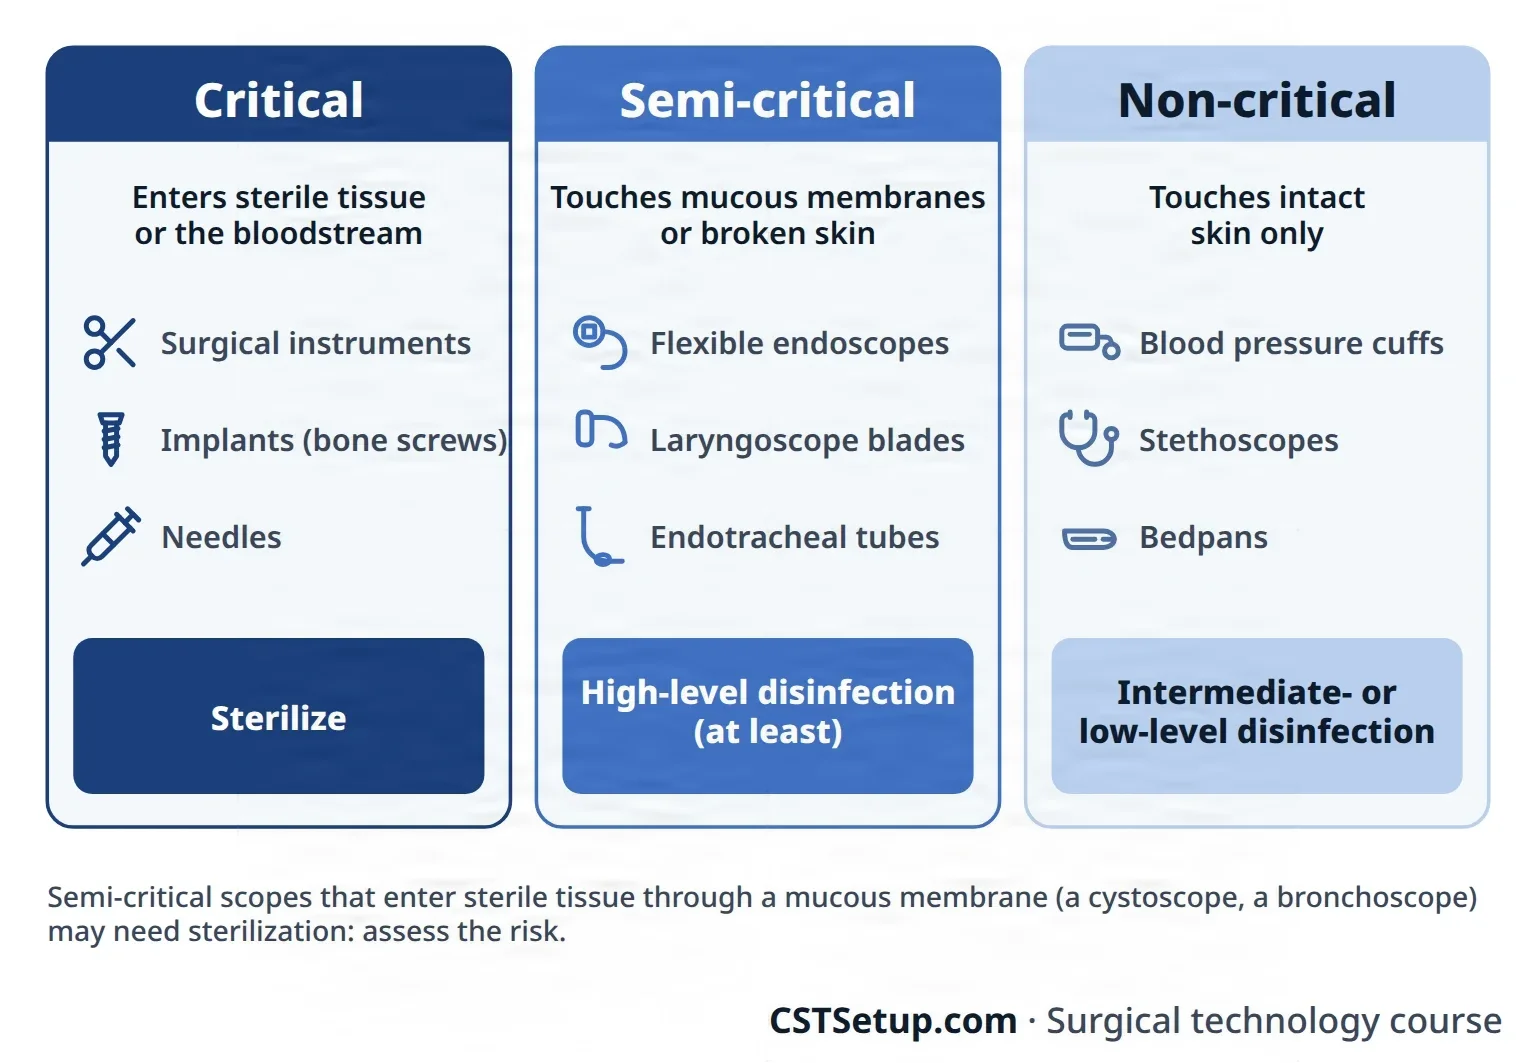
How clean an item must be depends on where it goes in the body. The Spaulding classification, named for Earle Spaulding, sorts patient-care items into three groups by their risk of carrying infection:
- Critical items enter sterile tissue or the bloodstream, such as surgical instruments, implants and needles. They must be sterile. So must every scope used in laparoscopy, thoracoscopy, arthroscopy or angioscopy, because it enters sterile tissue.
- Semi-critical items touch mucous membranes or broken skin without entering sterile tissue, such as flexible endoscopes, laryngoscope blades and endotracheal tubes. They need high-level disinfection at least, or sterilization. Some scopes pass through a mucous membrane into sterile tissue, such as a bronchoscope into the lungs or a cystoscope into the bladder; a team assesses the risk to decide whether these should be sterilized instead.
- Non-critical items touch only intact skin, such as blood pressure cuffs, stethoscopes and bedpans. They need intermediate- or low-level disinfection.
Some scopes pass through a mucous membrane into sterile tissue: a cystoscope enters the sterile bladder through the urethra, and a bronchoscope reaches sterile lung tissue through the mouth. AORN advises a team risk assessment of whether such items should be sterilized rather than disinfected.
What makes disinfection work
- Bioburden and soil: soil uses up the chemical and shields germs, and more germs need more time. Clean first.
- Device design and material: crevices, joints and channels are harder to reach. Take items apart, fill lumens with no air bubbles, and submerge them completely.
- Concentration: too weak a solution fails. Mix it exactly by the label with a measuring device, and test reused high-level disinfectants for their minimum effective concentration (MEC) before each use.
- Exposure time: the item must stay wet with the disinfectant for the full contact time. If it dries early, start again.
- Moisture: wet instruments dilute a soaking solution, so dry them before immersing.
- Physical factors: temperature, pH, humidity and water hardness all change how well a disinfectant works. Most work better warmer, within the label's range.
- Resistance of the microbe: the hardest germ present sets the time needed.
Disinfectants you should know
Alcohol (ethyl or isopropyl):
- Action: denatures (unfolds) the proteins of the germ.
- Advantages: fast-acting and leaves no residue. Bactericidal, tuberculocidal, fungicidal and virucidal.
- Disadvantages: not sporicidal, so it is an intermediate-level disinfectant. It evaporates before a long contact time is reached, is weakened by protein, is flammable, can damage the cement that holds lenses, and hardens rubber and plastic tubing.
- Uses: small surfaces such as vial stoppers, and sometimes the outside of noncritical equipment such as stethoscopes. Never use it to disinfect or sterilize surgical instruments.
Glutaraldehyde (a common brand is Cidex):
- Action: alkylation, which damages the germ's proteins so it cannot live or reproduce.
- Advantages: kills bacteria, TB, fungi and viruses, and kills spores with a long enough soak. Works in the presence of some organic matter, and does not corrode endoscopes, rubber or plastic.
- Disadvantages: must be activated before first use and lasts only 14 to 28 days after that, and less if the MEC test fails sooner. Its fumes irritate the eyes, nose, throat and skin. Residue left in a scope has caused colitis, and in eye instruments, corneal damage.
- Uses: high-level disinfection of semi-critical items, mostly flexible endoscopes, usually in 20 to 45 minutes. It can sterilize with a soak of up to 10 hours, which is rarely done.
Ortho-phthalaldehyde (OPA, a common brand is Cidex OPA):
- Action: like glutaraldehyde, it reacts with the proteins of the germ.
- Advantages: needs no activation, has almost no odor, is not known to irritate the eyes or nose, and kills TB faster than glutaraldehyde. Under its US label, high-level disinfection takes 12 minutes at 20°C (68°F); labels in other countries call for 5 to 10 minutes.
- Disadvantages: stains proteins gray, including skin, so it is handled with gloves and eye protection. Residue left on poorly rinsed probes can stain the patient's mouth. Rare allergic-type reactions have followed repeated cystoscopy with scopes processed in OPA, so it is not used on urologic instruments for patients with a history of bladder cancer. It is not labeled as a sterilant.
- Uses: high-level disinfection of semi-critical items such as flexible endoscopes and laryngoscope blades, by hand soak or in an AER, with a reuse life of about 14 days.
Other disinfectants, such as quaternary ammonium compounds and phenolics, are low- or intermediate-level products used mostly on floors, furniture and other surfaces. Bleach (sodium hypochlorite) kills a broad range of germs, but it corrodes instruments, so it is used on surfaces, not on instruments. Chapter 30 covers these surface disinfectants with cleaning the OR.
Some washers and pasteurizers disinfect with heat alone. Pasteurization holds items in hot water, about 158°F (70°C) for 30 minutes, which kills all vegetative germs but not spores.
Safety with disinfectants
- Read the label and safety data sheet (SDS, once called a material safety data sheet or MSDS) for every chemical. OSHA requires employers to provide them and train you in their hazards.
- Wear PPE: chemical-resistant gloves (nitrile or butyl for glutaraldehyde), eye protection and a fluid-resistant gown.
- Use high-level disinfectants only where ventilation is good, or under a fume hood or in an enclosed workstation, and keep containers covered.
- Measure every dilution, never mix two chemicals, and never use an unlabeled container.
- Label each high-level disinfectant with the date it was opened or activated and its expiration date. Log every MEC test and every use: who, when, which item, and for which patient.
- Rinse disinfected items thoroughly with sterile or filtered water as the label directs, and dispose of solutions as local rules and the label require.
Never mix two chemicals, and never guess at a dilution. Mixing can release toxic fumes, and a weak solution leaves live germs on an item that looks clean.
7Preparing items for sterilization
Inspection
In the clean preparation area, every item is inspected again before it is packaged: clean, whole and working. Lighted magnification shows soil, stains, rust and cracks, and each instrument is tested for function. Damaged instruments come out of service for repair, and dirty ones go back to decontamination. Chapter 24 explains how each type of instrument is checked.
Instruments with moving parts get a water-soluble lubricant if their IFU calls for one. Never use oil on an instrument's surface: the sterilant may not get through it.
Assembly
Sets are built from a count sheet, a list of every item in the set, never from memory. The same sheet often serves the scrub and circulator for the first count in the OR.
- Open ringed instruments and hold them open on a stringer or in a rack, so steam reaches every surface.
- Put heavy instruments on the bottom or at one end, and pack the rest so they cannot shift.
- Point sharp tips down or cover them with tip protectors made for the sterilization method.
- Use trays with perforated or mesh bottoms, so steam and condensate can pass through. An absorbent towel in the bottom of the tray helps wick moisture; synthetic wrap does not belong inside a tray.
- Stand concave instruments, such as curettes and rongeurs, on their sides so water cannot pool in them.
- Never put peel pouches inside a tray unless the pouch maker has validated it, and never bind instruments with rubber bands.
- Disassembly: instruments taken apart for cleaning are put back together and tested, then taken apart again for sterilization, as their IFU directs.
- Powered instruments: take them apart, lubricate and test them as their IFU directs, coil hoses loosely, and set every switch to safe.
- Basin sets: nest basins with an absorbent towel between them, opened out fully, so air can escape and condensate is soaked up. Small cups and pitchers lie on their sides.
- Internal chemical indicator: put one inside every package, where steam has the hardest time reaching, and one on every level of a multi-level tray.
- Weight: keep a containerized instrument set at or under 25 pounds, instruments and container together. Heavier sets dry poorly and hurt the people who lift them.
- Dry first: everything is completely dry before it is assembled and packaged, because water left behind interferes with the cycle. In steam it upsets the balance of steam and water, with EO it forms toxic ethylene glycol, and in hydrogen peroxide or ozone it makes the cycle abort. Moisten a lumen for steam only if its maker's IFU calls for it.
- Stylets out: take the stylet out of a suction tip, so the sterilant can reach the inside. A stylet left in means the inside of the tip is not sterile.
Some references still teach flushing a little distilled water through every lumen just before steam sterilization, so the water turns to steam and drives the air out.
Labeling
Every package is labeled before it is sterilized, on the indicator tape, a label, or the plastic side of a pouch, with a marker approved for the purpose. The label shows:
- what is inside
- the sterilizer and the cycle (load) number
- the date of sterilization
- the initials of the person who assembled it
- the department that will receive it, or its storage location
The sterilizer, cycle and date together make up the lot (load) control number. If a load later fails a test, that number lets every package from it be found and pulled back.
8Packaging
A package exists to let the sterilant in and keep germs out until the moment it is opened. A good package:
- lets air out and the sterilant reach every surface, then lets the sterilant leave
- keeps the contents sterile until opened, as a barrier to germs and moisture
- is strong enough to resist tears and punctures, with seals that hold
- opens easily onto the field without contaminating the contents
- is safe: no toxic dyes and no lint
- suits the sterilization method, and is efficient and worth its cost
Protect corners and tips so they do not punch through, and keep sets within their weight limit.
Peel pouches
Peel pouches hold one or two small, light items and let you see them. There are two kinds, and they look alike:
- Paper and plastic: for steam and ethylene oxide. Never for hydrogen peroxide or ozone, because paper is cellulose, which soaks up those sterilants.
- Tyvek and plastic: for hydrogen peroxide and ozone. Tyvek melts in steam.
How to pouch an item:
- Choose a pouch with about an inch of space around the item: too small strains the seals, too big lets it slide around.
- Put the end you will grasp, such as the finger rings, toward the end that peels open, with tips facing the plastic side and hinges held open.
- Add an internal indicator, press out the air, and seal with a heat sealer or the pouch's own adhesive strip, with no gaps or air channels along the seal.
- Do not double-pouch unless the pouch maker has validated it, and never put heavy items in a pouch.
Rigid containers
A rigid container is a metal or plastic box with an instrument basket inside and a lid. Filters or valves let the sterilant in while keeping germs out, and tamper-evident locks show whether it has been opened. Containers do not tear, protect instruments well, and can be stacked in storage. They are heavy, can take longer to dry, and wear with use, so they are cleaned and inspected after every use, latches, locks and filters included. Use one only with the sterilization method and cycle its maker approves, with an intact filter or valve seated correctly. Disposable filters are thrown away after each use; reusable ones are cleaned as their maker directs and changed after a set number of cycles.
Wrapping
Flat wraps come in two materials. Woven (reusable cloth) wraps are cotton or a cotton and polyester blend with at least 140 threads per square inch, usually two layers sewn together. They are laundered after every use, which puts back the moisture they need in a sterilizer, and checked over a light table for holes, which are covered with heat-sealed patches. Repeated laundering slowly opens the weave and weakens the barrier. Nonwoven wraps, made of bonded synthetic fibers, are used once and thrown away. Inspect every wrap for holes and tears before use.
There are two wrapping methods:
- Sequential: two separate wraps, one after the other, making a package inside a package. It takes longer, but gives a second chance at a sterile opening.
- Simultaneous: one double-layer sheet, bonded at the edges, wrapped once. It is faster, but there is no separate inner layer.
And two folds, used with either method:
- Envelope fold: for most instrument sets, small packs and single items. The tray sits diagonally in the middle of the wrap. The near corner comes over first and its tip folds back into a cuff, then each side corner in turn, and last the far corner, tucked under with a tab left for opening.
- Square fold: for large packs and trays. The tray sits square in the middle of the wrap, parallel to its edges. The near edge folds over and back into a cuff, then the far edge, then each side.
Wrap snugly, but not so tight that the sterilant cannot get in and out: a wrap that is too tight or too loose can keep the contents from being sterilized. Seal the package with chemical indicator tape, a Class 1 external indicator that changes color in the sterilizer and shows that the package was processed. Never close a package with pins, staples or clips: sharp ones make holes, and clips can come off and go back on without a trace.
Seldom-used packs may get a sealed plastic dust cover once they are cool and dry. A dust cover is labeled as one, so nobody mistakes it for a sterile wrapper.
9Sterilization
Choosing the method
Steam is the first choice for anything that can take heat and moisture. Low-temperature methods are kept for items steam would damage, and most of them use a chemical agent, such as ethylene oxide or hydrogen peroxide; sterilizing with a chemical is called chemical sterilization. A facility weighs each method's safety first, for patients and staff, then its speed and its cost. What decides it for each item:
- The device's IFU, which names the methods and cycles its maker has proven work.
- Heat and moisture: lensed, electronic and many power-driven items cannot be steam sterilized.
- Lumens: long, narrow channels are hard for any sterilant to reach, and low-temperature sterilizers limit how long and narrow a lumen may be.
- Package density, soil and bioburden: dense packs, soiled items and items carrying many germs resist sterilization.
- Whether it can be submerged: liquid chemical methods work only on immersible items.
- Prions, which call for the special methods above.
Steam sterilization
Steam under pressure is the oldest, safest, cheapest and most common way to sterilize in health care. Moist heat kills by coagulating and denaturing the proteins of the germ, its enzymes included.
Steam kills only where it makes contact, so it must touch every surface, and all air must be driven out of the chamber and the packs first. Trapped air blocks steam. Contact then needs four conditions:
- Temperature: usually 121°C (250°F) or 132°C to 135°C (270°F to 275°F). Steam at normal air pressure is only 212°F (100°C), too cool to sterilize.
- Time: the higher the temperature, the shorter the exposure needed, typically about 30 minutes at 250°F in a gravity cycle and 4 minutes at 270°F in a prevacuum cycle for wrapped instruments. Some devices need extended cycles, and the device IFU always wins.
- Moisture: saturated steam, at least 97% vapor and no more than 3% water. Steam that is too dry (superheated) sterilizes poorly; too wet leaves wet packs. The water that makes the steam is treated to remove minerals: orange, white, brown or black spots on sterilized instruments can mean minerals in the water, and mineral deposits in box locks can keep instruments from working properly.
- Pressure is how the temperature gets that high: raising the pressure in a sealed chamber raises the temperature of the steam.
Advantages: nontoxic to patients, staff and the environment; fast; inexpensive; easy to control and monitor; and it penetrates packaging and lumens. Disadvantages: it damages heat- and moisture-sensitive items and repeated cycles wear microsurgical instruments; it can leave instruments wet, which rusts them; oils, powders, cork and wood cannot be steam sterilized; and hot items can burn you.
Gravity and dynamic air removal
- Gravity displacement: steam enters at the top, and because air is heavier than steam, the air sinks and leaves through the drain at the bottom of the chamber. Simple, but slower.
- Dynamic air removal: the sterilizer pulls the air out actively, either with a vacuum pump (prevacuum, also called high-vacuum) or with repeated pulses of steam above air pressure (steam-flush pressure-pulse). Air removal is more complete and cycles are shorter.
Most sterilizers can run either type of cycle; tabletop units are often gravity only.
The cycle
A steam cycle has four phases, though an IUSS cycle has little or no drying:
- Conditioning: air is removed from the chamber and the load and replaced with steam.
- Exposure: the load is held at the set temperature for the set time, the exposure time, also called the hold time. This is the part that sterilizes.
- Exhaust: steam is removed and the chamber returns to normal pressure.
- Drying: heat and vacuum dry the load.
Loading and unloading
Load so steam can reach everything and condensate can drain away:
- Leave space between packs, and do not let any pack touch the chamber walls. Never overload.
- Lay instrument trays with perforated or mesh bottoms and rigid containers flat. Do not stack containers unless their maker allows it.
- Stand peel pouches on edge in a rack or basket, paper side facing plastic side.
- Put basins, cups and other items that hold water on their sides or edges, tilted so water runs out.
- Stand linen packs on edge, with their layers up and down.
- In a mixed load, put linens and soft goods on the top shelves and metal items below, so condensate from metal cannot drip onto them.

At the end of the cycle, open the door as the sterilizer's IFU directs, and leave the load on its cart in a quiet spot away from air-conditioning vents until it reaches room temperature, which takes 30 minutes to 2 hours or more. A warm pack still holds steam. Set it on a cold counter or touch it, and the steam turns to water that can wick germs in from outside.
Wet packs. Any package with dampness, droplets or puddles on or in it after a cycle is a wet pack, and it is contaminated, touched or not. It is repackaged and sterilized again. Several wet packs from one load make the whole load wet. Common causes are dense, heavy sets, poor loading, missing absorbent towels between basins, packs wrapped too tightly, a damaged door gasket, a clogged drain screen and poor steam quality. Report every wet pack.
A package is never touched while it is warm, and a wet package is never used. Moisture is a road for germs into the package.
Immediate-use steam sterilization
Immediate-use steam sterilization (IUSS), once called flash sterilization, sterilizes an item for use right away, with little or no drying. It is for an urgently needed item that has no sterile replacement, when there is no time to process it the usual way. It is never a shortcut for convenience, to save time, or to avoid buying enough sets.
- The item gets the same full cleaning in decontamination first.
- It goes in a container validated for IUSS, never an open tray, using the device and container makers' cycle. As an example, metal instruments without lumens may take 3 minutes at 270°F (132°C), while a gravity load that mixes in lumens or rubber takes 10 minutes.
- It is used at once, never stored.
- Some items never go through IUSS: single-use devices, any device whose IFU does not say it may go through IUSS, and instruments used on a patient with known or suspected prion disease.
- Implants are never sterilized this way except in a documented emergency with no alternative, and then with a biological indicator, ideally a rapid-readout one, and a Class 5 integrating indicator. An implant is a device placed in a surgically or naturally formed body cavity to stay there for 30 days or more, such as a bone plate or a joint replacement.
- Every IUSS load is recorded: date and time, patient, procedure, items, cycle, operator and the reason.
Facilities keep IUSS to a minimum. They review how often it is used and why, and cut it down with enough instrument sets, careful planning and good communication with implant makers. The Joint Commission expects a plan to reduce it, and a shortage of instruments is no excuse.
The circulator brings the container to the field, and the scrub lifts the items out. The container itself does not go onto the field, and the scrub never leaves the field to fetch it. The items are very hot, so let them cool before they touch tissue.
Flash sterilization ran unwrapped items through the sterilizer in an open tray, and the CDC guideline still describes that way beside the covered container. Current guidance uses a closed container validated for IUSS, which protects the item on its way to the field.
WHO guidance says to avoid IUSS, because the item is sterilized with no packaging and no drying and is easier to contaminate, and it describes a strong movement toward supplying instruments wrapped, dry and cool, which takes enough sets and fast prevacuum cycles. It keeps IUSS for emergencies, such as unexpected surgery or a dropped instrument.
Monitoring sterilization
No single test proves a package is sterile. Instead, several checks together show that the conditions for sterilization were met, and catch a failure before it reaches a patient.
Physical monitors. The sterilizer's gauges, display and printout record the time, temperature and pressure of every cycle. Check the printout at the end of every cycle, before anything comes out, sign it, and know what a normal one looks like.
Chemical indicators (CIs). Inks that change color when exposed to one or more conditions of the cycle. They show that a package went through a sterilizer, and help find failures, but they do not prove it is sterile. There are six classes:
- Class 1, process indicators: on the outside of every package (tape, labels, printed legends), to show it was processed.
- Class 2, specific test indicators: for special tests, such as the Bowie-Dick test.
- Class 3, single-variable indicators: react to one condition, such as temperature.
- Class 4, multi-variable indicators: react to two or more conditions.
- Class 5, integrating indicators: react to all the critical conditions, and are used with a BI to monitor implant loads.
- Class 6, emulating indicators: react to all the conditions of one specific cycle.
The class number is not a ranking; each class has its own job. An external indicator goes on every package unless its internal one can be seen, as in a peel pouch. An internal indicator (Class 3, 4, 5 or 6) goes inside every package, and you read it as soon as the package is opened, before you use what is inside.
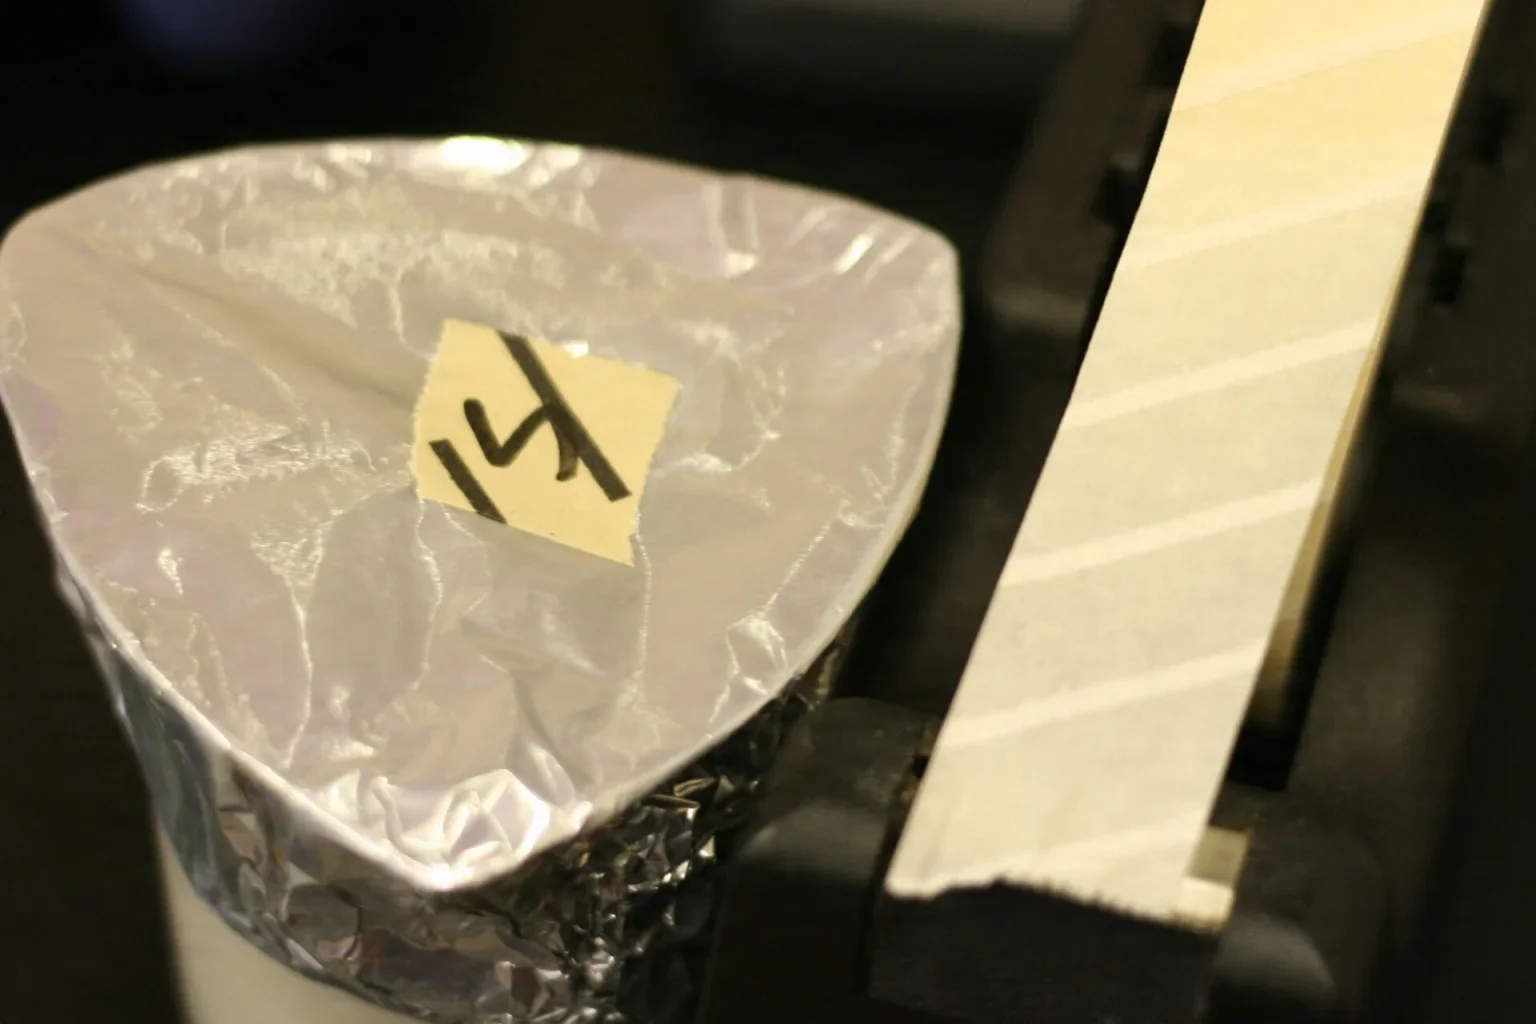
Biological indicators (BIs). A BI holds live bacterial spores that are very hard to kill but harmless to people. It is the only test that measures directly whether the process killed germs.
- Steam and hydrogen peroxide are tested with Geobacillus stearothermophilus; ethylene oxide with Bacillus atrophaeus, once named Bacillus subtilis.
- Placement: the BI goes inside a process challenge device (PCD), a test pack built to be hard to sterilize, placed where sterilization is hardest, usually the front of the bottom shelf over the drain, with the sterilizer full. To test IUSS, the container serves as the PCD and runs in an empty chamber.
- How often: steam sterilizers at least weekly, preferably every day they run, and every load that contains an implant. Some recommendations go as far as every steam load. Ethylene oxide is tested in every load.
- Incubation and results: after the cycle, the BI comes out of the PCD and goes into an incubator, following its IFU. Standard BIs take 24 to 48 hours; rapid-readout BIs use an enzyme and read in about 30 minutes to 3 hours. No growth means the sterilizer worked. A control BI from the same lot, never run through the sterilizer, is incubated with it and must grow; if it does not, the spores in that lot were probably dead before the cycle, and the test result cannot be trusted.
- A positive BI (growth) means a possible sterilizer failure. Every item from that load, and from every load since the last negative BI, is treated as non-sterile and recalled, which is where lot control numbers earn their keep. If items were already used, the surgeon and infection prevention are told.
- Implants: an implant load is monitored with a PCD holding a BI and a Class 5 integrating indicator, and the implants are quarantined until the BI is negative. Releasing one early is allowed only in a documented emergency.
The Bowie-Dick test. A dynamic air removal sterilizer is tested every day before the first load, in an empty chamber, with a Bowie-Dick test pack placed on the bottom shelf over the drain. It is also called the daily air removal test (DART). It checks that the vacuum pulls all the air out and that the chamber has no leaks. A pass is an even color change across the sheet; a spot of unchanged color shows trapped air. A failed sterilizer is not used until it is repaired and passes.
Administrative monitoring. Records tie it all together: printouts, indicator and BI results, load contents and lot numbers, implant logs, and maintenance and repairs. These records are kept as long as your state's statute of limitations requires. After installation, major repair or a failure, a sterilizer is retested with Bowie-Dick and BI runs in empty chambers before it goes back into use.
If an indicator has not changed fully, a package is wet or torn, or anything about it looks wrong, do not open it onto the field. Hand it off for reprocessing with its load information.
Ethylene oxide
Ethylene oxide (EO) is a gas that sterilizes heat- and moisture-sensitive items at low temperature.
- How it kills: alkylation, which wrecks the germ's proteins, DNA and RNA.
- What controls it: gas concentration, temperature (about 99°F to 145°F, 37°C to 63°C), humidity (about 40% to 80%) and exposure time (1 to 6 hours).
- Advantages: penetrates packaging and lumens deeply, and is compatible with most materials.
- Disadvantages: long cycles plus long aeration; it is toxic, flammable and explosive, and a known human carcinogen.
- Preparation: items must be clean and completely dry, because EO and water form a toxic residue (ethylene glycol), and taken apart so the gas reaches every surface. Use EO-compatible packaging.
- Loading: load loosely, packages on their sides, not touching the top or bottom of the chamber, and group items that need the same aeration.
- Aeration: after the cycle, warm air flushes absorbed EO out of the items, in the same chamber, for 8 hours or more. Cutting aeration short can give patients and staff chemical burns. Never rinse an item that may still hold EO, because EO and water form harmful byproducts.
- Safety: EO sterilizers are vented outdoors in restricted areas with warning signs. OSHA's ethylene oxide standard (29 CFR 1910.1047, issued in 1984, with the 15-minute limit added in 1988) limits staff exposure to 1 part per million (ppm) averaged over 8 hours, and to 5 ppm averaged over any 15 minutes. Staff near EO wear monitoring badges.
- Monitoring: physical printouts, an EO chemical indicator on every package, and a BI of Bacillus atrophaeus in a PCD in every load, with records kept. The PCD goes where the gas reaches last, the center of the load, lying on its side. After the cycle the BI is incubated as its IFU directs; a standard EO BI is incubated for 48 hours, and rapid-readout EO BIs also exist.
Because of these hazards, EO sterilizers are rarely in the OR, and many facilities have replaced them with faster low-temperature methods.
Hydrogen peroxide
Hydrogen peroxide sterilizers work at low temperature with short cycles, and have replaced EO in many facilities. There are two types:
- Hydrogen peroxide gas plasma: hydrogen peroxide vapor fills the chamber under deep vacuum, then radio-frequency energy turns it into a plasma full of germ-killing free radicals. These systems use a hydrogen peroxide solution of 59% to 95%, depending on the model; newer ones use up to 95%.
- Vaporized hydrogen peroxide: the vapor alone does the work, without a plasma phase. It uses a 59% hydrogen peroxide solution.
Both kill by oxidation. What controls them is time, temperature and the concentration of the sterilant.
- Advantages: short cycles (the CDC lists 28 to 75 minutes for gas plasma, depending on the model), no toxic residue (the byproducts are water and oxygen), no aeration, and dry packages ready to use or store.
- Disadvantages: cannot process paper, linen or liquids; long or narrow lumens may exceed the sterilizer's limits; the chamber is small; and the vapor is toxic above low levels.
- Preparation and packaging: items must be clean and completely dry, because moisture keeps the vacuum from forming and the cycle cancels. Wrap them in nonwoven polypropylene or use Tyvek pouches or containers validated for hydrogen peroxide. Anything made of cellulose soaks up the sterilant.
- Loading and unloading: follow the sterilizer's IFU for what goes where, and check each device's lumen size and material against its limits. Packages come out dry and can be handled at once.
- Monitoring: physical (the cycle cancels itself if a condition is not met, and prints a record), a chemical indicator made for hydrogen peroxide, and a BI of Geobacillus stearothermophilus, at least daily and preferably every load.
Other methods
- Liquid peracetic acid: an automated system that sterilizes immersible, heat-sensitive items such as scopes in about 30 to 45 minutes, pumping the sterilant through lumens. Items come out wet and are used right away, never stored.
- Dry heat: hot air, used only for items that moist heat would harm or cannot penetrate, such as powders and oils. It kills by oxidation, is nontoxic and does not corrode, but is slow (for example 340°F, 170°C, for 60 minutes) and too hot for most materials. It is used less and less, because powders and oils now come presterilized in single-dose packages.
- Glutaraldehyde: can sterilize an immersible item with a soak of up to 10 hours, but the item cannot be wrapped and must be rinsed, so it is rarely used for this.
- Ionizing radiation: gamma rays from cobalt-60, or electron beams, destroy the germ's DNA at low temperature. Manufacturers use it to sterilize sutures, sponges, drapes and other single-use items in bulk; its high cost makes it a factory method, not a hospital one.
- Ozone: a form of oxygen (three atoms) that kills by oxidation at low temperature and turns back into oxygen and water. The cycle is long, about 4 hours, only items its maker approves may go in, and it is not approved for implants.
- Chlorine dioxide gas kills by oxidation. The machine makes the gas for each cycle, and it sterilizes quickly at low temperature, about 25°C to 30°C (77°F to 86°F); in one study it sterilized a test of a million spores in 30 minutes. Humidity affects it more than any other factor. It does not cause cancer or genetic damage in humans, but it can corrode some metals and may not pass well through paper wrappers.
- Vaporized peracetic acid is also an oxidizer: peracetic acid is thought to denature the germ's proteins and disrupt its cell wall. In one study the vapor showed clear spore-killing activity within 10 minutes at 25°C (77°F) once the relative humidity reached 40%. One system that used peracetic acid and hydrogen peroxide vapor was taken off the market after instruments processed in it damaged patients' corneas.
- In the CDC guideline (2008, updated 2019), neither chlorine dioxide gas nor vaporized peracetic acid had FDA clearance for sterilizing devices in health care facilities.
Never resterilize a single-use item unless its maker says it can be, or the FDA's rules for reprocessing single-use devices (2000) are met.
Whether single-use devices are reprocessed at all is each facility's decision. A facility that does it either builds its own reprocessing system or contracts with a third-party reprocessor, and either way follows the FDA's rules. A device that cannot be properly disinfected and sterilized, or shown to work as well and as safely as it did new, is never reused, and a facility that reprocesses one its maker has not approved is liable if it fails and harms a patient.
10Sterile storage
Sterilization makes an item sterile; storage keeps it that way.
The storage area
- Limited access, under positive pressure, with at least four air exchanges an hour.
- No warmer than 75°F (24°C), with relative humidity under 70%, checked and recorded every day. Too damp loosens seals and labels and lets moisture wick into packs; too dry makes some plastics brittle.
- No sinks, water pipes or drains near the shelves, and no drafts from vents or windows.
- Sterile items are kept apart from clean, non-sterile supplies.
Shelving and bins
- Closed cabinets or shelving protect best from dust, air currents and bumps. Open shelving is cheaper but leaves packs more exposed. Shelves are smooth metal or plastic, never wood.
- The bottom shelf is solid and 8 to 10 inches off the floor, the top shelf at least 18 inches below the ceiling or sprinkler heads, and shelves at least 2 inches from outside walls, where condensation can form.
- Storage bins for small items are shallow, so nobody has to dig, and mesh or wire is better than a solid bin, where dust collects. Pack them loosely.
- Shipping containers: take items out of outside shipping cartons before they come into the surgical suite. Cartons carry dust, debris and insects.
Handling
- Never touch a package until it has cooled. Handle sterile packages as little as possible, with clean, dry hands.
- Lift packs; never drag them. Do not stack wrapped trays, which can tear wrappers and squeeze air in and out of the packs below.
- Put heavy items on middle shelves, light ones up high, and let nothing hang over a shelf edge.
- Check every package as it goes on the shelf and as it comes off: wrapper, seals and locks intact, external indicator changed, label present, dry, and not expired.
Event-related sterility
Most facilities follow event-related sterility: a package stays sterile until something happens to it. Events that make a package unsterile:
- moisture or liquid, such as a water stain
- a tear, hole, puncture or broken seal
- storage without environmental controls, or transport in a dirty or open cart
- rough, repeated or warm handling
- dust, dirt or insects
- a fall to the floor, depending on the wrapper: a woven cloth pack that falls is contaminated; an impervious one that is intact and landed dry may be used right away but never goes back on the shelf
Some references treat a dropped pack as contaminated whenever it had only one wrapper or looks damaged.
Advantages: packs are not pulled and resterilized just because a date passed, which saves labor, wrappers and money. Disadvantages: there is no date to warn you, so sterility depends on every person handling and checking every package correctly, and a pack forgotten at the back of a shelf for months collects dust and wear. When in doubt, consider it unsterile.
Some commercially sterilized items still carry an expiration date because the product itself breaks down over time. That date counts, whatever the facility's policy.
Package symbols
Commercially sterilized packages use standard symbols to fit a lot of information on a small label. Learn to find:
- the use-by date
- the lot (batch) number and the REF (catalog) number
- the date of manufacture and the serial number
- STERILE, with how it was sterilized, such as STERILE EO (ethylene oxide) or STERILE R (radiation)
- do not reuse, do not resterilize and do not use if package is damaged
- consult instructions for use
Inventory
- Stock rotation: first in, first out (FIFO). New stock goes behind or to the left, and the oldest is picked first. Items with expiration dates are used in date order.
- Out-dates: check manufacturer-sterilized items for their expiration dates every time they are stocked and dispensed, and remove expired items.
- Inventory control: shelves are labeled and organized by name, specialty or stock number, so anyone can find an item fast.
- Transport: sterile items move in clean, covered or closed carts; items going to another building travel in a vehicle made for sterile transport.
11Distribution
Distribution gets the right items to the right place at the right time. No single system suits every facility, and many use more than one.
- Case cart: SPD builds one cart for each scheduled procedure from the surgeon's preference card (pick list), which lists the instruments, supplies and implants for that surgeon's case. The cart goes to the OR before the case. Afterward, unopened items go back to stock and dirty instruments ride the same cart to decontamination.
- Specialty carts: preassembled carts kept ready for emergencies, such as an emergency cesarean, when there is no time to build a cart.
- Demand distribution and requisition: staff order what they need, on paper or by computer, as the need arises, including special items ordered ahead for a particular patient.
- Par level replenishment: each area has an agreed amount of each supply, and staff restock back up to that level on a schedule. Exchange carts swap a full cart for a used one.
- Automated systems: computerized cabinets release items when staff scan or press a button, track what is used, and reorder automatically.
- Just-in-time delivery: a vendor holds the stock and delivers items straight to supply carts on a regular schedule.
If the surgeon's needs change, update the preference card, because SPD builds the next cart from it.
Charging and tracking
- Patient charging: automated cabinets can bill the patient as each item is taken; with a case cart, SPD charges what was used when the cart comes back; exchange carts charge the unit's budget.
- Tracking: bar codes or other tracking systems follow each set through processing and to the patient it was used on, flag sets due for routine work such as sharpening, and, with load numbers, let a recall find every item.
Lo que te llevas de este capítulo
- Reprocessing is a loop: point of use, transport, decontamination, inspection and assembly, packaging, sterilization, storage and distribution. A failure anywhere can reach a patient.
- Start cleaning at the point of use: wipe and flush with sterile water, never saline; open, take apart, keep moist, sharps out, drain any soaking water, and send everything in a closed, labeled container.
- Nothing can be disinfected or sterilized until it is clean. Brush under water, fit the brush to the lumen, and follow each IFU.
- Spaulding: critical items enter sterile tissue and must be sterile; semi-critical items touch mucous membranes and need high-level disinfection at least; non-critical items touch intact skin.
- Packages must let the sterilant in and keep germs out: paper and plastic pouches for steam and EO, Tyvek for hydrogen peroxide, wraps sealed with indicator tape, containers with intact filters and locks, and a label with the lot number on every one.
- Steam needs contact, with the right temperature, time, moisture and pressure. Load so steam reaches everything, and never touch a warm pack or use a wet one.
- Physical, chemical and biological monitors work together. Read the internal indicator as soon as you open a package, before you use what is inside. A positive BI recalls every load since the last negative one; a failed Bowie-Dick test takes the sterilizer out of use.
- Sterility is event-related: moisture, tears, dust, rough handling and, for a cloth-wrapped pack, a fall make a package unsterile. The calendar counts only where a maker prints an expiration date.
Ponte a prueba5 preguntas rápidas
Gratis para todos. Elige una respuesta para cada una y luego revísalas todas juntas.
En el quirófanoDónde vas a usar esto
Todo el banco de preguntas del capítulo en series de 10, con la respuesta explicada después de cada una.
Parte del programa para educadoresLas palabras del capítulo en tarjetas de estudio: las que fallas vuelven antes.
Parte del programa para educadoresLo asigna tu docente. Cada grupo saca sus propias 25 preguntas del banco del capítulo.
Parte del programa para educadores
Sugerir una corrección
¿Algo está mal, confuso o desactualizado en este capítulo? Avísanos y lo corregimos para todos. Tu correo solo se usa para responderte.