Saltar al contenido principal
CSTSetup
Gratis · Core Curriculum for Surgical Technology, 7.ª edición

La lista de habilidades de tecnología quirúrgica.

Cada evaluación de habilidades de laboratorio del Core Curriculum, escrita paso a paso como hoja para evaluar. Léelas todas aquí mismo, o descarga el PDF e imprímelo para tu laboratorio.

7.ª ediciónel Core Curriculum que enseñan los programas de CAAHEP, obligatorio completo desde agosto de 2024
Las 5 seccionesmanejo pre-, intra- y postoperatorio del caso, circulante asistente, esterilización
344 pasosen 31 habilidades, cada uno algo que quien evalúa puede observar
Evaluación de habilidad de laboratorio · Preoperatorio3 de 31

Surgical scrub

Core Curriculum 7.ª ed. · Preoperative case management, objective 3

Fig. 1 · Surgical scrub, una de 31 hojas (nombres de ejemplo)Marca los últimos tres pasos
La lista

31 evaluaciones de habilidades de laboratorio, paso a paso.

En las cinco secciones del Core Curriculum. Abre una sección y luego una habilidad. Cada una indica el objetivo que cubre, así coincide con tu guía del curso.

Manejo preoperatorio del caso · 9 habilidades

Manejo preoperatorio del caso · Habilidad 1 de 9

Getting the room ready

Core Curriculum 7.ª ed. · Preoperative case management, objective 1

11 pasos
  1. Dresses for the restricted areaClean scrubs, a cap covering all hair, a mask and eye protection. No jewelry and no artificial nails.
  2. Washes hands before handling any suppliesA medical handwash at the sink.
  3. Damp dusts the room before the first case of the dayA lint-free cloth and the facility's disinfectant on the lights, furniture and flat surfaces, high places first.
  4. Checks the case cart against the surgeon's preference cardInstruments, supplies, suture, drapes, gowns and gloves in the right sizes, medications, irrigation and skin prep. Gets what is missing and reports any error on the card.
  5. Takes out furniture and equipment the case does not need
  6. Sets up the OR table under the lightsClean linen and a lift sheet, arm boards, the safety strap, and the positioning aids and transfer device the case calls for.
  7. Places and tests the electrosurgical unitClose enough to the table for the cords to reach, and switched on to confirm it works.
  8. Sets up and tests the suctionA new canister liner, tubing connected tightly to the wall vacuum, suction confirmed. A separate suction is ready for anesthesia.
  9. Groups the back table, Mayo stand, ring stand and prep stand away from the doorAt least 12 inches from walls and anything not sterile, and out of the traffic path.
  10. Lines the kick buckets and the trash and linen hampersImpervious liners in each, set away from the sterile furniture and from traffic.
  11. Checks the overhead lightsThey switch on, move freely and can be aimed at the table.
Manejo preoperatorio del caso · Habilidad 2 de 9

Opening sterile items

Core Curriculum 7.ª ed. · Preoperative case management, objective 2

12 pasos
  1. Washes hands and wears a mask before opening anything
  2. Sets each package on a clean, dry surface where it will be openedThe back table pack on the back table, the basin set in the ring stand, instrument sets on a flat surface of their own.
  3. Checks every package before opening itIndicator changed color, wrapper or seal intact with no tears, holes, moisture or stains, and not past any expiration date.
  4. Opens items in a set orderBack table pack, basin set, small wrapped items, peel packs, then instrument sets. Like items land together, with sharps in one corner.
  5. Opens the back table pack without reaching across itBreaks the tape, opens each fold from the side it faces by moving around the table, and never shifts the cover once it is down.
  6. Opens the basin set in the ring standFirst flap away from them, then the sides, then the last flap toward them, without reaching over the basin.
  7. Opens small wrapped items onto the fieldHolds the item in one hand, opens the flaps in the same order, secures the loose corners in the holding hand, and drops the item on without the hand crossing over the field.
  8. Opens peel packs without letting the item slide over the edgePeels the sides back evenly, then flips the item onto the field or holds it out to a scrubbed person. Heavy, sharp or bulky items go straight to a scrubbed person or onto a separate surface.
  9. Opens an instrument set on its own flat surfaceA wrapped set opens with the same flap order. For a rigid container: checks the lock indicator and filters, lifts the lid straight up and away, steps back, and checks the lid filter for holes or moisture.
  10. Opens their own gown and gloves on a separate surfaceSuch as the Mayo stand, never the back table, with the gloves beside the gown and not on top of it.
  11. Keeps 12 inches from every sterile surfaceNever reaches, leans, or passes over or under the field, and faces it when walking past.
  12. Sets aside any item whose sterility is in doubtA dropped item, a torn or wet package, an indicator that did not change, or something found inside the pack: it is not used.
Manejo preoperatorio del caso · Habilidad 3 de 9

Surgical scrub

Core Curriculum 7.ª ed. · Preoperative case management, objective 3

12 pasos
  1. Puts on cap, mask and eye protection before going to the sinkRings, watch and bracelets come off.
  2. Checks hands, nails and forearmsSkin unbroken, nails short and clean, no artificial nails or chipped polish.
  3. Does a medical handwashHands lower than the elbows, soap and friction for at least 20 seconds over palms, backs, fingertips, and between the fingers and thumbs. Rinses with the water running off the fingertips.
  4. Cleans under each nail under running waterWith a disposable nail cleaner, dropped in the trash afterward and never in the sink.
  5. Scrubs for the full time the antiseptic's directions giveOr counts strokes if that is the facility's method. Timing starts when the antiseptic goes on.
  6. Scrubs the nails and each finger on all four sidesIncluding the web space between each finger.
  7. Scrubs the hand and forearm on all four sides, up to 2 inches above the elbowMoves only toward the elbow and never goes back to an area already scrubbed.
  8. Scrubs the other hand and arm the same waySwitches the sponge to the scrubbed hand first.
  9. Keeps hands higher than the elbows the whole timeElbows bent and arms away from the scrub suit, so water runs off the elbows. If a hand touches anything, that area is scrubbed again.
  10. Drops the sponge or brush in the trash, not the sink
  11. Rinses from fingertips to elbows in one directionFingertips first, hands up, without splashing the scrub suit.
  12. Walks into the room with hands up and away from the bodyBacks through the door, hands above the waist and below the shoulders, water dripping from the elbows.
Manejo preoperatorio del caso · Habilidad 4 de 9

Gowning and gloving yourself

Core Curriculum 7.ª ed. · Preoperative case management, objective 4

12 pasos
  1. Starts with completely dry hands and armsAfter a water scrub, dries with the sterile towel: one end per arm, fingers to elbow without going back, towel held clear of the scrub suit. After a waterless rub, lets it air dry.
  2. Picks up the gown by its inside, just below the necklineLifts it up and away from the table and steps back into open space.
  3. Lets the gown unfold with the inside facing themHolds it by the inside of the shoulders, finds the armholes, and keeps it from touching anything.
  4. Slides both arms into the sleevesHands stay inside the cuffs and never pass the cuff seam.
  5. Stands still while the circulator pulls the gown up and ties the back
  6. Opens the glove wrapper with hands still inside the sleeves
  7. Lays the first glove on the matching sleeve, palm down, fingers toward the elbowGlove thumb lined up with their own thumb and the glove cuff at the gown cuff, all done through the sleeve.
  8. Stretches the glove cuff over the gown cuff and works the hand inPulls the cuff over with the other hand through its sleeve. No skin touches the outside of the glove.
  9. Gloves the other hand the same way
  10. Puts on the second pair of glovesTwo pairs for every case. A colored inner pair makes a hole easier to see.
  11. Turns the gownHands the tie card to the circulator, stands still while the circulator walks around, turns slightly, then pulls the tie free and ties it at the side.
  12. Keeps hands in the sterile zone throughoutIn front, between chest and waist, and at least 12 inches from sterile tables until the gown is turned.
Manejo preoperatorio del caso · Habilidad 5 de 9

Setting up the back table and Mayo

Core Curriculum 7.ª ed. · Preoperative case management, objective 5

12 pasos
  1. Drapes the Mayo stand early in the setupHands inside the cuff of the cover, slides it over the tray and lets it unfold, never below the waist. Lays a towel on top.
  2. Checks the indicator inside each tray before using itLifts a container basket straight up without touching the outside. A wrong indicator, moisture, debris, or an instrument found clamped shut means the tray is not used.
  3. Lays out the back table in zonesGowns, towels and drapes for the team in order of use with the first one on top, never on a basin holding fluid. Sponges in one upper corner with bands on. Sharps together near the sharps container.
  4. Arranges instruments by typeRinged instruments on a towel roll with the stringer removed, forceps and heavy retractors laid flat, tip guards off. Checks that each one works and is not damaged.
  5. Loads each knife blade with a needle holderNever with fingers. Point and edge aimed down and away, the blade slid onto the handle until it locks.
  6. Loads suture onto needle holders from the packetClamps the needle at the tips of the jaws, between the swage and the middle of the needle, without touching it.
  7. Verifies each medication and solution with the circulatorLabels the empty cup first, holds it or sets it at the table edge for the pour, and both read the name, strength, amount and expiration date aloud.
  8. Labels every medication and solution container right awayCups, syringes, basins and the bulb syringe get the name and strength, even if there is only one. Anything unlabeled is thrown out.
  9. Draws up medication and fills the bulb syringeDraws from the labeled cup into a labeled syringe and recaps the needle one-handed with the scoop method. Fills the bulb syringe with irrigation and squeezes out the air.
  10. Prepares the spongesLoads peanuts and Kittners onto clamps and folds a 4 x 4 onto a sponge stick. Only x-ray detectable sponges go on the field.
  11. Sets up the Mayo with the first instruments neededKnife, scissors, forceps, and clamps closed to the first ratchet, curves facing one way, ring handles over a towel roll. The suture bag hangs on the side away from the operative side.
  12. Keeps the field sterile and fixes any break at onceFaces the field with hands above the waist. A contaminated item comes off the field and gloves are changed.
Manejo preoperatorio del caso · Habilidad 6 de 9

The first count

Core Curriculum 7.ª ed. · Preoperative case management, objective 6

11 pasos
  1. Counts with the circulator before the incisionBoth people see each item and say each number aloud, with no distractions.
  2. Counts in the same order every timeSponges, then sharps, then instruments, then other small items, each type grouped together.
  3. Breaks each sponge band only when that pack is counted
  4. Separates and shows every spongeCounts each one apart from the others and checks that it has its x-ray marker.
  5. Takes a pack with the wrong number out of the countToo many or too few: it is passed off, bagged and labeled by the circulator, and kept in the room until the case ends.
  6. Counts sharpsSuture needles by the number on each packet, checked when the packet is opened, plus blades, hypodermic needles and electrosurgery tips. Loose sharps go straight into the sharps container.
  7. Counts instruments by type, with every loose partRetractor blades, wing nuts and screws included. Never trusts the tray list alone.
  8. Counts other small itemsSuch as vessel loops, umbilical tapes, shods, clip cartridges, suture reels, the electrosurgery scratch pad and x-ray detectable towels.
  9. Checks each total as the circulator writes it downOn the count sheet or board. If interrupted or unsure, counts that type again.
  10. Counts anything added later the same wayOut loud with the circulator, and written down at once.
  11. Names when the count is repeatedWhen closure of a cavity begins, when fascia closure begins, when skin closure begins, and when the scrub or circulator is replaced. Counted items stay in the room until the case ends.
Manejo preoperatorio del caso · Habilidad 7 de 9

Gowning and gloving another team member

Core Curriculum 7.ª ed. · Preoperative case management, objective 7

9 pasos
  1. Hands the towelDrapes it over their open hand, long end hanging from the palm, without touching them.
  2. Opens the gown with the inside toward themHolds it by the shoulders, with a wide cuff of gown over their own gloved hands.
  3. Holds the gown steady as they slide their arms inThe circulator pulls it on from behind and ties it.
  4. Keeps the gown cuffs at or past their fingertipsTheir bare hands never come out of the sleeves.
  5. Opens the right glove for themPalm toward them, cuff stretched wide, thumbs tucked under the cuff.
  6. Lets the cuff close over the gown cuffGently, without snapping it.
  7. Repeats with the left glove
  8. Turns the gown with the tieHands them the tie card and takes it back, or passes the tie, so the gown closes.
  9. Stays sterile the whole timeHands above the waist and away from anything not sterile. A touch means a new glove at once.
Manejo preoperatorio del caso · Habilidad 8 de 9

Draping the patient

Core Curriculum 7.ª ed. · Preoperative case management, objective 8

11 pasos
  1. Sets out the drapes the procedure calls for, first one used on topFor example: towels and a laparotomy sheet for the abdomen; stockinette, split or U drapes and an extremity sheet for a limb; an under-buttocks drape, leggings and a perineal sheet for lithotomy.
  2. Checks that the skin prep is dry before the first drape goes onAn alcohol prep left wet or pooled under the drapes can catch fire.
  3. Stands on the surgeon's side of the tableNever reaches across the patient or an undraped table, and moves around it instead. Stays 12 inches from the table.
  4. Hands each drape compactly folded and the right way upHeld above the waist, turned by its printed arrows, and never allowed to fall open in the air.
  5. Hands four towels to square off the incisionEach with an edge folded under, the towel for the near side first and the far side last. Then hands nonpenetrating clips or an incise drape to hold them.
  6. Protects gloved hands in a cuff of the drapeHands stay under the cuff while the drape is placed and unfolded.
  7. Lays the opening of the main drape over the incision, then unfolds it outwardToward the head to form the anesthesia screen, then toward the feet, working from the incision to the edges.
  8. Leaves each drape where it landsNever slides or shifts a placed drape. One in the wrong spot is covered with another, or removed and replaced.
  9. Keeps hands above table levelAny part of a drape that falls below the table edge is not sterile and is never brought back up.
  10. Secures drapes with nonpenetrating clamps onlyNever a clamp that pierces the drape.
  11. Reports any contamination at onceA glove that touches skin or anything below the table edge is changed before the next drape.
Manejo preoperatorio del caso · Habilidad 9 de 9

Moving the field to the patient, and the time out

Core Curriculum 7.ª ed. · Preoperative case management, objective 9

12 pasos
  1. Places sterile covers on the light handlesTouching only the covers, or hands them to the surgeon to place.
  2. Brings the suction tubing and electrosurgery pencil onto the fieldThe suction tip attached and the pencil in its holster.
  3. Passes the cord and tubing ends to the circulator before the Mayo comes inOff the foot of the table, hand staying above the table edge, with enough slack left on the field.
  4. Secures cords and tubing with nonpenetrating clampsThe clamp holds drape and tubing only, and the electrosurgery cord is never wrapped around a metal clamp. The holster sits where the surgeon can reach it.
  5. Brings the Mayo stand over the patientGuides it by the draped top, clear of the patient's body, at a height that reaches the field.
  6. Moves the back table into placeTouches only its draped top and sets it so they never turn their back on the field.
  7. Places the basin stand within reachWith sterile water for wiping instruments during the case.
  8. Places sponges at the incision siteTwo sponges ready on the field before the incision.
  9. Sets the neutral zone with the surgeonAgrees on the spot, such as a basin, magnetic pad or mat, before the incision. One sharp in it at a time.
  10. Stops all activity for the time outHands still and attention on the person leading it.
  11. Confirms each part of the time out aloudPatient's identity, procedure, site and side with the mark visible, position, allergies, and that needed equipment and implants are in the room.
  12. Speaks up if anything does not matchAnyone on the team, the student included, can call for a time out or stop until it is fixed.

Manejo intraoperatorio del caso · 8 habilidades

Manejo intraoperatorio del caso · Habilidad 1 de 8

Passing instruments

Core Curriculum 7.ª ed. · Intraoperative case management, objective 1

11 pasos
  1. Has the next instrument ready before it is asked forFollows the steps of the case and picks up what comes next without being told.
  2. Hands over the right instrument for each name or hand signalPicks the size and length that suit the depth of the wound.
  3. Checks that the instrument works and is safe to passTips meet, ringed instruments are closed on the first ratchet, and power or stapling instruments are in safety mode.
  4. Holds the instrument by its middleGrasps it near the box lock or hinge, never by the tips.
  5. Turns it so the surgeon can use it at onceCurved clamps follow the curve of the surgeon's hand, scissors go tips up, retractors blade down, self-retaining retractors closed.
  6. Places it firmly in the surgeon's palmUses a light snap so the surgeon feels it without looking away, and lets go only once the surgeon has it.
  7. Passes tissue forceps with the tips pointing downHolds them near the middle and lays the handle end into the surgeon's hand.
  8. Takes back each used instrument right awayTrades one for one, so nothing lies loose on the drapes or rests on the patient.
  9. Wipes the instrument with a sponge wet with sterile waterClears blood and tissue from the tips and box lock; never uses saline on instruments.
  10. Flushes suction tips and other hollow instruments with sterile waterKeeps them from clogging with blood during the case.
  11. Returns each instrument to its place on the Mayo standKeeps the stand in the same order all case, with sharps kept in their own area.
Manejo intraoperatorio del caso · Habilidad 2 de 8

Loading and passing the scalpel

Core Curriculum 7.ª ed. · Intraoperative case management, objective 1

11 pasos
  1. Matches the blade to the handle the surgeon wantsBlades #10, #11, #12 and #15 fit a #3 handle; #20 and larger fit a #4.
  2. Takes the blade from its packet with a needle holderNever touches the blade with the fingers.
  3. Loads the blade onto the handle with the needle holderGrips the blunt back edge above the slot, points the cutting edge down and away, and slides it onto the grooves until it clicks.
  4. Keeps the loaded knife in the sharps area of the Mayo standBlade down and pointing away from self and the surgeon.
  5. Agrees on the neutral zone with the surgeon before the incisionSets a basin, tray or magnetic mat where the surgeon can reach it.
  6. Places the knife in the neutral zone and says so out loudSays "knife" or "scalpel in the zone" each time.
  7. Turns the knife so the surgeon can pick it up without adjusting itHandle toward the surgeon, blade down, and only one sharp in the zone at a time.
  8. Takes the hand fully out of the zoneNever reaches in while the surgeon is picking up or returning the knife.
  9. Picks the knife up from the zone only after the surgeon has let goLifts it by the handle and returns it to the sharps area.
  10. Removes the blade with a single-handed blade removerIf none is available, lifts the heel of the blade off with a needle holder and slides it forward, pointing away from everyone.
  11. Drops the used blade straight into the sharps containerNever leaves a loose blade on the field, and keeps it in the count.
Manejo intraoperatorio del caso · Habilidad 3 de 8

Loading and passing suture, and ties

Core Curriculum 7.ª ed. · Intraoperative case management, objective 1

12 pasos
  1. Picks the suture and needle holder the surgeon asks forMatches the needle holder's weight to the needle and its length to the depth of the wound.
  2. Loads the needle while it is still in the packetUses the needle holder and the packet to steady the needle, never the fingers.
  3. Clamps the needle about one-third of the way back from the swaged endUses the tips of the jaws, closes on the first ratchet, and never clamps the swage itself.
  4. Draws the strand out of the packet without tugging on the needleGently straightens out any kinks.
  5. Passes the needle holder ready to useNeedle point up and aimed back toward the surgeon; holds the strand end back so it does not catch in the surgeon's palm.
  6. Gives toothed forceps to the surgeon's other handSo the surgeon handles the needle with instruments, never with fingers.
  7. Loads and passes for a left-handed surgeon tooSets the needle the mirror way for the left hand. The teacher plays a left-handed surgeon.
  8. Trades one for one and puts each used needle in the needle boxTakes back the used needle holder as the next one is passed, so every needle is accounted for.
  9. Passes free ties and ligature reels into the surgeon's palmHolds a precut tie taut between two hands; gives a whole reel with a short end free, then puts the reel back in its place.
  10. Passes a stick tie and a tie on a passerLoads the stick tie on a needle holder like any suture; clamps just the end of a tie in the tips of a curved or right-angle clamp and drapes the strand over the back of the hand.
  11. Cuts suture with suture scissors, never tissue scissorsSteadies the blades with the index finger, slides the tips down to the knot, tilts them to see it, and leaves the tail the surgeon wants.
  12. Tags suture ends with a hemostat when askedClamps the ends together near their tips and lays the tag on the drape, clear of the wound.
Manejo intraoperatorio del caso · Habilidad 4 de 8

Medications on the field

Core Curriculum 7.ª ed. · Intraoperative case management, objective 1

12 pasos
  1. Sets out an empty sterile cup, labels and a marker before the drug arrivesPlaces the cup near the edge of the back table so the circulator never reaches over the field.
  2. Reads the drug with the circulator before it is pouredBoth look at the label and say the name, strength, amount and expiration date out loud, then check it against the preference card.
  3. Receives the drug without contaminating the fieldThe circulator pours it through a sterile transfer device, or holds the vial upside down while the student draws it up.
  4. Checks the label with the circulator a second timeRight after the drug is in the cup, before the vial is set aside.
  5. Labels the cup right awayName, strength and amount, even when it is the only drug on the field.
  6. Receives irrigation into a labeled basinThe circulator pours the whole bottle in one steady stream; the student notes the amount.
  7. Draws the drug into a syringe and labels the syringePushes out the air; the label does not cover the syringe markings.
  8. Keeps drugs in their own area of the back tableKeeps two strengths of the same drug apart, in containers that look different.
  9. Caps the needle with one handScoops the cap onto the needle at the back of the Mayo stand and leaves it loose, or uses a capping device; never recaps with two hands.
  10. Passes the syringe through the neutral zone and names what is in itSays the drug, strength and amount each time, with the needle pointing away from both people.
  11. Keeps a running total of each drug and of the irrigation usedCan tell the circulator how much has been given whenever asked.
  12. Reports the final totals out loud to the circulatorLeaves empty vials and bottles in the room until the case is over.
Manejo intraoperatorio del caso · Habilidad 5 de 8

Handling a specimen

Core Curriculum 7.ª ed. · Intraoperative case management, objective 1

9 pasos
  1. Asks before removal what kind of specimen is comingRoutine, frozen section or culture, and how many; has a basin, cup, Telfa and saline ready.
  2. Takes the specimen from the surgeon gentlyReceives it in a basin, a cup or on a Telfa pad; never uses crushing clamps, fingers or a counted sponge.
  3. Repeats back what the specimen isSays the name, the side and any marking stitch or clip the surgeon describes, and the surgeon confirms.
  4. Keeps the specimen moist and safe on the back tableUses saline, never water; keeps it in its own container in a set-aside spot, never wrapped in a towel or sponge.
  5. Keeps each specimen separateOne container for each specimen, each one identified, never mixed together.
  6. Asks the surgeon before passing it off the field
  7. Passes it off with sterile technique to a gloved circulatorWipes the outside of a sterile container with a sterile sponge first; sends a frozen section right away, with no preservative.
  8. Names the specimen, site and side during the hand-offThe circulator repeats it back before taking it.
  9. Checks the label with the circulatorOn the side of the container, not the lid: two patient identifiers, specimen and site with side, date and time, preservative and surgeon.
Manejo intraoperatorio del caso · Habilidad 6 de 8

The closing counts

Core Curriculum 7.ª ed. · Intraoperative case management, objective 1

11 pasos
  1. Calls for each closing count at the right timeAs closure of a cavity begins, as fascia closure begins and as skin closure begins; instruments before the cavity is closed.
  2. Gets the field ready before countingGathers used sponges, needles and instruments where both people can see them, and knows what is still in the wound.
  3. Counts out loud with the circulator, both seeing each itemSeparates every sponge and points to every needle and instrument.
  4. Counts the areas in the same order every timeSurgical field, then Mayo stand, then back table, then off the field: kick buckets, bagged sponges and the sharps container.
  5. Counts by type in the same order as the first countSponges, then sharps, then instruments and small items such as reels, vessel loops and blade covers.
  6. Includes everything added during the caseChecks the totals against the count sheet or whiteboard.
  7. Reports the result to the surgeon with the circulatorSays out loud whether the count is correct.
  8. Tells the surgeon at once when a count is wrongThe teacher removes one item so every student shows this.
  9. Recounts and searches the sterile fieldChecks the drapes, under basins and trays, the Mayo stand and around the wound while the circulator searches the floor, buckets and trash.
  10. Asks for an x-ray if the item is still missingBefore the wound is closed and before the patient leaves the room; every step taken is written down.
  11. Keeps counted items, trash and linen in the room until the count is correct
Manejo intraoperatorio del caso · Habilidad 7 de 8

Dressings

Core Curriculum 7.ª ed. · Intraoperative case management, objective 1

10 pasos
  1. Asks for the dressings only after the skin is closed and the final count is correct
  2. Sets the dressings on a clean towel on the Mayo standIn the order they go on: contact layer, absorbent layer, then tape or wrap.
  3. Keeps dressing sponges apart from counted spongesNever uses a counted, x-ray detectable sponge as a dressing.
  4. Clears sharps and instruments off the drapesKeeps only suture scissors and what the last stitches need.
  5. Cleans and dries the skin around the incisionUses a sponge wet with saline, then a dry one, without pulling on drains.
  6. Takes off the outer gloves before touching the dressingKeeps blood on the outer gloves away from the clean dressing.
  7. Places the contact layer right over the incisionHolds it in place while the drapes are moved away from the wound.
  8. Adds the absorbent layer and secures itTapes without stretching the skin, and dresses each drain site.
  9. Holds the dressing while the drapes come offThe drapes are rolled away from the incision, so the soiled side stays inside the roll.
  10. Checks that the dressing covers the wound and is secureKeeps the Mayo stand and back table sterile until the patient leaves the room.
Manejo intraoperatorio del caso · Habilidad 8 de 8

Second scrub: cut, retract, sponge, suction, camera

Core Curriculum 7.ª ed. · Intraoperative case management, objective 2

11 pasos
  1. Stays sterile at the fieldKeeps the hands above the waist and on the field, and never reaches across the scrub's Mayo stand.
  2. Cuts suture with the tips of suture scissorsSlides down to the knot, tilts the scissors to see it, leaves the tail the surgeon wants and lifts the cut ends off the field.
  3. Holds a retractor exactly where the surgeon placed itOverhand grip and a steady pull; does not tip the blade in unless asked, and does nothing else with that hand.
  4. Retracts with an instrument, never the fingers, while a sharp is in use
  5. Blots the field with a sponge when askedDabs instead of wiping, uses a sponge stick deep in the wound, and hands used sponges back to the scrub for the count.
  6. Suctions pooled blood, fluid and smokeKeeps the tip at the edge of the pool, off delicate tissue and vessels, and out of the surgeon's view.
  7. Clears a clogged suction tipSuctions sterile water from a basin until it runs clear.
  8. Gets the camera ready before it goes inWhite-balances on a white surface, focuses, and warms or defogs the lens.
  9. Keeps the picture level and centeredHolds the camera head upright so the horizon stays level, with the working instruments in the middle of the screen.
  10. Follows the surgeon's instruments slowly and smoothlyMoves in or out only when asked and keeps the lens off tissue.
  11. Cleans the lens when the picture fogs or smearsPuts the light source on standby whenever the scope is out of the patient.

Manejo postoperatorio del caso · 3 habilidades

Manejo postoperatorio del caso · Habilidad 1 de 3

Breaking down the field

Core Curriculum 7.ª ed. · Postoperative case management, objective 2

12 pasos
  1. Clears the drapes of instruments and sharps before the dressing goes onLooks over the whole field for sharps first.
  2. Takes off the outer gloves and cleans around the incisionA saline-moistened sponge, then a dry one, without pulling on drains.
  3. Helps place and secure the dressing, drains and tubingHolds the first layer in place while it is taped, so nothing pulls loose.
  4. Takes the drapes off by rolling them inward, away from the patientKeeps the dressing, lines and drains in place, and lowers the drapes into the biohazard bag without tossing them.
  5. Keeps the back table and Mayo sterile until the patient leaves the roomMoves them away from the bed with a knife, clamps, scissors, retractors and needle holders ready for an emergency.
  6. Changes into protective gear for the breakdownHead cover, mask and eye protection stay on. Sterile gown and gloves come off together, hands are washed, then nonsterile gloves and a protective gown go on.
  7. Gets rid of sharps firstBlades come off with a one-handed blade remover (or a safety scalpel is covered), never with fingers. Needles and blades go in the field sharps container, which is closed and placed in the room's sharps container.
  8. Wipes and soaks used instruments at the point of useA sponge with sterile water, then enzyme spray or soak as the facility directs, never saline. Lumens are flushed with sterile water.
  9. Packs instruments so they are not damagedBox locks and ratchets left open, not put back on a stringer; multi-part instruments taken apart with their parts kept together, heavy ones on the bottom, delicate and sharp ones apart. Unused instruments go back too, and damaged ones are tagged.
  10. Sorts the wasteSoiled items in the biohazard bag, clean packaging in regular trash, reusable linen in the linen bag, suction canisters as the facility directs. Nothing is thrown from a distance.
  11. Contains everything for the trip to decontaminationSoaking water or solution suctioned off or discarded first; instruments in a closed case cart or a covered, labeled biohazard container, with trash and linen bags closed.
  12. Takes off protection in order and washes handsGown and gloves together, then eye protection by its band, ties or earpieces, then the mask by its ties only; then hand hygiene.
Manejo postoperatorio del caso · Habilidad 2 de 3

Taking off gown and gloves

Core Curriculum 7.ª ed. · Postoperative case management, objective 3

6 pasos
  1. Pulls the gown away from the body while still glovedGrasps the front with gloved hands and pulls it forward so the fasteners at the neck and waist break. A neck tie that cannot break is undone by a nonscrubbed team member, or by the student without touching the neck.
  2. Rolls the gown off inside outPulls it down off the arms, touching only its inside, so the soiled outside ends up inside the bundle and never touches the scrub suit.
  3. Peels the gloves off with the gownAs the hands come out of the sleeves, the gloves come off inside out with the gown. Bare hands touch only the insides of the gown and gloves.
  4. Lowers the bundle into the right bagThe biohazard bag, or the linen hamper for a reusable gown. Slowly, never tossed, snapped or flung.
  5. Washes hands right awayA medical handwash of at least 20 seconds.
  6. Keeps head cover, mask and eye protection on for the breakdownPuts on nonsterile gloves and a protective gown. When the breakdown is done, eye protection comes off by its band, ties or earpieces, then the mask by its ties only, and hands are washed. Reusable eyewear goes to be cleaned.
Manejo postoperatorio del caso · Habilidad 3 de 3

Cleaning the room

Core Curriculum 7.ª ed. · Postoperative case management, objective 4

12 pasos
  1. Starts only after the patient has left the room
  2. Wears protective gearGloves, a protective cover gown, a mask and eye protection.
  3. Removes trash, linen and suction wasteBags closed and taken to the holding area, suction canisters handled as the facility directs.
  4. Reads the disinfectant label before using itA hospital-grade disinfectant mixed as directed, with its contact time and safety data sheet known. For an isolation case, the product the facility requires.
  5. Cleans from top to bottom and from clean to dirtyHigh surfaces first and the floor last. Lights only once they are cool.
  6. Wipes every surface touched during the caseLights, Mayo stand, back table, ring and prep stands, IV poles, kick buckets, equipment and cords, door handles, light switches and the keyboard.
  7. Keeps each surface wet for the full contact timeWipes again if it dries too soon.
  8. Cleans the OR table completelyPads off and cleaned on both sides, then the top, hinges, straps, arm boards and attachments. Moves the table to clean the base and casters.
  9. Cleans spills before disinfecting themSoaks up blood or fluid first, then disinfects. Walls and doors are spot cleaned where soiled.
  10. Mops the floor around the field3 to 4 feet all around the sterile field, including under the table, and any floor that is visibly or possibly soiled.
  11. Resets the room for the next caseClean linen on the table, new liners in kick buckets and hampers, a new suction canister and tubing, furniture back in place.
  12. Takes off protective gear and washes hands

Circulante asistente · 6 habilidades

Circulante asistente · Habilidad 1 de 6

Vital signs

Core Curriculum 7.ª ed. · Assistant circulator role, objective 2

12 pasos
  1. Cleans hands and identifies the patientAsks for full name and date of birth and checks them against the ID band.
  2. Tells the patient what is going to be doneHas the patient rest, sitting or lying, with the arm supported.
  3. Takes the temperature with a clean probe coverPlaces the thermometer correctly for the route chosen and waits for the signal.
  4. Feels the radial pulse with the pads of two or three fingersNever the thumb, and presses lightly.
  5. Counts the pulse for 30 seconds and doubles itCounts a full minute for the first reading or when the beat is irregular; notes rhythm and strength.
  6. Counts breaths without telling the patientKeeps the fingers on the wrist and counts the breaths for a full minute, noting how deep and how regular they are.
  7. Puts a cuff of the right size on the bare upper armCenters it over the brachial artery about 1 inch above the elbow crease, with the arm at heart level.
  8. Finds the estimated systolic pressure by feelInflates while feeling the pulse until it stops, notes the number, then lets the air out and waits before going on.
  9. Listens over the brachial artery and inflates 30 mm Hg above that number
  10. Lets the air out at about 2 to 3 mm Hg per secondNotes the first clear sound as the systolic and the point where the sounds stop as the diastolic.
  11. Records all four signs and reports any that are out of rangeWrites the time, route and units, and tells the nurse or anesthesia provider about abnormal values.
  12. Cleans the equipment and cleans hands
Circulante asistente · Habilidad 2 de 6

Urinary catheter

Core Curriculum 7.ª ed. · Assistant circulator role, objective 3

12 pasos
  1. Checks the order, the catheter type and size, and allergiesSmallest catheter that will work, with a 5 mL balloon for an adult; asks about latex and iodine allergies.
  2. Gets the anesthesia provider's OK and positions the patient with privacyFemale: knees bent and apart; male: supine with legs slightly apart. Good light, and only the area needed is uncovered.
  3. Cleans hands and opens the kit with sterile techniqueOn a clean surface within easy reach.
  4. Puts on sterile gloves using the open glove techniqueBare hand touches only the folded cuff; gloved hand touches only the outside of the other glove.
  5. Places the drape and gets the supplies readyAntiseptic on the swabs, lubricant on the catheter tip, syringe of sterile water ready, bag connected; tests the balloon only if the catheter maker says to, and never a silicone balloon.
  6. Holds the labia apart or the penis upright with the other handDraws back the foreskin; that hand is now unsterile and stays in place until the catheter is in.
  7. Cleans the meatus with the sterile handFemale: front to back with a new swab each stroke; male: circles out from the meatus. Never goes back over a cleaned area.
  8. Inserts the lubricated catheter gently until urine flowsThen advances it a little farther; never forces it.
  9. Fills the balloon with sterile water, never air or salineThe amount the catheter maker's instructions give, never less; then pulls back gently until it stops, and returns the foreskin over the glans.
  10. Secures the tubing to the thigh with no pull on the catheterKeeps the bag below the bladder and off the floor, with no kinks in the tubing.
  11. Removes gloves and cleans hands
  12. Records the catheterThe order and the reason, the date and time, the size, the color and amount of the urine at insertion, and who placed it.
Circulante asistente · Habilidad 3 de 6

Moving the patient to the table and back

Core Curriculum 7.ª ed. · Assistant circulator role, objectives 4, 5 and 9; Postoperative case management, objective 1

11 pasos
  1. Identifies the patient before moving themChecks two identifiers against the ID band and chart, plus the procedure, site and allergies.
  2. Moves the stretcher safely to the ORRails up, strap on, patient covered, IV bags on the pole at the foot; pushes from the head end, feet first.
  3. Lines the stretcher up with the OR table and locks bothSame height, stretcher brakes on and table locked.
  4. Frees and protects every tube and lineIV bags above the patient, catheter bag below, drains secured so nothing pulls.
  5. Guides the awake patient across, standing on the far side of the tableKeeps the patient covered, explains each move and never lets the patient move alone.
  6. Puts on the safety strap and stays beside the patientStrap 2 inches above the knees with room for two fingers; never leaves the patient alone.
  7. Waits for the anesthesia provider's OK before moving the patient after surgeryThe anesthesia provider holds the head and airway and calls the move.
  8. Has at least four people and a transfer device in placeRolls the patient to one side to slip the device under the draw sheet.
  9. Moves the patient across on the count, never dragging the skinKeeps the body straight and watches the dressing, drains and lines.
  10. Secures the patient on the stretcherRails up, strap on, warm blanket, catheter bag hung below the bladder and off the floor.
  11. Checks the skin and dressing before leaving the roomReports any red areas or loose dressing to the circulator.
Circulante asistente · Habilidad 4 de 6

Positioning

Core Curriculum 7.ª ed. · Assistant circulator role, objective 7

12 pasos
  1. Names the position for the procedure and the equipment it needsSupine, prone, lateral, lithotomy, Fowler's, Trendelenburg, reverse Trendelenburg or Kraske, as the teacher assigns.
  2. Gets the table attachments and padding ready and checks themArmboards, stirrups, chest rolls, kidney rests, footboard or headrest; checks they lock and will hold the patient's weight.
  3. Has enough people and waits for the anesthesia provider's OKAt least four to turn a patient prone and five for lateral; the anesthesia provider controls the head and neck.
  4. Moves the patient slowly, lifting instead of slidingKeeps tubes and lines free; in lithotomy, two people raise or lower both legs at the same time.
  5. Lines the patient up on the table for the positionKraske: hips over the middle break; lithotomy: buttocks at the lower break; lateral kidney: flank over the kidney rest.
  6. Checks body alignmentHead, neck and spine in a straight line, legs parallel and uncrossed, nothing twisted.
  7. Pads every pressure point for that positionSupine: heels, elbows, sacrum. Prone: chest rolls from collarbone to hip bone, knees, toes. Lateral: axillary roll, pillow between the legs. Lithotomy: padded stirrups clear of the outer calf.
  8. Places the arms safelyPadded armboards at less than 90 degrees, palms up when supine, or tucked at the sides with a draw sheet, palms in; fingers clear of table breaks.
  9. Protects the eyes, ears, breasts and genitalsNothing presses on the eyes, ears lie flat, breasts and male genitals are free of pressure.
  10. Puts on the safety strap once the position is reachedAcross the thighs 2 inches above the knees, in lateral too, with room for two fingers underneath.
  11. Tilts or bends the table slowlyFor Trendelenburg, reverse Trendelenburg, Fowler's and Kraske; uses a padded footboard for reverse Trendelenburg and Fowler's.
  12. Checks the whole position with the team before the prepNo skin touching metal, nothing hanging off the table, nothing resting on the patient; states the position and devices for the record.
Circulante asistente · Habilidad 5 de 6

Accessory devices

Core Curriculum 7.ª ed. · Assistant circulator role, objective 6

10 pasos
  1. Gathers the devices on the preference card and tests themRuns the electrosurgical unit's self-test and checks the pad alarm; turns on the compression and warming units.
  2. Puts the compression sleeves on both legsRight size, snug with room for two fingers, tubing not under the legs; turns the pump on and checks that the sleeves fill.
  3. Applies the dispersive pad once the patient is in final positionChecks the date, a moist and unbroken gel surface, and the right size for the patient; never cuts or folds a pad.
  4. Chooses a safe pad siteClean, dry skin over a large muscle near the incision; not over bone, scars, tattoos or metal implants, not below a tourniquet, away from the warming blanket; clips hair if needed.
  5. Smooths the pad on with full contactNo wrinkles, gaps or tape, and no part of the patient touches metal.
  6. Connects the pad cable to the electrosurgical unitChecks that the alarm clears.
  7. Places the forced-air warming blanket and connects the hose to itUses only the blanket and hose made for that unit and never blows warm air from the hose alone.
  8. Takes the cords and tubing from the scrub and connects themActive electrode cord to the electrosurgical unit and suction tubing to the canister; checks that the suction works.
  9. Confirms the power settings with the surgeon before the incisionKeeps the activation sound loud enough to hear.
  10. Records each device, its settings and the skin under the padChecks the skin before the pad goes on and after it comes off.
Circulante asistente · Habilidad 6 de 6

Skin prep

Core Curriculum 7.ª ed. · Assistant circulator role, objective 8

11 pasos
  1. Confirms the site, the solution and the patient's allergiesChecks that the site mark shows, looks at the skin for rashes or sores, and leaves hair unless the surgeon orders clipping.
  2. Gets the anesthesia provider's OK and uncovers only the prep area
  3. Protects against pooled solutionTucks towels along the edges; covers the dispersive pad, monitor leads or tourniquet cuff if they are close by.
  4. Cleans hands, opens the prep tray with sterile technique and puts on sterile glovesUses the open glove technique.
  5. Starts at the incision site and works outwardNever brings a used sponge back toward the center, and drops each sponge at the edge.
  6. Scrubs for the time the product label givesUses gentle pressure on thin or fragile skin.
  7. Handles dirty areas the right wayCleans the umbilicus first with applicators; preps the axilla, groin, perineum, a stoma or an open wound last with a fresh sponge.
  8. Preps well beyond the incisionWide enough for a longer incision, drains or a change to an open procedure.
  9. Lets the solution dry completelyWaits the full drying time on the label and checks for wet or pooled areas, above all with alcohol solutions.
  10. Removes the wet towels before the drapes go onWithout dragging them across the prepped skin.
  11. Records the prepSite, solution, skin condition and who did the prep.

Esterilización · 5 habilidades

Esterilización · Habilidad 1 de 5

Cleaning at point of use

Core Curriculum 7.ª ed. · Sterile processing, objective 1

11 pasos
  1. Wears protective gear for dirty instrumentsGloves, fluid-resistant gown, mask and eye protection.
  2. Takes off every disposable sharp firstBlades with a single-handed blade remover, needles into the sharps container.
  3. Wipes off blood and tissue with a sponge wet with sterile waterNever uses saline, which pits and rusts the steel.
  4. Flushes suction tips and other hollow instruments with sterile water
  5. Opens every hinged instrumentBox locks and ratchets left open so the cleaning solution reaches every surface; they are not put back on a stringer.
  6. Takes apart instruments with several partsFollows the maker's instructions and keeps the parts together.
  7. Sorts the instruments to protect themHeavy ones on the bottom, delicate ones on top or back in their own case, sharp ones such as trocars and skin hooks kept apart.
  8. Tags any broken or damaged instrument for repairThe teacher puts one damaged instrument in the set.
  9. Keeps the instruments moistSprays them with enzyme foam or cleaner, or covers them with a towel wet with water.
  10. Closes them in a leak-proof container marked as biohazardSends them to decontamination promptly, in a closed case cart.
  11. Takes off the protective gear and cleans hands
Esterilización · Habilidad 2 de 5

Inspecting and assembling a set

Core Curriculum 7.ª ed. · Sterile processing, objective 2

11 pasos
  1. Works from the set's count sheet, never from memory
  2. Checks the tray or container for damage and dirt
  3. Looks at every instrument under a lighted magnifier for soilBox locks, teeth, jaws and hinges; one dirty instrument sends the whole set back to decontamination.
  4. Checks that each instrument worksTips meet and line up, box locks have no cracks or play, ratchets close and hold.
  5. Tests sharp and insulated instrumentsScissors cut test material with the tips, insulation passes the tester, needle holders grip without slipping.
  6. Pulls damaged instruments and tags them for repairReplaces each with the same instrument, or marks the tray and count sheet if one is missing; no swaps unless the OR approves.
  7. Puts multi-part instruments together to test them, then takes them apart for sterilizingKeeps small parts in a holder next to the instrument.
  8. Arranges the set in its standard orderRinged instruments open on a stringer, curves facing the same way, heavy items on the bottom, tips protected.
  9. Checks each item off the count sheet as it goes inNames each one; does not just count totals.
  10. Places the internal chemical indicator where steam reaches lastOne on each level of a tray with more than one level.
  11. Checks the set's weight and signs the count sheetNo more than 25 pounds with the container.
Esterilización · Habilidad 3 de 5

Wrapping and peel packs

Core Curriculum 7.ª ed. · Sterile processing, objective 3

11 pasos
  1. Checks the packaging before useNo holes, tears or expired material; container gaskets, filters, valves and latches intact.
  2. Closes a container systemFilter in place, internal indicator in the tray, lid on, tamper-evident locks and label card in place.
  3. Sizes a peel pouch to the itemAbout 1 inch of space around the item, and not so big that the item slides around.
  4. Loads the pouch the right wayThe end to be grasped faces the end that peels open, tips face the plastic side, hinges open, indicator inside.
  5. Presses out the air and seals the pouchHeat seal or self-seal with no wrinkles, gaps or channels; never staples or pins.
  6. Wraps an item with the envelope foldWrap turned like a diamond, item in the center; bottom corner up with a tab folded back, then left, then right, then the top corner tucked under with a tab showing.
  7. Wraps an item with the square foldItem square in the center; bottom edge up with a cuff, top edge down with a cuff, then each side over with a cuff.
  8. Uses two wraps one after the other, or one bonded double wrapEach wrap covers the item completely and is snug but not tight.
  9. Seals each wrapped pack with chemical indicator tape
  10. Labels every packageContents, packager's initials, lot number, date and destination; on tape, a label or the pouch's plastic side, never on the wrap or the pouch paper.
  11. Checks every seal and places the packages in the area for sterilizer loading
Esterilización · Habilidad 4 de 5

Running a steam sterilizer

Core Curriculum 7.ª ed. · Sterile processing, objective 4

12 pasos
  1. Checks the sterilizer before the first loadChamber clean, drain strainer clear of lint and tape, door gasket intact.
  2. Runs or checks the daily test the sterilizer needsFor a prevacuum sterilizer, an air removal (Bowie-Dick) test in an empty chamber with an even color change before the first load.
  3. Checks each package before loadingLabel with lot number, outside indicator, closed seals and no tears.
  4. Loads so steam can reach and drain from everythingSpace between packs, nothing touching the chamber walls, not overloaded.
  5. Places each kind of item the right wayPeel pouches on edge in a basket, paper to plastic; basins on edge and tilted; perforated trays flat; linens above metal items.
  6. Adds a biological indicator test pack to a load with an implantThe teacher includes an implant in the load.
  7. Chooses the cycle that fits the load and the items' instructionsGravity or prevacuum, with the right temperature, exposure time and dry time.
  8. Closes the door, starts the cycle and fills in the load recordLot number, items, cycle and operator.
  9. Reads the printout and signs itTime, temperature and pressure were all met; a load that missed them is not released.
  10. Lets the load cool without touching itPulls the cart to a quiet spot away from cold air vents for 30 minutes to 2 hours or more.
  11. Checks every package for dryness and indicator changeTreats a wet pack or a failed indicator as unsterile and sends it back for reprocessing.
  12. Holds implants until the biological indicator reads negativeRecords the result.
Esterilización · Habilidad 5 de 5

Sterile storage and case carts

Core Curriculum 7.ª ed. · Sterile processing, objective 5

12 pasos
  1. Lets sterilized packs cool fully before moving themHandles them as little as possible, with clean, dry hands.
  2. Checks every package before it goes on the shelfWrap, seals and locks intact, outside indicator changed, lot label present, dry, and not past any expiration date.
  3. Shelves packs where they stay clean and drySolid bottom shelf, 8 to 10 inches off the floor, at least 18 inches below sprinkler heads, away from sinks, pipes and vents.
  4. Places packs so they are not crushed or hanging over the edgeHeavy items on middle shelves; lifts packs instead of dragging them.
  5. Rotates stock first in, first outNewest behind or to the left, oldest picked first; items that expire first are used first.
  6. Pulls any package that has had an eventWet, torn, crushed or opened goes back for reprocessing; a dropped package never goes back on the shelf.
  7. Reads the pick list for the caseChecks the surgeon, procedure, date and room against the surgeon's preference card.
  8. Pulls each item and checks it off the listChecks each package again as it is picked and takes the oldest first.
  9. Reports anything missing or swappedTells the OR and notes it on the pick list; never swaps an item without approval.
  10. Loads the case cart so nothing is crushedClean cart, heavy items on the bottom, cart closed or covered.
  11. Labels the cart and delivers it on time to the right room
  12. Returns unused, unopened items to stock after the caseSends opened and dirty items to decontamination.
La escribimos con nuestras propias palabras a partir de las evaluaciones de habilidades de laboratorio del Core Curriculum for Surgical Technology, 7.ª edición.Gratis para leer, imprimir y usar en tu programa.
Descarga gratis

Descarga la lista en PDF.

Las 31 habilidades, una por página, con líneas para el nombre de cada estudiante, quien evalúa, la fecha, el intento y el resultado, y un registro de habilidades para el expediente de cada estudiante. Escribe en él en pantalla o imprime varias copias para el día de evaluación.

Recibe el PDF gratis

Aquí te mandamos el enlace a tu PDF.

Te mandamos por correo un enlace al PDF. También recibirás nuestros correos ocasionales para educadores, y puedes darte de baja cuando quieras.

Quién hizo esto

Somos CSTSetup. Los técnicos quirúrgicos estudian con nosotros desde 2019.

11,500+ técnicos quirúrgicos y estudiantes usan CSTSetup para aprender los setups, los instrumentos y el examen de certificación. Escribimos esta lista para programas como el tuyo, y creamos tres cosas a su alrededor.

  1. Que tus estudiantes jueguen la lista antes del laboratorioMuy pronto
  2. Evalúa a tus estudiantes en una tableta, no en papelPara programas
  3. Dale a cada estudiante los setups e instrumentos detrás de cada habilidadEn cada lugar
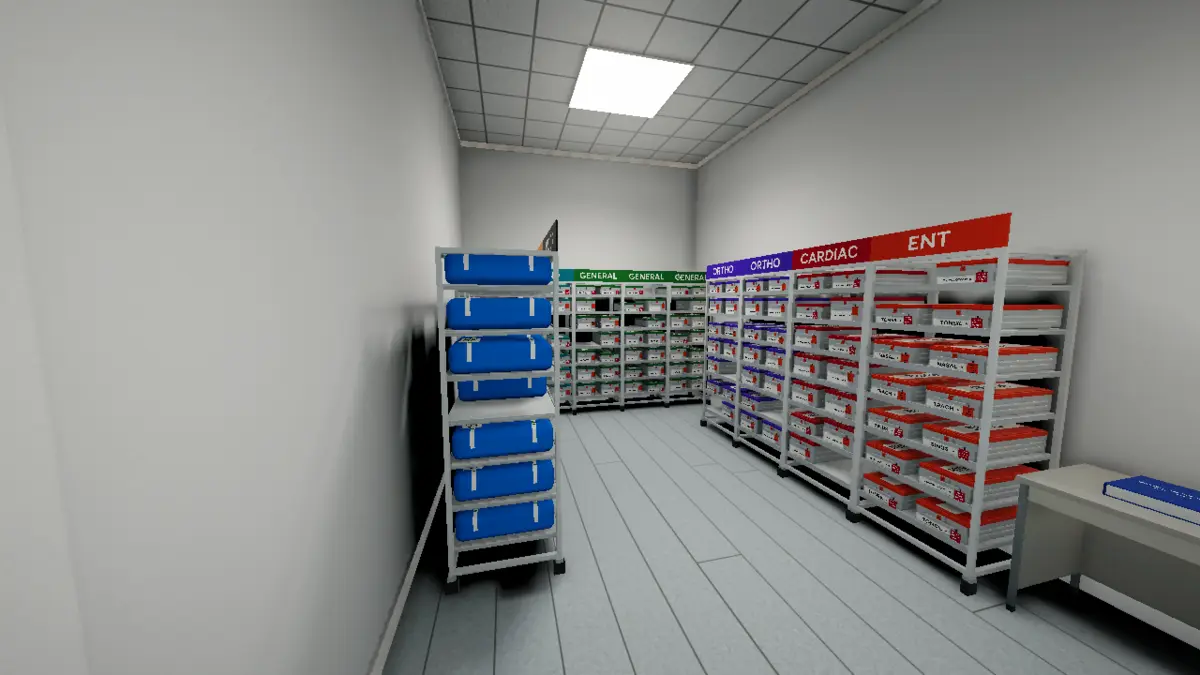
Un almacén estéril en el juego: estantes con bandejas de instrumental marcadas General, Ortho, Cardiac y ENT
Capítulo 5 · EsterilizaciónNivel 5: Almacén estéril y carros de casos
Reto 8 de 12Saca cada artículo y márcalo en la lista

Relaciona cada bandeja con una línea de la lista de surtido.

Examen · sin pistasAlmacén estéril y carros de casos
★★★★★

11 de 12 pasos correctos · 6:40

Faltó: rota el inventario, primero en entrar, primero en salir

Muy prontoEl juego de la lista de habilidades

Fig. 4 · Un nivel en modo práctica. Cambia a modo examen para ver las estrellas.

Muy pronto

Que tus estudiantes jueguen la lista antes del laboratorio.

Estamos convirtiendo esta lista en un juego. Cada sección es un capítulo, cada habilidad es un nivel y cada paso es un reto por completar.

  • El modo práctica los guía de la manoCada nivel se juega como una misión, con una guía en cada paso y una pista cuando se atoran.
  • El modo examen los sueltaSolo la tarea, como "Prepara la sala". Hacen cada paso por su cuenta y ganan de una a cinco estrellas.
  • Preparación para el día de la evaluaciónPara cuando tomes el portapapeles, ya habrán jugado cada habilidad de esta lista.

Fig. 2 · Una evaluación en el portal del programa, en una tableta del laboratorio (grupo de ejemplo)

Para docentes

Evalúa a todo el grupo desde una tableta.

Cuando tus estudiantes estén listos, olvídate del papel. El portal del programa de CSTSetup trae esta lista incluida: toca cada paso conforme se hace, marca Aprobada o Necesita práctica, y aparece la siguiente persona que todavía necesita la habilidad.

  • Lista desde el primer díaCada grupo y cada estudiante tiene la lista. Nada que copiar, armar ni asignar.
  • Hazla de tu programaCambia un paso, agrega tus propias habilidades o desactiva las que enseñas de otra forma.
  • Cada intento queda registradoQuién evaluó, cuándo, los pasos como estaban ese día y la nota de Necesita práctica.
  • Un registro impreso para cada expedienteUna página por estudiante con cada habilidad y su resultado, para la visita de acreditación.
  • Tus estudiantes practican los mismos pasosVen exactamente lo que vas a evaluar, en el celular, antes del laboratorio.
El resto del registro

La lista está junto a todo lo demás que registras.

Habilidades, casos y horas de los mismos estudiantes, en un solo portal, contados según tu organismo acreditador conforme llegan.

de 120 casosMínimo de la AST, estudiante de ejemplo

Registros de casos, contados según tu estándar

Tus estudiantes registran desde el celular. Cada caso cuenta para AST, NCCT o CC4SA en cuanto lo apruebas.

Entrada, 6:42 a. m.En el centro clínico

Horas clínicas confiables

Turnos registrados en el centro clínico, con la ubicación, para que destaque un turno registrado desde casa.

Escanea, marca, confirmasin necesidad de cuenta

Firma del preceptor con un escaneo

El preceptor escanea un código QR con la cámara del celular y marca los casos que supervisó. Sin cuenta, sin app, sin hojas de firmas.

Registro del programacada estudiante, cada caso

Todo el registro, en una descarga

Exporta los casos, las horas y el progreso de cada estudiante cuando quieras. Los registros son tuyos.

¿Vienes de otro sistema? Trae contigo los casos anteriores de tus estudiantes.

Cómo funciona el portal del programa
Entre evaluaciones

Lo que se estudia en cada lugar.

Cada lugar incluye CSTSetup Pro para cada estudiante, así que los setups, los instrumentos y la práctica para el examen detrás de estas habilidades van en su bolsillo.

Preoperatorio · Habilidad 5 de 9

Setting up the back table and Mayo

  1. Drapes the Mayo stand early in the setup
  2. Checks the indicator inside each tray before using it
  3. Lays out the back table in zones
  4. Arranges instruments by type

+ 8 pasos más en la lista

Detrás de cada habilidad, en el bolsillo del estudiante:

  • 385
    SetupsLa mesa auxiliar y la mesa de Mayo de casos reales, con fotos tomadas en quirófanos reales, cada instrumento con su nombre y el caso recorrido paso a paso.
  • 3,358
    InstrumentosFotos, medidas y usos, tarjetas de estudio y modelos 3D para girar en la mano.
  • 7
    Pruebas de prácticaUna por cada examen de certificación, incluidos los exámenes CST y TS-C, con la calificación para aprobar como referencia.
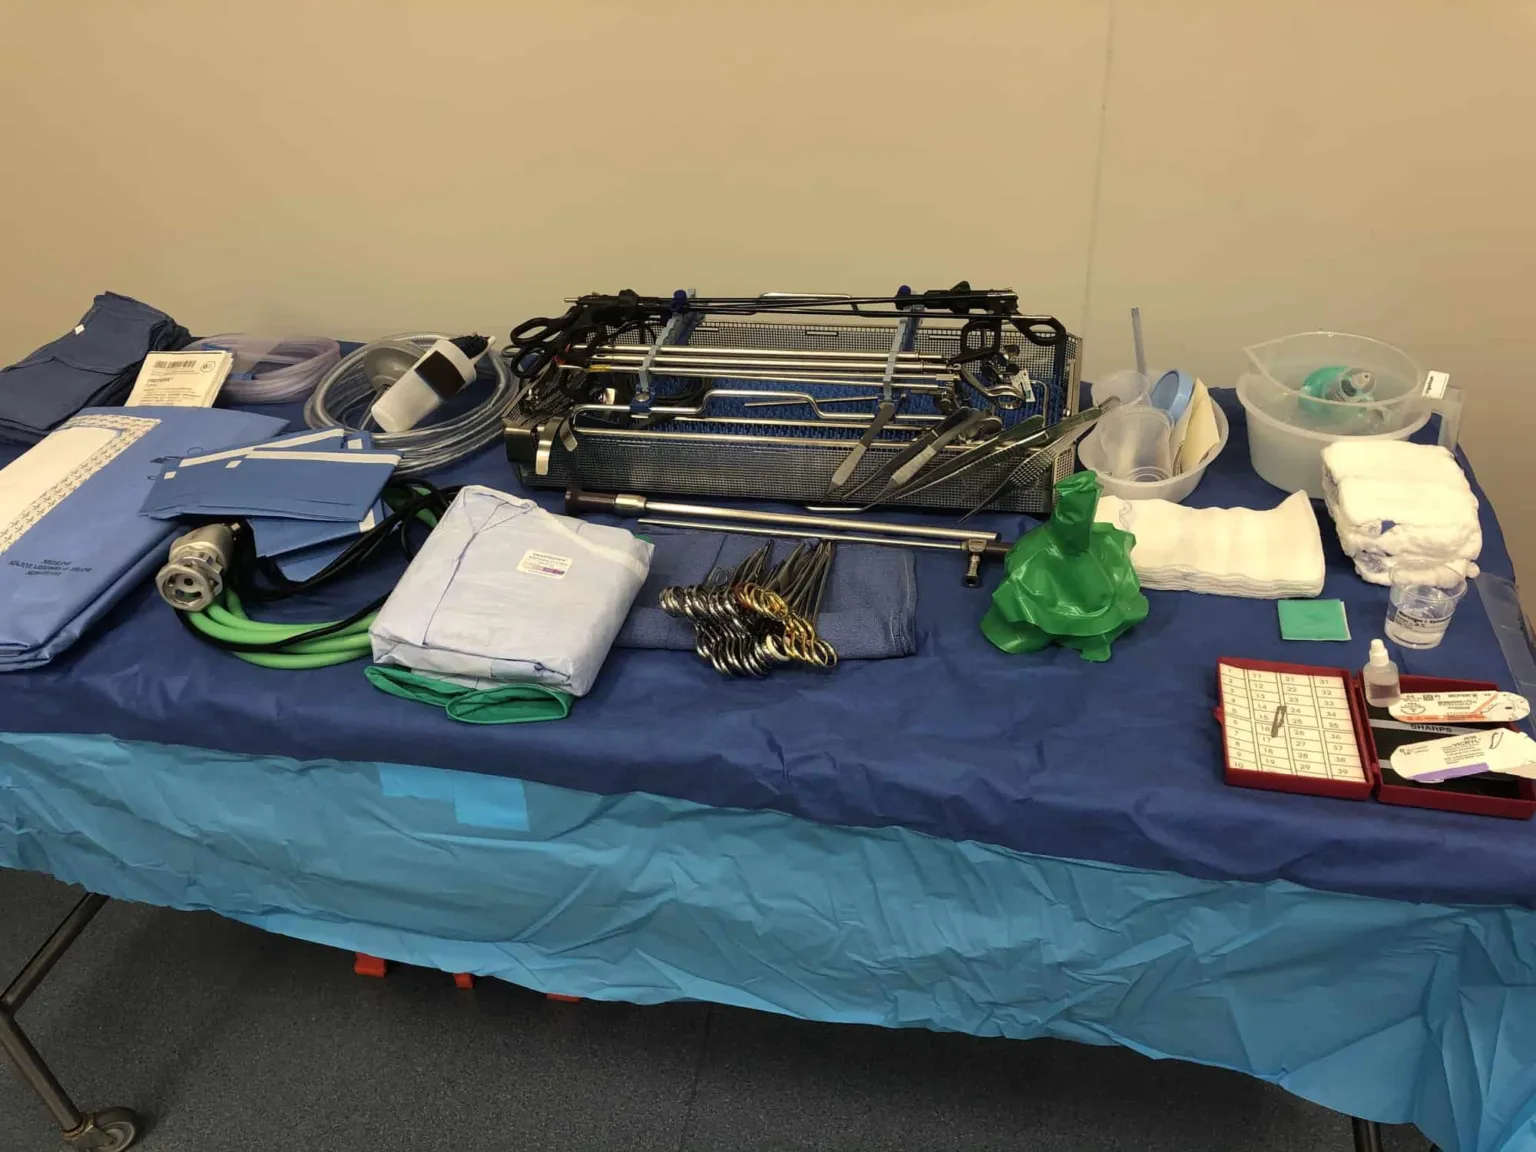
La mesa auxiliar preparada para una colecistectomía laparoscópica en un quirófano real Laparoscopic Cholecystectomy · 36 instrumentos
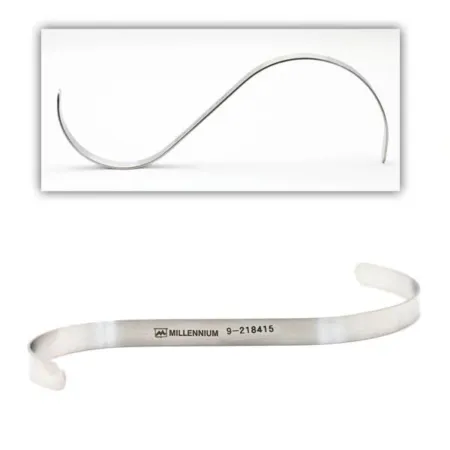
Hasson S Retractor
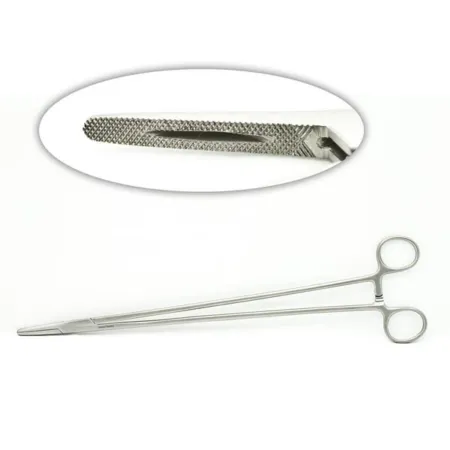
3DMayo-Hegar Needle Holder
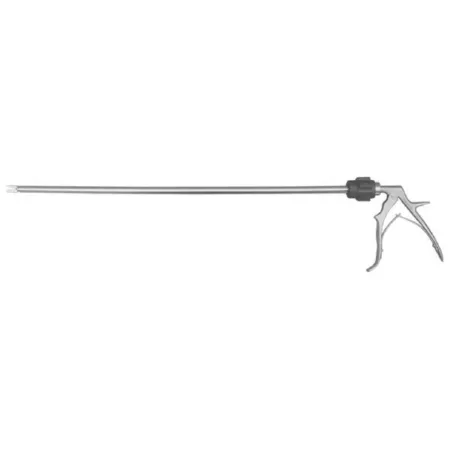
Laparoscopic Clip Appliers
Laparoscopic Maryland Dissector Grasper
Fig. 5 · La mesa auxiliar de la colecistectomía laparoscópica y cuatro de sus instrumentos, como los ve un estudiante en Pro

$10.39por estudiante al mes, en plan anual para un grupo de 5 o más. Pro para cada estudiante y todo el registro para tu programa, en un solo lugar.

Ver precios por lugar
Preguntas

Sobre la lista.

¿Es la lista oficial de la AST?

Es nuestra propia hoja de evaluación, escrita con nuestras palabras a partir de las evaluaciones de habilidades de laboratorio del Core Curriculum for Surgical Technology, 7.ª edición. Cada habilidad indica el objetivo que cubre, así puedes cotejarla con tu guía del curso y los registros.

¿Qué edición del Core Curriculum sigue?

La 7.ª edición, con sus cinco secciones de laboratorio. ARC/STSA exigió a los programas acreditados por CAAHEP enseñar la 7.ª edición completa a partir del 1 de agosto de 2024.

¿Podemos adaptarla a nuestro programa?

Sí. Imprímela, cópiala y adáptala a como funcione tu laboratorio. Si usas el portal del programa de CSTSetup, puedes cambiar cualquier paso, agregar tus propias habilidades y desactivar las que enseñas de otra forma.

¿De verdad es gratis?

La lista, cada habilidad de estas páginas y el PDF son gratis. El portal del programa, donde evalúas a tus estudiantes en una tableta y guardas sus registros, tiene precio por estudiante.

¿Qué significa "hecho" en cada paso?

Cada paso es algo que quien evalúa puede ver que ocurre, escrito en palabras sencillas con una nota breve sobre cómo se ve bien hecho. Una habilidad se aprueba cuando se hacen todos los pasos.

Para programas

Tu lista ya está configurada.

Si diriges un programa, configuramos contigo el portal en una llamada: el organismo acreditador, los grupos y los docentes. Tus estudiantes entran por correo.