After the case
The last jobs of every case: dressing the wound, keeping a sterile setup ready until the patient leaves, taking the field apart safely, and cleaning the room for the next patient.
1Why it matters
The skin is closed and the final count is correct, but the case is not over. In the next few minutes you help dress the wound, keep a sterile setup ready in case the patient needs it, take the sterile field apart safely, and help get the room clean for the next patient.
Each of these jobs protects someone. The dressing protects the patient's new wound. Careful breakdown protects you and your team from blood and sharps, and it protects the people who handle the waste, laundry and instruments after you. A clean room protects the next patient.
This chapter teaches the end of the case in the order it happens. Other chapters hold the pieces it builds on: how wounds heal in chapter 11, closing the skin with sutures, staples or skin adhesives, and drains and other wound supplies, in chapter 25, how and when the counts are done in chapters 28 and 29, specimens in chapter 29, cleaning and sterilizing instruments in chapter 27, how infection spreads and isolation in chapters 10 and 26, moving the patient to the stretcher in chapter 31, and waking from anesthesia and the recovery room (PACU) in chapter 13.
2What a dressing does
A dressing is the covering placed over a wound at the end of surgery. Most are simple. A dressing gets more complex when the body part also needs support, as after many orthopedic operations.
A dressing can do several jobs at once:
- Protection: it shields the wound from bumps and rubbing, and keeps germs from outside away from it.
- Absorption: it soaks up drainage (exudate) and draws it away from the edges of the wound.
- Pressure and hemostasis: a firm dressing presses on the wound. That helps control bleeding (hemostasis), limits swelling (edema), closes dead space, and helps prevent a hematoma.
- Support: it holds still, or splints, a body part or the incision.
- Moisture control and tissue preservation: it keeps the right amount of moisture at the wound, so new skin cells do not dry out.
- Aesthetics: it hides the wound from view, and it adds to the patient's comfort.
- Some dressings also remove dead tissue (debridement) or hold a medication against the wound.
A closed incision is protected with a sterile dressing for the first 24 to 48 hours after surgery. A sterile dressing change, when a dressing is replaced later, follows sterile technique too.
Choosing a dressing
The choice of dressing depends on the wound's type, size and place on the body, how much drainage is expected, the surgeon's preference, the patient's age, size, allergies and other illnesses, the skin around the wound, and comfort. A good dressing is the right size and type for the wound, stays put, and is comfortable.
Ointment is not usually put on a closed surgical incision. Antibiotic ointments, such as "triple antibiotic," are no longer recommended on surgical wounds, and current CDC guidance says not to put antimicrobial ointments, solutions or powders on the incision to prevent infection. Some contact layers come already soaked with petrolatum or an antibacterial agent so the dressing will not stick.
A 2014 textbook still describes the surgeon placing an antiseptic or antibiotic ointment on the wound before the dressing goes on, and a 2021 pharmacology reference still lists antibiotic ointment as part of the postoperative dressing.
3Types of dressings
The Core Curriculum sorts dressings into biological, one-layer, packing, rigid, specialty and three-layer dressings. This chapter starts with the three-layer dressing, which can cover an incision of any size.
The three-layer dressing
A three-layer dressing covers an incision of any size that is expected to drain, lightly or heavily. It can be as simple as an adhesive bandage strip or very complex. The layers are also called the primary, secondary and tertiary layers.
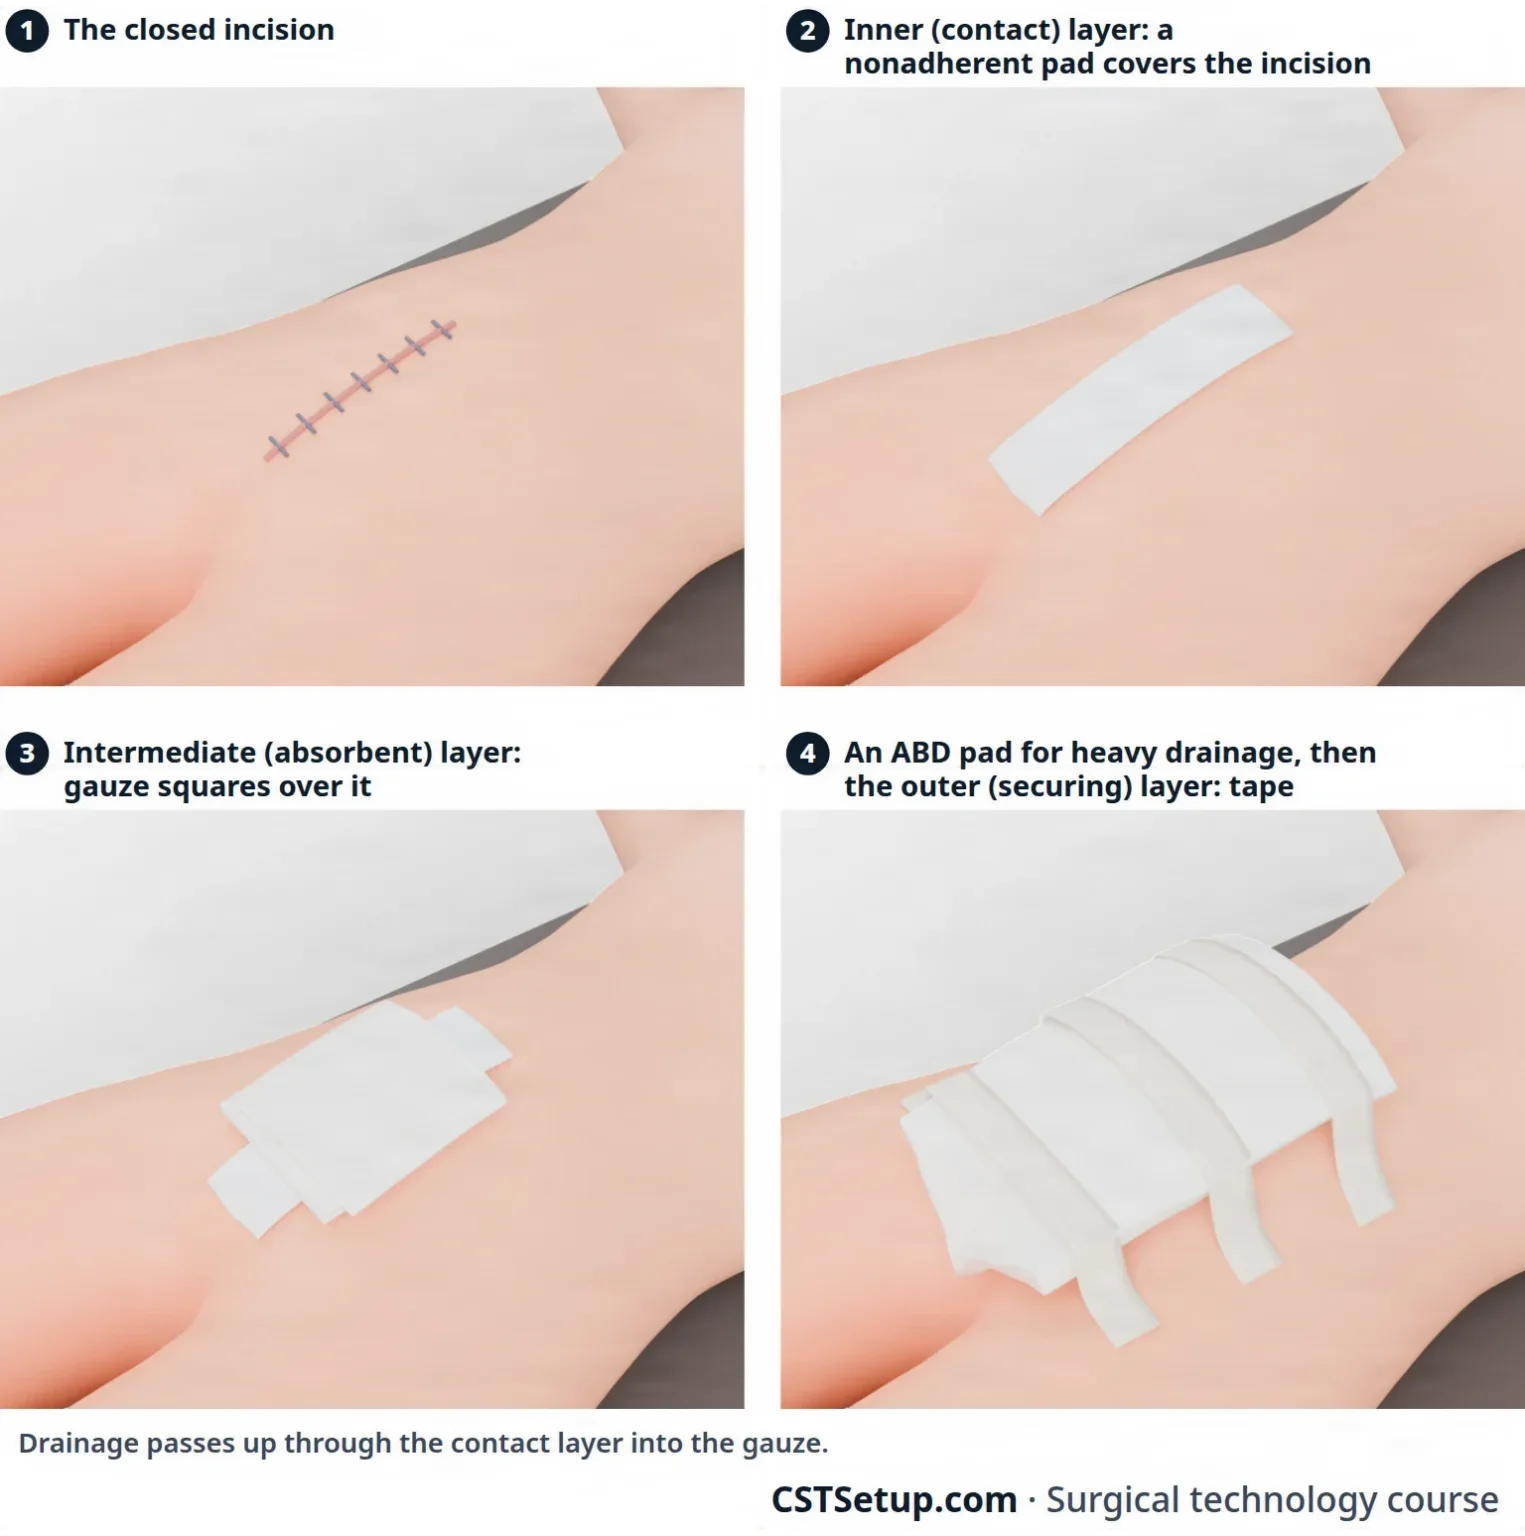
1. The inner (contact) layer lies right on the wound and covers it completely. Drainage passes up through it into the next layer. It should not stick to the wound, unless the surgeon wants the dressing to pull off dead tissue. There are three kinds:
- Occlusive (nonpermeable): a fine mesh gauze soaked with an emulsion, such as petrolatum gauze or Xeroform. It makes a seal that air and water cannot pass through, so an occlusive dressing may be placed around the exit site of a chest tube to keep air from being drawn back into the chest. Xeroform also slows the growth of bacteria.
- Semi-occlusive (semipermeable): a hydrogel, or a hydrocolloid (which some sources call occlusive), that lets some air and fluid through. Hydrocolloids are one option for chronic wounds, such as burns and pressure injuries. A transparent film is semipermeable too: air passes, but the incision is shielded from direct contact.
- Nonocclusive (permeable): a nonadherent pad such as Telfa or Adaptic. It draws drainage up away from the wound (wicking), lets air and fluid pass, and comes off without pain.
2. The intermediate (absorbent) layer goes over the contact layer and soaks up drainage. The more drainage expected, the thicker it is. Common choices are 2 x 2 and 4 x 4 gauze squares, fluffs (folded gauze that is teased open to add bulk), and the ABD pad, a large padded dressing for wounds that drain heavily. Dressing gauze is never a counted surgical sponge.
The flat dressing is this build at its simplest: a nonadherent pad or a petrolatum-soaked mesh, two or three gauze squares over it, and tape. Fluffs are added when it needs more padding.
3. The outer (securing) layer holds the other two in place:
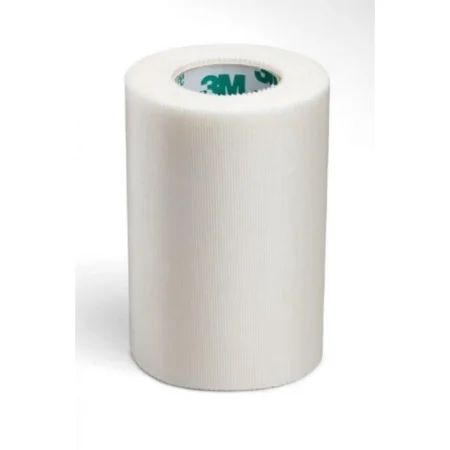
- Tape: paper or "silk" tape is light and sticks gently; plastic tape bends easily and sticks harder; foam tape is another choice; cloth tape is seldom used on surgical wounds because it hurts to remove. Some patients are allergic to certain tapes. Ready-made dressings that look like a large adhesive bandage, gauze surrounded by paper or silk tape, are another choice; one name for them is the Owens dressing.
- Transparent: a clear polyurethane dressing can hold the absorbent layer down, and adds compression when it is wanted.
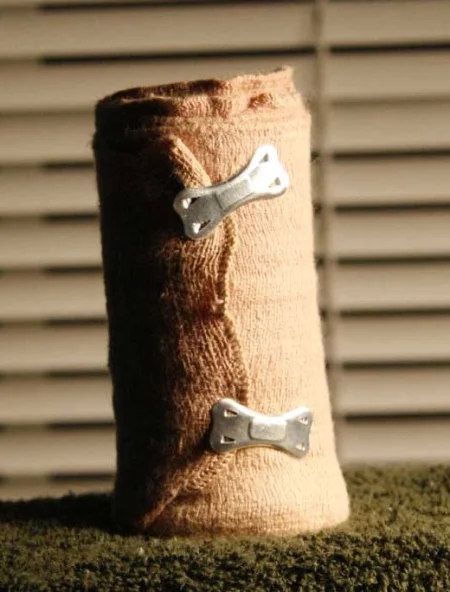
- Wrap (rolled dressings): rolled gauze (Kling, Kerlix) molds around a limb or the head; an elastic bandage (Ace) adds compression; self-adherent wrap (Coban) makes a protective outside layer on a limb; stockinette goes on before a splint or cast; tube gauze slides over a finger or limb. A wrap can also hold a chest dressing while letting the chest rise and fall with each breath.
- Montgomery straps, described with the specialty dressings below.
A wrap that is too tight can damage the nerves and blood vessels beneath it (neurovascular damage).
Two variations change the three layers:
- Pressure dressing: extra padding in the middle layer, or a tighter outer layer, to press on the wound. It immobilizes and supports the area, absorbs heavy drainage, spreads pressure evenly, closes dead space, and reduces edema and hematoma. Too tight, and it can harm the nerves and blood flow beneath it and slow healing.
- Bulky dressing: extra absorbent material in the middle layer, to immobilize the area, support the wound and soak up heavy drainage.
One-layer dressings
A one-layer dressing covers a small incision that will drain very little, such as a laparoscopic port site. It is also used over IV sites.
- Transparent film: a thin, clear polyurethane sheet with an adhesive back (OpSite and Bioclusive are brands). You can watch the wound through it without taking it off, and it keeps outside germs and water out while holding moisture in.
- Hydrocolloid: a self-adhesive wafer with gel-forming agents in it. Some sources call it occlusive and others semi-occlusive. It sticks to a wet or dry wound, keeps the wound moist and blocks bacteria, and suits clean wounds with little drainage.
- Foams, gels and spray dressings.
- Collodion: a liquid painted on the incision that dries into a seal, often used on children. It is flammable, and some facilities do not allow it.
- Skin closure tapes (such as Steri-Strips): they hold the wound edges together, and on a small wound they may be the whole dressing.
- Skin adhesives (such as Dermabond): a liquid glue that closes and seals the wound with no needle. Chapter 25 covers them.
Skin preparation agents. Tape, closure strips and films stay on better when a liquid or spray adhesive, such as tincture of benzoin or Mastisol, is put on the skin first. For closure strips, benzoin goes on each side of the incision.
Biological dressings and skin grafts
Biologic dressings, also called biosynthetic skin substitutes (Integra, Dermagraft and Apligraf are examples), cover open wounds from trauma, burns or skin ulcers for a while. They protect the wound, keep germs out and cut down fluid loss; some also bring proteins and growth factors that help healing.
A skin graft has two wounds to dress:
- Recipient site, where the graft is laid: often a bolster (tie-over or stent) dressing. A nonadherent petrolatum gauze goes on the graft, padding such as moist cotton balls is shaped over it, and long sutures placed beside the wound edges are tied over the top. It presses the graft evenly against the wound bed and stops fluid from collecting under it. A meshed graft needs a moist dressing so it does not dry out and fail.
- Donor site, where the skin was taken: the surgeon's choice, such as a biosynthetic dressing, a petrolatum fine mesh gauze or Xeroform, or a transparent film.
Chapter 38 covers grafting procedures.
Packing
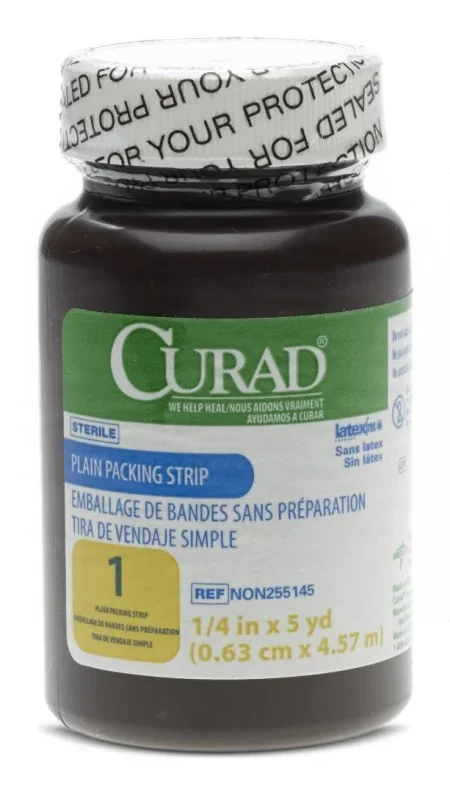
Packing is gauze or another soft material placed in a cavity or an open wound to help stop bleeding, press on tissue, support the wound or fill dead space. It goes in the nose, the sinuses, the rectum, the vagina, a fistula tract, or a wound that is left open to heal.
- It usually comes as one long, narrow strip in a bottle, so it can be fed into the space a little at a time.
- It is plain (non-impregnated) or impregnated with an antiseptic such as iodoform, a bacteriostatic agent or petrolatum. Some kinds have an x-ray marker.
- It is usually removed early in recovery, because it can quickly become a source of infection.
- Packing left in the patient is named in the handoff to the PACU nurse, along with drains and tubes.
Rigid dressings: casts and splints
Rigid dressings hold a body part still while it heals. They are made of plaster or a lighter synthetic such as fiberglass.
- A splint goes on one side of a body part, to support it and stop it moving in one direction. A finger splint after tendon repair, for example, keeps the finger from bending. Some splints are molded plastic or metal.
- A cast goes all the way around a body part, to support it or stop all movement. It holds the joints above and below the injury. The most common is the cylinder cast on an arm or leg. A spica cast reaches onto the trunk to hold the hip or shoulder, and is often used on children; a walking cast has a sole or heel added.
Casts are named for what they cover: a short arm cast runs from the knuckles to just below the elbow, a long arm cast to the armpit; a short leg cast runs from the ball of the foot to just below the knee, a long leg cast to the hip; a cylinder cast runs from the ankle to the groin when the knee must not bend; and a body jacket holds the spine. Rolls come 2 to 6 inches (5 to 15 cm) wide, over padding.
A fresh or open fracture is not put in a closed cast, because of the high risk of compartment syndrome and infection; a splint, which leaves room for swelling and lets the wound be checked, is often the choice right after surgery. Some patients leave the OR in a brace, such as a cast brace, instead. You help apply all of these at the end of the case; the steps for a cast or splint are below.
Specialty dressings
Some dressings are made for one part of the body or one job. The Core Curriculum names these:
- Abdominal binder: a wide band fastened snugly around the belly for support, often worn after incisional hernia repair. Its compression is thought to reduce fluid collection and pain, and patients say it makes them more comfortable.
- Bolster (stent) dressing: tied over a skin graft, as above, or used to hold a dressing on a curved area such as the face, neck or nose.
- Bulky dressing: extra absorbent padding, as above.
- Drain dressing: a gauze square made with a slit, or cut into a slit or Y with scissors, so it fits snugly around a drain where it leaves the skin.
- Eye pad and shield: an oval gauze pad over the closed eyelid keeps the lid shut and holds medication in place; a rigid oval shield over the pad protects the eye from pressure and injury.
- Montgomery straps: wide adhesive straps on each side of the wound, tied together over the gauze. They untie to let the nurse change the dressing, so they suit wounds that need frequent or long-term dressing changes.
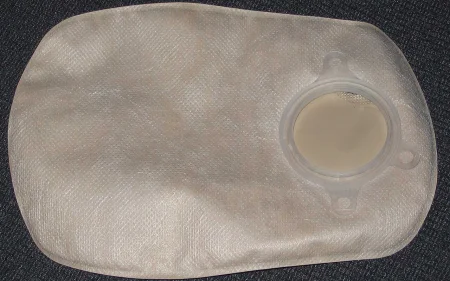
- Ostomy pouch: a bag with adhesive around its edge, placed over a new stoma (an opening made in surgery from inside the body to the skin) to collect drainage without leaking while the stoma heals.
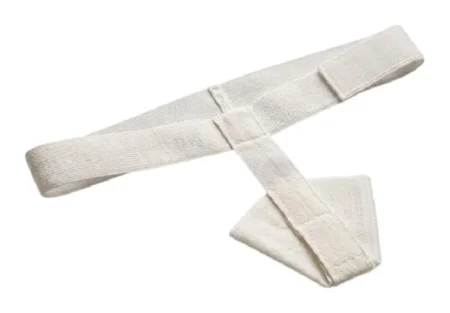
- Perineal pad: absorbs vaginal or perineal drainage, and is held in place by a belt, underwear or a T-binder.
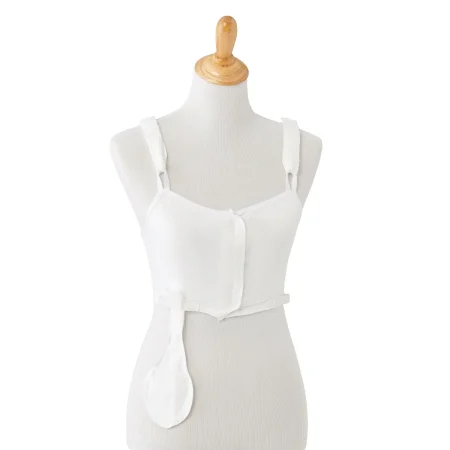
- Post-op bra: a soft surgical bra that holds breast dressings and is often the dressing itself. It must not be so tight that it cuts off blood flow to the skin flaps.
- Scrotal support: after scrotal surgery, an athletic-style support holds a fluff dressing in place and presses lightly to help prevent swelling.
- Skin adhesives: covered above and in chapter 25.
- Skin graft (donor and recipient sites) and stent dressings: covered above.
- Thyroid collar: a wrap around the neck that holds the dressing over a thyroid incision. It may come ready-made or be made from a surgical towel, and it must not be too tight.
- Tracheotomy dressing: a drain dressing placed around the tracheotomy tube, with the tube held by wide umbilical tape or hook-and-loop straps around the neck.
- Tube gauze: stretchy, tube-shaped gauze from a roll that slides over a finger or limb to hold a dressing on.
- Wet-to-dry dressing: gauze moistened with saline or another solution the surgeon chooses is packed into the wound and left to dry. When it is pulled off, dead tissue comes away with it, a mechanical debridement often done for burns, sometimes under anesthesia for comfort. A wet-to-wet dressing is changed before it dries, which removes less tissue and hurts less.
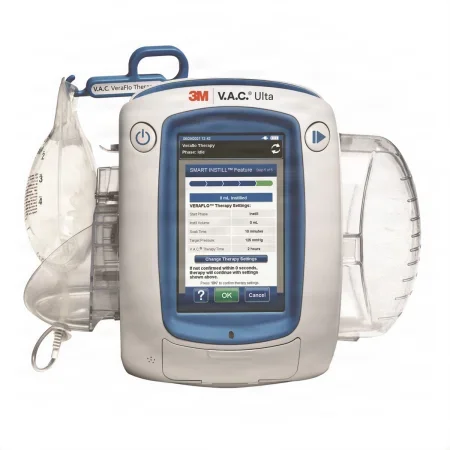
- Wound vac (negative pressure wound therapy, also called wound vacuum-assisted closure): foam is placed in the wound and sealed under an occlusive film, and tubing connects it to a pump with a collection canister. The pump keeps a steady, controlled suction on the wound bed that pulls off drainage, reduces swelling and helps new tissue grow. It is used for wounds that are hard to heal. Surgeons may also place one over a closed incision at the end of the case, a use that is becoming more common on abdominal incisions; WHO suggests it for closed incisions in adults whose wounds are at high risk of infection. The device itself is in chapter 25.
Never too tight. A wrap, pressure dressing, bra or cast that is too tight can cut off blood flow or injure nerves.
4Preparing and applying the dressing
In the OR, putting on the dressing is the last step of the operation, and it is done with sterile technique. You get the dressing ready and help the surgeon apply it.
When the dressings come out
Dressings are not brought to the field until the skin layers are closed and the final count is correct. Dressing gauze has no x-ray marker, so keeping it off the field until then avoids any mix-up with the counted sponges. If the back table pack already holds the dressings, they stay in their wrapper until the final count is done.
Getting ready
- Before closure begins, excess instruments come away from the wound, the closing sutures, suture scissors and clean sponges go on the Mayo stand, and you prepare any drains and their tubing. Chapter 29 covers the closing counts.
- As the last sutures or staples go in, clear the Mayo stand of everything except what those last stitches need.
- Lay a clean towel on the Mayo stand, and set the dressings on it with suture scissors and skin forceps. Keep the dressings as clean as you can.
- Line the dressings up in the order they will go on: contact layer, absorbent layer, then whatever secures them.
- Before the dressing goes on, take every sharp, instrument and reusable item off the drapes. Power cords and air hoses come off the top drape too, so nothing tangles when the drapes are pulled away. Once the dressing is on, look over the whole field for a loose sharp before the drapes come off.
Putting it on
- Clean the skin. Gently wipe around the incision with a sponge moistened with saline, or a clean wet lap sponge, to remove blood, dried prep solution and debris. Then pat it dry with a dry sponge. Do not disturb the wound edges or pull on a drain.
- Take off your outer gloves if you are double gloved, before you touch the dressing. Blood on the outer gloves would otherwise end up on the clean dressing.
- Prepare the skin for tape with benzoin or Mastisol if the surgeon wants it.
- Place the contact layer over the incision and over each drain site. Hold it there while the top drapes are moved away from the incision.
- Add the absorbent layer, still with sterile technique.
- Take the drapes off. One sterile team member holds the dressing while the drapes are pulled slowly and carefully away from the patient. Roll each drape as it comes off, so the soiled side ends up inside the roll, and move it gently to keep from stirring up the air. Lower it into the biohazard bag; never throw a drape into a container from a distance, which splatters blood onto the floor, the walls and your teammates.
- Secure the dressing. In many rooms the circulator tapes the dressing and connects the nonsterile ends of the drains to their collection devices. Chapter 25 shows how a closed suction drain is activated.
Taping
The type of tape depends on how strong and how stretchy it needs to be, the patient's allergies, the condition of the skin, and how often the dressing will be changed.
- Lay the tape across the dressing without stretching it, and press it down evenly on both sides, working away from the incision. Tape that is pulled tight stretches the skin and can injure it.
- Over a joint, the tape covers the edges of the dressing and is placed at right angles to the direction the joint moves.
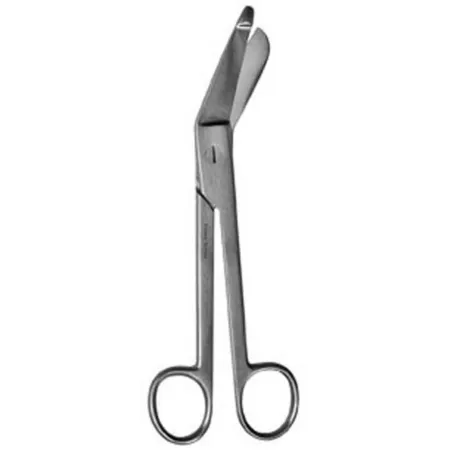
- Bandage scissors cut dressings and remove wraps. The longer lower blade has a flat, blunt tip that slides under a wrap without cutting the skin beneath.
Helping with a cast or splint
Most departments keep the casting supplies together on a cast cart: plaster or fiberglass in rolls and flat sheets, cast padding (Webril) and stockinette, a bucket for water and heavy scissors. Casting material starts to harden quickly once it is wet, so have everything ready before the first roll gets wet.
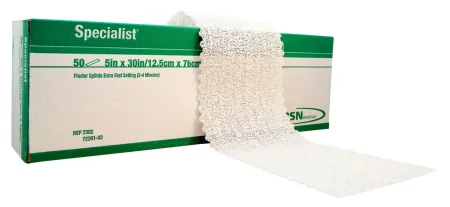
- The surgeon puts the padding on first: stockinette, then at least two layers of cast padding rolled from the far end of the limb toward the body, with extra padding over bony points. It protects the skin from the heat of setting plaster and from rubbing and pressure.
- A roll is held under cold or room-temperature water, never warm, until bubbles stop rising, which shows it is fully wet. Plaster gives off heat as it sets, and with warm water that heat can burn the patient.
- Unroll the first 2 to 3 inches before you hand the roll over, and pass it with the loose end down so it rolls on easily. Wait for the surgeon's word before the next roll goes in the water.
- Hold a wet cast with the flat of your open hands, never your fingertips, which leave dents in the cast.
- Afterward, the fingers or toes are checked for blood flow and nerve function, the six Ps: pain, pallor, pulse, paresthesia (tingling), paralysis and temperature (poikilothermia).
Two 2014 references still have the rolls dipped in lukewarm water.
A cast that is too tight is one cause of compartment syndrome: the pressure rises inside a closed space of the limb until it squeezes the blood vessels and nerves. A limb swells after surgery, so a cast put on in the OR must allow for that swelling. Choosing a splint, which does not go all the way around the limb, is one safeguard, and the cast padding must not be wrapped too tight.
Watch, then report
Cleaning and dressing the wound puts your eyes right on it. Tell the surgeon and the circulator about anything unusual: bleeding at the incision, swelling that may be a hematoma, or a rash. Later, in the PACU, a dressing that soaks through with blood in a short time is a sign of excessive bleeding and is reported to the surgeon at once.
5Until the patient leaves the room
AST's position is clear: the scrub stays in sterile gown and gloves, and keeps the back table, Mayo stand and basins sterile, until the patient has been taken out of the room.
The reason is the patient. A patient waking from general anesthesia can vomit and inhale it (aspiration), get into breathing or heart trouble, or start to bleed. The team may need to reopen the incision, or do an emergency tracheotomy, as for bleeding after a tonsillectomy, and it must be ready to treat these problems right there in the OR.
As a general anesthetic is withdrawn, the patient wakes (emergence) and normal reflexes return. The breathing tube comes out once normal breathing returns, before the patient leaves the room. Chapter 13 covers emergence.
What to do:
- Once the drapes are off, roll the back table, the Mayo stand and the basins well clear of the bed and out of the path of traffic.
- Keep at least these on the sterile Mayo stand: a knife handle with a #10 or #15 blade on it, four hemostats (Crile or Kelly), Mayo and Metzenbaum scissors, both curved, two retractors (Army-Navy or Richardson), and two needle holders.
- Stay sterile while the rest of the team gets the patient ready to move.
Breaking down the tables before the patient leaves, to make the room turn over faster, is a common habit that AST says puts quality care in question.
Other things that happen in these minutes:
- Suction stays connected until the patient leaves the room.
- While you stay sterile, the circulator and other nonsterile team members disconnect the equipment, wipe leftover prep solution and any blood or fluid off the skin, remove the return electrode and check the skin under it, remove monitoring and positioning devices, secure the dressing, drains and tubing for the move, and cover the patient with a clean gown and a warm blanket. Chapter 31 teaches these steps.
- Many facilities hold a team debriefing before the patient leaves. It names the procedure that was done and confirms that the sponge, sharp and instrument counts are complete, the specimens are identified and labeled, and any equipment problems are reported. The team discusses the wound classification (chapter 11) and the key concerns for the patient's recovery, and has a chance to talk over how the team worked, key events and any lasting change to the preference card. Chapter 16 covers team communication.
- Everyone on the team, the CST included, signs every record that needs their signature before leaving the room. This is also when the supplies used, any special procedures, the specimens, and the drugs and solutions used are checked and reported with the circulator (chapter 29 covers keeping those totals).
- When a specimen is sent on after surgery, the circulator may check with the surgeon where it goes and any special notes for pathology. Anything out of the ordinary, such as a patient keeping a specimen, is verified.
- When the patient is stable, they are moved to the stretcher and taken to the PACU, or to another unit such as the ICU. The anesthesia provider must go with a patient who had general anesthesia. The circulator goes too, and always when monitors are still running or oxygen is being given. They give report when they arrive. Moving the patient to the stretcher is in chapter 31, and the PACU is in chapter 13.
The field stays sterile until the patient is out of the door. Until then, the patient may still need it.
6Breaking down the field
Taking the sterile field apart matters as much as setting it up. Done well, it protects the patient and the team from cross-contamination, prevents sharps injuries, and starts the cleaning of the instruments. Doing it right when you are tired and the next case is waiting is part of your surgical conscience.
The principles
- The first scrub does it. The CST in the first scrub role breaks down the field, because that person knows where every sharp and every contaminated item is.
- Economy of motion. Move as little as you can. Keep each motion simple, useful and done once. Work smoothly and quickly, but never at the cost of safety, and follow the same logical order every time. A set routine helps the room turn over efficiently.
- Point-of-use decontamination. Cleaning the instruments begins at the table where they were used.
- Standard precautions. Blood and certain body fluids from every patient are treated as if they could carry HIV, hepatitis B or another bloodborne pathogen. Wear your personal protective equipment (PPE), keep it on while you work, and wash your hands when you finish.
Taking off your gown and gloves
Taking off protective gear is called doffing. Your sterile gown and gloves come off first, and protective gear goes on for the dirty work. The gown and gloves come off together, so your bare hands touch only their insides:
- Break the ties. Grasp the front of the gown with your gloved hands and pull it away from your body, so the fasteners at the neck and waist break. If the neck tie cannot break, another team member undoes it, or you undo it without touching your neck.
- Roll the gown off inside out, so the outside ends up inside the roll.
- Peel the gloves off with it, turning them inside out as the gown comes off, so your bare hands touch only the insides of the gown and gloves.
- Lower the bundle into the bag: the impervious red (or yellow) bag marked with the biohazard symbol, or the soiled linen hamper for a reusable gown. The World Health Organization recommends yellow bags. Never toss it from a distance, and never snap or fling a glove, which splatters blood.
- Do a medical hand wash. Hold your hands lower than your elbows so the water runs off at the fingertips, rub every surface and between the fingers with friction for at least 20 seconds, rinse the same way, dry with a clean towel, and turn off the faucet with a paper towel. Chapter 28 teaches the medical hand wash.
- Put on fresh protection. Keep your head cover, mask and eye protection on through the whole breakdown, and put on nonsterile gloves and a nonsterile protective gown.
AST's 2014 gowning standard and its 2018 breakdown guideline take the gown off first, with the gloves still on, so bare hands never touch the blood on the gown. The gloves then come off one at a time: grip the first glove at the palm with the other gloved hand and peel it off inside out (glove to glove), then slide a bare finger under the second cuff and peel it off (skin to skin).
The CDC's 2002 hand hygiene guideline and AORN's 2021 guidance set the minimum for the hand wash at 15 seconds of rubbing.
PPE is taken off and put in its proper container before you leave the restricted area, and fresh PPE goes on for the cleaning part of turnover.
Sharps first
Sharps come off the field first, before the instruments and the disposables. A sharp left on a drape or hidden in the trash can injure your team and the workers who handle things after you.
- Never take a blade off with your fingers. When a safety scalpel is not used, take the blade off with a one-handed blade remover, a passive safety device the American College of Surgeons prefers because it generally protects better.
- Put blades and suture and hypodermic needles in the small, rigid sharps container you set up on the back table. Close it, then place the whole container in the room's large puncture-resistant sharps container. That container sits where you can see its biohazard symbol and how full it is.
- Never overfill. The back table container must still close tightly, and the room's container is replaced often enough that it never overflows. WHO advises closing and removing a sharps container when it is three-quarters full.
- A sharps container must be puncture resistant, leak proof, labeled or color-coded, and able to be closed.
- Reusable sharp instruments, such as Gelpi retractors, reamers and trocars, go in a basin of their own, to prevent injury.
Some references still teach taking the blade off with a needle holder: lift the lower corner of the blade slightly, then slide it out of the slot. AORN's 2020 sharps guidance still allows an instrument when no safety-engineered device is available, and one summary of OSHA's rules names a clamp or other mechanical device.
Instruments
Chapters 24 and 27 explain each of these steps; here is what you do at the table.
- Wipe soiled instruments with a sponge wet with sterile water. Never use saline: its chloride corrodes and pits the steel.
- Keep them moist on the way to decontamination. Put them in a basin of water with an enzyme detergent, or spray them with an enzyme product and then place them in the basin. Other ways are an enzyme foam, gel or spray made for instruments, or a towel moistened with sterile water laid over them. Do not leave them in enzyme solution for a long time, which can damage the finish. Heavy instruments go on the bottom, light ones on top.
- Return delicate instruments to their own container.
- Open the box locks and ratchets of every ringed instrument, so the cleaning solution reaches every soiled surface, and do not thread them back onto a stringer.
- Take apart instruments with several parts as their instructions for use (IFU) direct, and keep the parts together.
- Flush anything with a lumen with sterile water, so blood does not dry inside it.
- Instruments that were opened but not used go back in their own container or tray, so they are not damaged. Every instrument opened on the field is reprocessed, used or not, because droplets in the air or direct contact can contaminate it without anyone seeing.
- Mark a damaged instrument with the facility's repair tag. It is still cleaned before it goes out for repair.
- Before the instruments leave the room, suction off or discard the water or solution they soaked in, so it cannot spill on the way.
AST's 2018 guideline for breaking down the field puts the opened ratcheted instruments on a stringer at the end of the case.
AST's 2018 guideline for breaking down the field puts each basin of instruments in a bag with the biohazard label, so the soaking solution cannot splash in the case cart.
Reprocessed devices. Some devices made for single use, such as laparoscopic trocars and pulse oximeter probes, can be collected for a reprocessing company that must clean, inspect, test, package and sterilize them under FDA rules. These go in the facility's color-coded collection bin, not the trash.
Disposables: biohazard bag or regular trash
- Regulated medical waste (biohazardous waste) is anything soaked or visibly soiled with blood or body fluid. It goes in a red bag, or a yellow one where that is the standard, marked with the biohazard symbol. Its handling is regulated by the states and by OSHA's Bloodborne Pathogens Standard.
- General waste is clean packaging, paper, and drapes, gowns, gloves and towels with no blood or body fluid on them. It goes in the regular (clear) trash bag.
Sorting well matters. Infectious waste costs about ten times as much to process as regular trash, yet about 90% of red-bag waste does not belong there, and about 40% of the red-bag waste from ORs is packaging.
Sort as you go: only items soiled with blood or body fluid go in the red bag, and clean packaging stays out of it. Most recyclable waste, such as packaging, is made before the incision, when supplies are opened. In one method AST describes, the waste hamper is lined with a clear bag while the room is set up; that bag is closed before the patient comes in and stays in the room until the case ends, and a red bag takes the regulated waste made during the case. Your facility's policy and your state's laws draw the exact line.
AST's 2018 guideline for breaking down the field places every disposable item from the breakdown in the red or yellow biohazard bag.
Federal guidelines name five kinds of medical waste, each with its own disposal: general waste, infectious and pathologic waste, pharmaceuticals, radioactive waste and sharps.
Bagging waste:
- Pack bags loosely, never pressing the waste down, and close them. Double-bag if one bag is not strong enough.
- Never reach into a bag you cannot see into. If something must be found in the trash, spread the contents out on an impermeable sheet.
- Medical waste never goes down a trash chute; it leaves on a cart.
Linens
- Reusable linen (gowns, table covers, towels) goes in the linen bag, apart from disposables.
- Handle soiled linen as little as possible, so nothing is shaken into the air, and never rinse or sort it in the room. Wear gloves.
- Linen bags must be fluid-impervious, so wet linen cannot soak through, and labeled or color-coded so everyone knows what is inside.
- Towel clips come off the towels and go back to the back table with the other instruments.
Suction and fluid waste
Opening a full suction canister and pouring it into an open hopper puts the worker at extremely high risk of infection. Facilities handle fluid waste in one of these ways:
- Solidifier: a product added to the canister turns the fluid solid, and the closed canister goes in a red bag. Splashes and spills can still happen.
- Fluid management system: a closed unit collects the fluid and empties it straight into the sanitary sewer, which is safer for staff. Some units are built in; others sit on a portable cart that drains automatically into the sewer. After the case, the suction apparatus is docked for cleaning.
- Where regulations allow, bulk blood and suctioned fluid may go down a drain connected to the sanitary sewer.
Whatever the system, the outside of a canister is wiped down, and disposable canisters and suction tubing are thrown away as your facility's policy and local, state and federal rules direct.
Specimens
Every specimen leaves the room correctly labeled and contained, as chapter 29 teaches.
Transport: the closed case cart
- Dirty instruments go to decontamination in a closed case cart, or in covered containers that are leak-proof and puncture-resistant. Whatever the system, it must close completely, not leak, and carry an orange or red biohazard label.
- Without a case cart, soiled items travel in leak-proof bags or a locking biohazard transport container.
- If instruments travel in the same rigid container they were sterilized in, keep soil off the outside of it.
- Take the cart as soon as you can after the case, so blood and tissue do not dry on the instruments.
- When the field is broken down, take off your PPE in this order. The gown and gloves come off first, peeled off together the same way. Then your eye protection, handled only by its band, ties or earpieces, and your mask last, by its ties only. Pulling off gloves can spatter blood, which is why the eye protection and mask stay on until the gloves are off. Disposable PPE goes into the biohazard bag, and reusable goggles go to be cleaned.
- The closed linen and trash bags are taken to the area set aside for environmental services. Then do a medical hand wash.
Never throw a gown, glove or drape into a container from a distance, and never reach into a bag you cannot see into. Splashes carry blood, and hidden sharps cut.
High-risk cases: suspected prion disease
Prions are infectious proteins that cause Creutzfeldt-Jakob disease (CJD), a brain disease that is always fatal. They resist the disinfection and sterilization methods normally used. The Core Curriculum points to AAMI and WHO guidance for cleaning these items at the point of use, and your facility's prion policy, set with infection prevention, decides the details.
- Before the case: every department involved is told, including SPD, infection prevention, environmental services and pathology. Unneeded equipment leaves the room, and the OR table, anesthesia equipment and other surfaces are covered with impervious sheets.
- During the case: single-use instruments are used whenever possible, and items that cannot take heat and moisture are avoided, because reusable instruments may be ruined by the harsh processing. Instruments are kept moist, because prions stick fast to dry steel.
- At breakdown: drapes, attire, sponges, sharps and fluid waste are bagged and labeled "possible CJD," kept apart from other waste, and sent for incineration. Reusable instruments are contained, labeled and handled by the facility's policy, which may mean holding them or destroying them. Chapter 27 covers how they are processed.
7Cleaning the surgical environment
Why the room is cleaned
Germs can reach the surgical field from the patient, from the people working, and from the objects in the room. Cleaning the room deals with that last source, for three reasons the Core Curriculum names:
- The patient. Surfaces that carry germs can pass them on, and environmental cleaning helps prevent healthcare-associated infections, surgical site infections among them.
- The staff. Cleaning keeps you and your coworkers from being exposed to blood and germs. OSHA requires every hospital to have an exposure control plan that spells out how staff are protected.
- Infection control. Cleaning and disinfection stop cross-contamination between patients and staff. Cleaning comes first, because soil left on a surface keeps a disinfectant from working well.
The OR is a high-risk place for passing on germs: many patients pass through it, and many surfaces are touched again and again. Under standard precautions every case is treated as possibly contaminated, so every room gets the same careful cleaning. WHO adds that routinely disinfecting or fumigating the whole room is not needed, even after a contaminated case; only certain isolation cases, below, need more.
A 2014 textbook still gives a special routine after a dirty case: the floor cleaned with a phenolic detergent, the equipment and furniture wiped with 70% alcohol, the rubber and plastic tubing replaced, and the case scheduled last of the day when possible, so terminal cleaning follows it.
Who cleans what
- Environmental services (EVS) staff clean and disinfect the floors, furniture and surfaces between cases, working with the OR team to turn the room over quickly. In many hospitals they do most of the terminal cleaning at night.
- The surgical team, the CST included, takes a growing share of turnover.
- The CST wipes down the surfaces that housekeeping staff are not allowed to touch, such as the electrosurgical unit, the infant warmer, the anesthesia machine and the computers, wipes equipment consoles, docks the suction unit, and resets the room.
- Your facility's policy names each item to be cleaned, how, with what, how often, and by whom.
Before the first case
- Damp dust. Before the first case of the day, wipe the lights, furniture, fixed equipment and every flat surface with a clean, lint-free cloth moistened with the facility's hospital-grade disinfectant. Dust and lint settle on surfaces overnight and can carry germs into the air.
- Top first. Start high and work down, so dust does not fall on what you have already wiped.
- Remove what is not needed. Furniture and equipment the case will not use come out of the room, and the rest is placed with enough space to open sterile supplies without contaminating them.
Chapter 28 covers the rest of getting the room ready.
During the case: spills
Cleaning while the case goes on is called concurrent cleaning. The circulator, or another nonsterile team member, cleans blood and body fluid off the floor and other nonsterile surfaces as soon as possible. If that cannot be done while the surgery is going on, it is done as soon as it can be, or at the end.
- Keep the contamination to as small an area as you can.
- Wear gloves (heavy-duty ones are best for this) and other PPE as needed.
- Soak up the visible blood with disposable absorbent material, then disinfect the area. Blood largely inactivates bleach and other disinfectants, so they work poorly on a surface still covered in it.
- For a small spill of blood (under 10 mL), the CDC accepts a 1:100 dilution of household bleach or an EPA-registered disinfectant that kills tuberculosis. A large spill is cleaned up, then disinfected with an EPA-registered disinfectant or diluted bleach. When bleach is used on a large spill, the CDC adds a 1:10 application before the cleanup, which lowers the cleaner's risk of infection if a hidden sharp breaks the skin, and a 1:100 application at the end. Your facility's spill procedure gives the details.
- A chemical spill follows the steps on the chemical's safety data sheet (SDS) and the facility's policy. Formalin is kept out of the OR, in its own ventilated storage area (chapter 29), but wherever it spills, a large spill means leaving the area right away and reporting it.
- An instrument that falls to the floor is picked up by the circulator with gloved hands and placed in a basin so its soil does not dry.
- Used sponges go into a lined kick bucket, never onto the bare floor.
Room turnover
Room turnover is the cleaning, disinfection and preparation of the OR between patients. It follows a routine, so nothing is missed:
- Wait for the patient to leave. Cleaning, including taking out the trash and linen, does not start until the patient is out of the room.
- Wear PPE for the cleaning: gloves, a protective cover gown, a mask and eye protection.
- Remove the waste. Trash, linen and fluid waste go out in closed bags to the holding area, and a full sharps container is replaced.
- Know your disinfectant. Use the EPA-registered hospital disinfectant your facility has chosen, mixed exactly as the label says, and know its contact time.
- Work from top to bottom and from clean to dirty. Start high and with the least soiled areas, and finish low with the dirtiest, so debris falls to the floor and is cleaned up last. Wait until the surgical lights have cooled; cold solution on a hot light can break the bulb.
- Wipe everything used for the patient. That includes the overhead lights; the OR bed with its straps, attachments, positioning devices and transfer devices; the Mayo stands, tables and IV poles; the anesthesia cart, machine and monitors; mobile and fixed equipment; chairs, stools and step stools; computer keyboards and mice; light switches, door handles and push plates; and the trash and linen holders.
- Clean the OR table completely. Take off the pads and clean them on both sides, then the table underneath, its hinges and pivot points. Move the table aside to clean its base and casters, the floor under it, and to find anything that fell during the case.
- Spot clean walls and doors wherever they are soiled, with extra attention to cabinet door handles and latches.
- Clean the floor. Disinfect and mop or wet-vacuum the floor 3 to 4 feet (about 1 to 1.2 m) all around the sterile field, and mop any part of the floor that is visibly or possibly soiled.
- Keep surfaces wet for the disinfectant's full contact time. If it dries too fast, apply it again.
- Clear the cleaning supplies. Everything used to clean leaves the room, and used detergent and disinfectant solution is thrown away, never saved.
- Reset the room. Put the furniture back, put clean linen on the OR table and its arm boards back on, put fresh liners in the kick buckets and linen holders, connect new suction tubing at the wall, return unused supplies to storage, and lay out what the next case needs.
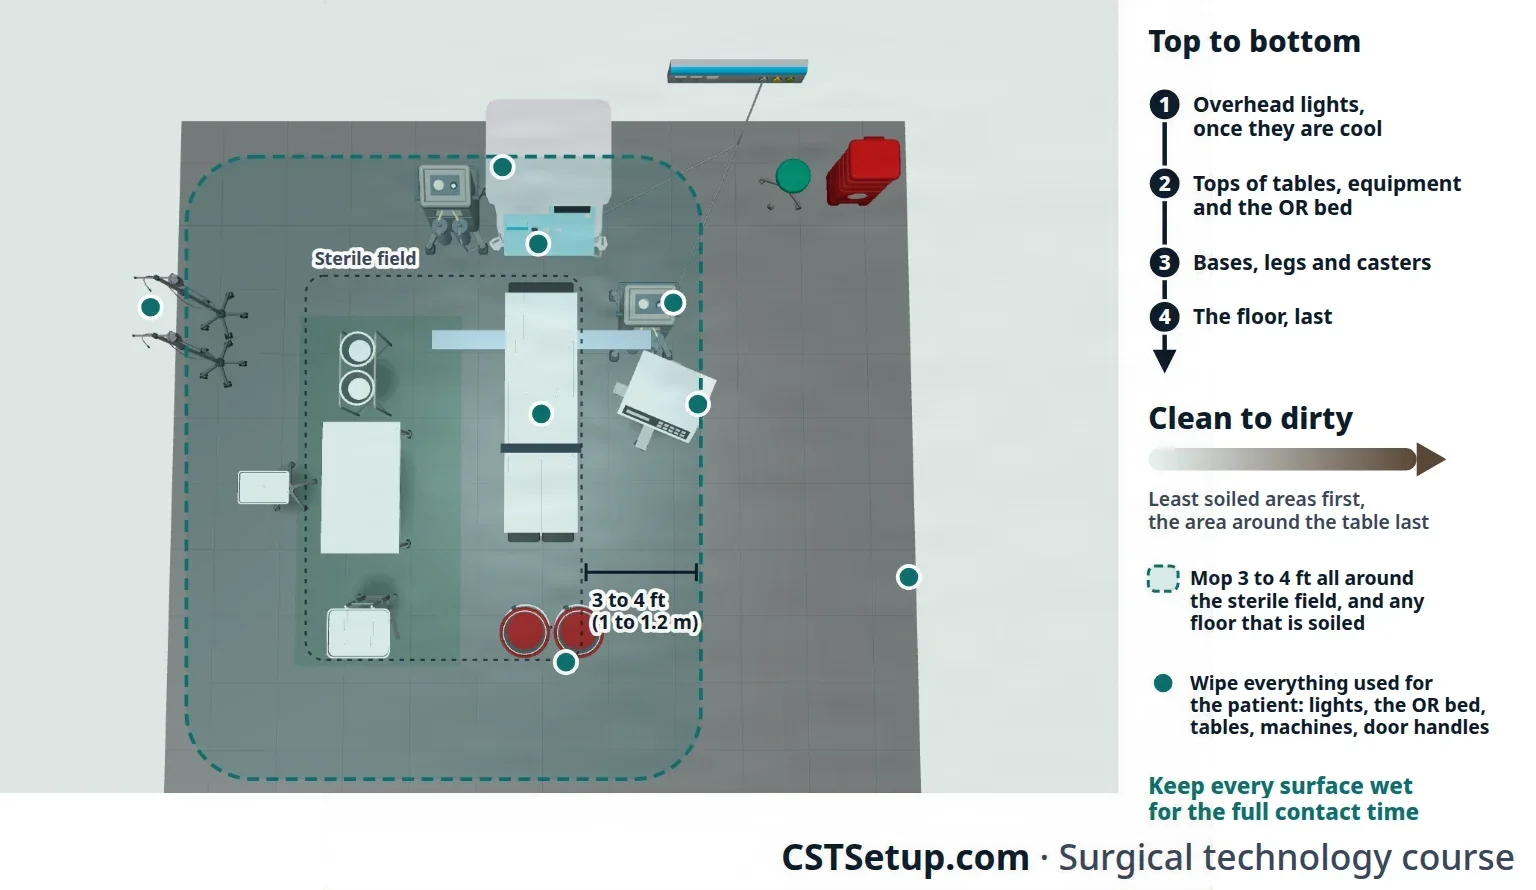
Top to bottom, clean to dirty, and wet for the full contact time. A disinfectant must stay wet on the surface for its whole contact time to do its job.
Isolation turnover: C. difficile
C. difficile is a bacterium that forms spores, and its spores resist some routinely used hospital disinfectants, including quaternary ammonium compounds and alcohol. A patient with C. difficile is cared for with contact precautions as well as standard precautions.
- Your facility's policy, set with infection prevention, names the product. Where C. difficile rates are high or there is an outbreak, the CDC calls for a product that kills the spores: an EPA-registered sporicidal disinfectant (EPA keeps a list of them, List K) or a 1:10 dilution of household bleach.
- Wash your hands with soap and water afterward. Alcohol hand rub does not kill spores.
- Use disposable equipment when you can; reusable noncritical equipment is disinfected before it is used for another patient.
Terminal cleaning
Terminal cleaning is the thorough cleaning done at the end of each day's schedule in every room that was used. Trained staff clean and disinfect every exposed surface, plus the wheels, casters, cables, handles and knobs of everything in the room.
- Everything on the turnover list, plus all the furniture (prep stands, desks and the rest), storage cabinets and supply carts, overhead lights, high-touch areas such as door and cabinet handles, phones and computers, light switches, cords and cables, and fixed equipment such as suction regulators, monitors, the electrosurgical unit, gas regulators and the microscope.
- Move the furniture aside and clean the whole floor, under the bed and the mobile equipment too, by wet vacuum or mop.
- Afterward, the cleaning equipment is itself cleaned, disinfected and stored. A wet vacuum is taken apart and washed with disinfectant first.
- The rest of the department is cleaned too: scrub sinks, substerile and storage rooms, stretchers, hallways, the preoperative and recovery areas, and the processing and instrument storage areas.
- Each OR is restocked and organized at the end of the day, so the minimum supplies are in the room, and the lights are turned off.
- Areas that are not part of daily cleaning, such as air vents and heating duct grills, are cleaned on a schedule the facility sets, often weekly.
Some facilities add no-touch systems, such as ultraviolet light or hydrogen peroxide, to their cleaning. They help, but they do not replace cleaning by hand.
Terminal cleaning after a suspected CJD case
- The impervious covers put on surfaces before the case are removed and thrown away as the policy directs; covers soiled with high-risk tissue are incinerated.
- Surfaces soiled with high-risk tissue, such as brain, are cleaned with detergent, then spot-decontaminated with a 1:5 to 1:10 dilution of bleach, ideally left on for 15 minutes, and then the whole surface is cleaned by the usual routine.
- Surfaces soiled with lower-risk tissue or body fluid are disinfected the way any blood spill is, with diluted bleach or another product OSHA accepts for blood.
- The facility's prion policy, set with infection prevention, governs every step, because the guidance is updated as more is learned.
8Disinfectants for the environment
Cleaning removes soil; disinfection then kills germs. Disinfectants come in three levels:
- High-level disinfectants kill all germs except some bacterial spores.
- Intermediate-level disinfectants kill tuberculosis and other mycobacteria, bacteria, and most viruses and fungi, but not spores.
- Low-level disinfectants kill most bacteria and some viruses and fungi.
Floors, walls, furniture and counters get low- or intermediate-level disinfectants. High-level disinfectants are for medical devices, as chapter 27 explains.
The disinfectants you should know
Alcohols (ethyl alcohol and isopropyl alcohol):
- Intermediate level: they kill bacteria, tuberculosis, fungi and many viruses, including HIV and hepatitis B, but not spores.
- They evaporate fast, so a long contact time is hard to reach, and protein weakens them.
- They are flammable: never use them near electrosurgery or a laser.
- They tend to damage the coating on lensed instruments, and repeated use can harden some rubber and plastic tubing. Because they do not kill spores and they corrode stainless steel, they are never used on surgical instruments.
- Used on small surfaces, such as vial stoppers and stethoscopes.
Glutaraldehyde is a high-level disinfectant for medical devices that can be soaked, such as endoscopes (chapter 27). It should never be used to clean surfaces such as floors and furniture, because it is too toxic and too costly.
Halogens: chlorine.
- Chlorinated lime (chloride of lime) is an old disinfectant: in 1822 a French pharmacist showed that solutions of chlorides of lime could be used as disinfectants, and in 1847 Ignaz Semmelweis had medical students and doctors wash their hands in chlorinated lime water between patients, which cut deaths from childbirth fever.
- Today the hypochlorites are the most used: liquid sodium hypochlorite (household bleach) and solid calcium hypochlorite.
- Bleach kills a broad range of germs: HIV and hepatitis B at low strengths, and tuberculosis and bacterial spores at higher strengths. It is fast and inexpensive.
- Strength depends on dilution. Household bleach is about 5.25% sodium hypochlorite. A 1:10 dilution gives about 5,000 ppm of available chlorine, the strength used on large blood spills and for C. difficile; a 1:100 dilution gives about 500 to 600 ppm, enough for a small blood spill.
- Blood and other soil inactivate it, so the surface is cleaned before bleach goes on.
- It corrodes metal, so it is used on counters, floors and other surfaces, and not routinely on instruments.
- Diluted wrong, it irritates the lungs and burns the skin.
Halogens: iodine. Iodophors, such as povidone-iodine, are widely used as antiseptics on skin. A skin-strength iodophor holds too little free iodine to disinfect hard surfaces; products made with more free iodine are used on some equipment. Their level runs from low to intermediate, depending on strength.
Ortho-phthalaldehyde (OPA, Cidex OPA) is another high-level disinfectant for medical devices that can be soaked. It is not a surface cleaner (chapter 27).
Phenols (carbolic acid and its relatives):
- Low or intermediate level: they kill tuberculosis, bacteria, fungi and viruses, but not spores.
- Sold as concentrated detergents, they are diluted for floors, counters and other large surfaces.
- They are toxic, so the dilution must be exactly as the maker directs. Porous materials soak them up, and the residue irritates tissue. They have a strong odor and can irritate the skin and lungs in some people.
- Because of harm to newborns, they are not used on infant incubators and bassinets, or are rinsed off completely if they are.
- Hexachlorophene is a phenol compound that was once used widely for hand washing, surgical scrubs and bathing babies. It mainly stops the growth of gram-positive bacteria such as Staphylococcus aureus. It was linked to nervous system damage in infants and is absorbed through broken skin, so today it is prescription only and is not recommended for skin prep.
Quaternary ammonium compounds ("quats," such as benzalkonium chloride):
- Low level: they kill bacteria, fungi and enveloped viruses, but not spores, and usually not tuberculosis.
- Hard water, soap residue and protein soil weaken or cancel them, and cotton and gauze soak up their active ingredient.
- Used on noncritical surfaces such as floors, walls and furniture.
Choosing and using a disinfectant
The Core Curriculum lists what to weigh when a disinfectant is chosen and used:
- Microbial resistance: the product's level must match the job. Blood spills need a product that kills tuberculosis or is labeled for HIV or hepatitis B; for C. difficile, CDC guidance or your facility's policy may call for one that kills spores.
- Kill time (contact time): how long the surface must stay wet. Most hospital disinfectant labels give 10 minutes, and studies show many work with at least 1 minute of contact, but by law the directions on the label are the ones you follow.
- Method of application: wiped on with a cloth or mop. Avoid methods that make mists or sprays in the air, and throw out used solution after each use.
- Requirements: an EPA-registered hospital disinfectant, measured and mixed exactly as directed. Too weak or too strong, and it works less well; too strong can also damage surfaces.
- Safety and handling: wear gloves and eye protection, keep the room well ventilated, use each product only for the job it was made for, and never mix two chemicals.
- Safety data sheets (SDS): the SDS for each chemical tells you its hazards, the protective equipment to wear, first aid, and how to clean up a spill. Your employer must keep the SDS readily available to everyone who could be exposed.
- Temperature: use the product at the temperature its label gives, and store it at a controlled room temperature in a well-ventilated room.
Never mix bleach with ammonia: together they release chlorine gas, which is highly toxic to the lungs and can kill. Never mix bleach with formaldehyde either.
Lo que te llevas de este capítulo
- Dressings protect, absorb, press, support, keep moisture right and cover the wound. A closed incision keeps a sterile dressing for the first 24 to 48 hours.
- A three-layer dressing has a contact layer (occlusive, semi-occlusive or nonocclusive), an absorbent layer (gauze, fluffs, ABD pad) and an outer layer (tape, transparent dressing or wrap). A wrap, collar, bra or cast must never be too tight.
- Dressings come out only once the skin is closed and the final count checks out. Clean and dry the skin, take off your outer gloves, place the contact layer, then roll the drapes away while someone holds the dressing.
- Stay sterile, and keep the Mayo stand set with basic instruments, until the patient has left the room.
- Break down the field in a set order with economy of motion: gown and gloves off together, hands washed, fresh PPE, sharps first, instruments cared for at the point of use (box locks open, not restrung, soaking water removed), waste sorted, everything contained for a closed case cart.
- Sort waste by your facility's policy: only items soiled with blood or body fluid go in the red biohazard bag, and clean packaging goes in the clear bag. Never throw waste, and never reach into a bag you cannot see into.
- Turnover starts after the patient leaves: top to bottom, clean to dirty, everything the patient touched, the table inside and out, the floor 3 to 4 feet around the field, and every surface wet for its full contact time.
- C. difficile calls for soap-and-water hand washing and, as your facility's policy directs, a spore-killing product such as bleach; a suspected CJD case follows the facility's prion policy. Match the disinfectant to the job, read its label and SDS, and never mix chemicals.
Ponte a prueba5 preguntas rápidas
Gratis para todos. Elige una respuesta para cada una y luego revísalas todas juntas.
En el quirófanoDónde vas a usar esto
Todo el banco de preguntas del capítulo en series de 10, con la respuesta explicada después de cada una.
Parte del programa para educadoresLas palabras del capítulo en tarjetas de estudio: las que fallas vuelven antes.
Parte del programa para educadoresLo asigna tu docente. Cada grupo saca sus propias 25 preguntas del banco del capítulo.
Parte del programa para educadores
Sugerir una corrección
¿Algo está mal, confuso o desactualizado en este capítulo? Avísanos y lo corregimos para todos. Tu correo solo se usa para responderte.