During the case
From the first cut to the closing count: incisions and exposure, passing and sharps, medications, sponges, hemostasis and the care of every specimen.
1Why it matters
The time-out is over and the surgeon picks up the knife. From the first cut to the last stitch, the scrub keeps the case moving and the field safe.
During the case you:
- pass each instrument the moment it is needed, ready to use
- keep every sharp under control
- watch the field and fix any break in sterile technique
- prepare and label medications, and report how much was used
- track sponges, help the team measure blood loss, and have hemostatic supplies ready
- receive, protect and pass off each specimen
- count with the circulator as the wound closes
Each of these protects the patient. A stray needle can stick a teammate. A mislabeled specimen can lead to the wrong treatment or a second operation. Bleeding that is not controlled hides the surgeon's view and can leave a hematoma, and blood pooling in the wound raises the risk of infection.
Other chapters hold the pieces this one uses. Instruments and loading a blade are in chapter 24, sutures, needles and staplers in chapter 25, and the full count procedure in chapter 28. Drugs and their doses are in chapter 12, electrosurgery and laser physics in chapter 20, scopes and the robot in chapter 21, dressings and breaking down the field in chapter 30, communication and handoffs in chapter 16, the wound classes in chapter 11, and bowel technique in detail, in each bowel operation, in chapter 32.
2Incisions
An incision is the surgeon's doorway into the body. Knowing the common ones tells you what the surgeon will reach, which layers come next and which instruments to have ready.
Regions and layers of the abdomen
To say where something is, the abdomen is divided into nine regions or into four quadrants. The quadrants come from one vertical and one horizontal line that cross at the umbilicus, giving the right upper, left upper, right lower and left lower quadrants. The simpler quadrants are the ones used most in medicine.
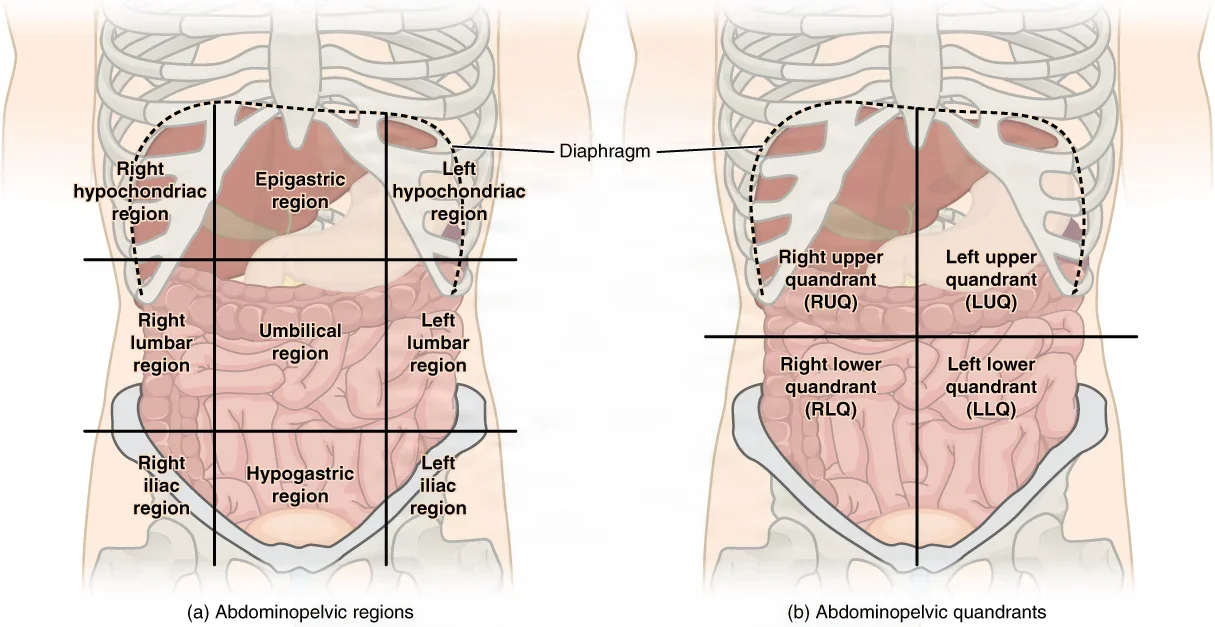
The layers the surgeon cuts depend on where the incision is.
- In the midline: skin, subcutaneous fat, the linea alba, preperitoneal fat, then the peritoneum. The linea alba is a vertical band of fibrous tissue from the xiphoid process to the symphysis pubis, where the sheaths of the two rectus muscles join. It has almost no blood vessels or nerves.
- Away from the midline: skin, two layers of subcutaneous tissue (Camper's fascia and Scarpa's fascia), three flat muscles (the external oblique, internal oblique and transversus abdominis), the transversalis fascia, preperitoneal fat and the peritoneum. Beside the midline, the rectus abdominis muscle lies inside its sheath.
Follow the layers as the surgeon goes. Once the skin is cut, the surgeon usually deepens the incision with the electrosurgical pencil, controlling small bleeders on the way. Before the peritoneum is opened, it is lifted with two hemostats or smooth forceps, so the bowel underneath is not cut. Chapters 3 and 7 teach the muscles of the abdominal wall and the organs beneath it.
Vertical incisions
- Midline (median): through the linea alba, above the umbilicus, below it or both, curving around the umbilicus rather than through it. It opens fast, reaches any part of the abdomen, can be lengthened up or down, and closes quickly and securely, so it is the standard incision for an exploratory laparotomy and for trauma. Its drawbacks are a wider scar and the highest rate of wound separation (dehiscence) and incisional hernia.
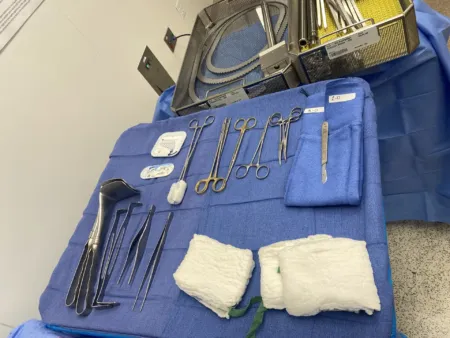
- Paramedian: a vertical incision about 2 to 5 cm to one side of the midline, upper or lower. The surgeon opens the front of the rectus sheath, moves the rectus muscle to the side, then opens the back of the sheath and the peritoneum. It may hold better than a midline incision, with fewer hernias, but it can injure the epigastric vessels and the nerves to the rectus muscle. A lower left paramedian incision suits surgery on the sigmoid colon.
Oblique incisions
- Subcostal (Kocher): begins below the xiphoid and runs parallel to the edge of the ribs (the costal margin), about 2.5 to 3 cm below it. A right subcostal incision reaches the gallbladder, bile ducts and pancreas; a left one reaches the spleen. It divides the abdominal muscles, and its drawbacks are more pain afterward and a less tidy scar. The surgeon spares the ninth dorsal nerve so the abdominal muscles do not weaken.
- Chevron: right and left subcostal incisions joined at the midline, like an upside-down V. It gives excellent exposure for stomach, duodenal, pancreatic and portal system operations, and it is used for liver transplant. It also forms part of the Mercedes-Benz incision.
- McBurney: a short slanted cut in the right lower quadrant over McBurney's point, one-third of the way from the bony point at the front of the hip (the anterior superior iliac spine) to the umbilicus. The muscles are split along their fibers rather than cut. It is quick to open, close and extend, but it gives only limited exposure. It is the common incision for an open appendectomy. A more transverse version, the Rocky-Davis, is often used for children and pregnant patients.
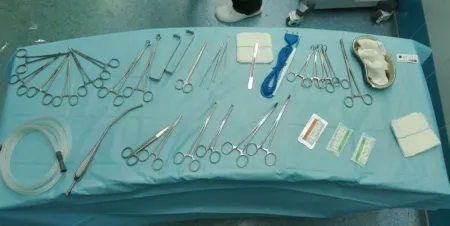
- Lower oblique inguinal: slightly above and parallel to the inguinal ligament, running from near the pubic tubercle toward the hip. It is the standard incision for an open inguinal hernia repair and also reaches the spermatic cord.
- Lumbar: incisions that reach the kidney and ureter without entering the peritoneal cavity. A lumbar incision, made below the 12th rib with the patient on one side or face down, gives limited exposure, for removing an adrenal gland, a kidney biopsy or a small, low kidney. A flank incision runs along the 11th or 12th rib, with the patient on one side, and reaches the adrenal gland, kidney and upper ureter. A Gibson incision curves down from just inside the front of the hip bone to just above the symphysis pubis. It reaches the lower ureter and is sometimes used to place a donor kidney.
- Thoracoabdominal: starts as an abdominal incision (subcostal or midline) and carries on along a rib space into the chest, joining the two cavities. It reaches the esophagus, upper stomach, liver, spleen, kidneys, aorta and vena cava. The patient lies partly on one side, and chest tubes go in before the chest is closed.
Transverse incisions
- Midabdominal transverse: a horizontal cut across the upper or middle abdomen. A curved upper one gives access to the pancreas and is also used to explore the abdomen after blunt trauma.
- Pfannenstiel: a slightly curved horizontal cut 10 to 15 cm long, low on the abdomen, roughly 3 to 5 cm over the pubic bone (symphysis pubis) and most often within the pubic hair. The fascia is opened crosswise and the rectus muscles are separated at the midline. It follows the natural skin folds, so the scar is neat, and it is strong and gives good exposure of the pelvis: the uterus, tubes and ovaries, and the bladder. It is used for cesarean births and other pelvic surgery, such as an abdominal hysterectomy or a suprapubic prostatectomy.
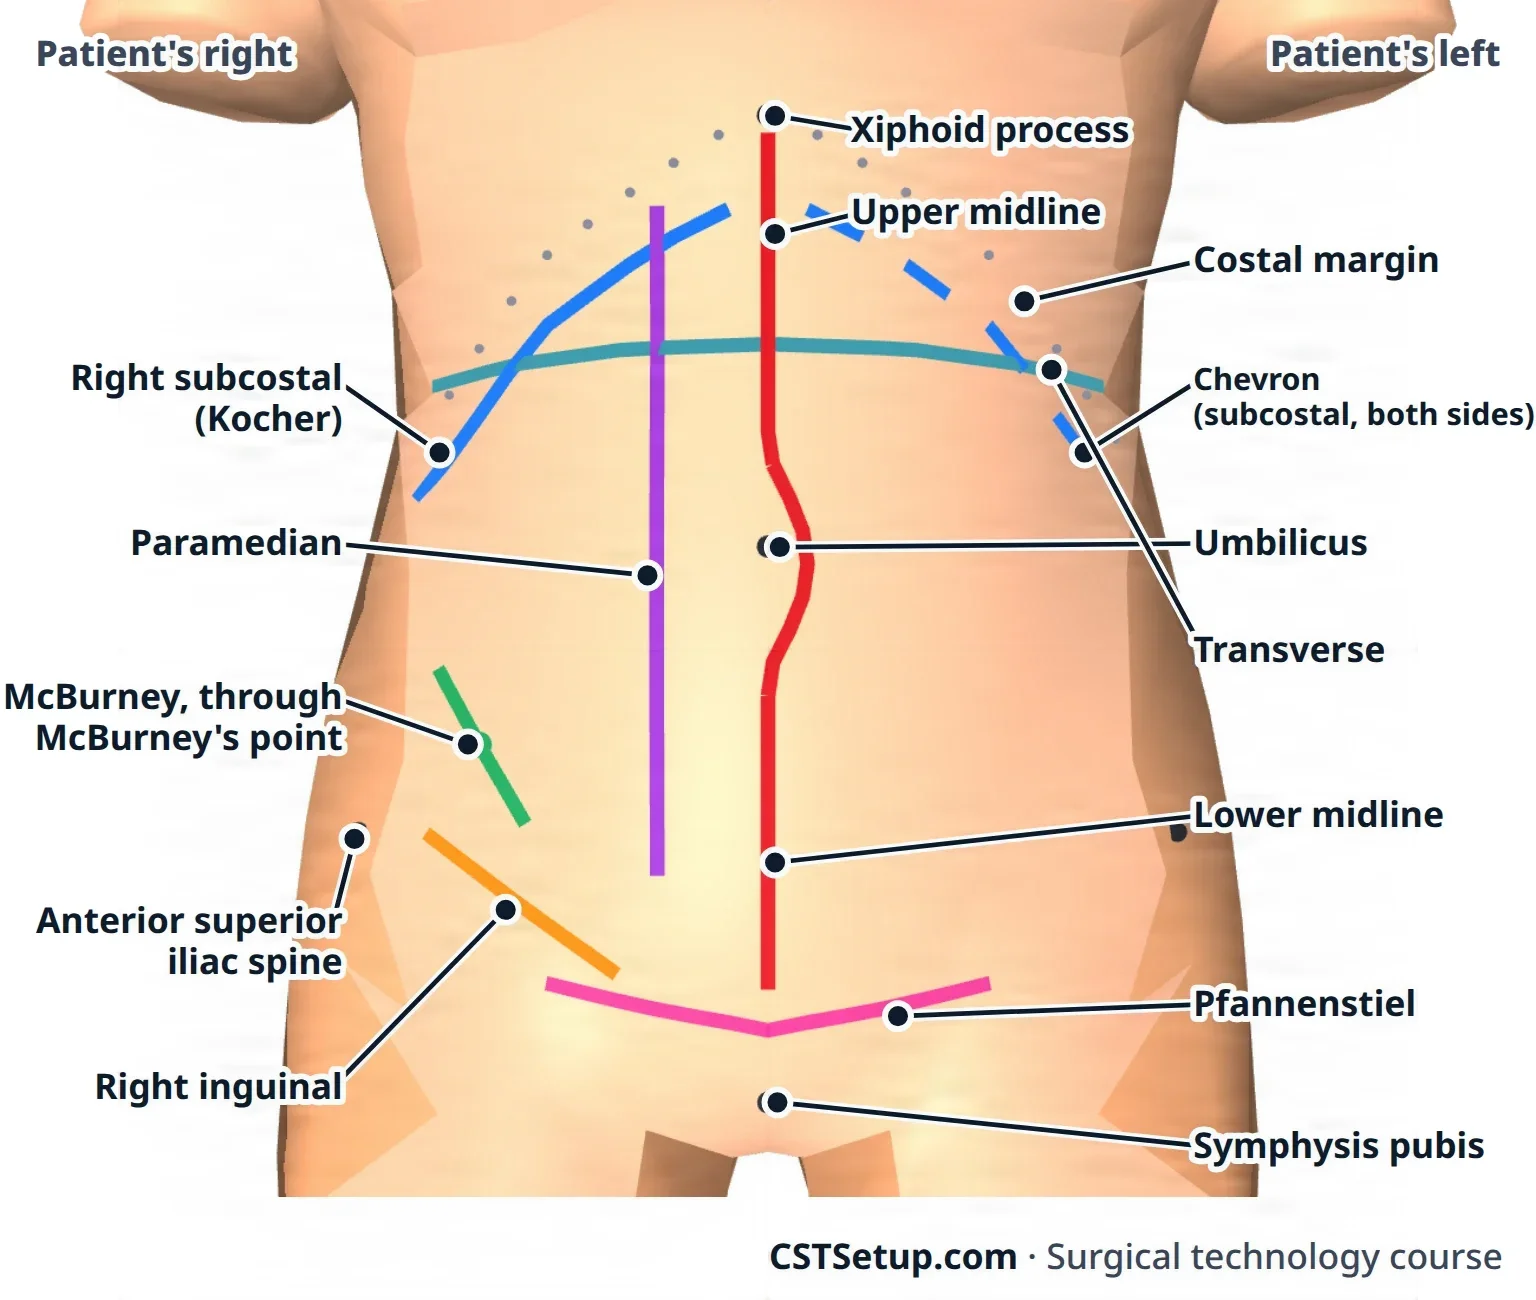
Midline for speed and access to anything, subcostal for the gallbladder or spleen, McBurney for the appendix, inguinal for a hernia, Pfannenstiel for the pelvis. The incision tells you what is coming.
Incisions in other specialties
Every specialty has its own incisions, and you meet them with the procedures in chapters 32 to 42. For each one, learn which layers are cut and which critical structures lie close by, such as the nerves that a retractor, a deep stitch or the incision itself could injure.
Planning an incision
The surgeon chooses the incision. These are the things that decide it:
- Placement: it must reach the problem with a clear view, without harming the organs around it, and leave the abdominal wall working.
- Size: big enough to work safely, and able to be lengthened if the surgeon finds something unexpected.
- The patient: how fast the abdomen must be opened, how certain the diagnosis is, old scars, a likely future operation or stoma, body build, bleeding risk, pain afterward and the look of the scar.
- Langer's lines: lines of tension in the skin that follow the direction of its fibrous tissue. A cut along them usually heals with a finer scar than one across them, which is why a transverse cut on the lower abdomen tends to leave a neater scar than a vertical one.
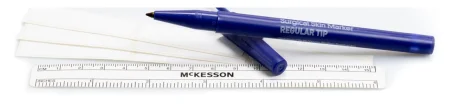
- Skin marking: the surgeon's mark from before surgery confirms the side and site (chapter 28). The surgeon may also mark the incision line or landmarks with a sterile skin marker, for example around a skin lesion or the outline of a flap. A marker used before the operation is thrown away, and a fresh sterile one is used during it.
- Blade choice: usually a #10 for large incisions such as the skin, a #15 for fine, precise cuts and a #11 for stab incisions; laparoscopic procedures need a #11. A #20 is a larger blade shaped like the #10, and some surgeons use it for an abdominal skin incision. Chapter 24 covers loading the blade.
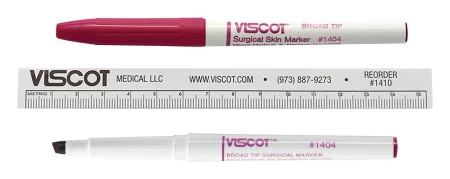
After the time-out, the anesthesia provider tells the surgeon when the incision can be made, so that a patient under general anesthesia is deep enough first. At the start, place two sponges on the field and the knife in the neutral zone. Once the incision is made, move the knife to the sharps area of the back table. Have curved hemostats ready for bleeding the electrosurgical pencil cannot control, and for a biopsy, where the pencil's heat would damage the tissue the pathologist needs to see.
3Exposure
Exposure means opening and holding the wound so the surgeon can see and work. It has two purposes: to show the tissue, and to protect it while it is held aside.
Retractors
Retractors come in two kinds.
- Handheld retractors, such as the Richardson and the Army-Navy, are held by the assistant, or by you when you are in the assistant role.
- Self-retaining retractors hold themselves open once they are placed. A ratchet on its shanks holds the shallow Weitlaner open in hernia repair. In the abdomen, the Balfour holds a large wound open with side blades and a wide center blade on a frame, and the Bookwalter's frame attaches to the rails of the table.
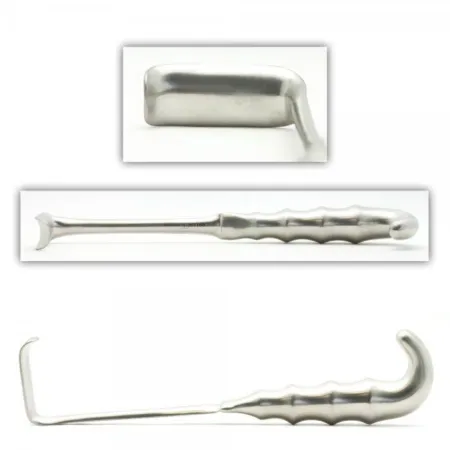
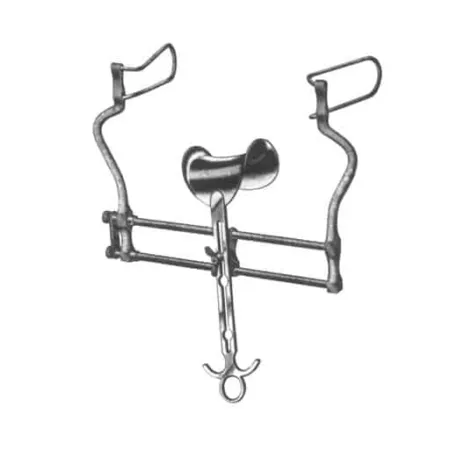
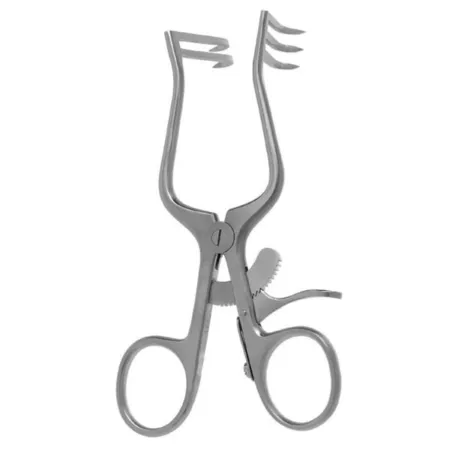
Selection depends on the depth of the wound, the depth of the blade, the tip (blunt, sharp, curved, claw-like or tapered), the size and weight of the retractor, and the tissue it will hold. Broad, smooth blades over sponge packs protect organs such as the bowel and liver; small rakes and skin hooks are for skin alone, and rakes or an Army-Navy for skin with the fat under it. An experienced scrub learns to hand the right retractor by following which layer is open, a skill that comes with time.
Placement: the surgeon usually places the retractor, and you hold it exactly where it was put. Hold most retractors overhand, keep your hand still, and do not tip the blade inward ("toe in") unless the surgeon asks. Pull only as hard as needed, because the blade presses on living tissue and too much pressure bruises it. While you are retracting, do not try to work the Mayo stand as well, because that is how a retractor slips. Skin hooks and small rakes have sharp points, so keep your mind on the pressure at the tip to avoid tearing the tissue, and hold them in the middle, between the thumb and two or three fingers, for the most control.
Pass a retractor with its blade pointing down toward the wound, and a self-retaining retractor closed, ready to open in the wound. Avoid holding tissue back with your fingers when a sharp is in use; use an instrument such as a retractor whenever one will do.
Holding a retractor and running the Mayo stand at the same time splits your attention. AST's position is that the first scrub and surgical assistant roles should be kept separate, because doing both at once can compromise case management, aseptic technique and patient outcomes, though it is common for a CST to do both on minimally invasive and minor procedures. Where state law and facility policy allow, a CST may also activate power equipment and the electrosurgical unit under the surgeon's direction.
When a second CST scrubs in, that person works in the second scrub role, helping the surgeon see and keep the wound clear: retracting tissue, holding and moving the camera (the endoscope) in a minimally invasive case, sponging, suctioning and cutting suture. Chapter 14 explains the scrub roles, and chapter 21 the camera.
Handling tissue
Living tissue bruises, tears and dries easily. Rough handling, or a retractor or clamp pressing too hard, bruises it, makes it swell and cuts off its blood supply, and that slows healing. That is why Halsted's principles, taught in chapter 25, include handling tissue gently and keeping it moist.
- Traction and countertraction: traction is a pull on tissue; countertraction is a pull in the opposite direction, against it. Pulling both ways holds the tissue taut, which helps the surgeon dissect. For example, the gallbladder is held up under steady traction while it is freed, and the stomach is grasped while countertraction is applied to bring a ligament into view.
- The right instrument for the tissue: smooth forceps for organs and mucous membrane, toothed forceps for skin and fascia, and broad, smooth blades over sponges for organs. Chapter 24's table matches the instruments to each tissue.
- Moisture: exposed tissue dries during surgery, and dry tissue bruises and scrapes more easily, so moist sponges and irrigation protect it (see Suction and irrigation).
Other ways to hold tissue aside
- Moist sponges: wet laparotomy sponges pack loops of bowel out of the way, protect the wound edges and cushion the blades of large retractors. To pack an abdomen the surgeon needs smooth forceps of the right length and at least three moist laps. Note each sponge that goes in and tell the circulator.
- Wound protector: a plastic sleeve that lines the incision, holds it open and keeps its edges moist; some disposable types retract the wound all the way around. In bowel surgery it lowers the infection rate.
- Penrose drain: a soft rubber tube looped around a structure, such as the esophagus, to lift and move it gently.
- Vessel loops: stretchy silicone loops that lift and hold vessels, nerves and ducts, or briefly block a vessel. They are colored so neighbors can be told apart: usually red for arteries, blue for veins, and white or yellow for nerves and ducts.
- Umbilical tape: a cotton tape, used wet and loaded on a hemostat, that does the same job. Vessel loops have mostly replaced it.
- Suture: a stay (traction) suture holds tissue up or aside, such as the edges of an opened bile duct.
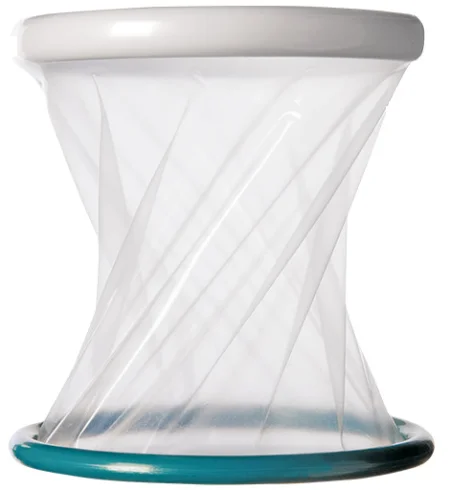

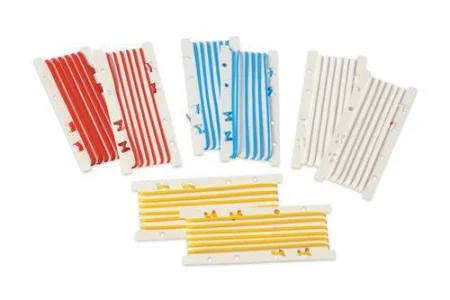
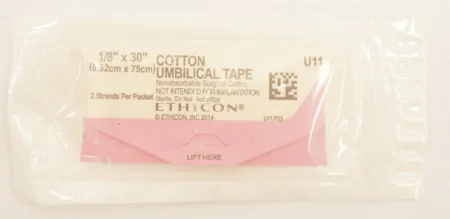
Vessel loops and umbilical tapes used in the wound are counted with the miscellaneous items (chapter 28).
Choosing an exposure device
The choice depends on:
- the procedure and the structures to be reached
- the tissue: delicate organs need broad, smooth blades with sponges under them, and tissue weakened by disease, old radiation, long steroid use or poor nutrition heals poorly and needs gentle handling
- the surgeon's preference, listed on the preference card
- the size and depth of the wound: a deep wound needs a deeper blade and longer instruments
Suction and irrigation
Suction keeps the field clear of blood and fluid so the surgeon can see.
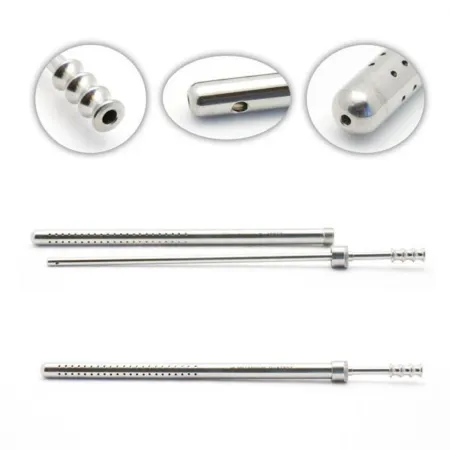
- Selection: the Yankauer handles large amounts of fluid in open cases. The Poole, used in the abdomen, has a guard full of small holes that spreads the pull, so bowel, spleen and lung are not drawn against the tip. Fine, small-bore tips work in small spaces (chapter 25).
- Technique: draw sterile water through the tip every so often, before blood clots inside it. Clear a small tip with its stylet. Do not poke it clear with the electrosurgical tip, which scores that tip and makes it overheat.
- Tubing placement: fasten the tubing to the drapes with a nonpiercing clamp, with enough slack, and hand the end off the field (chapter 28). Suction stays connected and working until the patient leaves the room, in case of sudden bleeding.
- Irrigation: tissue must not dry out; a surface that turns dull, loses its stretch and starts to fray is drying. Keep a basin of normal saline (0.9% sodium chloride) for irrigating body cavities, at body temperature, 37°C (98.6°F), and no warmer, which also helps keep the patient warm. Hand it up in an Asepto or bulb syringe or pour it from a pitcher. In selected cases an antibiotic irrigation is used to help prevent infection. Before closing, the surgeon usually irrigates the wound to wash out clots, debris and bits of suture. Keep track of how much you hand up.
- Special irrigation: in small wounds, such as eye and ear surgery, only solutions labeled for that tissue are used; the eye gets balanced salt solution (BSS) from small bottles fitted with an irrigation tip. In joint, bladder, prostate and uterine surgery, fluid runs continuously as the medium the surgeon works in: it widens a joint space for the scope, or flushes out pieces of tissue as they are cut away. The specialty chapters cover each one.
AST's 2019 normothermia guideline, going by the temperatures used in studies, says to warm irrigation fluid to 33 to 40°C, as the fluid's maker allows. One reference's care plan sets the limit at less than 40.5°C (105°F).
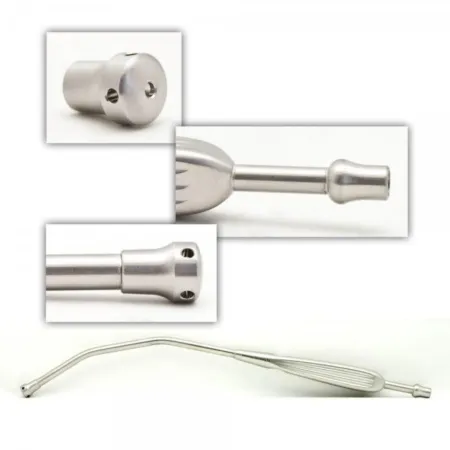
All the irrigation you use ends up in the suction canister with the blood. If you do not know how much you used, nobody can work out how much blood the patient lost.
4Keeping pace with the surgeon
Critical thinking and anticipation
Your goal is to stay one step ahead: to know what the surgeon will need next while handing over what is needed now. Use every quiet moment to prepare for the next step.
Anticipation comes from:
- knowing the procedure, its steps and the anatomy behind them
- knowing the surgeon: the preference card, that surgeon's habits, and whether they are right- or left-handed
- watching the field, even while you load a needle or prepare a supply, so you see a bleeder, a change of plan or the end of a step before anyone asks
- thinking ahead in three groups: the next instruments (a clamp, a deeper retractor), the next supplies (suture, more sponges, a hemostatic agent) and additional items (an extra set, a culture tube, a drain)
- planning for a change of plan: any laparoscopic operation may have to be converted to an open one, so a laparotomy set is kept readily available; whether it is opened and counted before the case starts depends on your facility's policy, or on the patient and how hard the case is expected to be
Ask the circulator for supplies before you run out, but only for what you need. New scrubs often stockpile sponges and sutures for fear of running short, which wastes money. Trust the circulator and plan together. When the surgeon asks for something that is not on the field yet, say so and say when it will be there, such as "I'm getting them now."
Team expectations
The surgeon, assistant and circulator count on you to know where everything on the field is, to have the next item ready, and to speak up. Keep the area by the wound tidy: during a pause, take back instruments that are not being used, and pick off tissue and suture debris so nothing falls into the wound or onto the floor. Only take back an instrument once you are sure the surgeon is finished with it.
Watching the field
Everyone on the team watches for breaks in sterile technique, and the scrub has the extra duty of watching for possible as well as actual contamination. Breaks happen most often:
- when a sterile person takes an item from, or hands one to, the circulator
- when sterile team members change places, such as moving to the other side of the table
- when drapes are too small or placed wrong
- on large cases with many tables and machines, when people and equipment crowd the field
Recognizing and correcting. Tell the team about a break as soon as it happens, or as soon as you suspect one. When a teammate points out your break, fix it, even if you are not sure they are right. Fix a break at once, unless that would put the patient at risk; then fix it as soon as it is safe. Remove the contaminated item. Change a torn glove right away. A puncture through both the outer and inner gloves means a new gown as well, because once the glove is off the gown cuff is no longer sterile and you cannot reglove yourself with the closed method. Chapter 26 covers each kind of break.
Spatial perception. Know where every nonsterile person and surface is, and how close you are to them. AST calls this a sixth-sense awareness, which you develop by staying aware of the whole room.
The patient. Watch the patient as well as the field. Never lean on or against the patient, and never let the Mayo stand or heavy equipment, such as a power tool, rest on them: that pressure can cause a pressure injury. Positioning itself is taught in chapter 31.
Reporting to the team
Tell the team, without waiting to be asked:
- Counts: the result of every count, correct or not. The circulator then tells the surgeon that everything is accounted for.
- Blood loss: what you see on sponges and in the field. The anesthesia provider and surgeon use the estimate to decide whether the patient needs blood.
- Fluids: the total irrigation used, so it can be subtracted from what is in the suction canisters.
- Implants: what was placed, and where (see Implants and grafts).
- Medications: what is on the field, its strength and how much was used.
- Anything wrong: for example, dark (poorly oxygenated) blood in the field is one sign of malignant hyperthermia, a rare, life-threatening reaction to certain anesthetic drugs. AST asks CSTs to know the signs of malignant hyperthermia and watch for them (chapter 13).
When an emergency happens
The surgeon directs the team in an emergency. What you do for a fire and for heavy bleeding is in Fire safety and Hemostasis. In a cardiac arrest (a code blue), AST's guideline makes your main job staying sterile and protecting the field while the rest of the team cares for the patient:
- keep the back table, the Mayo stand and the surgical site sterile
- pack the wound with moist sponges and cover it with a sterile drape or sterile towels
- keep track of every instrument, sponge and needle on the field, and have ready what the surgeon will need next
- be ready to help when asked: giving chest compressions, helping to breathe for the patient with a bag, or assisting the surgeon if the heart must be shocked or massaged directly inside the chest
When a life is at stake, saving it comes before protecting the sterile field. Stay gowned and gloved and keep a few basic instruments sterile on the Mayo stand until the patient leaves the room, in case the incision must be reopened quickly or an emergency airway is needed at the end (chapter 30). Chapter 13 teaches cardiac arrest, malignant hyperthermia and severe allergic reactions in full, and chapter 17 the facility's emergency plans.
5Passing instruments
Passing is the skill everyone sees. Done well, the surgeon never has to look away from the wound.
The principles
- Pass it ready to use. The instrument lands in the surgeon's hand in the position it will be used in the body, so the surgeon never has to turn it or look at it. That means knowing what each instrument does and which hand will use it.
- Pass firmly. Place it in the palm with enough pressure that the surgeon feels it and closes their hand around it, and keep hold until you feel them take it. Touch only the palm, not the rest of the hand.
- Hold the middle. Grasp an instrument near its middle, or a ringed instrument at its box lock, and avoid handling its working tip. It balances better, and handling the tip can tear your glove or cause an injury.
- Position in relation to the surgeon. In a laparotomy you stand directly behind the Mayo stand. Standing across the table from the surgeon usually makes passing easiest. Never pass through the surgeon's line of sight when you hand something to the assistant.
- The right hand. Know whether the surgeon and assistant are right- or left-handed, and pass to the hand that will use the instrument.
- Safety first. Put powered instruments and staplers in their safe or locked position before you pass them.
- Paired instruments. Many instruments travel together. Tissue forceps go to the surgeon's other hand with a loaded needle holder, so the needle is moved with instruments, never fingers. Choose them for the tissue: toothed forceps for skin, tendon and fascia; smooth forceps for mucosa, organs and any tissue that bleeds easily; and vascular forceps, whose scored tips grip without puncturing, for vessels. A tie follows a clamp, and suture scissors follow the tie.
AST's 2017 sharps guideline has the scrub pass forceps with teeth with every needle holder.
Hand signals
A surgeon may ask for an instrument with a hand signal instead of words. Signals cut down talking at the field, and with it the germs talking spreads, and they let the team work quietly when the patient is awake. The basic signals ask for a knife, scissors, a suture, tissue forceps and a clamp. Your lab check-off asks you to pick the right instrument from a signal.
Instrument by instrument
- Ring-handled instruments such as clamps: hold at the box lock, closed on the first ratchet, and place the rings in the surgeon's palm with a light snap. The tips point up, and a curve follows the curve of the surgeon's fingers. Angled clamps, such as a right angle, usually go with the angle pointing down.
- Scissors: hold at the hinge and place the handles in the palm, with the points toward the back of the surgeon's hand.
- Tissue forceps: tips down, laid in the hand so the surgeon takes them between the thumb and fingers.
- Retractors: blade down toward the wound; self-retaining retractors closed.
- Needle holders: one for one, through the neutral zone: a loaded holder goes out as the used one comes back (see Sharps on the field). When the zone cannot be used and you hand one over, the needle point faces up and ready, with the loose end of the suture held or draped over the back of your hand so it does not tangle in the surgeon's palm.
- Microsurgical instruments: passed gently, more slowly and with less pressure, and in the order the surgeon will need them, because the surgeon is looking through a microscope at a tiny field.
- Long endoscopic instruments: when a sharp one, such as long scissors, will not fit in the neutral zone, hand it handle first with the tip pointing down.
7Fire safety during the case
A fire needs three things, called the fire triangle: fuel, an oxidizer and an ignition source. All three are present in every operation, so preventing a fire means keeping them apart.
- Fuel: drapes, gowns, sponges, towels, the patient's hair, alcohol-based prep solutions, and plastic items such as the breathing tube.
- Oxidizers: oxygen and nitrous oxide. Air holding more oxygen than normal is called an oxygen-enriched atmosphere, and it can build up under the drapes near the face during head and neck surgery.
- Ignition sources: the electrosurgical pencil, the laser, a fiber-optic light cable and faulty electrical equipment.
What you do during the case:
- Electrosurgery: keep the pencil in its insulated holster whenever it is not in use, and keep the tip clean of eschar, the charred tissue that sticks to it and can itself catch fire. Keep sponges near the tip wet. A long laparoscopic electrode that will not fit the holster goes on the Mayo stand.
- Lasers: the laser stays on standby until the surgeon is ready to use it. Wet the towels around the site, keep sponges moist, and use anodized or ebonized instruments that do not reflect the beam. Chapter 20 covers laser safety.
- Light cords and endoscopes: a light cable can get hot enough to start a fire. Put the light source on standby whenever the cable is not connected to the scope, never lay a lit cable on drapes or sponges, and do not let it hang over the side of the field while the source is on.
- Airway surgery: the anesthesia provider keeps the oxygen as low as is safe for the patient; with a laser, wet pledgets may be placed around the breathing tube.
- Your back table: always have sterile water or saline ready to put out a fire on the field.
- Bowel surgery: the gases in the intestine include hydrogen and methane, which can burn, and methane can explode. Do not use the ESU or a laser to open the bowel, use either one with caution whenever intestinal gas is present, and suction the gas away from the site.
AST's 2012 electrosurgery standard says the ESU should not be used at all once the gastrointestinal tract is entered, such as during a colon resection.
If a fire starts on the patient, burning objects are taken off the field as safely as possible, and for a fire around the airway the anesthesia provider reduces the oxygen flow. You stand by for direction from the surgeon, with sterile saline or water ready to put the fire out. If the fire spreads beyond the patient, the team follows the facility's fire plan, remembered as RACE: rescue, alert, contain, evacuate.
8Medications and solutions on the field
You manage the medications on the field from the moment they arrive until the case ends, under the surgeon's direction and orders. Errors are common: in one study, medication errors happened in about half of the surgical procedures observed. Chapter 12 covers the drugs and their doses; this section covers handling them during the case.
The six rights
AST asks you to confirm six rights for every drug: the right patient, drug, dose, route, time and documentation.
- Patient: confirmed at the time-out, along with the patient's drug allergies.
- Drug and dose: check them against the preference card. When the circulator delivers a drug, you both confirm its name, strength and expiration date, out loud and by looking at the label.
- Route: a drug made for one route is dangerous by another, and giving it by the wrong route is a medication error. Two strengths of one drug on the field, such as two strengths of epinephrine for a middle ear case, often have different routes, so never let them be confused.
- Time: the card often tells you when. A local anesthetic goes in before the incision or as needed during the case, and a drug for pain afterward may go in at the start or after closure.
- Documentation: the circulator records every drug delivered to the field, and you report the totals.
Receiving and labeling
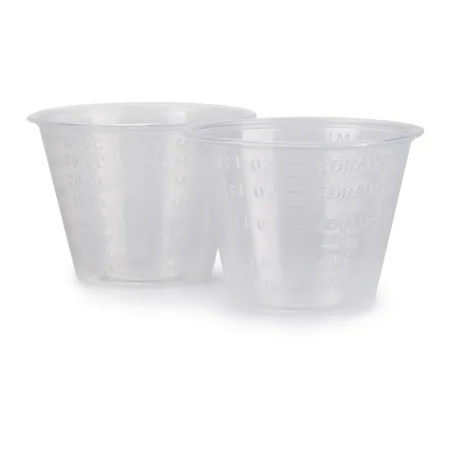
- Label each container the moment the drug reaches the field: medicine cups, basins, pitchers and syringes, the Asepto included, even when there is only one drug. The label gives the drug's name, its strength, the amount if the container does not show it, and the diluent's name and volume if the container does not show them, and it never covers the markings on a syringe.
- Solutions such as saline and water come to the field the same way: the circulator pours slowly and steadily, without splashing or dripping, into a basin or cup near the edge of your table, or one you hold, as close to the time of use as possible, and you label it at once. A bottle is poured only once. Its cap is never put back on and what is left is thrown away, never poured again or used for another patient, because drops that ran over its nonsterile lip can carry germs back in.
- Label transfer devices as well, so one syringe is never used for two drugs.
- If you have any doubt about what a container holds, throw it out and ask for a fresh supply. Anything found unlabeled is discarded at once.
- Keep empty vials and containers in the room until the case ends, as proof of what was given; one reference keeps them until the patient has gone to recovery.
- Keep two strengths of one drug apart, in different kinds of containers.
- The same drug may sit in two places, such as lidocaine in a syringe on the Mayo stand and more in a cup on the back table; label both.
Drawing up
The circulator gets the drug to you in one of these ways:
- From a vial: the circulator cleans the stopper, then pours the drug through a sterile transfer device or squirts it from a syringe into your container, which you label at once, or holds the vial upside down while you draw it up. A blunt needle makes drawing from the circulator's vial safer.
- From an ampule: the drug is drawn up through a filter needle, which keeps out tiny shards of glass.
- From a tube: AST recommends the circulator squeeze it onto an uncounted sponge that does not show on x-ray.
Measure carefully. Use a tuberculin syringe for amounts under 1 mL, never use an insulin syringe for anything but insulin, and keep air out of the syringe. Put local anesthetics in plastic cups, because some drugs react with metal. When you combine or dilute drugs, the mixture gets a new container right away, and its label gives the complete mixture or dilution. If you are unsure of a calculation, ask a teammate to check it; some facilities require that check.
Delivering
- Pass a liquid drug in a syringe, with or without tubing, sized for the amount to be given; the card usually lists the syringe size.
- Say the drug's name and strength each time you hand it to the surgeon. This is the final safety check, and it lets the anesthesia provider and circulator know what is being given.
- A drug's maximum safe dose depends on the patient's weight and condition, so confirm it with the anesthesia provider and circulator before surgery.
- The surgeon gives every drug used at the surgical site.
Tracking usage
Keep a running total of each drug and solution, irrigation included; a sterile marker can keep a written tally on the field. When the case ends, tell the circulator the final amount of each for the record. At a break or change of staff, the people leaving and arriving check every drug and solution on and off the field, and its label, together. When the procedure is over, the labeled containers on the field are removed and what is left in them is thrown away.
If you are not sure what is in a cup or syringe, it does not go to the surgeon. Throw it out and get a fresh, labeled supply.
9Implants and grafts
An implant is a manufactured device placed in or on the body, meant to stay permanently or for a long time. It may replace all or part of a body part, give structural support, monitor how the body works, deliver a drug or improve appearance. Plates, screws, rods, clips, shunts, coils, artificial joints, heart valves, stents, pacemakers, cochlear implants, lenses for the eye, nerve stimulators and drug pumps are all implants. The FDA regulates them and sets strict standards for their use.
Planning for an implant
- Many implant systems are branded sets that work only with that maker's parts, and the sets are often leased rather than bought.
- The system to be used is usually named when the case is booked. Make sure every instrument and device for it is there on the day of surgery. When several cases need the same sets, allow time to sterilize them again in between; orthopedic sets can need extra time to cool after steam sterilization.
- Implants change fast. Makers offer training, a company representative may help during the case, and online tutorials are available.
Handling and tracking
- Confirm first. The surgeon, the scrub and the circulator confirm the exact implant, its type and size, before it is opened onto the field. Check the package is whole and the expiration date has not passed.
- Handle with care. Keep the implant sterile and undamaged. A scratched implant can corrode and weaken, and one damaged in storage or handling is thrown away. Once an implant has been bent to fit, it is not bent back. Screws and the plate they hold must be the same metal, or the two corrode. Never handle a silicone implant with bare hands, and keep lint and dust off it, because anything foreign on it can inflame the tissue around it.
- Sterility. A sterilizer load that holds implants is held back until its biological indicator shows the load was sterilized. Releasing an implant before that result, in an emergency, is an exception that must be documented.
- Tracking. The FDA requires certain implants to be tracked, and every implant is documented. Make sure the maker, lot number and serial number of each implant reach the patient's record, and when several are placed, tell the circulator where each one went.
- The implant log. The facility also keeps every implant in a permanent log, electronic or written. The FDA requires the facility's name and address, the maker's identification, the implant's serial, lot and batch numbers with any other identifying details such as size and type, the patient's and the surgeon's identification, and the implant's expiration date where it has one.
What implants are made of
An implant must suit body tissue, be sterile or able to be sterilized, be proven safe, let tissue cover it and blood vessels grow around it, and be stable enough for its job.
- Metals: stainless steel, Vitallium, titanium and other alloys, which are strong and inert, for orthopedic implants.
- Polymers: polylactic acid (PLA) in orthopedic and maxillofacial surgery; porous polyethylene in facial reconstruction, which tissue and blood vessels grow into; PEEK, which reinforces an implant; and silicone (Silastic), inert and durable, made as a gel, sponge, film, tube, liquid or sheet.
- Vascular grafts: woven synthetic tubes of Dacron, PTFE or polyester.
- Bone cement (methylmethacrylate): a powder and a liquid mixed on the field to secure an artificial joint in bone. Its fumes are toxic, so it is mixed in a special closed container, following its maker's instructions. Chapter 39 covers it with the joint replacements.
Tissue grafts
A graft is tissue from another part of the patient, from another person or from an animal, used to replace tissue lost to injury, disease, a birth defect or surgery. Chapter 25 names the kinds: an autograft from the patient, an allograft from another person, a xenograft from an animal, and synthetic grafts.
- From a tissue bank: a graft that is not the patient's own usually comes from a registered tissue bank, which tests allografts for infection before it releases them. The Joint Commission requires every facility to track the donor and the recipient of each tissue, to store grafts exactly as required, and to have a program for receiving, storing and managing them.
- Skin and its substitutes: skin keeps out infection and holds in fluid, so lost skin must be covered. Besides the patient's own skin, the surgeon may use porcine (pig) dermis, a temporary cover that falls away after 1 to 2 weeks; amniotic membrane from a donated placenta, which dresses burns, ulcers of the skin and infected wounds and is also used in some eye and spina bifida surgery; or an engineered skin substitute (artificial skin), whose outer layer keeps out infection and which often has a layer that guides new skin as it grows. Chapter 38 covers skin grafting.
- Umbilical cord: a human umbilical cord can replace an artery when the patient's own saphenous vein cannot be used.
- Bone: a bone graft gives support and helps new bone grow. Cancellous (spongy) bone is porous, so tissue fluid reaches deep into it and most of its cells live; cortical bone is rigid and strong, used to repair skeletal defects and fixed with wire, or plates and screws. A bone graft may come from the patient or from donor bone, or be a processed or synthetic material, such as demineralized bone matrix (granules, chips, putty or gel) or ceramics, which give support only.
The patient's own tissue
Tissue taken from the patient to be put back later in the same operation or another one, such as bone (a skull flap among them), skin, an amputated finger or a saphenous vein, is handled under the protocols of the pathology department and the facility's specialists. Ask the surgeon how to keep it. A moist saline environment is the most common, though not right for every tissue, and it should not touch a dry, absorbent surface, which can stick to it.
- Have the graft placed straight onto the Mayo stand or back table rather than handed to you, and handle it as little as you can.
- While a bone graft is taken, the surgeon stands on the same side as the graft, so if it falls it lands on the drapes, not the floor.
- Point out where the graft is to anyone who relieves you.
- No guideline recommends steam sterilizing a dropped bone graft, because it damages the graft and raises the risk of infection. The College of American Pathologists offers protocols for a dropped graft, so follow the one your facility has adopted.
10Sponges during the case
Sponges soak up blood, hold tissue aside, cushion retractors and help separate tissue. Every sponge used in a wound has a marker that shows on x-ray. A wet sponge can look like tissue and hide in the wound, so the team must always know where each one is. Chapters 25 and 28 cover the types and the count.
Size and type
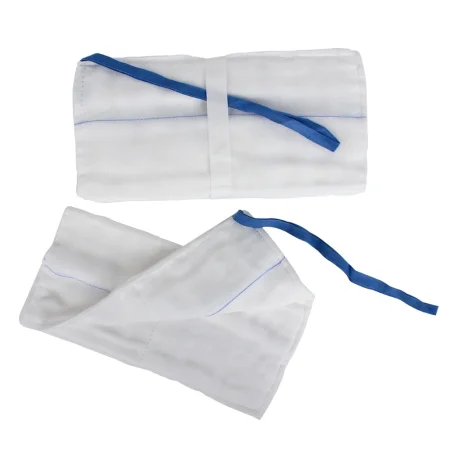
- Laparotomy sponges (laps): for the abdomen, the chest, large vessels and major orthopedic cases. They are usually wet in warm saline and wrung out before passing, unless the surgeon asks for one soaking wet.
- 4 by 4 gauze sponges (Raytec): for shallow wounds. In a body cavity or deep wound they go up only folded onto sponge forceps, as a sponge stick.
- Dissecting sponges (peanuts, Kittners): small round or oval sponges, kept mounted on an instrument or in their holder and never loose on the field.
- Tonsil sponges (round string sponges): round, gauze-covered sponges with a string, used in throat surgery, often to stop bleeding where a tonsil was removed. The string stays outside the mouth. A round sponge without a string is never used in the throat, because it can drop into the airway and block it completely, so check the string is still attached when each one comes out.
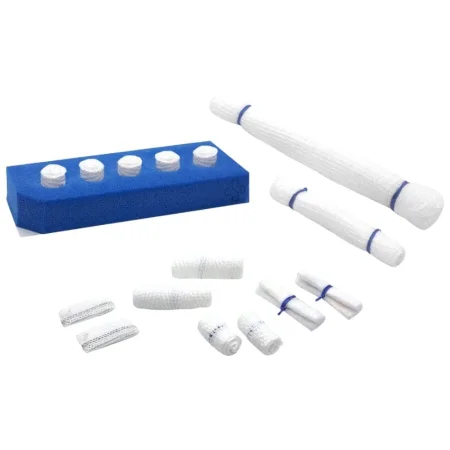
- Neurosurgical patties (cottonoids): flat sponges used moist with saline or thrombin. Neurosurgery also uses cotton balls made not to shred, each on an X-ray detectable string, kept wet in a small bowl of saline or thrombin and saline. Check that each patty and cotton ball comes back whole, with its string, and never cut the strings.
Location and tracking
Know where every sponge is: on your tables, in the surgeon's hand, in the wound or in the kick bucket. Count the sponges that are packed into the wound as they go in and tell the circulator, who records them. Drop used sponges into the kick bucket; never throw them. Never cut a counted sponge, and never use one for the dressing.
Replacement
Keep clean sponges within the surgeon's reach, with fresh ones on the Mayo stand for closure. Ask the circulator for more before you run out, and open new packs only when they are needed; each pack added is counted and added to the total.
If a pack holds the wrong number, too many or too few, do not use it. The whole pack comes off the field and out of the count, and the circulator bags it, labels it as incorrect and keeps it in the room, apart from the other sponges, until the case ends. The same goes for a suture packet with the wrong number of needles (chapter 28).
Sponging techniques
When you sponge for the surgeon, dab the area to give a dry view. In eyelid surgery, for example, the scrub dabs tiny bleeders with small cellulose spears so the surgeon can see and seal each one. When skin and fat are held back for the electrosurgical pencil, a folded sponge gives grip and counter-traction.
Monitoring blood loss
Blood loss is measured or estimated in three ways.
- Suction: the total in the suction canisters, minus all the irrigation used.
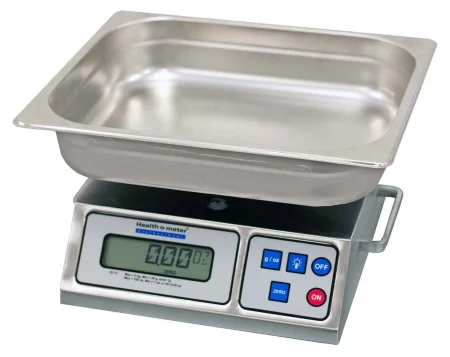
- Weighing sponges: the circulator weighs the bloody sponges; the weight of the dry sponges and the bag is taken away, and each gram left counts as about 1 mL of blood. This is more accurate than looking.
- Looking: some anesthesia providers estimate by inspecting the sponges, drapes and suction canisters.
Weighing and measuring the blood lost, instead of judging it by eye, is called quantitative blood loss (QBL). Judging by eye is hard, and an amount judged too low can delay treatment for heavy bleeding. Your irrigation total is part of the measurement, so report it at the end of the case.
Measuring blood loss matters most for infants and children, older and critically ill patients, trauma and transplant patients, and anyone with a bleeding or clotting problem.
11Closing counts in practice
Chapter 28 teaches how a count is done. This section is about when the closing counts happen and how to be ready for them.
Counts are tied to events in the case, and facility policy decides the details. Sponges and sharps are counted:
- Before the procedure, as the baseline (chapter 28).
- Before a cavity within a cavity is closed, such as the uterus or another hollow organ; instruments are not counted at this point.
- When closure of the wound begins.
- As skin closure begins, or when the case ends and counted items are no longer being used.
Sponges and sharps are also counted whenever more are added to the field, when a scrub or circulator is permanently relieved, at set intervals in a long case, whenever a discrepancy is suspected and whenever anyone asks; a scrub handing off to a relief CST counts with them first (see Transfer of care). Counts are kept out of the critical moments of a case, such as a critical dissection or the handling of specimens. Instruments are counted for every procedure in which a body cavity is open, before the incision and before the cavity is closed.
AST's 2006 counts standard ties the closing counts to the layers: when closure of the peritoneum (or the first layer of any cavity) begins, when closure of the fascia (or the layer before the subcutaneous tissue) begins, and when skin closure begins. It also counts at any change of scrub or circulator, and counts instruments on every procedure, minimally invasive ones included.
Getting ready
- After the final irrigation, the surgeon and assistant take the sponges and instruments out of the wound, and the closing count begins.
- Before closure, clear excess instruments away from the wound, and put the closing sutures, suture scissors and clean sponges on the Mayo stand.
- Closing a wound means approximating it: bringing the tissue edges together with sutures or by other means, such as staples, usually layer by layer. Chapter 25 covers the sutures and staples that close the wound.
- Know where every counted item is: on your tables, in the kick bucket, in the sharps container, off the field and still in the wound. A tidy field makes the count quick.
- Count in the same order every time, the order your facility's policy sets. A typical order starts at the wound and works outward: the surgical field, the Mayo stand, the back table, then anything off the field.
- A count is not complete until the sponges and instruments used to close are out of the wound and back with you.
- Do not ask for the dressings until the skin is closed, and keep them away from the counted sponges.
The final count is never rushed, and the ST and circulator do it without distraction. If it is wrong, the surgeon is told and the search starts at once (chapter 28).
12Special techniques: bowel, cancer and isolation
Bowel technique
When the bowel is opened, its bacteria can spill into the wound and cause a surgical site infection. Bowel technique keeps everything that touches the open bowel apart from the clean setup. AST supports using it in every procedure that enters the gastrointestinal tract, open or endoscopic.
Once the diseased part is removed, the surgeon usually joins the healthy ends back together. A connection like this between two tubes, such as two ends of bowel, two blood vessels or two ducts, is an anastomosis; the body has some natural ones, and the surgeon makes others.
- Set up two Mayo stands: a clean one for opening and closing, and a contaminated one for work on the open bowel. Have a separate basin ready for the specimen.
- Before the bowel is opened, place sterile towels around the incision; the surgeon may also want a plastic wound protector. The team says out loud that the bowel is being opened.
- From then on, everything that touches the open bowel, or is handled with those gloves, is contaminated: instruments, sponges, the suction tip, the Asepto, the electrosurgical tip, light handles, gloves and gowns.
- Do not touch the clean Mayo or the back table. To get something from the back table, use a sponge stick kept in a small basin, touching only its rings.
- When the anastomosis is done and the bowel is closed, gather the contaminated items, including the electrosurgical pencil, suction and light handles, on the contaminated Mayo, remove the towels or wound protector, and move that Mayo away from the field but within your sight, because its instruments and sharps are still counted. Hand off the specimen basin. The wound is irrigated, the counts begin, and the change to a clean closure is announced.
- The team changes gloves, and often gowns too. One sterile member stays at the field while the others change, then changes last.
- Then bring in the clean setup: a new drape or towels over the old ones, a new suction tip and electrosurgical tip, clean sponges, a new Asepto and light handles, and the clean Mayo for closure.
AST's 2017 bowel technique guideline has every sterile team member change both gown and gloves, with the scrub changing first and then gowning and gloving the others.
Some facilities use a single setup instead. The instruments for the resection come to the Mayo, the back table stays untouched until the contaminated items are passed off in a basin, and the team changes gloves, and often gowns, before closing with instruments from the back table.
Cancer technique
The same idea protects against cancer. When a tumor is cut out, cancer cells can be released, and instruments can carry them into healthy tissue, a kind of spread (metastasis) called seeding. Instruments and supplies that have touched the tumor are kept apart from the clean setup, as in bowel technique, and they are not used on a second site in the same patient.
Isolation technique
Isolation technique is the name for the whole idea: anything that has touched the open bowel or the tumor, or may have touched it, counts as contaminated and stays away from the sterile setup. Some texts use isolation technique and bowel technique as names for the same thing, and AST's guideline lists bowel isolation technique among its terms. Your facility's policy sets the routine, and every scrub should follow it the same way.
The same idea applies when an abdominal operation opens into the vagina, as in an abdominal hysterectomy: instruments that touch the cervix and vagina are removed from the field, so they cannot carry vaginal germs to the abdominal incision (chapter 33).
13Transfer of care during the case
Sometimes another CST takes over during a case, for a break or at a shift change. Information is easily lost at a handoff, so AST recommends a standard checklist and a face-to-face, spoken handoff, with the circulator calling out each item and initialing it as it is done. Masks hide much of the face, so say everything aloud and ask questions.
Timing
Hand off during a calm stretch, never:
- during sudden heavy bleeding
- during a fast run of clamp, clamp, cut, tie
- during a closing count
- while a specimen is being handled
Keep it quiet and short, and keep watching the field while you talk. Music, side conversations and power tools make a handoff harder to hear.
During the high-risk parts of an operation, the team should agree in advance on times when no one is handed off.
Communication
Cover at least:
- the patient, the position, the procedure, and anything unusual so far
- the type of anesthesia, such as whether the patient is awake, and allergies
- specimens: what they are, where they came from, where they are now, and any frozen section result still awaited
- x-rays taken and results still awaited
- special precautions, such as a pacemaker, a bloodborne infection or a joint implant
- the irrigation used so far
- where the instruments, equipment, supplies and implants are, including a second Mayo for bowel technique
- the ties: where they are, their type and their size
- staplers: which ones, how many firings, and where the used cartridges are
- medications and solutions: both CSTs and both circulators name each one, its strength and how much has been used, out loud and by reading its label
- whether advance directives are in the record, and whether an indwelling catheter, warming devices or devices to prevent deep vein thrombosis are in use
- grafts on the field and where they are kept
Counting
Before you break scrub, count the sponges, sharps and instruments with the relief CST. Point out the items off the field, the sharps and the sharps container, the neutral zone, any sponges and clamps inside the cavity or on ties, and where the most-used instruments are.
When the checklist is done, tell the team that the relief CST is now first scrub and that the counts are correct, sign the checklist, and only then break scrub. The relief CST signs it at the end of the case.
14Hemostasis
Hemostasis means stopping the flow of blood. It is an ongoing job from the first cut to the last stitch.
Why it matters
- Bleeding hides the anatomy the surgeon needs to see.
- Losing blood lowers the patient's blood volume.
- Blood and serum that collect in the wound after surgery can form a hematoma, hold the edges apart and raise the risk of infection.
- Before closing, the surgeon checks that all active bleeding has stopped.
Do not mix up hemostasis with homeostasis, the balance the whole body keeps.
How the body stops bleeding
Chapter 5 covers blood itself. In brief, when a vessel is cut:
- The vessel tightens (vasoconstriction), slowing the flow for a short time.
- Platelets stick to the cut edges and clump into a plug.
- Clotting factors in the blood react in a chain, the coagulation cascade. Thrombin turns fibrinogen into fibrin, and strands of fibrin bind the plug into a firm clot.
A patient who lacks a clotting factor, as in hemophilia, or takes an anticoagulant such as heparin or warfarin, or has liver disease, bleeds more. Heavy bleeding can overwhelm the body's system and lead to shock.
Watching blood loss
Watch the field, the sponges, the suction and the patient. Report heavy bleeding at once, and keep track of irrigation (see Sponges during the case). The anesthesia provider decides with the surgeon whether the patient needs blood.
Mechanical methods
- Pressure: a sponge pressed on the bleeding squeezes the vessels so the body's clotting can work. For hemorrhage, heavy bleeding, the area is packed with laps first to slow it; in trauma, all four quadrants may be packed while the surgeon finds the source.
- Sponges: absorb blood and press on bleeding points. Gauze packed into a shallow wound can act as a tamponade, as in a breast biopsy, where the electrosurgical pencil is avoided.
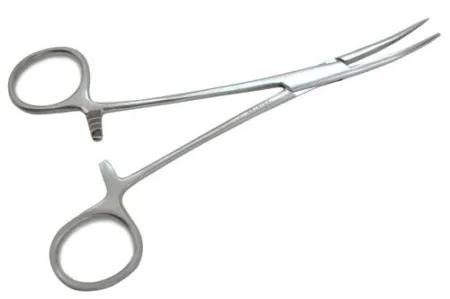
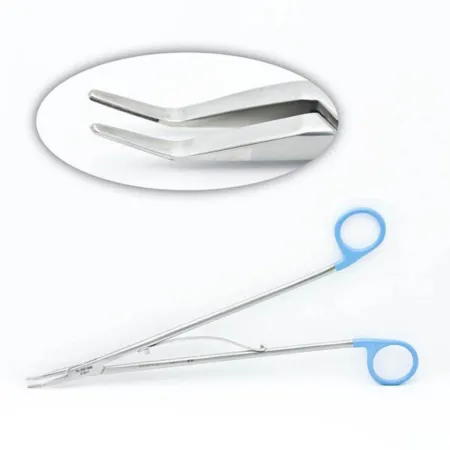
- Instruments: hemostats grasp a bleeding vessel. Mosquito, Crile and Kelly clamps serve superficial tissue; longer curved and right-angle clamps reach deep tissue. The surgeon then ties the vessel or seals it.
- Ligatures: a tie around a vessel, secured with two or more knots, used now mostly on medium and large vessels. It may be a free tie, a tie on a passer or a stitch through the vessel (a stick tie). For a large vessel that will be cut, two clamps go across it, the vessel is divided between them and each end is tied (chapter 25).
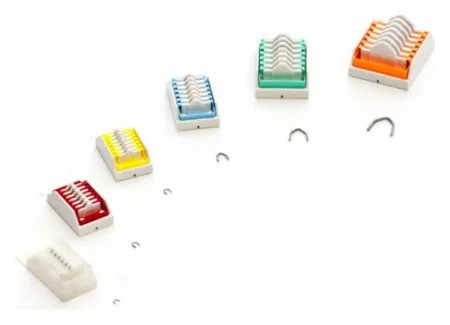
- Hemoclips (ligating clips): small V-shaped clips of stainless steel, titanium or absorbable material, squeezed shut across a vessel. They come in sizes, loaded one at a time onto a reusable applier or preloaded in a disposable one, for open and endoscopic surgery. Have the applier loaded and ready.
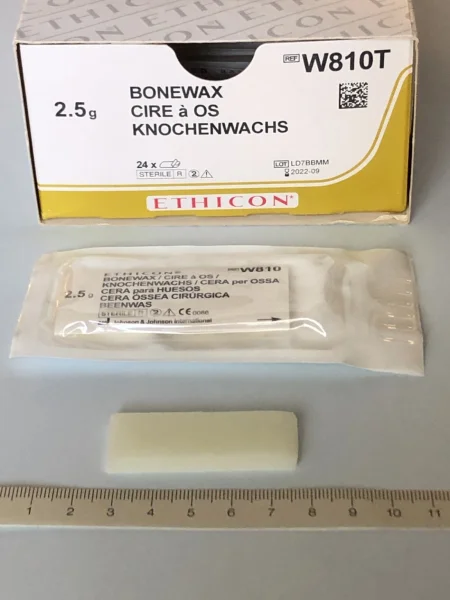
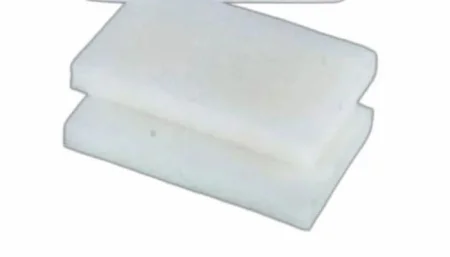
- Bone wax: a waxy material pressed onto bleeding bone to seal it, kept ready for every cranial and spinal cord operation. Soften small pieces by kneading them between your gloved fingers and stick them on the edge of a small basin. The surgeon applies it with a fingertip or an elevator such as a Freer or Penfield. Newer synthetic versions are replacing the original beeswax kind.
- Pledgets: small pads placed with a stitch over needle holes in a vessel to stop them bleeding, common in vascular and heart surgery.
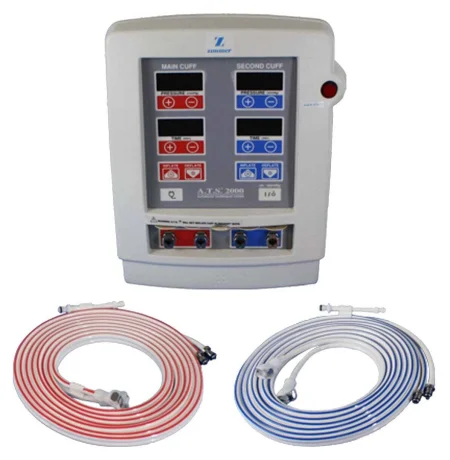
- Tourniquet: a cuff on a limb that stops blood flow, so the surgeon works in a bloodless field. A tourniquet alone does not achieve hemostasis, so bleeding is controlled before it is let down. Chapter 23 covers the pneumatic tourniquet unit.
Thermal methods
Heat seals vessels. Chapter 20 explains how each kind of energy works; here is what each does and what you do.
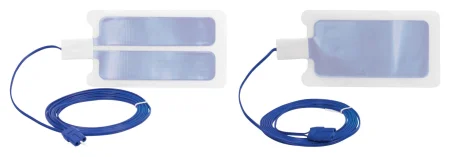
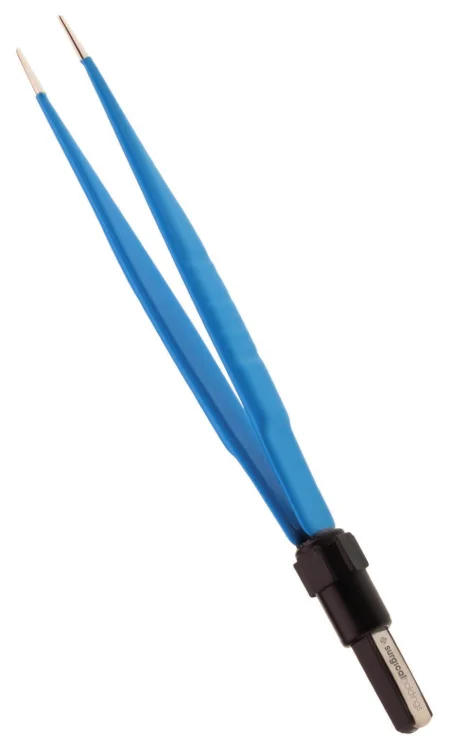
- Electrosurgical unit (ESU): current passing through tissue dries and chars small vessels. In monopolar electrosurgery the current flows from the pencil through the patient to a patient return electrode, a pad on the skin. In bipolar electrosurgery it passes only between the two tips of the forceps, so no pad is needed. Keep the tip clean with the scratch pad, or with a wet sponge for a nonstick tip, never with a blade.
- Coagulating a clamp ("buzzing"): the surgeon may ask you to touch the pencil to a hemostat holding a bleeder. Touch the tip to the clamp below the surgeon's fingers, make sure the clamp touches nothing else, such as the skin edges, activate only when the tip is in full contact and you can see it, and make sure your gloves and the surgeon's are dry. If the surgeon's glove is thin, current can pass through it and burn the surgeon's hand.
- Argon beam coagulator: argon gas carries monopolar current to the bleeding tissue without the tip touching it, giving rapid hemostasis with less charring than the ESU. It needs the same precautions as the ESU.
- Laser: a concentrated beam of light that cuts and coagulates at the same time, with little damage to the tissue around it.
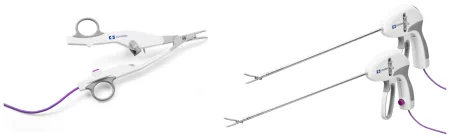
- Tissue-sealing devices (such as LigaSure): bipolar energy and pressure fuse the collagen in the vessel wall into a permanent seal, for vessels up to 7 to 8 mm, with fewer ties and clips.
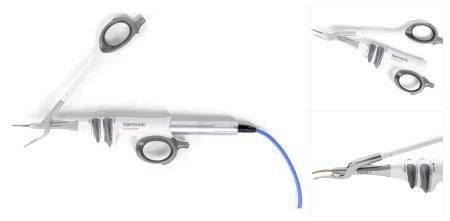
- Ultrasonic scalpel (such as the Harmonic): a blade vibrating at ultrasonic speed cuts and coagulates with little heat spread to the tissue and no charring, though the blade itself stays hot right after use, and makes far less plume than electrosurgery, mostly water vapor, which is still evacuated (chapter 20). No current passes through the patient, so no return pad is needed.
Chemical methods
Topical hemostatic agents work alongside ties and electrosurgery, mostly on oozing surfaces. Chapter 12 covers them as drugs; these are the main groups.
- Thrombin: an active agent that turns the patient's own fibrinogen into fibrin, forming a clot. It comes as a powder mixed with saline, or as a ready-made solution. It is for the surface only and is never injected into a vessel; treat it as a high-alert drug, and label it with its strength in units per mL. Gelatin sponges and patties are often soaked in it.
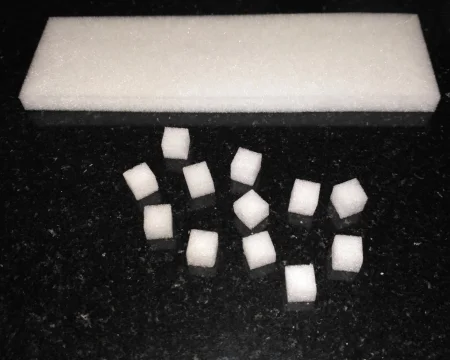
- Absorbable gelatin (such as Gelfoam): a gelatin sponge made from pork protein that gives the clot a framework to form in. Cut it to the size the surgeon wants, and use it dry or soaked in saline or thrombin; squeeze out the air so it softens. It absorbs many times its own weight.
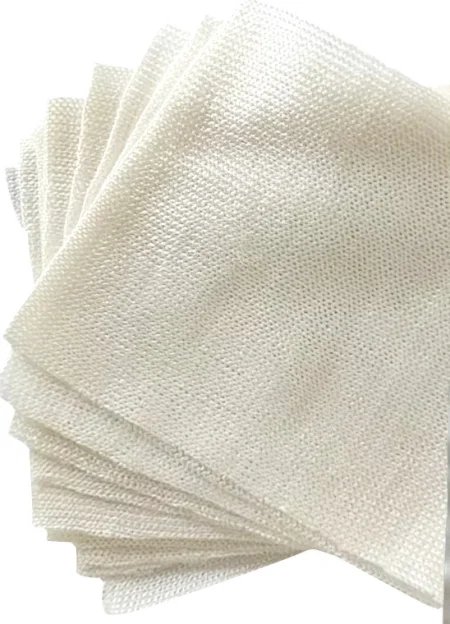
- Oxidized cellulose (such as Surgicel): a knitted gauze or fiber that swells into a gel on contact with blood. Keep it dry until it touches the tissue, because wet it is hard to handle and loses its shape.
- Microfibrillar collagen (such as Avitene): a dry, fluffy powder or sheet that draws platelets to it. Handle it with dry instruments and dry gloves, because it sticks to anything wet.
- Flowable agents (such as FloSeal and Surgiflo): a gelatin paste, often with thrombin, about as thick as honey, pushed from a syringe into places that are hard to reach.
- Fibrin sealants (such as Tisseel): a fibrinogen solution and a thrombin solution combined to form a clot, copying the last stage of clotting. Some take time to prepare.
- Plant-based powder (such as Arista): tiny starch spheres that act as a sieve to help blood clot. Clear blood and irrigation from the area first, and wash off the excess afterward; it is not used in neurosurgical or eye procedures.
- Others: epinephrine, a powerful vasoconstrictor, may be soaked into gelatin sponges for ear surgery, and silver nitrate chemically cauterizes bleeding surfaces.
Prepare each agent as its maker's instructions direct. Most of these agents are absorbable, yet many are taken out once the bleeding stops. Gelatin sponge is usually removed, so it does not press on nearby structures, and removal is recommended for oxidized cellulose; excess powders are washed away. In some operations, such as ear surgery, small pieces of gelatin sponge are left in place as packing. The surgeon decides. Clear away pieces you trim or the surgeon discards, so they cannot fall back into the wound.
Helpers: ablation and cold
- Ablation uses energy, such as radiofrequency, microwaves or a laser, to coagulate and destroy an area of tissue. In liver surgery, radiofrequency or microwave ablation devices can coagulate the line where the liver will be cut before the surgeon divides it, though larger vessels still have to be controlled. A laser can ablate a tumor in the urinary tract and stop its bleeding. Endometrial ablation, with electrosurgery, heat or radiofrequency, treats abnormal uterine bleeding.
- Hypothermia is the deliberate lowering of body temperature, which slows the body's metabolism and its need for oxygen. The Core Curriculum lists it with the hemostatic adjuncts, as external or internal. It can be done through the body surface, by cooling a body cavity, or by cooling the blood itself, as the heart-lung machine does during bypass. It is used in some heart, brain and transplant operations and to treat malignant hyperthermia. Iced saline slush, for example, cools a kidney while its blood flow is clamped. Cold saline is also used on a small scale: minor bleeding from the lining of the airway, for example, can be controlled by dripping cold saline or epinephrine solution onto it.
- Accidental cold does harm. A patient who becomes hypothermic clots poorly, because platelets and clotting factors work less well, and loses more blood. Keeping the patient warm is part of controlling bleeding.
Your role in hemostasis
- Preparation: know from the card and the procedure what the surgeon will need: the right clamps and ties, clip appliers loaded, bone wax ready for bone, hemostatic agents available, and the ESU and pencil working.
- Anticipation: keep watching the field. When a bleeder appears, have a clamp ready for the surgeon's hand, then a tie or the pencil, before you are asked. When the bleeding is massive, laps to pack it come first.
- Application: pass each method ready to use, coagulate a clamp when asked, sponge and suction to show the bleeding point, and prepare agents as directed.
Clamp, then tie or seal; pressure or a topical agent for oozing surfaces; bone wax for bone. And keep the patient warm, because a cold patient bleeds more.
15Specimens
Nearly every tissue and device removed in surgery goes to the pathologist, who examines it for disease (pathology is the study of disease), and the diagnosis decides the patient's treatment. A lost, mislabeled or damaged specimen can mean a wrong or missed diagnosis, treatment the patient did not need, delayed cancer care or another operation. A biopsy can sometimes be repeated, at a cost to the patient, but a removed organ or tumor can never be replaced.
Most specimen errors happen in the operating room, before the specimen reaches the lab. In one review of 156 specimen safety events, 56 specimens were mislabeled, 86 were unsuitable (the wrong preservative, the wrong storage or an empty container) and 14 were lost.
Your part runs from the moment the surgeon hands you a specimen until it leaves the field. You coordinate everything about specimens with the circulator, who is accountable for specimen management.
The College of American Pathologists sets the standards for handling and preserving specimens, and your facility's policies put them into practice, including which tissues need not be sent, amputated limbs and digits, removed devices and orthopedic hardware, breast cancer specimens, radioactive specimens and forensic evidence. A patient's cultural or religious practices about their tissue are discussed before surgery. A change from the usual pathology routine may need the patient's signature, and the surgeon, circulator and pathology department arrange what happens to the tissue afterward.
Types of specimens
The Core Curriculum groups cultures, fluids and washings, smears and tissue cells as cytology specimens.
- Cultures: a swab or a fluid sample sent to grow and identify germs, such as a wound culture. Aerobic and anaerobic cultures each need their own kind of tube.
- Fluids and washings: fluid drawn up with a needle and syringe, or washings collected through suction, such as bronchial washings. In some cancer operations, the surgeon washes the pelvic organs with saline as soon as the abdomen is open and draws the fluid back up; these pelvic washings are checked for cancer cells.
- Smears: cells spread on a slide and sprayed with a fixative, a solution that keeps the cells stable for examination, such as a cervical smear. The patient's name is written on the slide in pencil.
- Tissue cells: cells brushed from a lining through a scope (a brush biopsy). As the surgeon draws the brush out, guide its tip into a small container of sterile saline and swish it gently to free the cells, which may be too small to see. Some surgeons clip off the brush tip and send it in the fluid. Have several containers ready, each labeled once its specimen is in it.
The other types are:
- Fresh: sent with no preservative at all. Foreign objects, forensic evidence, amputated limbs and digits, stones and some tissue go fresh.
- Frozen section: tissue the pathologist freezes, slices and examines at once, while the patient is still in surgery, often to tell whether a growth is cancer and whether the surgeon needs to remove more. The answer usually takes 20 to 30 minutes. A frozen section is booked with the pathology department when the case is scheduled; the circulator lets the pathologist know when surgery starts and again when the specimen is nearly out.
- Permanent: tissue placed in a preservative, usually formalin, and processed onto permanent slides. The final report comes later. When a frozen section cannot give a clear answer, the surgeon may wait for the permanent report before deciding how much to remove.
- Specialty: fetal demise, products of conception, and radioactive or chemotherapy implants, each handled under its own policy (see Special specimens).
How specimens are taken
- Aspiration: fluid or cells drawn up through a needle, as in fine-needle aspiration.
- Excision: tissue cut out. An excisional biopsy removes a whole lump; an incisional biopsy removes part of it; a core needle biopsy collects tissue through a large, hollow needle or trocar, through the skin or into tissue exposed during surgery, and a hollow trocar can take a large core, such as bone marrow.
- Through a scope: the surgeon takes tissue with biopsy forceps and draws it out of the endoscope. Steady the end of the instrument and lift the tissue off with a needle or fine stylet, into saline or onto saline-soaked Telfa, as the surgeon directs. Core needle and fine-needle samples are pushed out onto saline-soaked Telfa or floated in saline, as the surgeon or the pathology department asks.
- Swab: a sterile swab wiped over the tissue for culture.
Collection containers
Sterile containers come onto the field; nonsterile ones stay with the circulator.
- Sterile: culture tubes with their swabs and transport medium; a Lukens trap, a small vial in the suction line that collects washings and must be kept upright so the sample is not lost; and sterile specimen cups.
- Nonsterile: clean containers and pans for large specimens, specimen cups, and blood collection tubes (vacutainers), such as the tubes used to measure a hormone level during parathyroid surgery.
Every container is leak-proof with a tight lid, large enough for the specimen with any preservative covering it, and not see-through, so no one can see the contents on the way to pathology.

Care on the field
- Preparation: the team plans the specimens before the case: how many, which tests, any frozen section, and which containers and preservatives. Have the containers ready when you open the case.
- Field placement: put the specimen in a container or small basin in a protected spot on the back table, where it is easy to see, until it can be passed off. This is called sequestering it.
- Never on a counted sponge: a specimen never leaves the field with or on a radiopaque counted sponge. A small specimen can go on a nonadherent pad (such as Telfa).
- Handle gently: move it by hand or with smooth forceps or an atraumatic clamp, never with crushing instruments such as bone clamps or hemostats, and do not squeeze it in your fingers.
- Multiples: keep each specimen separate and identified, in the order removed (they may be labeled A, B, C), each in its own container.
- Orientation and markings: the surgeon may mark the edges (margins) with sutures, clips, dye or small cuts, often in clock positions, so the pathologist knows which edge is which. Keep the markers in place, and make sure their meaning, such as "suture tag at 12 o'clock", goes with the specimen.
- Keep it moist: unless the surgeon says otherwise, never let a specimen dry out. Keep it in its container or a small basin, moist with sterile saline, never water, which distorts the cells. Do not wrap it in a sponge or towel: wrapped specimens are a common cause of loss, because they get thrown away by mistake. Small biopsies dry out fast and are easy to lose; a saline-dampened Telfa in a small container keeps them safe. Stones are the exception: they stay dry (see Special specimens).
AST's 2008 specimen standard lets a specimen that cannot go into its container right away wait in a sterile basin wrapped in sponges soaked in saline, until it is passed off.
Validation and transfer
- Get permission. Ask the surgeon before any specimen leaves the field.
- Confirm it. The surgeon states the tissue, where it came from, the side and any markings, and you or the circulator repeat it back. When several specimens are taken, as in parathyroid surgery, a brief extra time-out is recommended as each one is collected, with distractions kept low, in which the surgeon, scrub and circulator agree on its name, type, source and preservative.
- Pass it off to the circulator with aseptic technique; the circulator wears gloves. Wipe the outside of a sterile container with a sterile sponge first. If you place a specimen in a nonsterile container, the instrument you used is now contaminated.
- Frozen sections go direct to pathology. Pass them off at once, with no preservative, on moistened Telfa or in a covered container, and do not float them in saline unless the surgeon asks. Be ready for more surgery while you wait for the result.
- Cultures go straight to the lab. The circulator opens the culture tube; you hand the swabs to the surgeon and put them back into the tube the circulator holds. For fluid in a syringe, take the needle off into your sharps container and cap the syringe, or inject the fluid into a stoppered transport tube; never send a needle on a syringe.
- Large specimens too big for any container go off in a sterile basin, which the circulator covers and bags. An amputated limb is wrapped in a drape first (see Special specimens).
The circulator then confirms the preservative, labels the container, completes the requisition, and either sends the specimen on or places it in the department's specimen storage area for pickup on an agreed schedule. The pathologist reports a frozen section result straight to the surgeon.
For the trip, each leak-proof container goes in an impervious bag with a biohazard label, and its paperwork rides in a clear pouch on the outside of that bag, never inside it. Before it goes, the label must match the requisition and the patient's chart exactly. Besides what is on the label, the requisition gives the patient's date of birth and gender, the surgeon's preoperative diagnosis, the test requested and the name of the person who prepared the specimen.
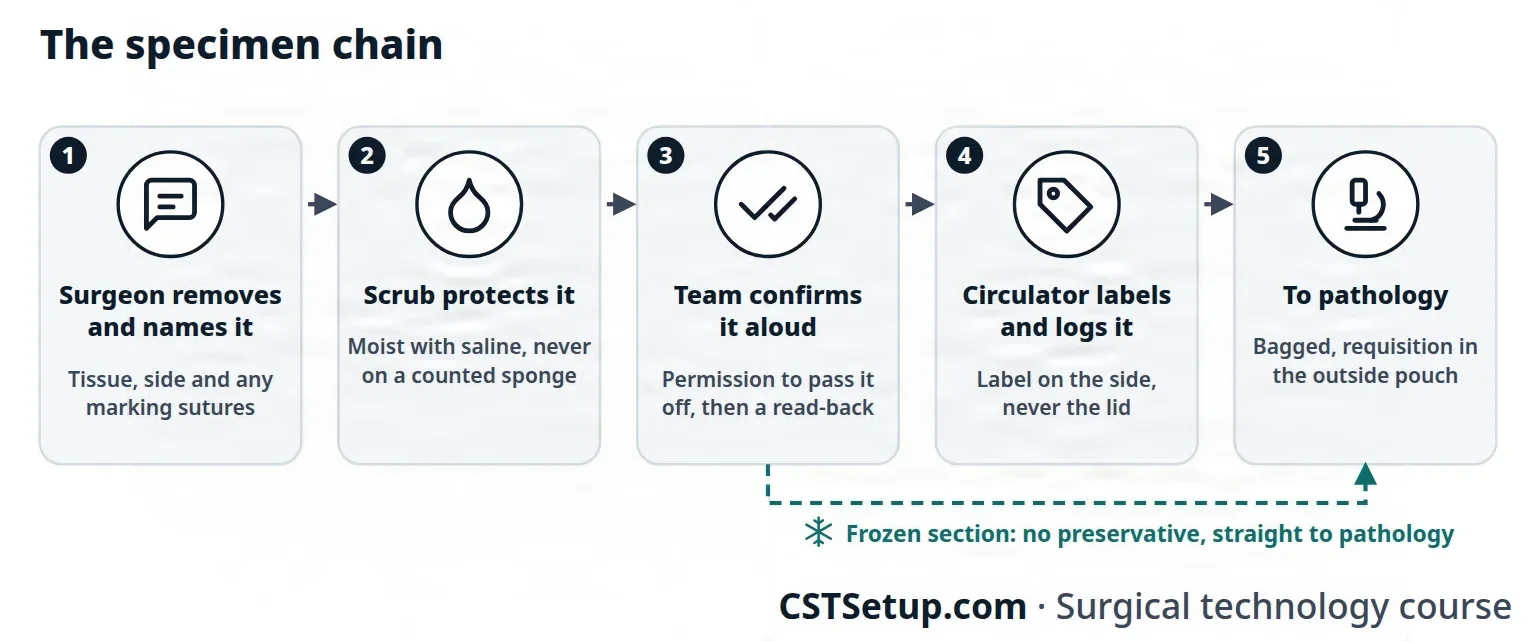
Validation means each person in the chain confirms the specimen out loud: the surgeon and scrub, the scrub and circulator, and the circulator and surgeon. Every handoff is a chance for error, so keep the number of handoffs low and log every specimen. Before the patient leaves the room, the team confirms the specimens again at the debrief.
The chain ends at the lab or pathology department. The specimen log records each specimen and the name of each person who carries it there. When the pathologist reports a result straight to the surgeon, in person, by phone or by intercom, the report is recorded in the patient's operative record. A result reported to the circulator instead is read back.
Preservatives
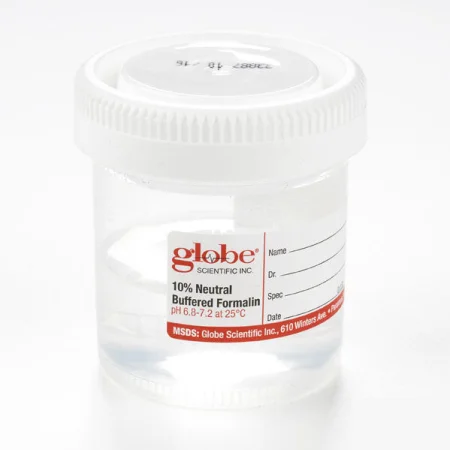
The preservative (fixative) is confirmed with the surgeon by the scrub and circulator. Formalin is the most common one for permanent specimens. It is toxic, it can cause cancer and it is a fire risk, so it never goes on the sterile field, and it is not brought into or stored in the operating room: it is kept in a designated, well-ventilated storage area. A specimen that needs formalin goes into a container already filled with it, never with formalin poured over it, which can splash, and the container is big enough for the formalin to cover every surface of the specimen. Whoever handles formalin wears goggles and a face shield (both, since a shield does not replace eye protection), a mask, impervious gloves and impervious protective clothing, and handles it only where the air is well ventilated. Your facility's policy sets where and by whom specimens are placed in formalin. Frozen sections, stones and other fresh specimens get no preservative.
Labeling
The label is written or printed in the room by the circulator, from what the team confirmed, following the department's policy. AST's Core Curriculum lists what it carries:
- the date and time
- the patient's name
- the medical identification number, so the label has two identifiers
- the specimen's name and source, including the side
- the exact location and orientation, such as suture tags, when they apply
- the specimen type and handling instructions, such as the preservative or "frozen section"
- the surgeon's name, and a contact number when required
- the circulator's signature
The label goes on the side of the container, never the lid, which can be separated from it in the lab, and is written in permanent ink. Containers are not labeled before the specimen is in them, to avoid mix-ups. Standardized, computer-printed labels cut identification errors.
Special specimens
- Foreign objects: anything removed from the body that is not tissue.
- Forensic evidence: bullets, knife blades, fragments and clothing that police may need. Never handle a bullet with a metal instrument unless its tips are covered, because metal scratches the marks on it, and never wipe it. AST says to rinse off blood and tissue with sterile water and place it in a nonmetal container. Unless the surgeon says otherwise, it goes dry, in a tightly sealed container. Clothing is cut along the seams, around holes rather than through them, and any fabric around a weapon or fragment is kept intact and sent with it. Clothing goes in paper bags, except clothing wet with blood or fluids, which goes in moisture-proof bags. Every person who handles evidence is recorded, from the surgeon to the police officer's name and badge number, with the time of each handoff: this record is the chain of custody.
- Explanted devices: a removed device or piece of hardware is kept with all its pieces together in a dry container and is not cleaned or sterilized; a defective device is reported to its maker, and its serial number goes on the documentation.
- Limbs and digits: wrap the limb, keep it out of sight of a patient who is awake, and pass it to the circulator. It goes to pathology like any specimen, even when the patient's culture or religion calls for it to be returned to them afterward.
- Stones: from the urinary tract, gallbladder or salivary ducts, received in a small dry basin and sent dry, in a dry container, with no saline. No preservative is added either, because it can dissolve or change them.
- Muscle biopsy: a small piece of a large muscle, often the vastus lateralis in the thigh, taken to diagnose a muscle or body-wide disease. No electrosurgery is used to cut or coagulate. The muscle goes to pathology quickly on saline-moistened Telfa, never floated in saline and never in formalin, and kept cold, with the container, not the tissue, packed in ice. If it cannot get there within 30 minutes, the pathology department may direct that it be flash frozen.
- Cord blood, umbilical cord and placenta: after a birth, blood left in the umbilical cord may be caught in a small basin when the cord is cut and moved into blood tubes for the lab. Cord blood can also be collected on the field with a kit (a bag, clamps and tubing), before the placenta is delivered, and banked for its stem cells. The cord and placenta are sent as the facility's policy directs.
- Fetal demise and products of conception: embryonic and fetal tissue is treated with respect and dignity, and documented according to state reporting laws and your facility's policy.
- Radioactive and chemotherapy implants: tissue holding a radioactive tracer, such as a sentinel lymph node, or a removed radioactive seed is handled under the radiation safety officer's written rules. The requisition names the radioactive material, and the specimen goes to pathology right away and is not left unattended in an unsecured area. A chemotherapy wafer releases a cancer drug straight into the space a tumor was removed from. Anticancer drugs are hazardous to staff, so handle one with the right protective equipment and discard it as your facility's policy directs.
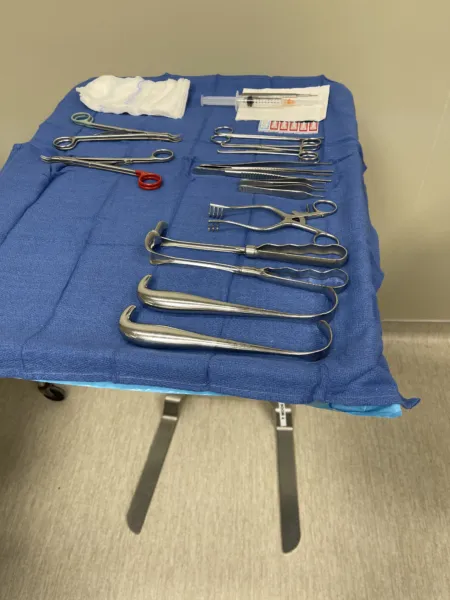
Some items need not go to pathology, such as teeth with no tissue attached or a normal placenta, but their removal is still documented. Your facility's policy, written by the pathologists and staff together, decides which.
Specimen incidents
- Error types: lost specimens; mislabeled specimens, with the wrong patient, the wrong side or the wrong specimen; and unsuitable specimens, with the wrong preservative, the wrong storage or nothing in the container.
- Prevention: plan specimens at the brief, sequester each one, read back every identification, label in the room as soon as the specimen is in its container, keep handoffs few, and confirm specimens at the debrief. Distractions, poor communication and incomplete handoffs cause many errors.
- Reporting: report an incident or a near miss. The first step is to tell the operating room supervisor, who decides which report to file, on which form, and where it goes; risk management is notified and looks into it.
- Documentation: every specimen and what became of it goes in the patient's intraoperative record, with its name, source and side, the test requested and the time it was collected. AST favors a systems approach, which looks for the weak point in the process and fixes it rather than blaming a person.
Losing or mislabeling a specimen can be negligence, and it may force the patient through another operation.
Never let a specimen leave the field without the surgeon's permission and a spoken confirmation of what it is, and never pass it on a counted sponge.
Lo que te llevas de este capítulo
- Know the common incisions and what each reaches: midline for any part of the abdomen, subcostal for the gallbladder or spleen, McBurney for the appendix, inguinal for a hernia, Pfannenstiel for the pelvis.
- Exposure shows the tissue and protects it: retractors held still where the surgeon put them, moist sponges, loops and tapes, and suction kept clear.
- Stay one step ahead: watch the field and the patient, know the procedure and the surgeon, report and fix any break at once, and report counts, irrigation, blood loss, implants and drugs.
- Pass every instrument ready to use, firmly into the palm, and every sharp through the neutral zone, one at a time, saying "sharp".
- Label every drug and solution the moment it arrives, say its name and strength as you pass it, and report the totals; confirm every implant with the surgeon before it is opened, and keep the patient's own tissue moist and protected.
- Match the method to the bleeding: pressure, clamps and ties, clips, bone wax, heat or topical agents, and keep the patient warm.
- Count before a cavity within a cavity is closed and as wound and skin closure begin, and hand off only in a quiet moment, with a full count.
- Many specimens can never be replaced: keep each one moist and off counted sponges, get the surgeon's permission, confirm it aloud, and make sure it is labeled right.
Ponte a prueba5 preguntas rápidas
Gratis para todos. Elige una respuesta para cada una y luego revísalas todas juntas.
En el quirófanoDónde vas a usar esto
Todo el banco de preguntas del capítulo en series de 10, con la respuesta explicada después de cada una.
Parte del programa para educadoresLas palabras del capítulo en tarjetas de estudio: las que fallas vuelven antes.
Parte del programa para educadoresLo asigna tu docente. Cada grupo saca sus propias 25 preguntas del banco del capítulo.
Parte del programa para educadores
Sugerir una corrección
¿Algo está mal, confuso o desactualizado en este capítulo? Avísanos y lo corregimos para todos. Tu correo solo se usa para responderte.