Instruments
How surgical instruments are made, sorted and named, and how to check, pass and care for the tools you put in a surgeon's hand again and again through every case.
1Why instruments matter
A surgeon reaches out without looking away from the wound, and the right instrument lands in their palm, turned the way it will be used. Passing well is one of the core skills of your job as a scrub, and knowing instruments is one of the most important parts of your role.
To make that happen you need to know what each instrument does, what it is called and how it is built. Knowing how it is built lets you spot one that is dirty, cracked or about to fail before it reaches the patient. That check is everyone's job, even when a separate department cleans and sterilizes the instruments.
Catalogs hold thousands of instruments, but a fairly small number are used again and again. AST sorts instruments into ten classes, each named for its job: cutting and dissecting, grasping and holding, clamping and occluding, retracting, suturing, suctioning and aspirating, dilating, probing, viewing, and accessory. Some books and makers group them a little differently, for example joining probing with dilating, or giving stapling and microinstruments classes of their own.
Learn the job first, then the names in each family, then the small differences between look-alikes. Learn them with the surgeries they belong to, too: studying instruments together with the cases they serve works better than memorizing them alone.
2How instruments are made
The metals
Most instruments are stainless steel, an alloy: a blend of two or more metals. It is iron mixed with carbon, chromium and small amounts of other metals. The more chromium, the better the steel. The chromium forms a protective layer of chromium oxide on the surface that resists corrosion. Stainless steel can still stain, spot and rust when it is mistreated, so a better name for it is stain resistant.
- 400 series steel is hard and can be hardened with heat. It holds a sharp edge and a fine point, so it makes scissors, hemostats and other clamps, needle holders, forceps, osteotomes, chisels and rongeurs. It is magnetic.
- 300 series steel is softer and easier to bend, and it resists corrosion even better. It makes retractors, cannulas, suction tubes, probes and mallets. It is not magnetic.
Titanium is lighter than steel, very strong, highly resistant to corrosion and pitting, and not magnetic, so fine needles do not cling to it. It is also expensive. You see it in microsurgery instruments, in implants such as plates and screws, and in ligating clips.
From steel bar to instrument
A heated bar of stainless steel is forged into the rough outline of each half. The halves are ground and milled, which cuts the box lock fittings, the serrations and the ratchet; some instruments need more than 20 milling steps. For a ringed instrument, a hole is drilled through the box lock and a pin or rivet joins the two halves. Heat treatment then sets the hardness and spring, and the instrument is polished.
Next comes passivation: a nitric acid bath removes leftover iron and carbon steel from the surface and builds up the protective chromium oxide layer. The instrument is then inspected and tested (its ratchet, tips, blades, serrations and box lock), and the maker etches its name and catalog number on it.
That protective layer keeps building over the instrument's life, but saline, abrasive cleaners and chemicals the maker has not approved damage it. Bleach, iodine, peroxide and household cleaners also harm instruments. That is why the care rules later in this chapter keep saline off instruments.
Grades
Each instrument company grades its own instruments.
- Surgical grade instruments have the most chromium. The finest grade is used for cutting instruments that must stay sharp, and a slightly lower surgical grade for instruments that do not cut or take heavy impact. Cared for properly, many stay in service for years.
- Floor grade instruments have less chromium and are meant for laboratories and other settings outside surgery. Some are chrome plated over brass or carbon steel, and the plating can chip off. They bend and break easily, they are not suitable for surgery, and they are never processed together with surgical grade instruments, because contact between the two grades weakens them further.
- Disposable (single-use) instruments cannot stand up to repeated high heat and are made for one use only, such as skin staplers and the disposable Yankauer suction tip. They are thrown away after one patient. Some facilities choose to have certain single-use devices reprocessed, in house or by an outside reprocessor, but only under FDA rules and the facility's own policy.
Finishes and inserts
- Polished (mirror) finish resists stains but reflects the OR lights, and the glare can get in the surgeon's way.
- Satin (matte) finish is a dull gray that cuts glare and is widely preferred, though it stains a little more easily.
- Black ebonized finish reflects almost no light. It is used in laser surgery, so the beam does not bounce off an instrument into nearby tissue.
- Anodized titanium has a colored, hardened surface made by running an electric current through the metal. The process is common in making orthopedic implants such as plates and screws, and the colors let matching implant parts and their tools be paired at a glance.
Some instruments carry harder materials or special edges at the working end, and the color of the handle marks some of them:
- Gold finger rings (a gold-plated handle) mean tungsten carbide inserts, an extremely hard metal. In needle holder jaws it grips the needle so it does not slip or turn. On scissor blades it keeps the edge sharp longer. Worn inserts can be replaced, which saves the instrument.
- Black finger rings on scissors usually mark supercut scissors. One blade is ground sharp like a knife so the scissors slice tissue instead of crushing it, and on some, one cutting edge has very fine serrations. They need special sharpening. An instrument that is black all over is ebonized for laser use instead.
- Diamond-dusted jaws or tips carry a hard diamond-dust coating that grips fine needles securely without damaging them. You find them on micro needle holders and forceps, often in heart and vessel sets.
- Diamond knives have a diamond blade and are used for fine cuts in eye surgery, such as finishing a cut through the cornea. Delicate eye instruments are easily damaged by rough handling, so handle them with care.
3The parts of an instrument
Instruments share one basic design, changed to suit each job. Learn the parts of a ringed instrument and you can name the parts of clamps, needle holders and scissors alike. From the working end back to your hand:
- Tips: the very end of the jaws, fine or blunt, pointed or rounded, straight or curved.
- Jaws: the working part. The pattern cut into the inner jaws, with the tips and shape, tells you how and on what tissue the instrument is used.
- Box lock: the joint in the middle where the two halves meet and pivot. It keeps the jaws lined up so the tips meet accurately.
- Shanks: the arms between the box lock and the rings. They set the instrument's length, which is chosen for the depth of the wound.
- Ratchet: the interlocking teeth just below the rings that lock the jaws closed on tissue. It has several steps; on some clamps, each step closes the jaws a little more.
- Finger rings: the handle, where the user's fingers go.
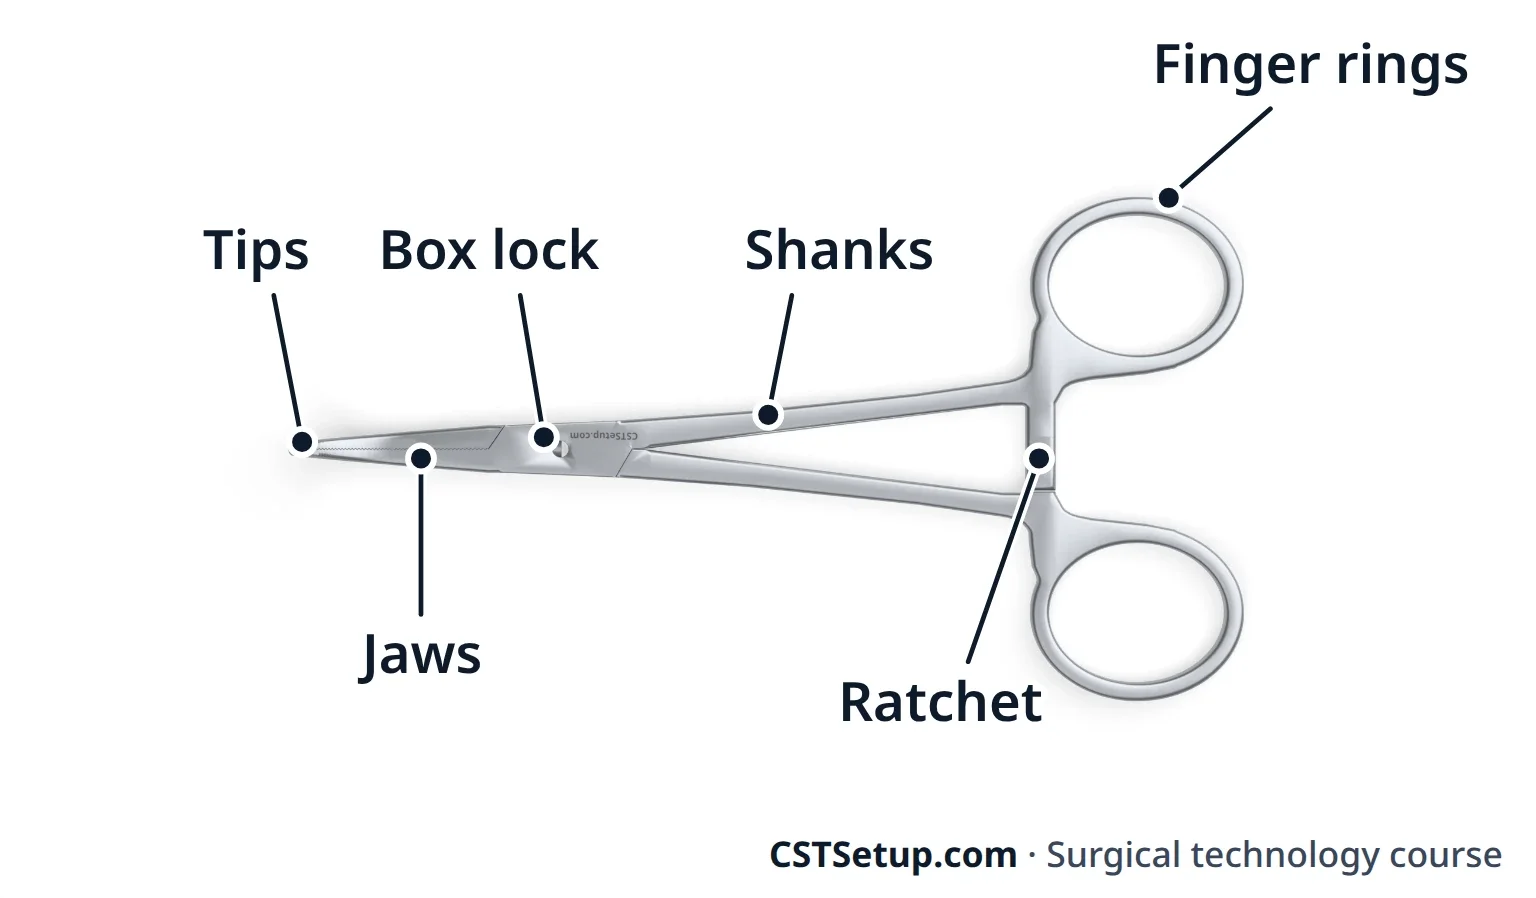
The box lock is the hinge in the middle. The ratchet is the lock by your fingers.
Scissors have a screw joint in place of a box lock, which can loosen and needs checking. Thumb forceps have no rings and no lock: two springy arms joined at one end stay open until squeezed. A handheld retractor has a handle, a shank and a blade with a tip.
Handles come in three kinds: finger rings; spring handles, which open and close with gentle pressure and give fine control, as on many microinstruments; and pistol grips, shaped like the grip of a gun, as on some ear instruments and optical trocars. Heavy bone cutters and rongeurs may have a double-action joint, a second hinge that doubles the leverage, so they bite harder with less hand strength.
Reading the jaws
- A serration is one of the fine grooves cut into a jaw. Crosswise (horizontal) serrations grip firmly, which is what a hemostat needs to compress a bleeding vessel.
- Lengthwise (longitudinal) serrations, or rows of fine lengthwise teeth, hold without crushing, as on vessel and bowel clamps.
- A cross-hatched pattern grips metal, as in needle holder jaws.
- Teeth bite in for a firm hold. A 1 x 2 ("one by two") pattern has one tooth on one side fitting between two on the other.
An instrument that holds tissue without crushing or tearing it is atraumatic. Look for smooth or finely serrated jaws, rounded tips and wide, smooth blades.
4How instruments get their names
Names follow a few patterns:
- The inventor: many carry the name of the surgeon who designed them, such as DeBakey, Mayo and Bookwalter. Specialties have their own famous names: DeBakey and Cooley in heart and vessel surgery, Heaney in gynecology, Cushing in neurosurgery and Castroviejo in eye surgery.
- What it looks like: a rake retractor is shaped like a small rake, and a right angle clamp bends at a right angle.
- What it does or where it goes: needle holder, towel clamp, sponge forceps, tonsil clamp. Some are named for the part of the body they were made for.
- Two names joined: Mayo-Hegar, Rochester-Pean, Potts-Smith.
- Shape and size: curved, angled, bayonet, long, 6-inch. Length is the straight-line distance from the bottom of the finger rings to the farthest tip.
The word forceps covers thumb forceps (pickups) and also some ringed grasping instruments, such as Allis and Kocher forceps. Names also change between regions and hospitals. One OR's Crile is another OR's "hemostat," "snap" or "stat," and many teams call a Kocher an "Ochsner." Learn the standard name and your facility's name, and be ready for differences.
5Cutting, grasping and clamping
Instruments are sorted into classes by what they do, and a set is built by choosing instruments from each class. The cert exam asks you to identify instruments by function, use and class. This section covers the first three classes.
Cutting and dissecting
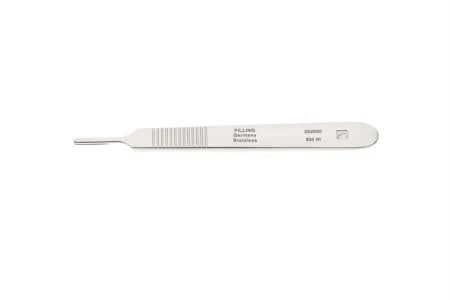
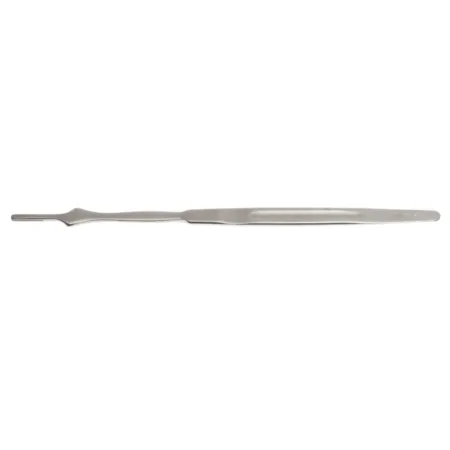
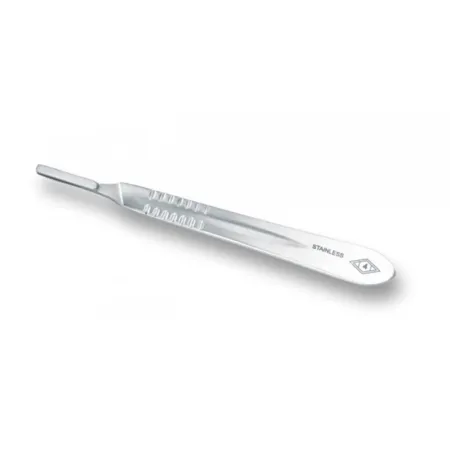
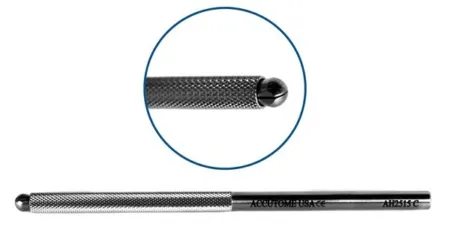
Knife handles hold disposable blades. A #3 handle takes the small blades: #10, #11, #12 and #15. The #7 handle is used for precise cuts in deep wounds and tight spaces; it takes the same blades. A #4 handle takes the large blades, #20 to #25. A Beaver handle holds the smaller, more delicate Beaver (micro) blades, used in plastic, eye and ear surgery. Load a blade with an instrument such as a needle holder, never with your fingers. To take it off, AST calls for a single-handed blade remover when a safety scalpel is not used (chapter 25).
Some references still teach taking the blade off with a needle holder: lift the lower corner of the blade slightly, then slide it out of the slot.
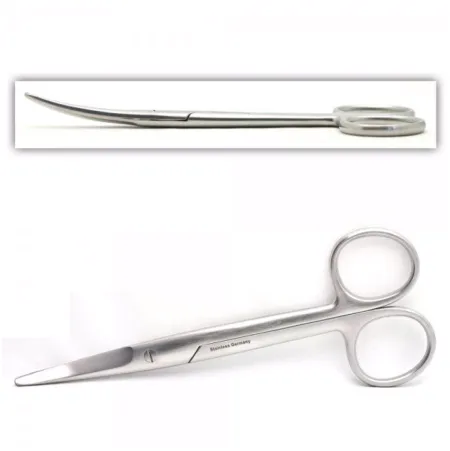
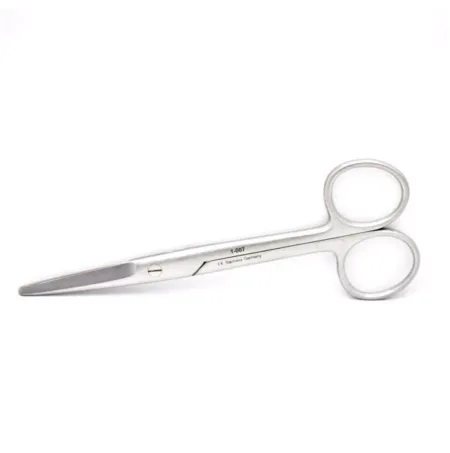
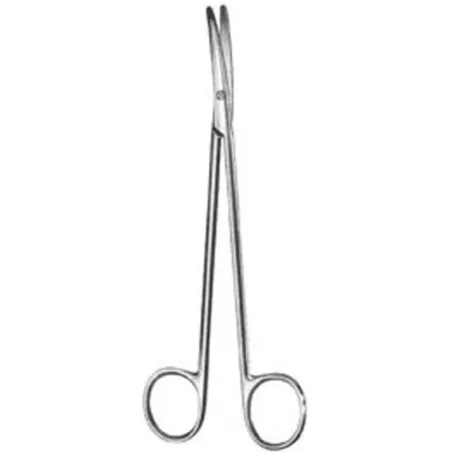
Most basic sets hold these three scissors:
- Curved Mayo: heavy blades for tough, fibrous tissue such as fascia and muscle.
- Straight Mayo: for cutting suture, so many ORs call them suture scissors.
- Metzenbaum: longer and thinner, with lighter blades, for delicate tissue. Never cut suture with them; it dulls the blades.
Stevens tenotomy and iris scissors handle fine dissection in eye and plastic surgery, and Potts-Smith scissors have angled blades for opening ducts, veins and arteries. Blunt dissection uses closed scissors spread open inside tissue, small sponges on clamps (peanuts and Kittners), the back of the knife handle or the surgeon's finger.
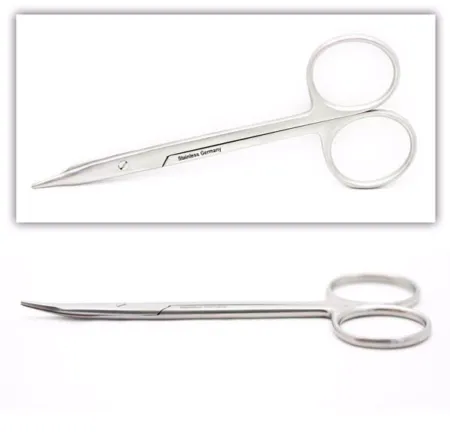
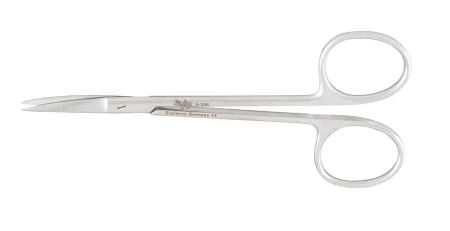
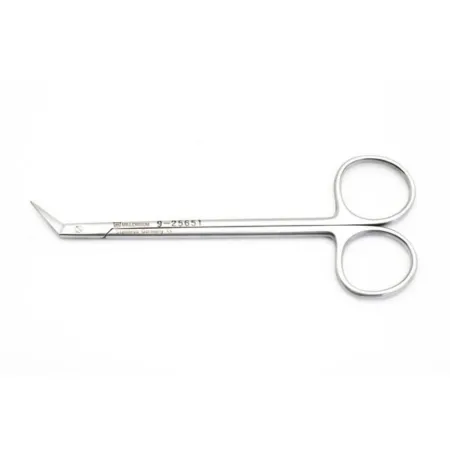
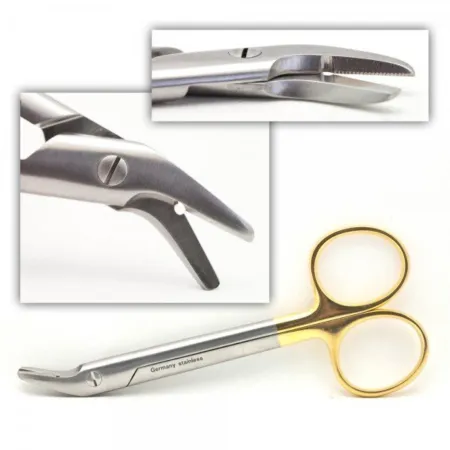
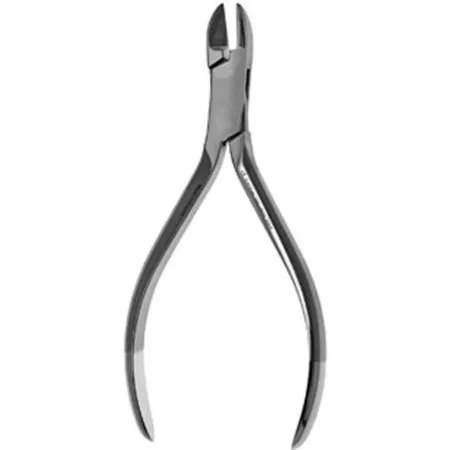
Scissors are also described by their points: sharp-sharp, sharp-round or round-round. Wire scissors are kept for cutting wire, such as steel suture, and a wire cutter cuts steel suture and small orthopedic pins.
Cutting bone
- Rongeur: a hinged instrument with sharp, cupped jaws that bites away bone and tissue. A single-action rongeur has one hinge; a double-action rongeur has two, for twice the leverage. Long, fine Kerrison rongeurs are used in spine surgery.
- Curette: a small cup at the end of a handle, with a sharp, serrated or smooth rim, for scooping out bone or soft tissue. Scraping tissue out this way is called curettage.
- Osteotome, chisel and gouge: struck with a mallet to cut or shape bone. An osteotome is beveled on both sides; a chisel is beveled on one side only and makes a straight-sided cut; a gouge is a chisel with a V- or U-shaped, trough-like blade that scoops out a channel. They come in graded sizes and are kept in a metal rack so their edges do not touch.
- Elevator: a straight instrument with a sharp or dull curved tip that separates tissue layers, such as lifting the periosteum off bone. Heavy orthopedic elevators are used with a mallet; fine ones are used in nerve and vessel surgery. A dissector lifts and separates tissue like an elevator but tends to have sharper edges, for delicate work in nerve, plastic and vessel surgery; the Penfield is a common one.
- Rasp: a file for smoothing or reshaping bone.
- Shears: large cutters that sever bone, most often a rib to open the chest, such as the Bethune rib shears.
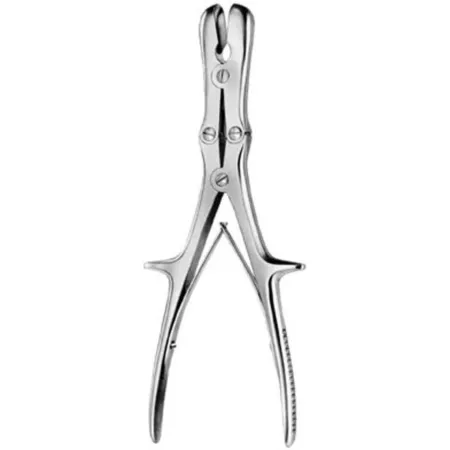 Stille-Luer RongeurEn 2 setups
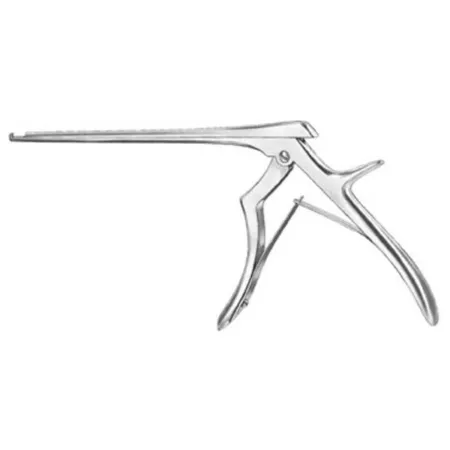 Spurling Kerrison Rongeur
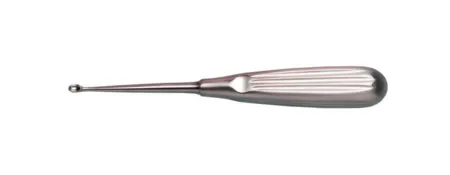 Volkmann Bone CuretteEn 7 setups
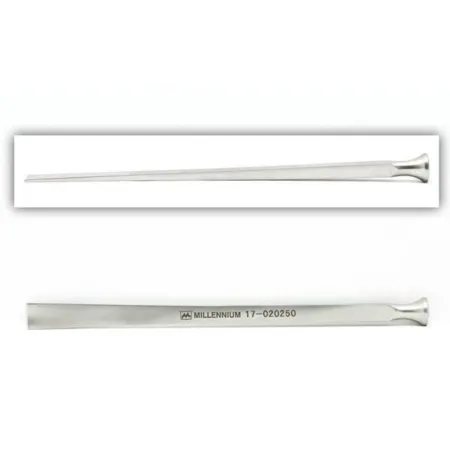 French Pattern Osteotome
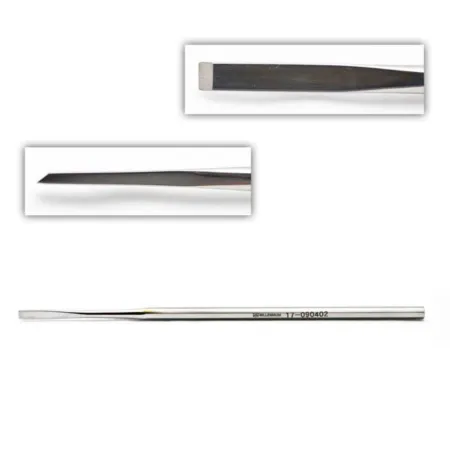 Chisel With Octagonal HandleEn 1 setup
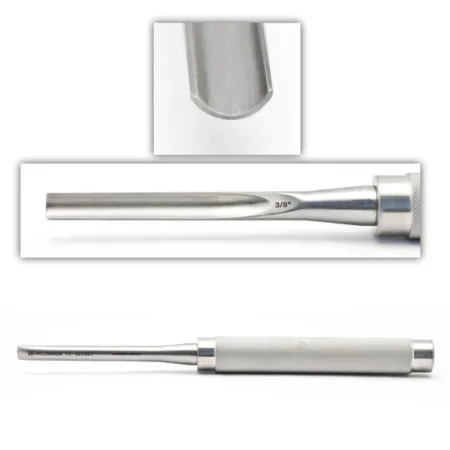 Bone GougeEn 4 setups
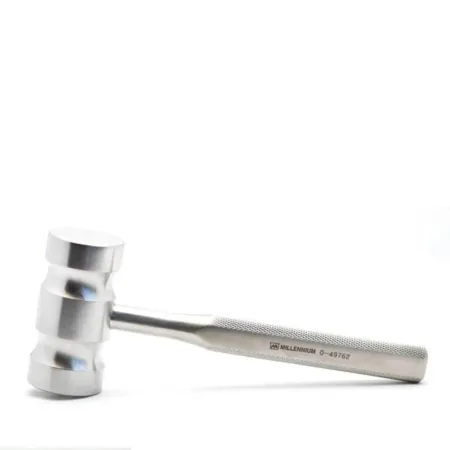 Orthopedic MalletEn 22 setups
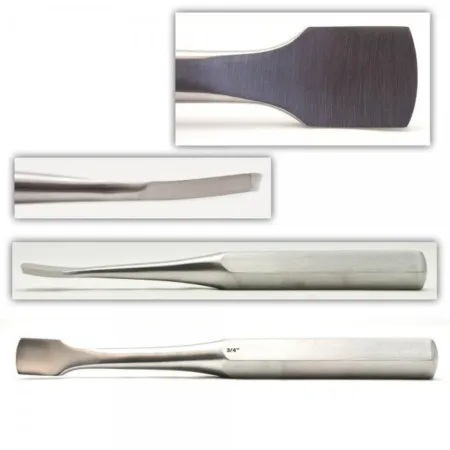 Key Periosteal ElevatorEn 19 setups
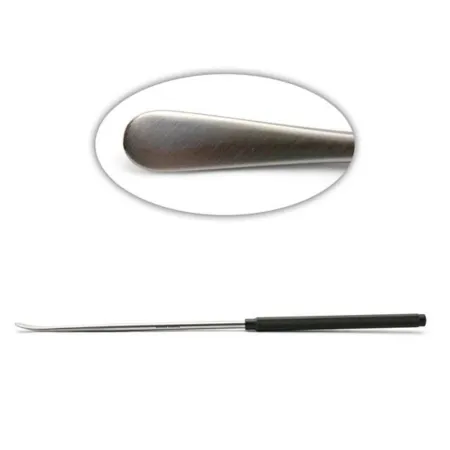 Penfield DissectorEn 2 setups
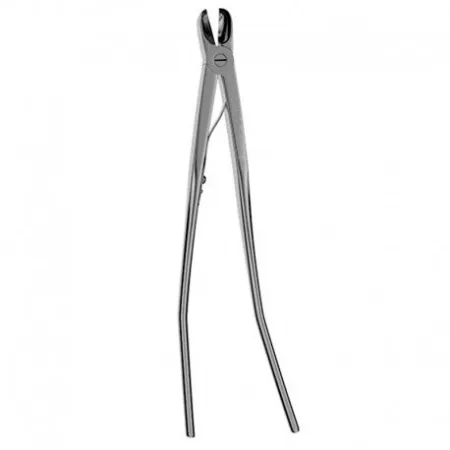 Bethune Rib ShearsEn 5 setups
Grasping and holding
Thumb forceps (pickups) are held like a pencil, usually in the surgeon's other hand while the dominant hand cuts or sews.
- Adson: short and fine. The toothed kind is commonly used to hold skin edges at closure.
- DeBakey: long, narrow tips with fine lengthwise serrations that grip without harming tissue. Made for vessels, they are used in nearly every specialty.
- Russian: round tips ringed with serrations in a starburst pattern, for dense tissue.
- Toothed and smooth: toothed (rat tooth) forceps hold thick, tough or slippery tissue. Smooth (dressing) forceps have serrations instead of teeth and handle delicate tissue and dressings.
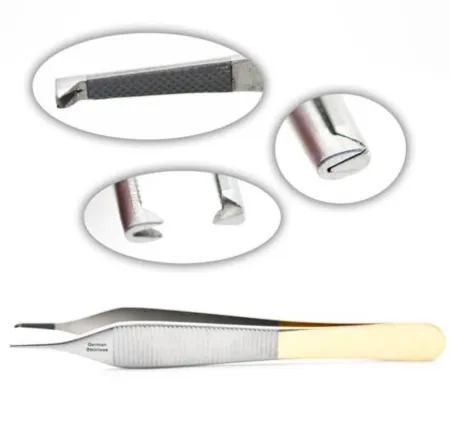
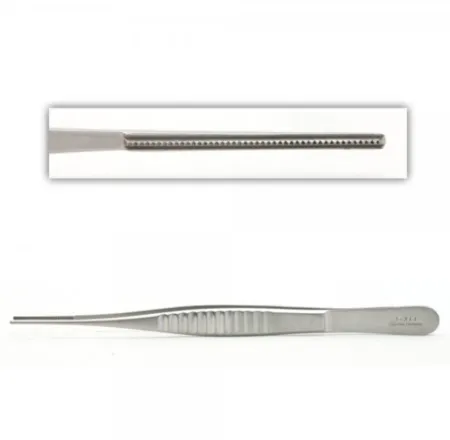
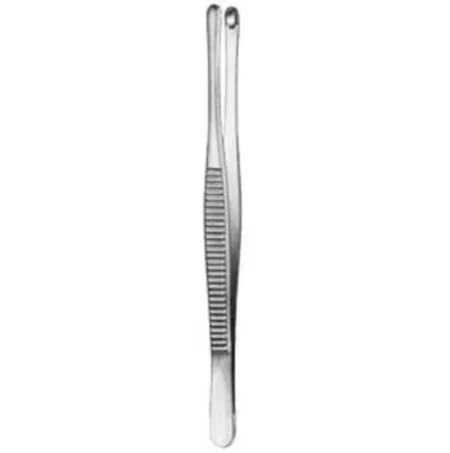
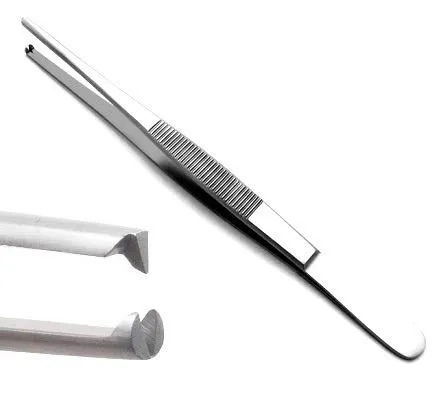
Ringed graspers lock with a ratchet. Learn these three from roughest to gentlest:
- Kocher: crosswise serrations and large 1 x 2 teeth at the tip, for tough, slippery tissue such as fascia and muscle.
- Allis: many short, fine, interlocking teeth at the tip. A firm grip on slippery, dense tissue, often tissue that is being removed, with less damage than a Kocher but not as gentle as a Babcock.
- Babcock: smooth, rounded, open jaws that cradle the appendix, fallopian tubes, ureters and bowel without crushing them.
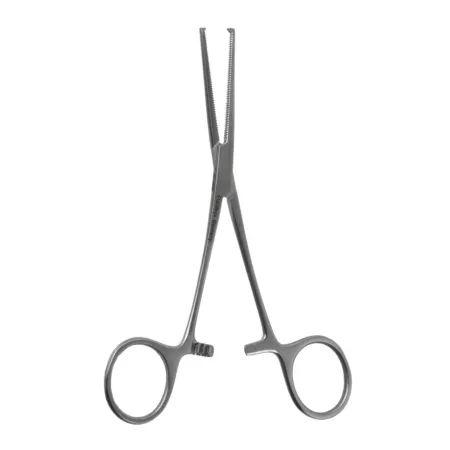
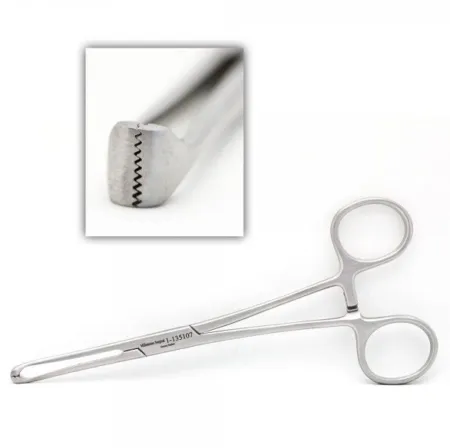
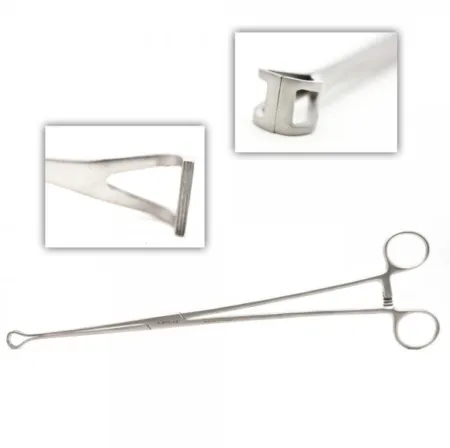
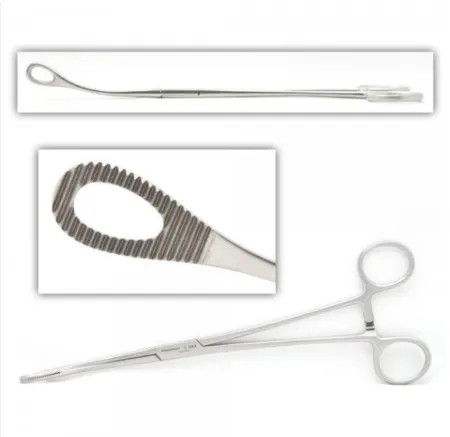
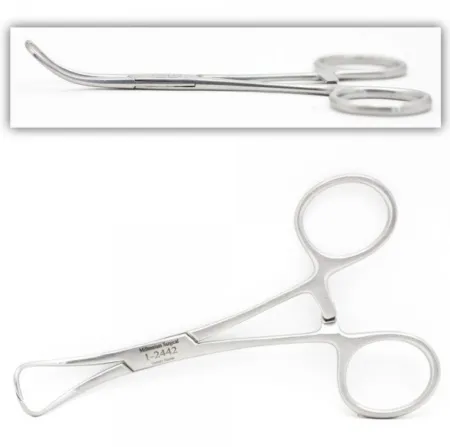
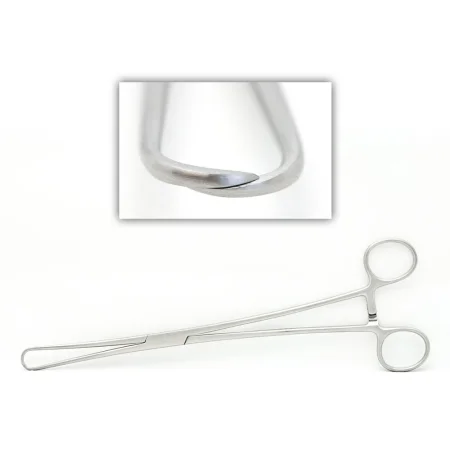
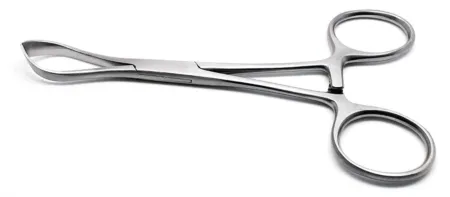
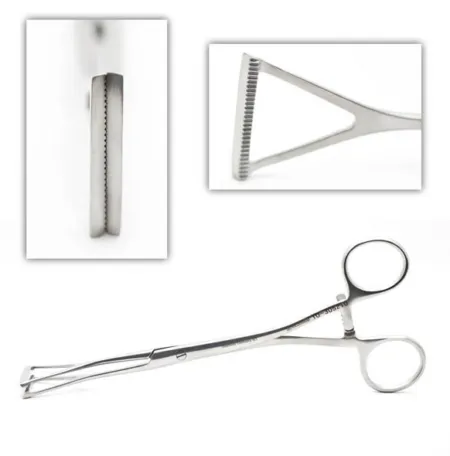
Foerster sponge forceps hold a folded radiopaque sponge to make a sponge stick, for blotting blood, pushing tissue aside or blunt dissection deep in a wound. A tenaculum has very sharp teeth that pierce tissue in a pincer hold, as on the cervix. Towel clamps hold towels, drapes, cords and tubing in place. A perforating towel clamp such as the Backhaus pierces whatever it holds, and its holes let germs reach the sterile field, so only non-perforating (atraumatic) towel clamps are used on the towels, drapes, cords and tubing. If a perforating clamp is used, it is taken off and passed off the field, and the drape is replaced.
Perforating towel clamps were long used to hold towels in place during draping, on the claim that their tips plugged the holes they made, which AST calls incorrect. Where one was used, an older way covers the hole with a sterile towel or drape instead of replacing the drape.
Clamping and occluding
Hemostasis means stopping bleeding, and a hemostat is a clamp made for it: deep crosswise serrations compress a bleeding vessel until it is tied, clipped or sealed. Occlusion means closing off a vessel or other tube. Some clamps close all the way at the first ratchet step; partial occlusion clamps close a little more with each step.
- Mosquito: a small hemostat, from about 3 1/2 inches (Hartman) to 5 inches (Halsted) long, with fine tips and serrations along the whole jaw, for small bleeders in superficial or delicate work and for tagging fine suture.
- Crile (in the library as the Curved Hemostat) and Kelly: the everyday hemostats, both about 5 1/2 inches. The Crile has crosswise serrations along the whole jaw. The Kelly has them only along about half of the jaw, toward the tip. The curved Crile is the most widely used clamp of all.
- Rochester-Pean: larger, with heavier, broader jaws, for big vessels and heavier tissue in deeper wounds.
- Right angle (Mixter): jaws bent sharply, to slip behind a vessel or duct and pull a tie or vessel loop around it. The bend varies by maker and pattern, from about 45 degrees to a full right angle (90 degrees). Right angle, Mixter, Gemini and Lahey are often used as one name, though they actually differ in their inner jaws.
- Tonsil (Schnidt): a fine clamp with longer shanks than a Crile or Kelly, for small vessels deep in a wound and for carrying a tie on a passer.
- Vascular clamps, such as DeBakey and Satinsky clamps, are light and delicate, with fine lengthwise ridges that slow or stop blood flow without crushing the vessel. Bulldogs are small, spring-loaded vessel clamps.
- Intestinal clamps, such as the Doyen, have lengthwise serrations or smooth jaws, sometimes covered with rubber shods, so bowel can be closed off without injury and joined again.
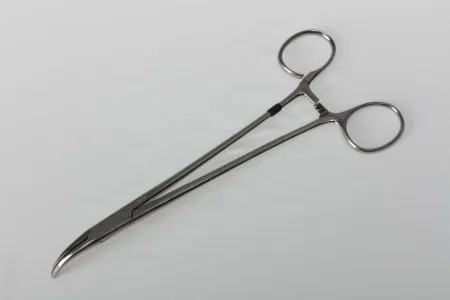 Mosquito Clamp - CurvedEn 170 setups
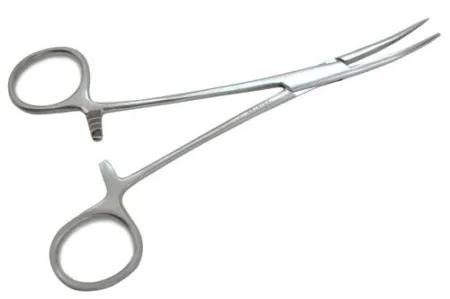 Curved HemostatsEn 313 setups
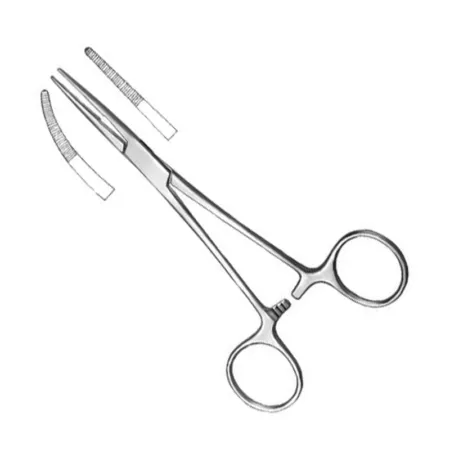 Kelly ForcepsEn 72 setups
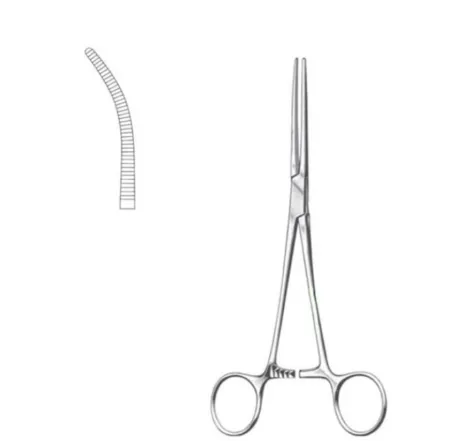 Rochester Pean ForcepsEn 90 setups
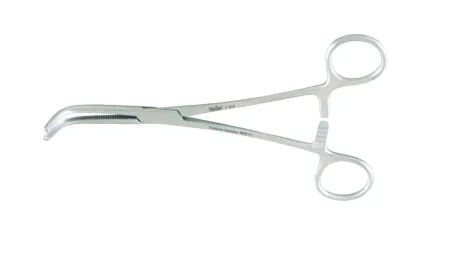 Right Angle ClampEn 100 setups
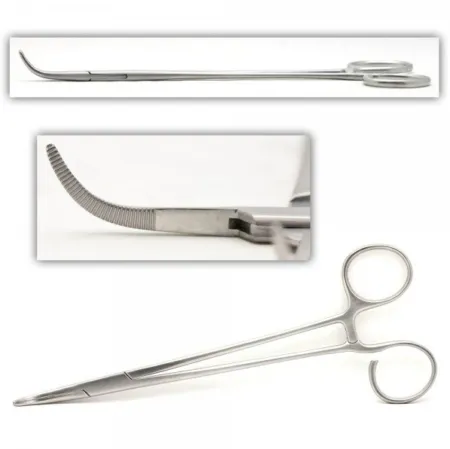 Tonsil ClampEn 116 setups
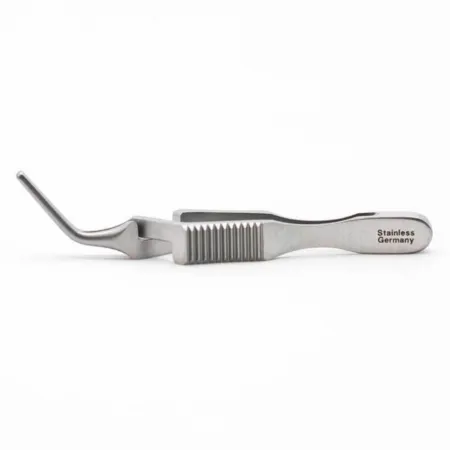 Debakey Bulldog ClampEn 46 setups
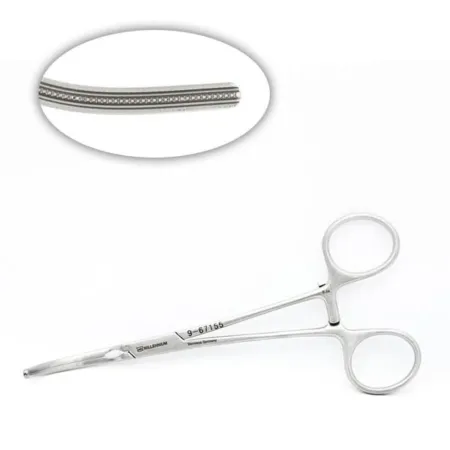 Debakey Vascular ClampEn 5 setups
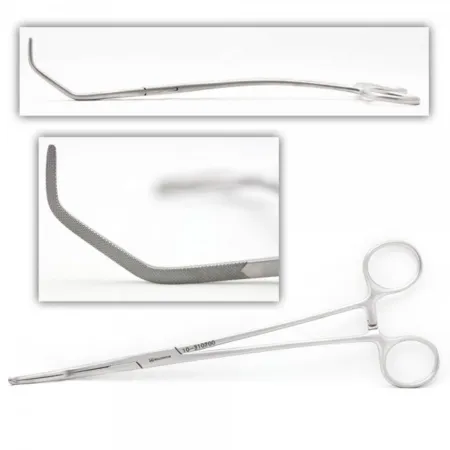 Satinsky Vena Cava ClampEn 8 setups
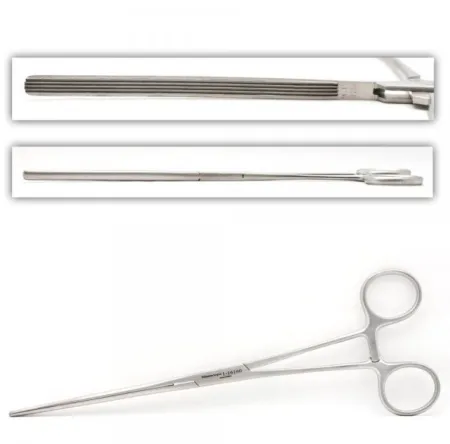 Doyen Intestinal ForcepsEn 2 setups
Tissue that will be sewn back together, such as bowel or a vessel, gets a noncrushing clamp. Never use a hemostat as a towel clamp or to clamp suction tubing; misuse can throw it out of alignment, crack it or break it.
6Retracting, suturing and suctioning
Retracting
A retractor holds tissue aside so the team can see and work. Handheld retractors are held in place by a team member, often in pairs, one on each side of the wound. Many are double-ended, with a slightly different blade on each end.
- Army-Navy: double-ended, with one end longer than the other, for small, shallow incisions through skin and the fat beneath it.
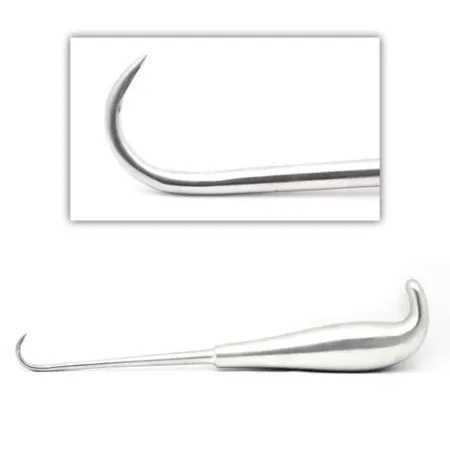
- Senn: small and double-ended, with three sharp or dull claws on one end and a small, narrow blade on the other. Pass it claws down. Blunt rakes are used near nerves and large blood vessels, sharp rakes mostly on connective tissue.
- Richardson: a larger retractor for the edges of an abdominal wound and deeper layers.
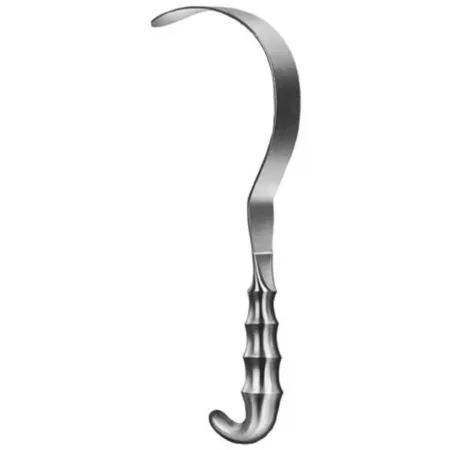
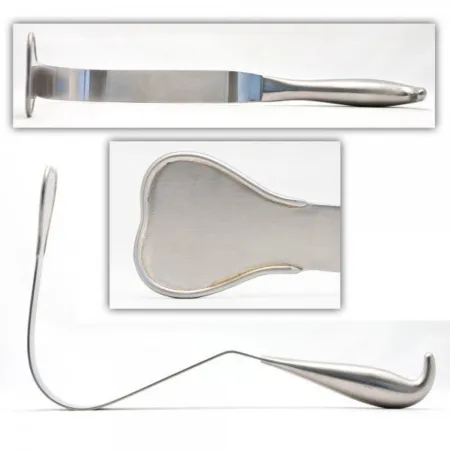
- Deaver: a flat, wide blade curved like a question mark, for holding organs back deep in the abdomen.
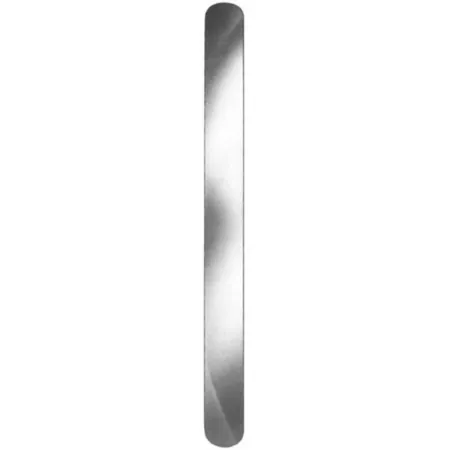
- Ribbon (malleable): a smooth, flat metal strip the surgeon bends to shape, for holding back organs and bowel. During closure it can be slid under the layer being sewn so the organs below are not caught in the stitches.
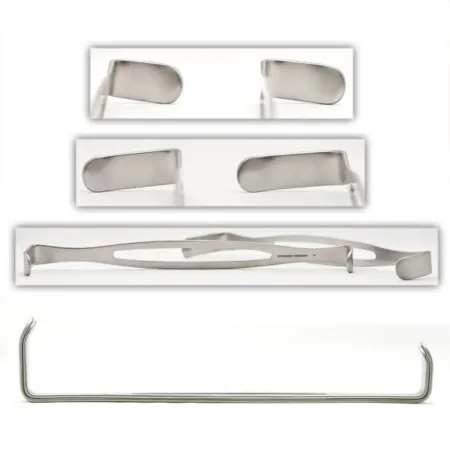
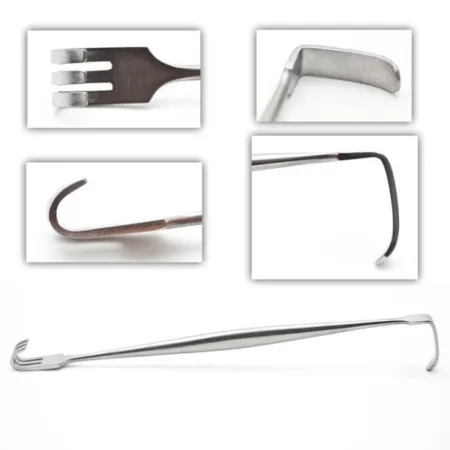
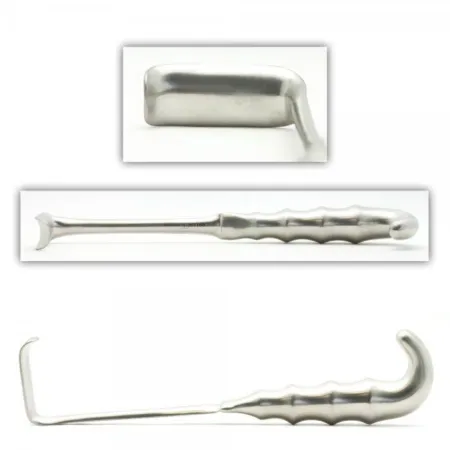
A self-retaining retractor holds itself open with a ratchet, crank, spring or other lock. Some have two opposing blades held apart by a ratchet; others are a frame that takes interchangeable blades.
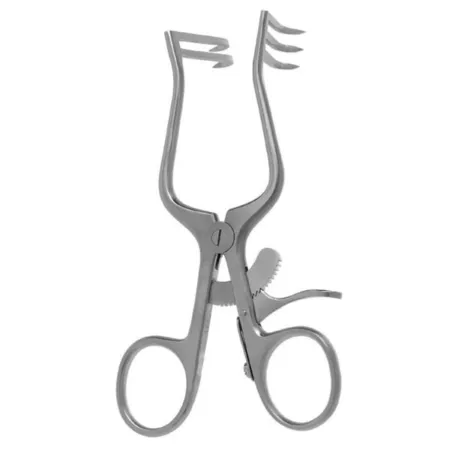
- Weitlaner: finger rings and a ratchet, with curved prongs (three on one side, four on the other) that may be sharp or dull, for shallow wounds such as a hernia repair.
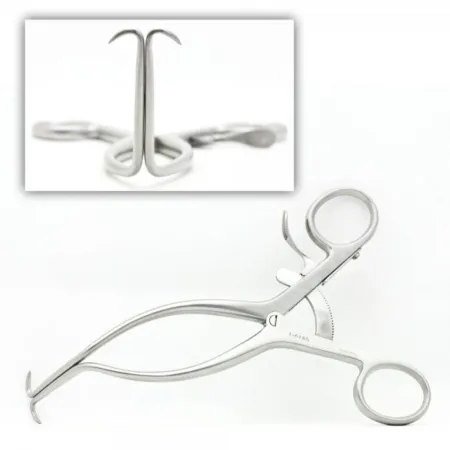
- Gelpi: finger rings and a ratchet, with one sharp, outward-turned point on each arm; a small retractor for wounds from shallow to deep. Treat the points as sharps.
- Balfour: an abdominal frame with a side blade on each arm and a wide center blade; a bladder blade can hold the bladder out of the way.
- Table-mounted retractors, such as the Bookwalter, attach to the operating table and hold many blades of different sizes on one frame.
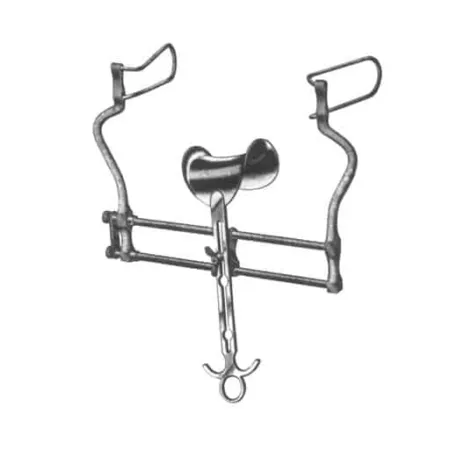
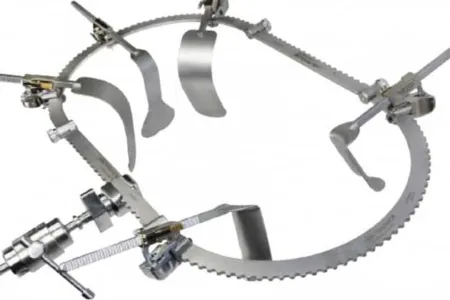
Large self-retaining retractors are put together from parts. A table-mounted system such as the Bookwalter is built from a table post, a bar, a ring, and ratchets that lock each blade onto the ring. A Balfour's side and center blades fit its frame and are changed to suit the depth of the wound. Screws, wing nuts or clamps hold the blades in place, and every piece that comes apart, such as each Balfour blade and wing nut, is counted.
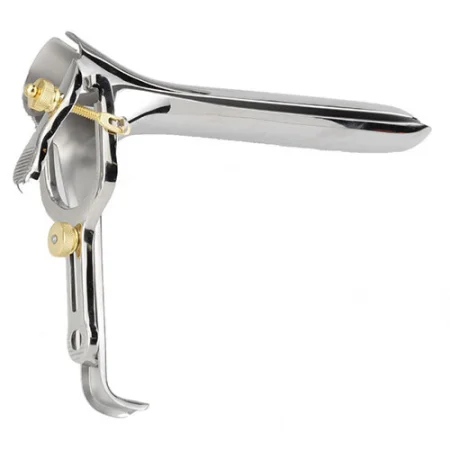
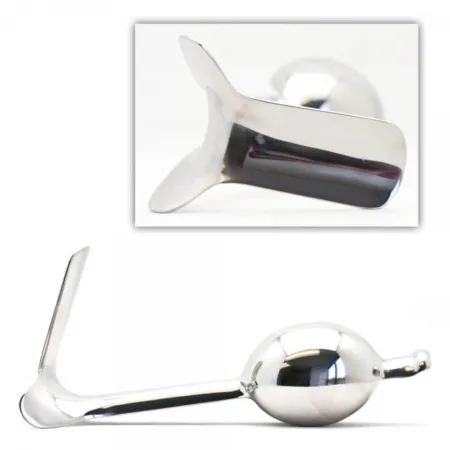
A speculum is a retractor that holds open a natural body opening, such as the vagina, the nose or the ear canal. The Graves vaginal speculum has two blades opened and held by a screw; the Auvard is weighted, so it hangs in place on the back wall of the vagina. Sources sort specula differently: some call them retractors, and some call them viewing instruments, because a speculum holds an opening apart so the team can see in.
Suturing
A needle holder grips a curved suture needle so the surgeon can drive it through tissue. Mayo-Hegar and Crile-Wood are the two most common designs, and the Mayo-Hegar takes heavier needles. Webster needle holders are small and fine, for plastic surgery closures. Heaney needle holders have curved jaws for suturing around curved structures in tight spaces, such as in a vaginal hysterectomy. Castroviejo needle holders have spring handles and hold fine needles in eye surgery.
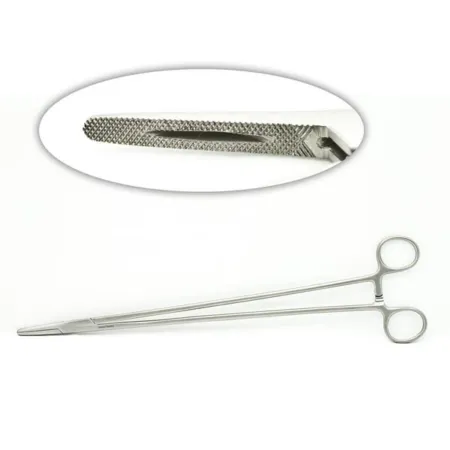
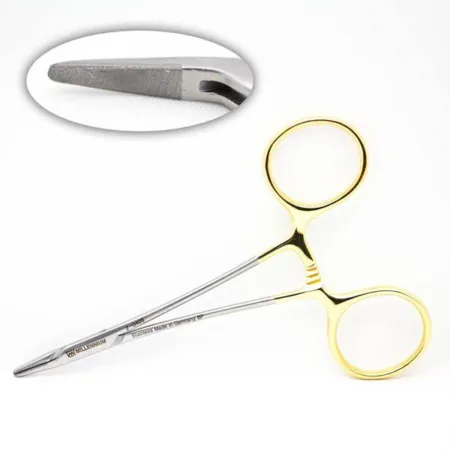
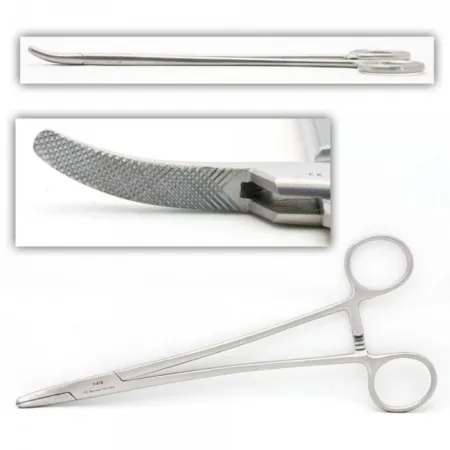
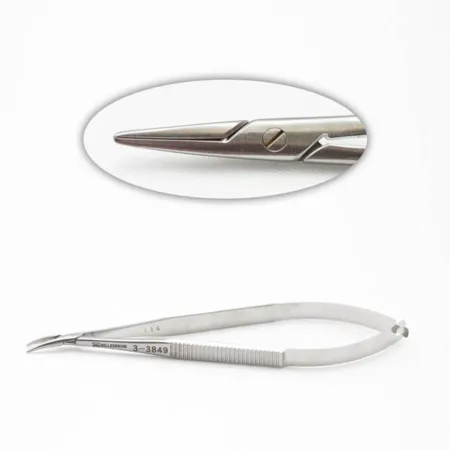
Match the needle holder to the needle. One that is too heavy robs the surgeon of the feel of the needle. One that is too light lets a heavy needle twist and can damage the needle holder's tips.
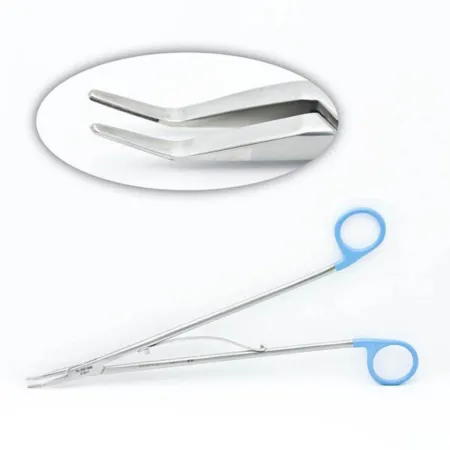
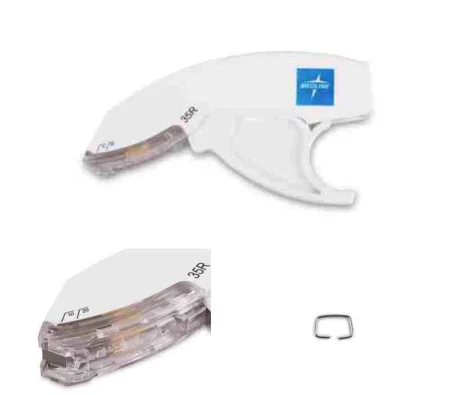
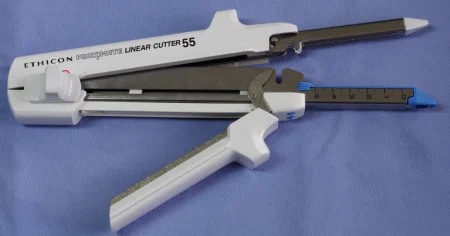
Staplers fire rows of staples to close or join tissue. A skin stapler places a single row across the incision. Internal staplers are used in resection (removing part of an organ or tissue) and anastomosis (joining two hollow structures, such as two ends of bowel), and cutting staplers divide the tissue between rows of staples. A clip applier squeezes a small V-shaped clip across a vessel or duct, and each clip size needs its matching applier. Staples and clips as supplies are in chapter 25.
Suctioning and aspirating
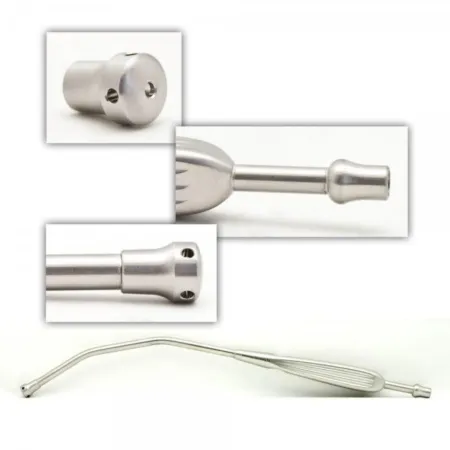
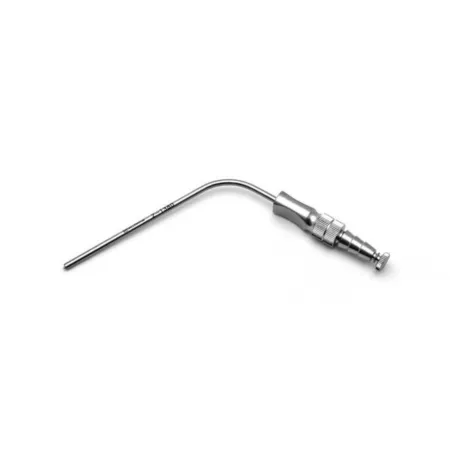
- Yankauer (tonsil suction): a tip with a slightly bent shaft, a bulb-shaped end and no guard, so it pulls hard. Made for the throat in tonsillectomy, it is used in almost every kind of wound, including the abdomen.
- Frazier: narrow and angled, with a thumb hole. Covering the hole strengthens the pull, so the surgeon can protect delicate tissue in the brain, spine, nose and ear. Its wire stylet clears clogs during the case and is never used to clean it; only a proper brush cleans a suction tip.
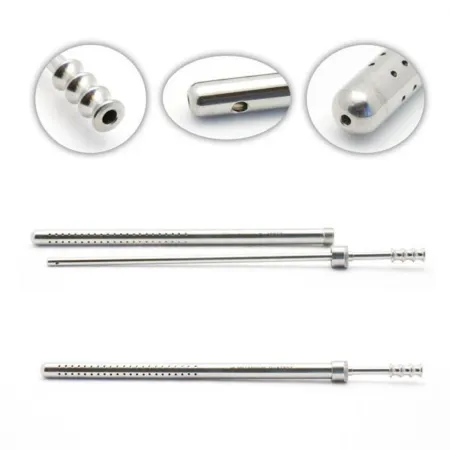
- Poole: an abdominal tip inside a removable sleeve full of small holes, which spreads the suction so bowel is not pulled against it.
7Dilating, probing, viewing and accessory
Dilating
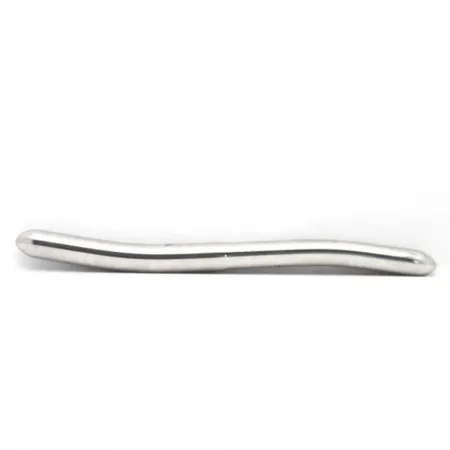
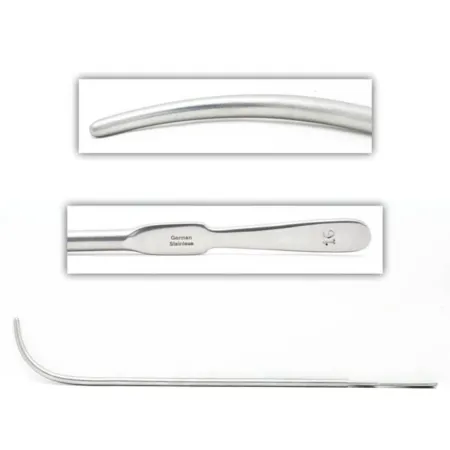
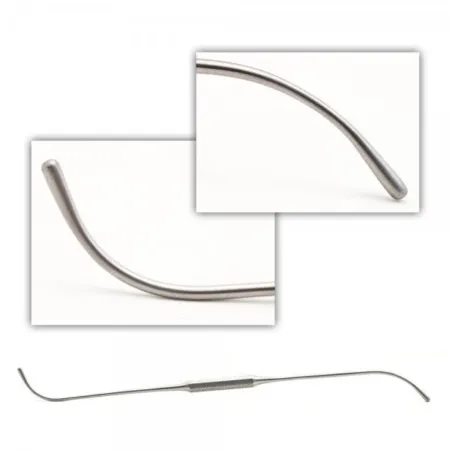
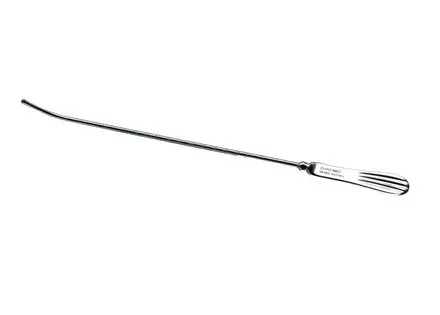
A dilator is a smooth, slender instrument with rounded ends that stretches a narrow opening or tube, one size at a time, from a graded set. Hegar dilators open the cervix for a D&C, Van Buren sounds dilate the male urethra, and Bakes dilators open the common bile duct.
Probing
A probe is a slender, blunt rod for exploring a tract, such as a fistula, or feeling the texture of tissue. A uterine sound is a marked rod that measures the depth of the uterus before a D&C, so the curette does not push through its wall. Because it measures, some books file it with the accessory instruments instead.
Viewing
Viewing instruments let the team see inside the body: endoscopes such as the laparoscope, cystoscope and hysteroscope, with their light cords and cameras (see Endoscopic instruments below), and specula such as the nasal speculum.
Accessory
Accessory instruments fit no other class but have clear jobs: mallets, screwdrivers, rulers, calipers, depth gauges that measure a drilled hole so the right screw is chosen, and sizers, reusable copies of an implant used to find the right size. Some books also put towel clamps and sponge forceps here.
8Micro, powered, endoscopic and robotic instruments
Microinstruments
Microinstruments are used under an operating microscope or magnifying loupes, in eye, ear, nerve, small-vessel and other microsurgery. They are made of stainless steel or titanium with a dull or black finish against glare. Many have spring handles with a light lock or none at all. They are small and delicate, and easily damaged.
- Keep them in their own padded rack, and never drop them, tangle them or set anything heavy on them.
- Handle them one at a time.
- Place each one in the surgeon's hand in the position it will be used, because the surgeon does not look away from the microscope. Take each one back as soon as the surgeon is done with it.
Powered instruments
Powered instruments run on electricity, on compressed air or nitrogen (pneumatic), or on batteries.
- Drills make holes in bone for screws and wires.
- Burs are round, cone-shaped or tapered tips that cut narrow holes or smooth small areas of bone, often at high speed, as in skull and ear surgery. A diamond bur cuts slowly and grinds rather than tears, so it is used near vital structures.
- Saws cut bone. A sagittal saw's blade sits at a right angle to the handpiece and swings side to side. A reciprocating saw's blade moves in and out, along the line of the handpiece; the sternal saw is one. A hand-pulled Gigli saw, a flexible twisted wire with a handle at each end, cuts bone with a back-and-forth pull, as in an amputation.
- Reamers enlarge a bone canal, and a cup-shaped reamer shapes the hip socket (acetabulum) for an implant.
- Dermatomes shave a thin, even layer of skin for a split-thickness graft. Plates on the dermatome set how wide the graft is.
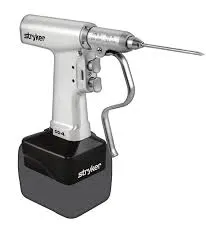
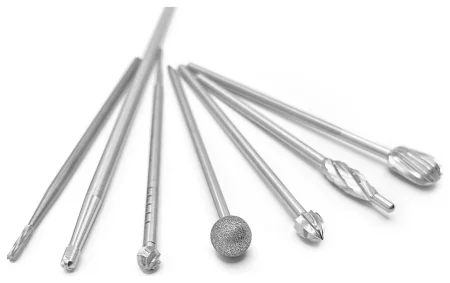
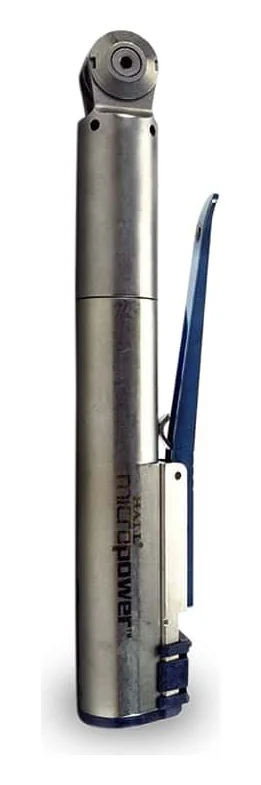
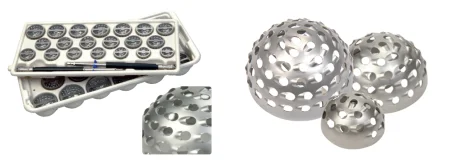
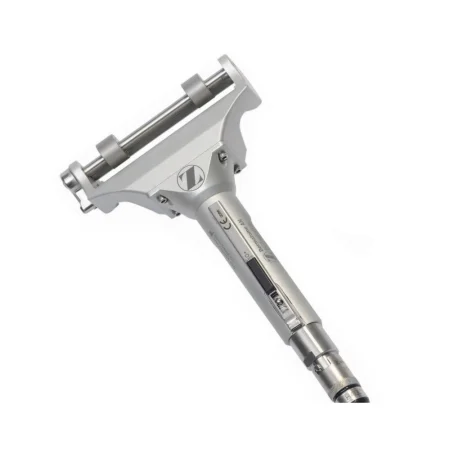
Test power equipment before the patient is brought into the room. Pass a power instrument with its sharp end pointing away from you and its safety lock on, and set it down locked. Keep irrigation ready, because the bone is irrigated as it is cut to cool it. Never put a handpiece, attachment, hose or battery in water unless the maker's instructions allow it.
Endoscopic instruments
An endoscope is a lighted viewing tube that enters the body through a small incision or a natural opening. Its parts:
- Telescope: the rigid shaft, holding a chain of lenses that carries both the image and the light. In some newer scopes the video chip sits at the tip.
- Lens: the objective lens at the far end, which sets the viewing angle. Rigid scopes look straight ahead (0 degrees) or at an angle (30, 45 or 70 degrees).
- Eyepiece: the near end, where the camera attaches or the surgeon can look in directly.
- Light post: the connector near the eyepiece where the light cord attaches.
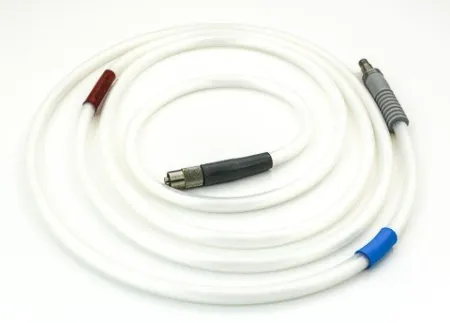
- Light cord: a cable of thousands of fine glass or plastic fibers that carries light from the light source.
- Camera head: attaches to the eyepiece and sends the picture to the camera control unit and on to the monitor.
Rigid scopes, such as laparoscopes and cystoscopes, are straight tubes. Flexible scopes bend to follow the airway or the colon. A diagnostic scope is for looking only and has no working channel; an operative scope has channels for irrigation, suction and instruments.
Hold a telescope by its heavier head end, never by the tip or shaft, and never put anything heavy on it or drop it. Coil light cords loosely and never kink, twist or drop them, because the fibers break. Light from the end of a cord that is off the scope is hot enough to set drapes and sponges on fire, so put the light source on standby whenever the cord is disconnected, and never leave a lit cord on the field.
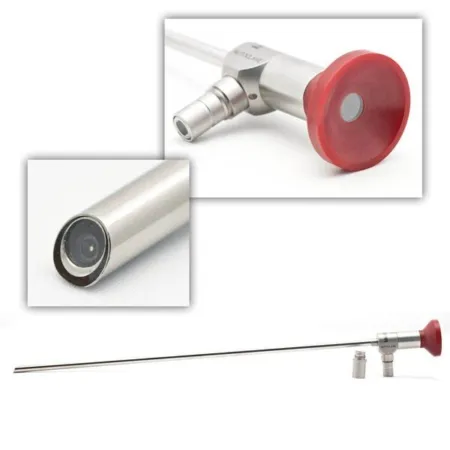
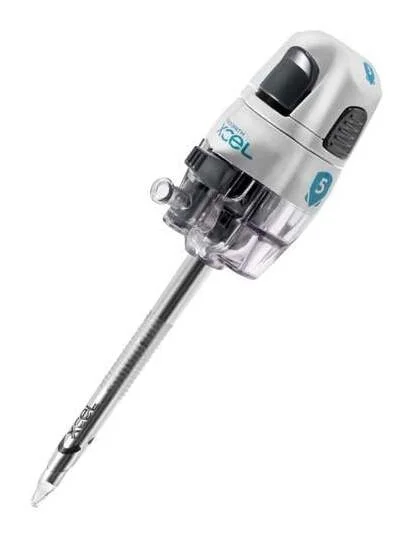
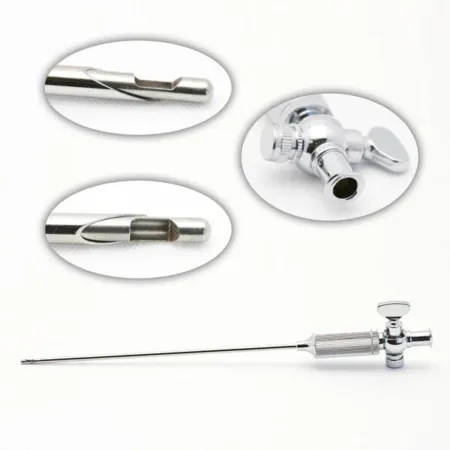
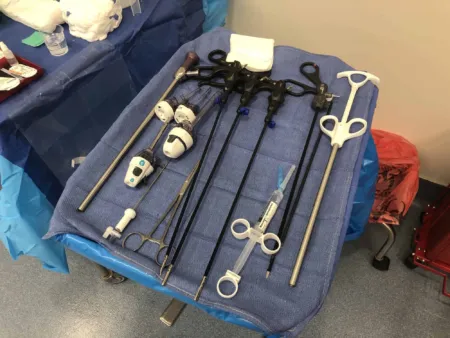
A trocar is a sharp or blunt rod inside a hollow tube called a cannula. The trocar makes the opening and comes out, and the cannula stays as a port for the scope and instruments. A Veress needle has a spring-loaded blunt stylet that springs forward once the needle is inside the abdomen, so the abdomen can be filled with carbon dioxide (insufflation). Laparoscopic instruments that carry electrosurgery current are insulated. A small break in the insulation can leak current and burn the patient, so check the coating closely; a digital insulation tester may also be used. Laparoscopic instruments come reusable, disposable or reposable (only the critical parts, such as the tips, are thrown away), and each is cared for by its maker's instructions for use (IFU).
Robotic instruments
In robotic surgery the surgeon sits at a console and controls wristed instruments mounted on robotic arms. Like laparoscopy, robotic surgery works through separate ports for each instrument (multi-port) or through a single port that carries several instruments. Each robotic instrument has a set number of uses that the system tracks, and the arm will not work with one that has used them all, so keep spares ready. The scrub inserts and exchanges instruments, and keeps open and laparoscopic instrument sets ready in case the case must be converted.
9Matching the instrument to the tissue
The instrument is chosen for the type of tissue, the depth of the wound, what the procedure needs and what the surgeon prefers. Tissues differ in texture, strength, stretch and fat content. Tough tissue needs teeth that bite; delicate tissue needs smooth, atraumatic jaws.
| Tissue | What it is like | Instruments that suit it |
|---|---|---|
| Skin | Elastic, fibrous and strong | Incised with a scalpel; fine, short scissors only trim it or dissect finely. Held only with toothed, hooked or serrated instruments, such as toothed Adson forceps. Small rakes or skin hooks retract it. |
| Fat (adipose tissue) | Loose, oily, few blood vessels; breaks apart when clamped | Rakes or a Weitlaner for shallow layers; Allis clamps to hold it; toothed forceps to sew it. Wipe instruments made slippery by fat with a damp sponge. |
| Muscle | Fibrous, strong and full of blood vessels | Separated along its fibers when possible. When it must be cut, it is held with Allis clamps and cut with heavy Mayo scissors or the ESU. |
| Cartilage, tendon and fascia | Very strong; slippery; few or no blood vessels | Toothed clamps such as the Kocher; curved Mayo scissors for fascia and large tendons. |
| Ligament | Strong, fibrous and elastic | Toothed forceps; strong clamps such as the Heaney for uterine ligaments, or a Kocher in joint surgery. |
| Peritoneum, the lining of the abdomen | Smooth, elastic and strong | Metzenbaum scissors to dissect; toothed forceps, broad-tipped hemostats or Allis clamps to hold it. |
| Organs covered by serosa, the thin outer layer of most organs (bowel and other viscera) | The serosa punctures easily, and the tissue under it can bleed heavily | Smooth forceps, wide retractors that do not cut, guarded suction tips, and Babcock clamps to grasp. |
| Lung, spleen, liver and thyroid | Very delicate and full of blood vessels; tear easily and barely stretch | Handled by hand or with round-tipped atraumatic instruments: smooth forceps and only partially occluding clamps, such as the Duval for lung. Wide retractors (Deaver, Richardson, Harrington) with sponges protecting the tissue. |
| Bone | Strong and springy, covered with tough periosteum | Moved by leverage or traction with bone hooks and bone clamps. Cut with power saws, drills and rasps, or with an osteotome, chisel or gouge and a mallet. |
10Instrument sets and specialty trays
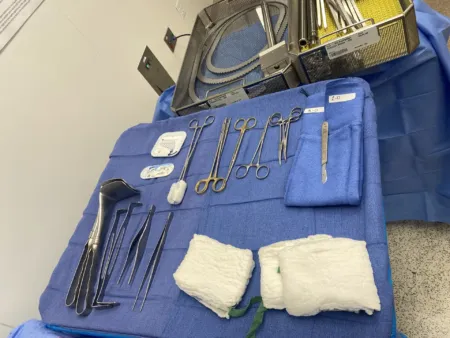
Instruments travel in sets (trays): standard groups packed for one kind of procedure, each with instruments from every class. Names vary between facilities, but most build on a minor (plastic) set for small procedures, a major (laparotomy) set for opening and closing the abdomen, and a D&C set, which is also often the base for vaginal surgery. Specialty sets, such as gallbladder, bowel and vascular sets, are added as needed, and rarely used instruments are packaged on their own.
Every set has a count sheet listing each item, signed by the person in sterile processing who assembled it. The scrub and circulator count the instruments together, out loud and by sight, and never assume the sterile processing count is right. Every piece that comes apart is counted. If an instrument breaks, every piece is found and accounted for, bagged by the circulator and kept in the room until the counts at the end are correct.
Inside the set, hinged instruments are held open, often on a stringer, a metal holder that keeps them open in the tray, so the sterilant reaches every surface. Curved instruments face the same way, heavy items sit on the bottom, delicate items go in protective cases and sharp points are protected. Each level of a multilevel set has its own internal chemical indicator. A container and its instruments together should weigh no more than 25 pounds.
Loaner (vendor) trays are lent by a company for a case. They were once mostly for orthopedic and neurosurgery and are now used in almost every specialty. They must arrive early enough to be logged, inspected, cleaned and sterilized by the maker's instructions, and they are cleaned and decontaminated again after the case before they go back.
Instruments by specialty
Each surgical specialty adds its own instruments to the basic sets. A few examples follow; each specialty's instruments are taught in full in chapters 32 to 42.
- General: the laparotomy set, Balfour or Bookwalter retractors, Babcock clamps and intestinal clamps for bowel, and staplers.
- Obstetrics and gynecology: Heaney clamps and needle holders, cervical dilators, tenaculums, uterine sounds, curettes and vaginal specula.
- Genitourinary: urethral sounds and dilators, kidney pedicle clamps and cystoscopes.
- Cardiothoracic: the sternal saw, rib spreaders, vascular and partial occlusion clamps, Potts-Smith scissors, and heavy wire cutters for sternal wires.
- Peripheral vascular: vascular and bulldog clamps, Potts-Smith scissors and tunneling devices for grafts.
- Neurosurgery: Kerrison rongeurs, Penfield dissectors, bayonet forceps, Frazier suctions and high-speed drills.
- Orthopedics: drills, saws and reamers, osteotomes, chisels and mallets, bone hooks, and loaner implant sets.
- Ophthalmology: microinstruments, lid specula, Castroviejo needle holders and diamond knives.
- Ear, nose and throat: nasal and ear specula, nasal elevators, mouth gags for tonsillectomy and sinus endoscopes with angled lenses.
- Oral and maxillofacial: elevators, mouth props, and plates and screws.
- Plastic and reconstructive: skin hooks, fine plastic surgery scissors, Webster needle holders and dermatomes.
To see the basic set at work from first cut to closure, study an open abdominal case:
11Checking an instrument before you trust it
Instruments are checked when the set is built, when you open it, as you set up the Mayo stand and after each use. Each time, ask three questions. Is it clean? Is it whole? Does it work?
When you open the set
A rigid container is checked before it is opened: its locks and tamper-evident seals intact, the chemical indicator on the outside changed color, its filters or valves secure and any gasket whole. Then the lid comes straight up and away from the container. Its filter or valve is checked: a filter that is out of place, damp, or has a hole, tear or puncture means the contents are not sterile. A filter may carry an indicator of its own.
The scrub lifts the basket straight up and out without touching the outside of the container. Before it goes on the back table, the scrub reads the internal indicator and checks the inside of the container for moisture and debris, and the circulator checks the filters in the bottom of the container. A wrong indicator, a damaged filter or moisture means the set is not sterile: hand it off and change gloves. Then, inside:
- Confirm the internal indicator on every level of the set changed correctly.
- Look for soil and foreign matter: blood, tissue, bone chips, burned tissue, hair or other debris. Any of it makes the set unusable.
- Make sure every ringed instrument is open. One locked shut on its ratchet kept the sterilant from the surfaces it was clamping.
- Remove tip guards and covers from the field. They do not show on an x-ray and could be left in a wound.
One dirty instrument, or one instrument locked shut on its ratchet, makes the whole set unusable. Hand the set off and get a new one.
Open a container the way the OR does, then find what is wrong inside before it reaches the field.
Este laboratorio funciona en el navegador con JavaScript activado.
Este navegador no pudo abrir la sala en 3D. Todo lo que practica el laboratorio está en el capítulo.
Testing each type
- Clamps and graspers: close the jaws and look along them. The tips meet evenly, the jaws line up and the teeth and serrations mesh. Check the box lock for cracks, pitting and tissue left in it. Open it and gently push one handle up and the other down: a little play is normal, but a loose box lock needs repair. The ratchets close with moderate pressure and hold: close it on the first ratchet and tap it lightly against the table edge, and it should not spring open.
- Scissors: the blades are free of pits, chips and cracks, the tips meet and are not bent or burred, and they open and close smoothly without grinding, snug but not tight at the screw. In sterile processing they must cut test material cleanly at the very tips.
- Needle holders: no cracks in the box lock or jaws (even a hairline crack takes one out of service). Carbide inserts feel evenly rough along their length and meet with no light showing between them. The needle holder stays closed on the first ratchet and feels smooth, not tight or sticky.
- Rongeurs: no loose or missing screws or pins, which could fall into the wound, and no rattle in the handle. The spring snaps the handle back, the tips open and close without sticking, and the cutting edge is sharp, free of pits and cracks, and clean of tissue. A sharp rongeur cuts cleanly through a thin card.
- Thumb forceps: the tips meet evenly and the teeth fit into the grooves on the other side.
- Self-retaining retractors: the ratchet locks securely and releases.
- Insulated and endoscopic instruments: no cracks or nicks in the insulation; shafts straight, with secure pins and fittings; and scopes with a clean, unscratched lens and a clear view through the eyepiece.
- Multi-part instruments: every part present, assembled and tested.
Stains, rust and damage
Rub a discolored spot with a pencil eraser. If it comes off and the metal underneath is smooth, it was a stain. If the metal underneath has tiny pits, that is corrosion, the start of rust. Damaged instruments are taken out of service: pits and tiny cracks hold debris and germs that cleaning and sterilization may not reach, cracks get deeper with use until the instrument breaks, and loose parts can fall into a patient.
Hand a damaged instrument to the circulator, who tags it to be repaired or thrown away. A counted instrument stays in the room until the case ends and is part of the final count. Never use a damaged instrument on a patient.
12Passing instruments and caring for them
Passing
The goal is the right instrument in the surgeon's hand, in position for immediate use, without the surgeon looking away from the wound. Passing sutures, sponges and other supplies during the case is taught in chapter 29.
- Hold it by its middle (near the box lock on a ringed instrument), not by the tips, which can tear your glove or injure you.
- Turn it so it lands the way it will be used. A hemostat goes rings into the palm with the tips up, and a curved instrument goes with its curve pointing the way it will be used. Scissors go handles into the palm with the points toward the back of the surgeon's hand. Tissue forceps go tips down. Retractors go blade down, and self-retaining ones go closed.
- Ringed instruments are closed on the first ratchet, so the surgeon can open them quickly.
- Place it firmly in the palm, and keep hold until you feel the surgeon grasp it, so it is not dropped.
- Pass a needle holder with the needle point up, the suture held back or draped over the back of your hand so it does not catch in the surgeon's palm, and trade one for one so every needle comes back.
- Pass sharps hands-free through the neutral zone, a basin, mat or magnetic pad you and the surgeon agree on. Name the sharp as you place it there, and take your hand completely away.
- Put power and stapling instruments in safety mode first.
- Know whether the surgeon is right- or left-handed, because that changes how you turn the instrument.
- When the field is not flat, such as in a beach chair or side-lying position, a magnetic mat keeps instruments from sliding off.
Hand signals
To keep talking at the field to a minimum, some surgeons ask for an instrument with a hand signal instead of words, and signals also help when the patient is awake. Learn the basic signals for a knife, scissors, a suture, forceps and a clamp. Your lab check-off asks you to pick the right instrument from a signal.
Clamp, clamp, cut, tie
Much of open surgery runs on one rhythm. The surgeon places two clamps across a vessel or bundle of tissue, cuts between them, then ties or seals the cut ends. When a tie is placed around tissue held in a clamp, the clamp is released once the tie is secured. Know the rhythm and you stay a step ahead: two hemostats, then tissue scissors, then the ties, then suture scissors to trim them.
Read the surgeon's signals and pass the next instrument before they ask.
Este laboratorio funciona en el navegador con JavaScript activado.
Este navegador no pudo abrir la sala en 3D. Todo lo que practica el laboratorio está en el capítulo.
Care during the case
- Wipe blood and tissue off each returned instrument with a sponge moistened with sterile water, so blood never dries in the jaws or box lock.
- Flush the lumen, the channel inside, of suction tips and other hollow instruments with sterile water so it does not clog.
- Return each instrument to its own place on the Mayo stand or back table as it comes back, and keep the setup organized: like instruments grouped, curves facing one way.
- Keep every instrument on the field under control. One left loose can fall into the wound, tear a drape, hurt someone or drop to the floor.
- Use each instrument only for its own job; misuse dulls, bends and breaks instruments.
Saline is for the patient, never for instruments. Its chloride pits and rusts stainless steel. Wipe and flush with sterile water.
Point-of-use care and transport
Point-of-use care is the first step of cleaning. It begins during the case and continues the moment the case ends, because dried blood and tissue are hard to remove and let germs build a protective film, called biofilm. The scrub who worked the case breaks down the field, because that person knows where every sharp is. Cleaning, decontamination and sterilizing are taught in chapter 27, and breaking down the field in chapter 30.
- Protect yourself: keep your mask, eye protection and head cover on, and put on nonsterile gloves and a protective gown.
- Sharps: take off every disposable sharp first. Blades come off with a single-handed blade remover, and blades and needles go into the small sharps container from the back table, which then goes into the large sharps container in the room. Sharps containers are puncture-resistant and leak-proof, close to where sharps are used and replaced before they are overfilled.
- Isolate sharp instruments: put reusable sharp instruments, such as Gelpi retractors, skin hooks, reamers and trocars, in their own puncture-resistant container, so nobody in decontamination reaches in blind.
- Wipe and flush: wipe off visible soil with sterile water and flush every lumen.
- Open everything: open the ratchets and box locks of every ringed instrument, so cleaning reaches every surface. Current guidance says not to thread them back onto a stringer.
- Take apart: take multi-part instruments apart as their maker directs, and keep the parts together.
- Sort: separate the instruments into a basin or other container, heavy ones on the bottom and lighter ones on top. Fragile items, such as rigid scopes, cameras, light cords and microinstruments, go apart in their own containers, and cords are coiled loosely. Power equipment stays out of the soaking basin.
- Keep them moist: AST has the scrub put them in a basin of water with an enzyme detergent, or spray them with the detergent first. Other ways are an enzyme foam, gel or spray, or a towel wet with water laid over them. Do not leave them in enzyme solution for long, which can damage the finish.
- Tag for repair: mark damaged instruments with your facility's repair tag. Repair services sharpen, realign and fix instruments; one that cannot be repaired, such as a needle holder whose plain steel jaws have worn out, is replaced.
- Everything goes back: every instrument opened for the case is reprocessed, used or not, because it may have been contaminated without anyone seeing. Loaner trays go back complete, to be cleaned before they are returned.
AST's 2018 guideline for breaking down the field puts the opened ratcheted instruments on a stringer at the end of the case.
Dirty instruments go to decontamination as soon as possible. Before they leave the room, suction off or discard the water or solution they soaked in, so it cannot spill. A closed case cart is the method of choice. Instruments travel in covered, leak-proof, puncture-resistant containers labeled with the biohazard symbol. If an open cart is used, it has a solid bottom shelf and everything on it is completely covered.
AST's 2018 guideline for breaking down the field puts each basin of instruments in a bag with a biohazard label, so the soaking solution cannot splash in the case cart.
Lo que te llevas de este capítulo
- Learn instruments by class first (cutting and dissecting, grasping and holding, clamping and occluding, retracting, suturing, suctioning and aspirating, dilating, probing, viewing, and accessory), then by name, then by the small differences between look-alikes, and learn them with the surgeries they serve.
- Most instruments are stainless steel, an alloy whose chromium oxide layer, built up by passivation, resists corrosion. Hard, magnetic 400 series steel makes edges and grips; softer 300 series steel makes retractors and suction tubes. Titanium is light, strong and nonmagnetic.
- Gold rings mean tungsten carbide inserts. Black rings on scissors mark supercut blades, and an all-black (ebonized) finish is for laser surgery.
- A ringed instrument has tips, jaws, a box lock, shanks, a ratchet and finger rings. The jaw pattern shows how it grips: crosswise serrations compress, lengthwise ones hold without crushing.
- The Crile has serrations along the whole jaw and the Kelly along about half. From roughest to gentlest, the ringed graspers run Kocher, Allis, Babcock. Tough tissue gets teeth; delicate organs get smooth, atraumatic instruments.
- Check every instrument: is it clean, is it whole, does it work? One dirty instrument, or one locked shut on its ratchet, makes the whole set unusable, and a damaged instrument goes to the circulator to be tagged.
- Pass every instrument ready to use. Sharps go through the neutral zone, and power and stapling instruments stay in safety mode until the surgeon is ready.
- Wipe and flush with sterile water, never saline. After the case: sharps off first, open and take apart, sort, keep moist, tag damaged instruments, remove any soaking water before the instruments leave the room, and send everything in covered, labeled containers.
Ponte a prueba5 preguntas rápidas
Gratis para todos. Elige una respuesta para cada una y luego revísalas todas juntas.
En el quirófanoDónde vas a usar esto
Todo el banco de preguntas del capítulo en series de 10, con la respuesta explicada después de cada una.
Parte del programa para educadoresLas palabras del capítulo en tarjetas de estudio: las que fallas vuelven antes.
Parte del programa para educadoresLo asigna tu docente. Cada grupo saca sus propias 25 preguntas del banco del capítulo.
Parte del programa para educadores
Sugerir una corrección
¿Algo está mal, confuso o desactualizado en este capítulo? Avísanos y lo corregimos para todos. Tu correo solo se usa para responderte.