Orthopedic surgery
Broken bones, worn-out joints and torn tendons: the fractures and diseases orthopedic surgeons treat, the drills, saws, plates and screws they work with, and every case from the shoulder to the foot.
1What orthopedic surgery covers
Orthopedic surgery is the specialty of the musculoskeletal system. It prevents, finds and treats the injuries and diseases of the bones and joints, and the ligaments, tendons and muscles that hold them together and move them. The name comes from two Greek words, orthos, straight, and paideia, the raising of children, because the specialty began with correcting bone deformities in children. Today most orthopedic surgery restores bone and joint function lost to an injury or a disease, and relieving pain is one of its main goals.
The Core Curriculum sorts the cases by region: the shoulder and clavicle; the arm, elbow and forearm; the wrist and hand; the pelvis and hip; the leg and knee; and the ankle and foot. Each region has the same three approaches: open, through an incision, as when a broken bone is plated; closed, moving the bone back by hand or traction without cutting the skin; and minimally invasive, arthroscopic, through a scope in a joint, or percutaneous, as when pins or a nail are slipped in through small punctures under X-ray.
Any approach other than open counts as minimally invasive surgery (MIS), and cases that share instruments, supplies, positions and steps are taught together as co-related procedures. Orthopedics is one of the surgical specialties in your clinical case count.
Orthopedics borrows its words from carpentry and engineering: you will drill, tap, ream, saw, chisel and hammer, and biomechanics, the study of how movement relates to the body's structures, is the science behind it. Many cases use an orthopedic system: a company's set of instruments and implants, usually patented, made for one technique, whose parts usually do not fit another maker's. The systems are many but the principles are the same, so learn the basics here and apply them to every system you meet. Many sets are loaners; chapter 27 covers how they are received and processed.
Other chapters teach what this one builds on: the bones, joints and muscles and bone healing (chapter 3), trauma care (11), the C-arm and radiation (22), the tables and the tourniquet unit (23), positioning, prep and the tourniquet cuff (31) and robotic systems (21). Spine surgery, carpal tunnel release and the ulnar nerve are in chapter 42, soft tissue surgery of the hand in 38, facial fracture plates in 37 and amputation for vascular disease again in 40.
2Anatomy that matters
Chapter 3 teaches the skeleton, joints and muscles, and the movement words the surgeon uses, such as "more internal rotation", with the rule that a joint is moved only within its normal range of motion. Four things come up in nearly every case.
- Two kinds of bone: cortical (compact) bone is the hard outer shell and the wall of a long bone's shaft; cancellous (spongy) bone fills the ends of long bones and holds the red marrow. Screws and grafts are chosen for one or the other.
- Landmarks: a condyle is a rounded knob at a joint, a neck is a narrow bridge of bone, a process is a projection, a tuberosity is a large rounded bump, and a crest is a ridge, such as the iliac crest, a common place to take a bone graft.
- The surgical neck: the narrowing of the humerus just below its two tuberosities, where most fractures of the upper humerus happen.
- The ankle mortise: the lower ends of the tibia (the medial and posterior malleoli) and the fibula (the lateral malleolus) form a slot that holds the top of the talus.
3Diseases and injuries
Fractures make up most of the work in orthopedics; the rest is worn and inflamed joints, bone infections and tumors, deformities present from birth, and torn tendons and ligaments.
Fractures
A fracture is any break in a bone, from trauma or disease. Vehicle crashes, sports injuries and violence cause most, and a broken bone can damage the nerves and vessels beside it. The surgeon's description tells you what to prepare.
- By location: the bone and the part of it, such as the distal radius, the middle third of a long bone's shaft, or a named bump, such as the medial malleolus.
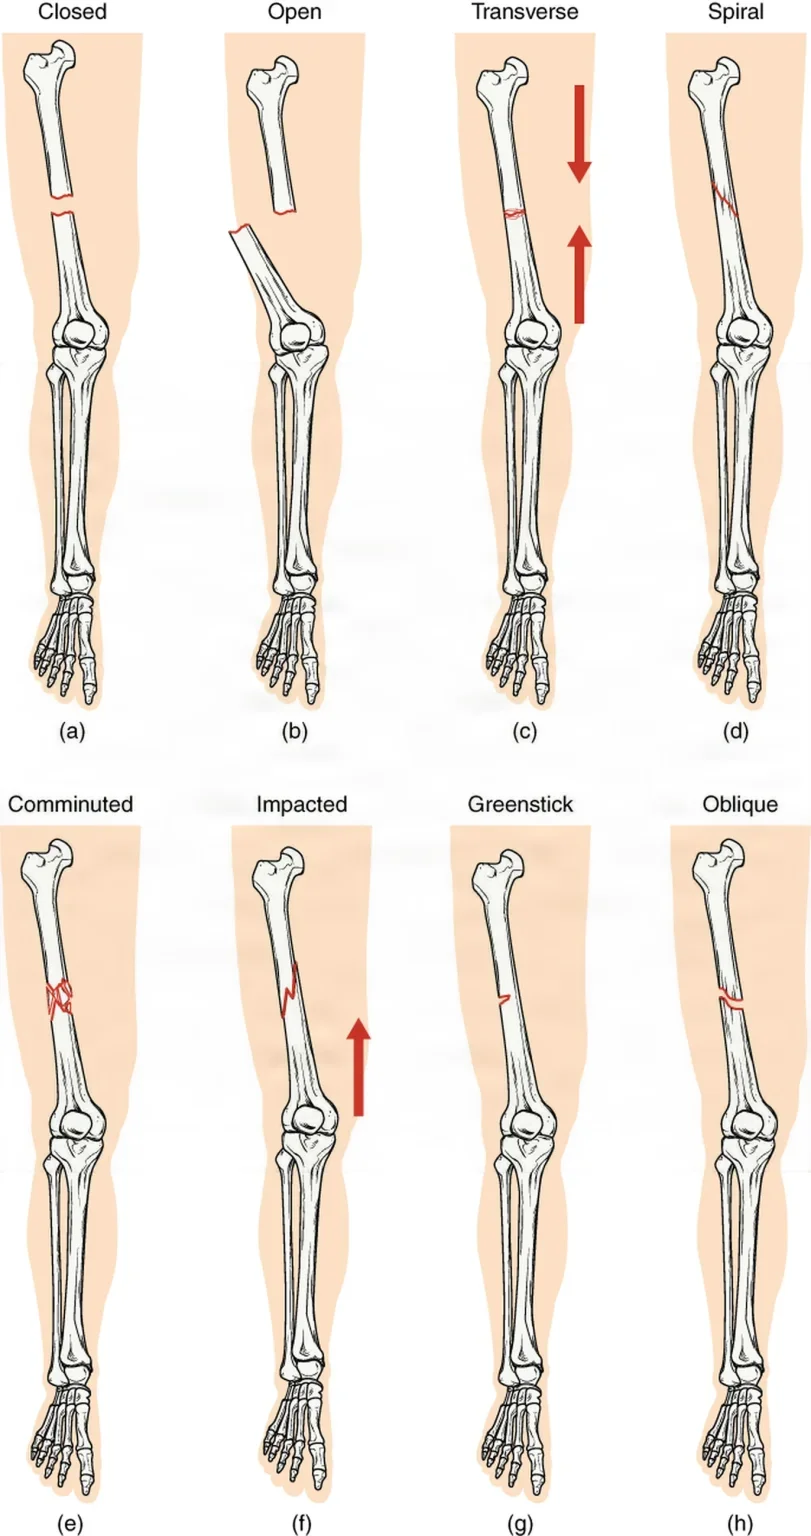
- By the skin: a closed (simple) fracture leaves the skin whole. An open (compound) fracture has a wound that reaches the break, often with the bone end pushed out through the skin. An open fracture is always treated as contaminated, because germs can reach the bone through the wound.
- By completeness: a complete fracture breaks all the way through, so the pieces are no longer joined; an incomplete fracture leaves part of the bone intact.
- By displacement: in a nondisplaced fracture the pieces stay lined up; in a displaced one they have moved out of line.
- By the number of pieces: a comminuted fracture has more than two pieces. A badly comminuted fracture means a longer case and more complex instruments.
The pattern of the break tells the surgeon what force caused it and what repair it needs.
- Transverse: straight across the bone, at a right angle to its long axis.
- Oblique: across the bone at a slant.
- Spiral: winding around the bone, from a twisting force.
- Linear: running along the length of the bone, parallel to its long axis.
- Impacted: one broken end driven into the other.
- Compression: bone crushed together, as when a vertebra collapses under pressure along the spine from an injury or from osteoporosis and loses height.
- Depressed: a piece of bone, usually of the skull, broken and pushed inward.
- Greenstick: an incomplete fracture of a child's softer bone, which bends on one side and breaks on the other, like a green twig.
- Pathologic: a break in bone weakened by disease, such as osteoporosis or a tumor, from a force that would not break healthy bone.
- Stress: a tiny break from repeated small forces, such as running or marching on hard ground, with no single injury. It can be hard to see on a first X-ray.
The Core Curriculum names two fractures for the doctors who described them.
- Colles' fracture: a break of the distal radius within about 2.5 cm (1 inch) of the wrist, with the broken end and the hand pushed toward the back of the wrist. It usually comes from a fall onto an outstretched hand.
- Pott's fracture: an older name for a break of the fibula near the ankle, often with the medial malleolus or a ligament, now called a bimalleolar ankle fracture.
Other injuries travel with fractures.
- Avulsion: a ligament or tendon pulls off the piece of bone it is attached to, or tissue is torn away from its attachment.
- Epiphyseal fracture: a break through a child's growth plate, which can slow that bone's growth (chapter 3).
- Dislocation: one joint surface pushed completely off the other, as when the humeral head pops out of the glenoid; it can damage nerves and vessels, so it needs immediate care. A subluxation is a partial dislocation.
- Sprain: some or all of the fibers of a ligament torn.
- Rupture: a tendon, ligament or muscle torn or pulled loose, usually suddenly, as with an Achilles tendon.
When a fracture heals badly
Under the right conditions a fracture heals in about 8 to 12 weeks, though full strength in a weight-bearing bone can take 6 months or more. Healing needs the pieces lined up, held still and fed by a good blood supply; movement, a gap, poor blood supply, infection and soft tissue caught between the ends slow it.
- Delayed union: the fracture takes longer than usual to heal.
- Nonunion: healing stops without the ends joining, most often because of infection or movement at the break; a bone-growth stimulator, which applies an electric current to the bone to bring on new bone, may help.
- Malunion: the bone heals in a bent or twisted position that impairs its function.
- Distraction: the pieces pulled apart, as by too much traction weight, so soft tissue can grow over the ends and block healing.
Joints
- Osteoarthritis: the most common arthritis, a wearing away of the joint cartilage with age, overuse or an old injury, until bone rubs on bone. It causes pain and loss of motion and is the most common reason for a joint replacement.
- Rheumatoid arthritis: an autoimmune disease that inflames the synovial lining of joints throughout the body. The inflamed tissue can stiffen and destroy the joint. A blood test for rheumatoid factor helps confirm it.
- Gout: an inflammatory arthritis in which high uric acid in the blood forms needle-shaped crystals in and around a joint, often first in the big toe, in painful flares of a week or two; blood tests show the uric acid.
- Infectious (septic) arthritis: bacteria in a joint, most often Staphylococcus aureus, which make it hot, swollen and painful, with fever. Fluid drawn from the joint shows the germ.
- Ankylosing spondylitis: a long-lasting inflammatory disease mainly of the spine and the sacroiliac joints that can stiffen and fuse them.
Bones
- Osteoporosis: bone that has lost so much mass that it is porous and fragile. By one estimate it causes more than 2 million fractures a year, most often of the hip, the spine and the wrist. Falling estrogen and testosterone with age, too little calcium or vitamin D, too little weight-bearing exercise, smoking and long-term steroid use all add to it. A bone density (DEXA) scan, a special X-ray usually of the hip and spine, measures it.
- Osteomalacia and rickets: soft, poorly mineralized bone from too little vitamin D, which the body needs to absorb calcium and phosphorus; in children it is rickets.
- Paget's disease (osteitis deformans): bone rebuilt too fast and in a disorganized way in older adults, so it comes out weak and poorly formed.
- Osteomyelitis: infection of the bone and its marrow, most often by Staphylococcus. Germs reach the bone through the blood, from nearby tissue, or directly through an open fracture or an operation. It can go unnoticed for a long time, destroy bone and cost a limb, so it is treated with surgery and weeks of IV antibiotics.
- Avascular necrosis (osteonecrosis): death of bone that has lost its blood supply. The femoral head is the classic place. Trauma, long-term steroid use and diseases such as sickle cell anemia can cause it.
- Bone cysts: fluid-filled holes in bone. A unicameral (simple) bone cyst is common in children, most often in the upper humerus or femur, and is often found only when the weakened bone breaks.
- Bone tumors: benign ones include the osteoma (bone), the chondroma (cartilage) and the giant cell tumor at the end of a long bone, often at the knee. Cancers that start in bone include osteosarcoma (osteogenic sarcoma), usually in the femur, which tends to spread to the lungs; Ewing's tumor, mostly in children; and multiple myeloma, a cancer of the plasma cells in the marrow. Cancer that has spread to bone from elsewhere can cause pathologic fractures.
Deformities
- Kyphosis and scoliosis: an excessive rounding of the upper back, and a sideways curve of the spine with twisting. Chapter 3 describes them and chapter 42 teaches spine surgery.
- Pectus excavatum and pectus carinatum: a chest wall that sinks in or juts out; chapter 41 teaches the repair.
- Radial dysplasia (radial club hand): part or all of the radius, and often the thumb, fails to form before birth, so the hand bends toward the thumb side; after stretching and splints, surgery lines the hand up on the ulna, usually before age one.
- Talipes, most often clubfoot (talipes equinovarus): a foot present from birth with the heel turned in and the foot pointed down, treated first with weekly stretching and casting from the first weeks of life (the Ponseti method), sometimes with a small cut of the Achilles tendon.
- Hallux valgus and the bunion: the big toe angled outward toward the other toes, with a bony bump on the inner side of the head of the first metatarsal. Poorly fitting shoes add to it.
Muscles and soft tissues
- Bursitis: inflammation of a bursa, the small fluid sac that cushions a tendon or muscle where it crosses bone, as in the shoulder, elbow and knee.
- Tendon and ligament tears: from injury, overuse or diseases such as rheumatoid arthritis. The rotator cuff, the meniscus and the anterior cruciate ligament tear most often; each is taught with its repair below.
- Carpal tunnel syndrome: pressure on the median nerve at the wrist; chapter 42 teaches the release.
- Fibromyalgia: widespread pain and stiffness, with fatigue and poor sleep, of unknown cause, treated with medicines and exercise, not surgery.
- Marfan syndrome: an inherited connective tissue disorder of the bones, ligaments, muscles and aorta.
- Muscular dystrophies: a group of inherited diseases in which the muscles weaken more and more over time and can stiffen into contractures.
- Myasthenia gravis: an autoimmune disease of the nerve-muscle junction that weakens the voluntary muscles, including those for breathing and swallowing.
4Diagnostic tests
Diagnosis rests on the history, the examination and imaging. Have the patient's images in the room before the case: the surgeon uses them to confirm the site and side and plan the approach.
- Range of motion: how far a joint moves, measured in degrees, with stress tests of the ligaments of the knee and shoulder.
- Imaging: a plain X-ray usually comes first, and baseline films taken before surgery are compared with films taken after; CT shows a complex fracture in detail and MRI the ligaments, tendons and cartilage. Chapter 22 teaches how each image is made.
- Bone scan: an image of the bone made after a radioactive tracer (technetium) is injected, which helps find tumors and tell a bone infection (osteomyelitis) from a skin infection (cellulitis).
- Arthrography: an X-ray of a joint after contrast is injected into it.
- Arthrocentesis: fluid drawn from a joint with a needle and sent for testing, to tell osteoarthritis, rheumatoid arthritis and gout apart and to find an infection.
- Lab tests: a raised sedimentation rate (ESR) points to inflammation, rheumatoid factor to rheumatoid arthritis, uric acid to gout, alkaline phosphatase to bone disease, and cultures find the germ in osteomyelitis or septic arthritis.
- Arthroscopy: a scope in the joint lets the surgeon look directly, and often treat in the same operation.
5Treating a fracture
A fracture is treated in two moves: put the pieces back in line, then hold them there until the bone heals. The aim is to give the bone back its length, shape and alignment, and the limb back its function. In an arm, that means restoring motion for fine, skilled work; in a leg, alignment, length and a stable limb that can bear weight.
Reduction
Reduction is moving the broken pieces back into their normal position. It is done with the patient anesthetized, and a swollen limb may need the pull of a traction device to bring the pieces into line.
- Closed reduction: the surgeon lines up the bone by hand or with traction, without cutting the skin, under a hematoma block (local anesthetic injected into the fracture), a Bier block, a regional or spinal block or general anesthesia, confirms it on X-ray or fluoroscopy, and holds it with a cast or brace. When it works, it is the treatment of choice: less infection, better union and a shorter recovery. Have the casting materials ready, and the instruments to open the fracture if it fails.
- Open reduction: an incision exposes the break so the surgeon can line up the pieces by sight. It suits fractures that are comminuted or that cannot be reduced closed, but opening the wound raises the risk of infection and nonunion.
Fixation
Fixation holds the reduced pieces still while they heal, and most orthopedic surgery is some form of it.
- Internal fixation: an implant inside the body, such as a plate and screws, a rod or nail, pins or wire. It is often the treatment of choice for long bones and the hip.
- External fixation: support from outside the body. A cast is the simplest kind; others are metal frames held to the bone by pins or wires through the skin.
Put together, these name four operations.
- Closed reduction, external fixation (CREF): the bone is reduced by hand or traction, then held by a cast or by an external frame on pins drilled in through small stab wounds.
- Open reduction, external fixation (OREF): the break is exposed and reduced, then held from outside with a frame.
- Closed reduction, internal fixation (CRIF): the bone is reduced without opening the fracture, then held by pins, screws or a nail slipped in through small punctures under fluoroscopy, with less infection and soft tissue damage than an open repair.
- Open reduction, internal fixation (ORIF): the break is exposed and reduced, and implants hold it.
Traction
Traction is a steady pull along a fractured bone. It lines up a fracture or dislocation, keeps the limb still, protects the nearby nerves and vessels, and eases pain and muscle spasm before surgery, though modern implants have made long-term traction uncommon. Manual traction is the surgeon's hands; skin traction, such as Buck traction, pulls through tape or straps on the skin for a short time, seldom in adults; skeletal traction pulls on a pin through the bone below the fracture, placed in the emergency department or the OR, and the fracture table can use it to reduce a long bone fracture.
Casts and splints
A cast, of plaster or a lighter, stronger synthetic such as fiberglass, is named for what it covers: a short or long arm or leg cast, a cylinder cast that keeps the knee straight, or a hip spica, which takes in the trunk and one or both legs. A fresh or open fracture is not cast, because of the risk of compartment syndrome and infection, but splinted, since a splint does not go all the way around and leaves room for swelling; chapter 30 teaches how you help apply both.
How urgent is it?
Emergency cases go as soon as possible, to prevent infection, nerve damage, amputation or death: open fractures, a dislocated major joint, a fracture with a deep or crushed wound, a spinal injury, a fracture or dislocation that cuts off the blood supply, and compartment syndrome. Urgent cases go within 24 to 72 hours: repeat debridement, the limbs of a patient with several injuries, a hip fracture, an unstable fracture or dislocation. Elective cases, already made stable, wait 3 or 4 days or even weeks.
Open fractures and orthopedic trauma
An open fracture is contaminated from the start. Besides infection, it can bring renewed bleeding, crushed soft tissue, torn vessels and nerves, and Volkmann contracture, the paralysis and stiffening left in muscles that have lost their blood supply. Antibiotics start early, the wound stays covered with sterile dressings, and the limb is handled gently, because rough handling can extend the injury to nerves and vessels.
With several major injuries, such as a near amputation, a crush injury, a contaminated wound or a pelvic fracture, the first operation may be damage control orthopedics: stop the bleeding, steady the fractures and prevent sepsis, leaving the full repair until the patient is stable. External fixation is the usual way to steady the bones: a frame for a long bone, a pelvic clamp or binder for an unstable pelvis. A binder already in place comes off only when the surgeon and the anesthesia provider say so, and if the leg arrived in traction, they direct every move so it holds.
Setup: a major orthopedic set and general instruments, vascular instruments on standby, and separate soft tissue sets for the dirty debridement and the clean repair. Have ready to open low- and high-speed drills with spare bits and a hand drill, K-wires and threaded Steinmann pins with a heavy cutter, an external fixation system, self-tapping screws and a nailing system. Expect large volumes of irrigation: impervious drapes and gowns, pocket drapes for the runoff, and leggings for the sterile team.
Debridement removes dead tissue and debris, with the whole limb prepped and draped. The surgeon cuts back crushed tissue with a knife, Metzenbaum or tenotomy scissors and toothed forceps until it bleeds, the sign it is alive. Everything removed is saved as a specimen, living bone fragments are kept moist in saline to be put back, and the wound is washed with large amounts of warm saline by bulb syringe or pulsed lavage, sometimes with bacitracin. The debridement is often repeated every 24 to 48 hours until the wound is clean.
Compartment syndrome can follow a fracture or a cast or dressing that is too tight. Bleeding and swelling inside a muscle compartment wrapped in fascia, most often in the forearm or the leg, raise the pressure until blood cannot reach the muscles and nerves. Nerve damage starts within about 30 minutes, muscle begins to die in 2 to 4 hours, and by about 12 hours the loss is permanent. The earliest sign is pain out of proportion to the injury, worse when the muscles are passively stretched, with a tense compartment; numbness, weakness and weak pulses come late. Report it at once. Chapter 11 teaches the pressures and the fasciotomy that relieves it.
6Planning the case
Orthopedic cases are equipment-heavy, and a missing implant or drill bit can stop a case cold. Before the patient arrives, know the approach, position and table; the sets and implants, checked when the case was booked; the power instruments and their bits, blades, burs and reamers; the imaging (fluoroscopy, a C-arm or an O-arm); any cement, hemostatic agents, special irrigation and bone graft; for an arthroscopy, the scopes, fluid and tubing; and the energy devices, sutures and anchors.
Table accessories are heavy, so have enough people to set them up, and allow the time: positioning alone can take up to 20 minutes. Open the minimum the case needs, with a plan for the unexpected. A company representative may bring instruments or advise on new equipment, but follows the facility's rules for being in the room.
Position
The position follows the part of the body. Chapter 31 teaches each position and its safety points, and chapter 23 the tables and positioners, such as the radiolucent hand table and the leg holders. Three positions belong to orthopedics.
- Beach chair (a semi-Fowler or modified Fowler position): for the shoulder and the humerus. The upper body is raised, the head held in a headrest, and the operative shoulder sits just off the edge of the table so the arm can move.
- Lateral for the hip: a beanbag, a hip positioner or padded supports in front and behind hold the patient on the side, with padding under the head, the down-side axilla, hip, knee and ankle.
- Supine on a fracture table: for hip fractures and femoral nailing. The foot of the operative leg sits in a padded traction boot, the other leg in a raised holder out of the C-arm's way, and the well-padded perineal post must never press on the genitals or the pudendal nerve.
Check and record the limb's pulses, color, warmth, movement and feeling before positioning and again at the end.
Prep and drape
Chapter 31 teaches the skin prep and its rules for a limb, and chapter 28 the extremity drapes. Orthopedics adds a few habits.
- The limb is held up, by an assistant or a leg holder, and prepped all the way around; for an upper thigh case the groin and anus are sealed off first, and a second site, such as a graft site, is kept from contaminating the first.
- A hand or foot left out of the field is excluded: wrapped in an impervious stockinette, often under an adhesive drape. A limb the surgeon must move during the case is draped free, passed through the drape's opening or between split sheets.
- Many incise drapes carry an iodophor, so they are not used on a patient allergic to iodophors.
Tourniquet
A pneumatic tourniquet gives a bloodless field for most arm and leg cases. Chapter 31 teaches the cuff, put on before the prep, and emptying the limb by raising it or wrapping it with an Esmarch bandage; chapter 23 the control unit and the pressure. Keep the time as short as possible, about 1 hour on an arm and 2 hours on a thigh for a healthy adult, and tell the surgeon the time at regular intervals. When the cuff comes down, check the limb's color, warmth, pulses, movement and feeling.
AST's 2018 guideline recommends 60 minutes on an adult's arm and 90 on a leg, and 60 minutes for a child.
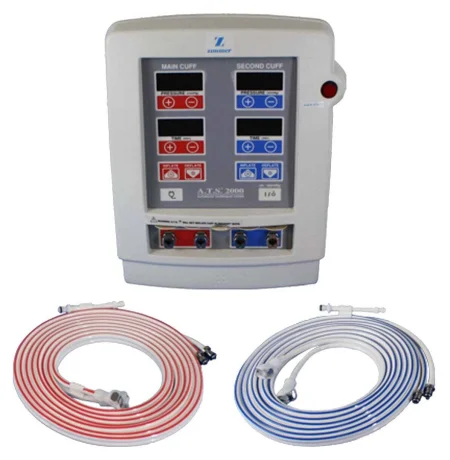
The prophylactic antibiotic is given within 60 minutes before the incision and before the tourniquet goes up, so the drug is already in the limb. A sterile exsanguinating tourniquet is a single-use ring the surgeon rolls up the draped limb, squeezing the blood out and then holding as the tourniquet, with no machine.
Keeping infection out and protecting yourself
An infected joint replacement can destroy the joint, and osteomyelitis can disable the patient for life, so orthopedic rooms add laminar airflow, a one-way curtain of filtered air over the field (chapter 17), body exhaust suits or sterile helmets, mostly for joint replacements (chapter 28), and controlled traffic. The cases are also wet and sharp: wear eye protection or a face shield, a fluid-resistant gown and boots, and double-glove, because sharp bone edges, wires and pins puncture gloves and skin.
Imaging
Many cases use a portable X-ray machine or the C-arm to confirm a reduction, follow the reaming of a long bone and check the implants. You drape the cassette or the C-arm with a sterile cover, and everyone near it wears a lead apron and a thyroid shield (chapter 22).
Medications, sutures and dressings
- Antibiotics: into a vein before the incision, added to the irrigation (bacitracin and polymyxin are common), or by pulsed lavage.
- Local anesthetics: such as bupivacaine, injected near the end of the case for pain afterward; long-acting liposomal bupivacaine is recorded, and the patient wears an alert band for it.
- Hemostatic agents: bone wax, a sterile beeswax pressed into bleeding bone, which can slow healing and raise the risk of infection; bone putty, which has largely replaced it; and gelatin foam, thrombin and microfibrillar collagen.
- Tranexamic acid (TXA): a drug that keeps clots from breaking down, given into a vein to cut blood loss in hip and knee replacement; its risks include clots and seizures. Steroids and normal saline are used too.
Chapter 12 teaches these drugs. When a cell saver is collecting the patient's blood to give back, help the surgeon make sure antibiotic irrigation and topical hemostatic agents such as bone wax are never suctioned into it: given back into a vein, the antibiotics can harm the nerves and kidneys and the hemostatic agents can cause clots, and both can clot the blood in the machine.
Tendons and ligaments heal slowly, so they are repaired with strong, lasting suture, such as braided polyester, polypropylene, PTFE, steel or a braided suture with an ultra-high molecular weight polyethylene core, often on a suture anchor in the bone. Orthopedic dressings support the limb as well as cover the wound: gauze fluffs between fingers or toes, cotton wrap and wadding, an elastic (Ace) bandage, a self-sticking wrap (Coban), and stockinette under a splint or cast (chapter 30).
Orthopedic supplies
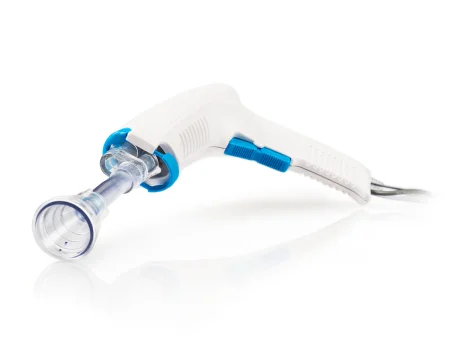
The Core Curriculum lists the supplies special to orthopedics, and you will meet each one below: an arthrocentesis kit for drawing joint fluid; arthroscopic supplies (suture anchors and their inserters, burs, fluid management tubing, shaver blades and tissue ablation devices); bone graft materials and buttons; a cement mixing kit for polymethylmethacrylate (PMMA); an Esmarch bandage and a pneumatic tourniquet cuff; pins and wires; saw blades; and a pulse lavage irrigator, which sprays irrigation in rapid pulses and suctions it back to wash debris out of a wound or a bone canal.
7Instruments
Orthopedic instruments do the same jobs as any others, grasping, cutting, holding back and viewing, but they are built for bone: many are struck with a mallet, and many belong to one maker's system. A department keeps a few basic sets, used with a soft tissue set sized for the site: a large bone set for the hip, knee, upper arm and elbow; a small bone (extremity) set for the hand and foot; hip, total knee and shoulder sets; bone graft instruments; and arthroscopy instruments. Revision surgery, which replaces an old implant, needs the extractors made to remove it.
Retractors and bone holders
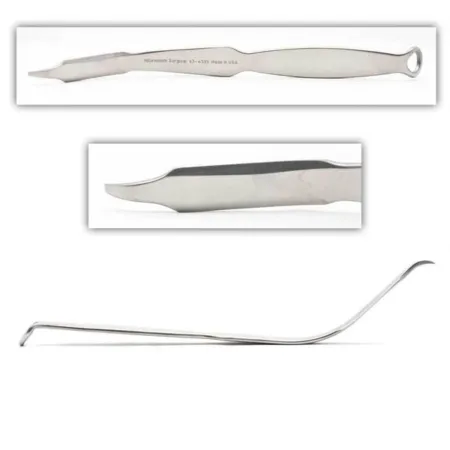
Bone does not give way to a retractor the way soft tissue does, so the surgeon holds the soft tissue away from the bone, or grabs the bone itself with a hook or clamp. Some bone retractors, such as the Blount, with its blunt right-angled blade, and the Bennett, work as levers against the bone; the Army-Navy, the Weitlaner, rakes and the Gelpi are used too.
- Hohmann: a thin, slightly curved blade ending in a small upturned point, slid behind and around a bone to lever the soft tissue away; you will see several in a hip, knee or shoulder case, down to the mini Hohmann at the ankle.
- Bennett: a broad, rounded blade curving down to a small upturned lip, slid around a bone's shaft for leverage.
- Chandler: a blunt, medium-curved blade that levers soft tissue away from bone while fixation goes on.
- Cobra: a flared blade with a small upturned round tip for holding back large areas of tissue, as around the hip; once placed, it is held down or back, not pulled.
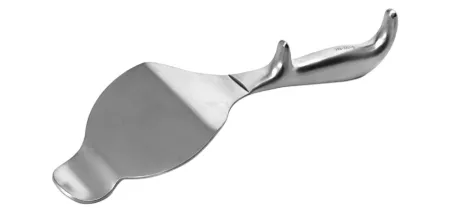
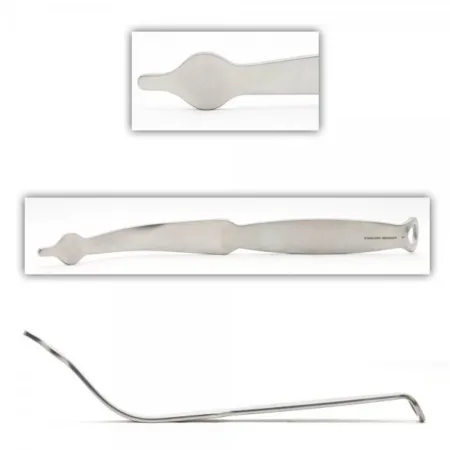
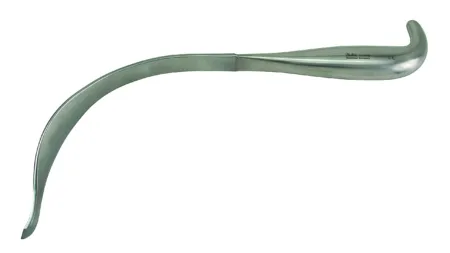
To hold or move the bone itself:
- Bone hook: a very sharp curved hook slipped around a bone to pull it, as when the femoral neck is lifted to dislocate the hip.
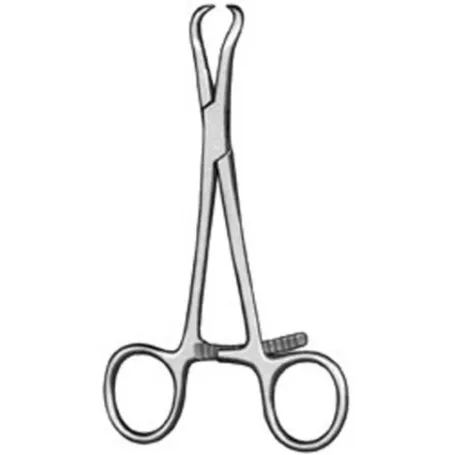
- Bone reduction forceps: ratcheted forceps with curved, pointed jaws that grip a break and draw the pieces together, often one on each piece.
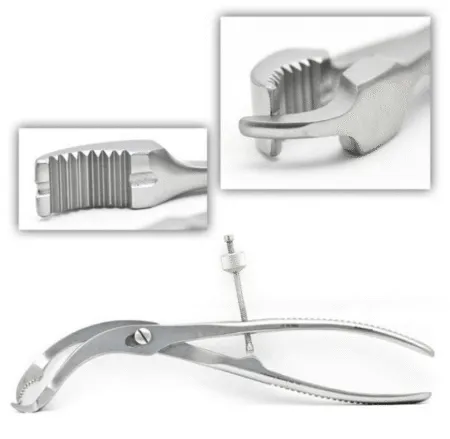
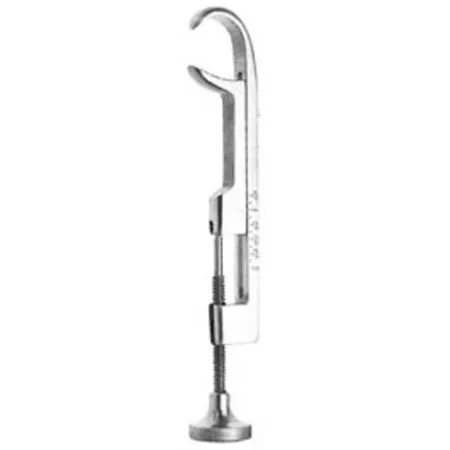
- Bone-holding clamps such as the Lowman, with three blunt curved claws tightened by a screw at the handle end, and the Verbrugge, which locks with a ratchet or a speed lock, hold a reduced bone, often while K-wires or a plate go on. Check the Lowman's screw before the case.
- Pelvic reduction clamps, such as the Weber clamp, grip the pelvis on each side of a break.
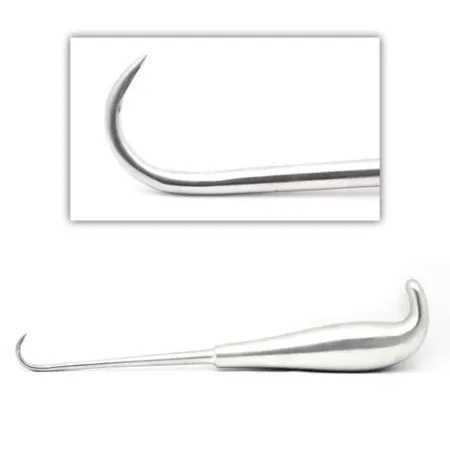
Cutting, scraping and shaping bone
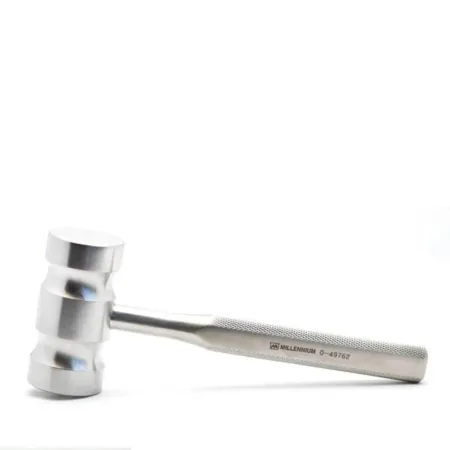
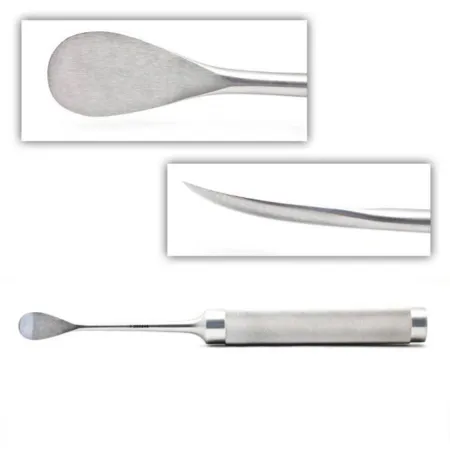
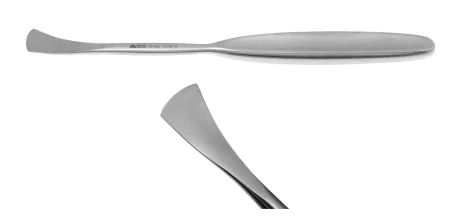
Chapter 24 teaches the osteotomes, chisels and gouges struck with a mallet, and the curettes, rongeurs, rasps and periosteal elevators. Two points are worth adding: a curette is used by hand, never with a mallet, and orthopedic sets carry the broad Cobb elevator, which strips periosteum and lifts muscle off bone, and the Langenbeck periosteal elevator.
Measuring
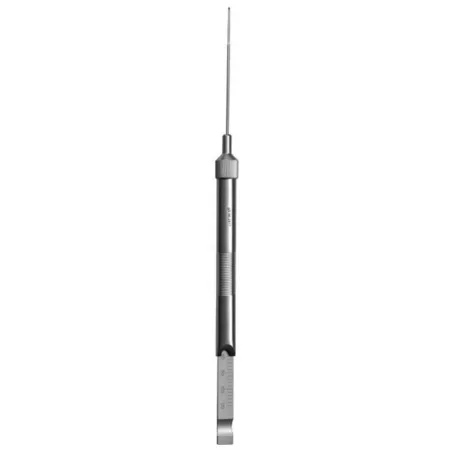
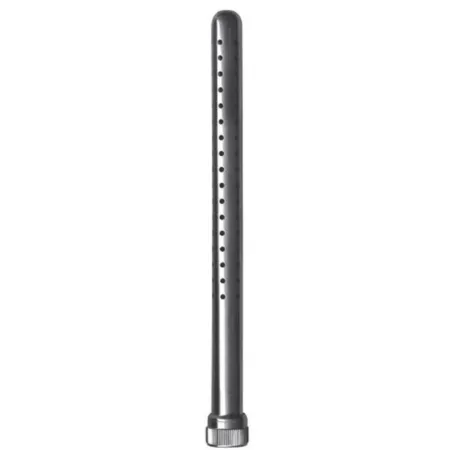
Orthopedics measures with rulers, calipers, a protractor for angles, and the depth gauge, a thin probe with a hook at its tip and a millimeter scale, which measures a drilled hole so the right screw length is chosen.
8Power instruments
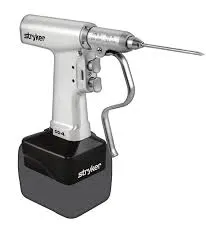
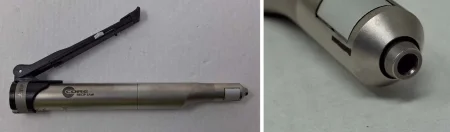
Power instruments cut, drill and reshape bone. They run on compressed nitrogen or medical air (pneumatic), on batteries, or on electricity, and the surgeon controls speed and power with a fingertip trigger. Know each one's safety features, how it connects to its power, how its attachments go on, how to assist while it runs, and how it is cleaned.
Drills and their parts
A drill is used whenever the job needs twisting force (torque); chapter 24 introduces the drill, burs and reamers.
- Chuck: the jaws on the drill head that grip a bit, bur, reamer or pin; many open and close with a chuck key, and others are quick-coupling, so a bit snaps in.
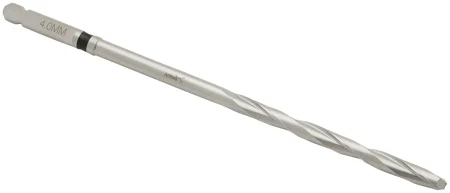
- Drill bit: a cutting pin with spiral grooves (flutes) that carry bone chips out of the hole, in graded sizes in a rack.
- Drill guide (drill sleeve): a tube held against the bone at the hole, which aims the bit, pin or wire and keeps it from catching soft tissue.
- Reamer: a cutter that enlarges a canal for a nail or, cup-shaped, hollows a surface such as the acetabulum, by power or by hand.
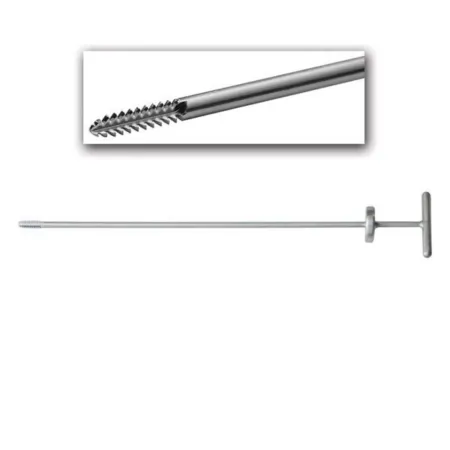
- Tap: a threaded cutter that cuts the spiral threads into a drilled hole before the screw goes in.
- Bur: a tip that cuts small holes and smooths small areas; a shaver is a spinning blade that trims cartilage, such as a torn meniscus.
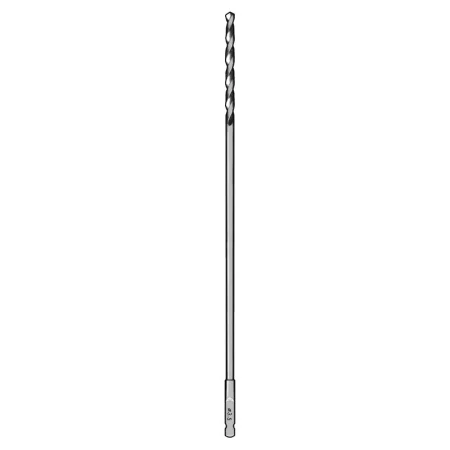
Saws
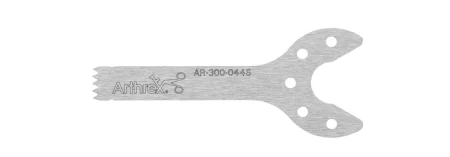
Power saws cut bone along a precise line with fine teeth that move very fast, and each saw takes its own blades, in many lengths and widths. Chapter 24 teaches the sagittal saw, whose blade sits at a right angle to the handpiece, and the reciprocating saw, whose blade moves in and out; orthopedics adds the oscillating saw, whose blade lies in line with the handle and moves back and forth. For a cut such as across the femoral neck in a hip replacement, prepare a narrow oscillating or reciprocating blade.
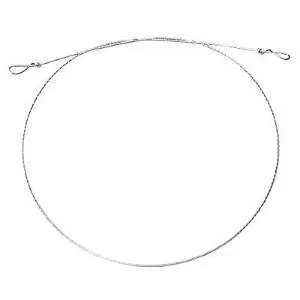
A hand-pulled Gigli saw, a flexible twisted wire with a handle at each end, cuts bone with a back-and-forth pull, as in an amputation.
Using power safely
The force of a power instrument and its hose can cause serious injury, so follow these rules every time.
- Check the handpiece and its hose or battery, make sure it is put together correctly, and test it before the patient comes into the room; check the nitrogen tank, and charge batteries the day before.
- Put the safety lock on before you attach an accessory, a hose or a battery, and before you pass the instrument, sharp end away from you. Never leave it resting on the patient.
- Never fit a bent bit, which wobbles and can fly loose, or a cracked or chipped tip, and seat each one fully, with its guard: a badly seated bit or blade can be thrown with great force.
- Keep an air-powered instrument within its maker's pressure, and to disconnect it, turn off the gas, then run the handpiece to bleed the hose.
- Irrigate the cutting tip, from a bulb or Asepto syringe, all the time it runs: friction makes enough heat to kill bone and tissue.
- Wipe it during the case, and clean, lubricate and sterilize it exactly as its maker says; it never goes under water unless its instructions allow it, and it has a yearly biomedical inspection.
the safety lock goes on before you attach anything, before you pass and whenever the handpiece rests, and the irrigation runs whenever the tip cuts.
9Implants
Orthopedic implants, often called hardware, hold bone to bone or soft tissue to bone: screws, plates, nails, wires, pins and anchors (joint replacements come below). There are hundreds, but they sort simply by type and use. Chapter 29 teaches the rules every implant follows: confirmed with the surgeon and circulator before it is opened, its package and date checked, never scratched, and its maker, lot and serial numbers in the patient's record and the implant log.
Materials and handling
Implants are made of metal alloys, mixtures of metals, because metal can carry the load a bone carries: stainless steel is still the most common, with titanium, light and strong, and cobalt-chromium, and some screws and anchors are bioabsorbable. A material is biocompatible when it causes no toxic, inflammatory or immune reaction, bioactive when it brings about a chosen response where it meets the tissue, such as helping bone grow onto it, and inert when it reacts with nothing.
Chapter 29 also teaches how hardware is handled: every implant in a repair is the same metal, because two metals together corrode (galvanic corrosion); a scratch can make an implant corrode and weaken, and a damaged one is thrown away; and a bent plate is never straightened. An implant is never steam sterilized for immediate use except in a documented emergency (chapter 27). Orthopedics adds two rules: an internal fixation device is never reused, and a plate is bent only with the proper bending press or plate benders.
Screws
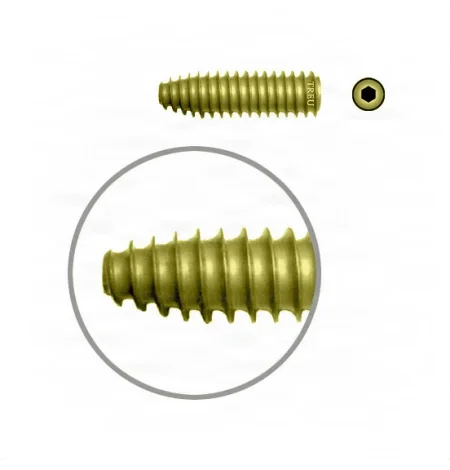
The screw, one of the most used implants, holds a plate to bone, bone to bone, or a fragment in place. Its head's recess (hexagonal, a straight slot or a cross) tells you which screwdriver to pass; the outside width of its threads is its diameter, which decides the drill bit you load; and its tip (blunt, corkscrew or trocar) tells whether it needs a hole drilled first. Screws are sized by diameter and length in millimeters, and you must know them by type:
- Cortical: threads that are fine and close together, running the full length, for the hard outer bone and for holding plates.
- Cancellous: broader threads set farther apart, for the soft bone near the ends of long bones, where the spongy bone packs into the threads and gives them grip.
- Lag: a screw that squeezes two pieces of bone together. Only its far end grips; the near piece slides along the smooth part, so as the screw tightens, the far piece is pulled tight against the near one.
- Locking: a screw whose threaded head locks into a threaded hole in a locking plate, so it cannot rock or back out.
- Cannulated: a hollow screw that slides over a guidewire placed first, so it goes in exactly where the wire points.
- Self-tapping: grooves (flutes) at its tip cut its own threads as it goes in. A non-self-tapping screw needs the hole drilled and tapped first.
- Headless compression screw: threads at both ends with different spacing draw two small pieces together as it goes in, as in a scaphoid fracture.
Drill, measure, tap, insert
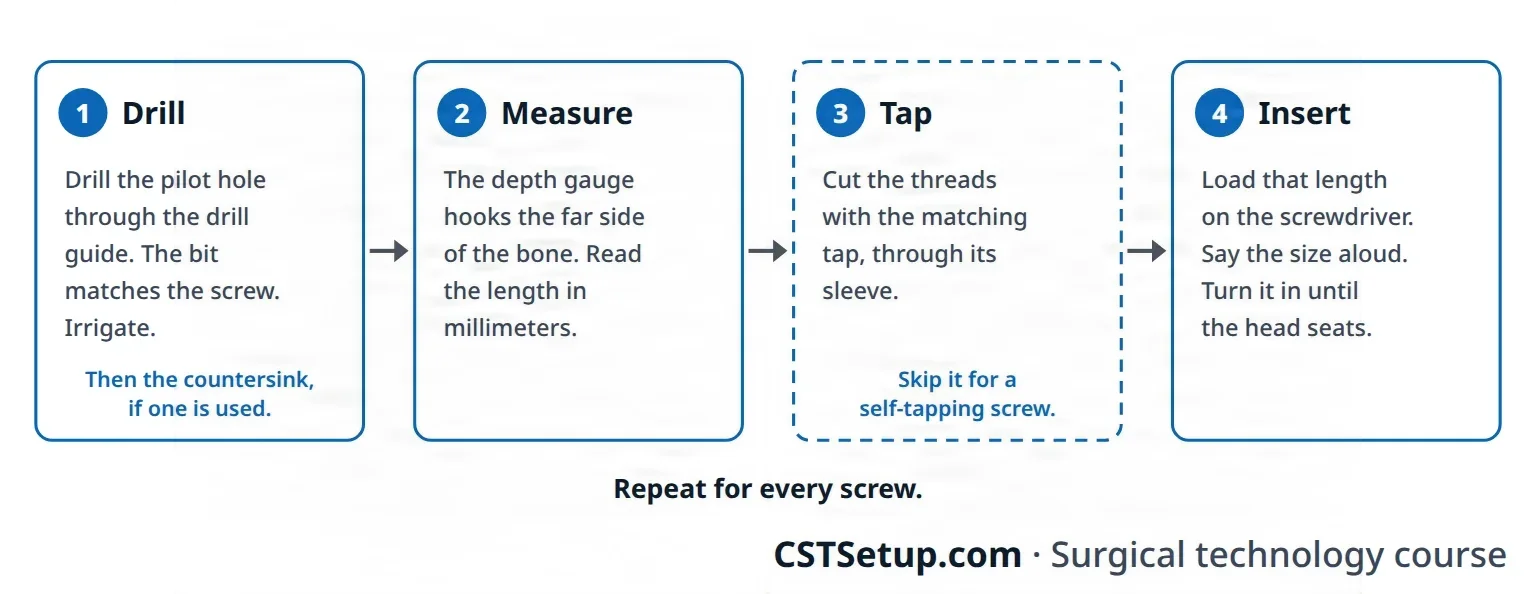
Every screw that is not self-tapping goes in by the same four steps. The Core Curriculum calls it the "drill, measure, (tap), screw" sequence. Know it so well that the surgeon never has to ask for the next instrument: it shortens the case.
- Drill: load the drill with the bit that matches the screw (on a quick-coupling chuck you fitted while setting up), tug the bit gently to be sure it is seated, slide the drill guide over it and pass the drill. The surgeon holds the guide against the bone or in the plate hole and drills the pilot hole while you or the assistant irrigate. A countersink may then shape the top of the hole so the screw head can be seated into the bone.
- Measure: pass the depth gauge. It goes into the hole and hooks the far side of the bone, and the surgeon reads the screw length from its scale and tells you the size.
- Tap: load the matching tap on its handle, in its tap-holding sleeve, and pass it with a hand under it in case it is knocked loose. The tap cuts the threads, through a sleeve that protects the soft tissue; tapping first keeps bone from jamming the screw's threads. Skip this step for a self-tapping screw.
- Insert: load the screw of that length on the screwdriver, held by its screw-holding sleeve, say the size aloud as you pass it, and keep a hand under it. The surgeon turns it in until its head seats.
The steps repeat for every screw, one at a time. Keep track of each plate and screw by type, size and number for the circulator, who records them as the FDA requires.

A lag screw through cortical bone adds one move. The surgeon first drills the near cortex with a wider bit, the size of the screw's threads, making a gliding hole; then a sleeve goes into that hole to center a narrower bit, the size of the screw's core, which drills the far cortex. The threads grip only the far side, so tightening the screw pulls the two pieces together. A partly threaded cancellous screw does the same job in soft bone, as long as all its threads sit past the break.
drill, measure, tap, insert. The bit and the tap match the screw's size, and the screw you load is the length the gauge measured.
Plates
A plate spans a break and holds the pieces steady while they heal: titanium or stainless steel, straight or shaped to a bone, with smooth, threaded or sloped holes. It may protect a lag screw repair, squeeze the break, bridge a badly broken section or prop up a fragment.
- Dynamic compression plate: sloped, offset holes, so a screw tightened off-center slides the plate and pulls the pieces together.
- Locking plate: threaded holes that lock the screw heads, so the screws cannot back out, though they cannot squeeze the break either.
- Reconstruction plate: thin enough to bend to a curved bone, such as the pelvis, shaped on the back table with a plate press or benders to a soft template fitted to the bone.
- Tension band plate: on the side of a bone pulled apart under load, so the load squeezes the break.
- Buttress plate: props up a fragment near a joint so it cannot collapse or slide.
- Condylar plate: shaped over the rounded end of a long bone, with lag screws through the fragments.
- Semitubular plate: light and less rigid, for bones that bear little weight, such as the forearm and fibula.
Intramedullary nails
An intramedullary (IM) nail is a strong rod, hollow (cannulated) or solid, driven into the medullary canal of a long bone such as the femur, tibia or humerus, holding the break from the inside: antegrade from the upper end, or retrograde from the lower. Every nail goes in the same way. An awl opens the canal and a guidewire goes down it under fluoroscopy; reaming always runs over the guidewire, in graded sizes from small, and the nail is a little narrower than the last reamer. Locking screws across the nail near each end, through a targeting guide or under the C-arm, stop rotation and keep the nail from drifting out, and an end cap may close its top. Reaming makes heat, so the reamers are sharp and never forced, and a tourniquet on the leg is let down while the tibia is reamed; collect the reamings. Older nails, such as the Ender nail and Rush rod, were thin rods used several at a time.
Wires, pins and cables
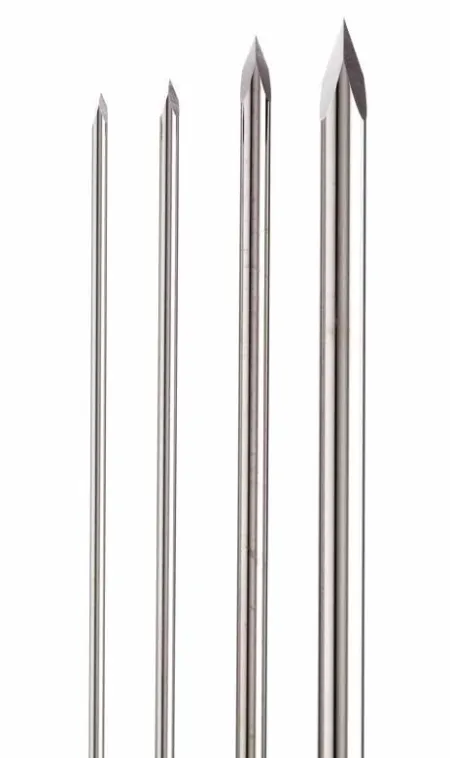
- Kirschner wires (K-wires) and the thicker Steinmann pins are smooth or threaded wires with a sharp, diamond-shaped tip, driven into bone with a drill. They hold a fracture for a while or for good, line up the pieces of a comminuted fracture, guide a cannulated screw or nail, span a small bone such as a finger, or anchor a traction device.
- They are very sharp and pierce gloves and drapes. Every piece cut off with the pin cutter goes into a magnetic container, so none is lost in the wound or sticks someone.
- Wire and cable pull small fragments together through drilled holes, or wrap around a bone (cerclage) to strengthen another implant. A wire is twisted tight and its end buried or bent flat; a cable is closed with a cable clamp.
- Tension band wiring: stainless steel wire crossed in a figure of eight over a broken patella or olecranon, anchored on pins or a screw. When the joint moves, the wire turns the pull of the muscle into squeezing force at the break.
External fixators
An external fixator holds a fracture from outside the body with pins or wires anchored in the bone, rods or bars along the limb, and clamps or rings that join them, as a single bar on one side or a cage of rods and rings; many pins drill and tap their own path. The Ilizarov frame, a cage of rings held to the bone by wires and pins, uses slow tension and pulling apart (distraction) to correct bone loss and lengthen a limb, as new bone grows into the gap.
Fixators are used for severe open fractures, badly comminuted closed fractures, infected joints and nonunions, fusions, to protect a repaired artery or nerve, and as a bridge to internal fixation. They leave the wound open to care and let the patient move early; the pin sites are not sutured, and each gets its own dressing.
Suture anchors, buttons and interference screws
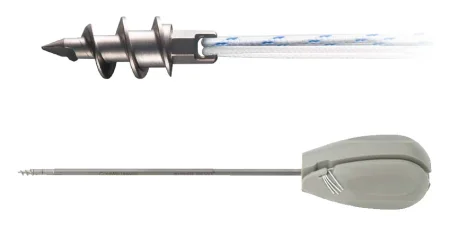
- Suture anchor: a small screw or tack of PEEK or a biosynthetic material, loaded with strong suture and set in a hole drilled in bone, so a tendon, ligament or labrum can be tied back; each system has its own inserter.
- Button: a small disk outside the skin or on the bone that the repair's sutures are tied to while it heals.
- Interference screw: a screw driven into a bone tunnel beside a graft to wedge it tight, as in a ligament reconstruction.
10Joint replacements, bone cement and grafts
Joint replacement implants
An arthroplasty repairs or replaces a joint, a joint replacement putting metal and plastic parts in place of the worn surfaces. As the parts slide, tiny worn-off particles collect, and the body's reaction to them slowly destroys the bone around the implant, so materials are chosen to resist wear, by the patient's bone, age, activity and health.
- Metals: cobalt-chromium-molybdenum or titanium-aluminum-vanadium alloys, pure titanium and tantalum. Metal rubbing on metal can release metal ions, so those implants are not used with kidney disease or in a patient who may become pregnant.
- Polyethylene: a tough, slippery plastic (ultra-high molecular weight polyethylene) for the bearing surface, such as a hip liner or knee insert; it slowly wears and can separate into layers.
- Ceramic: very hard, highly polished and scratch resistant, mostly for hip balls and liners, but brittle.
- Coatings: metal beads or fibers leave tiny pores that take cement or that bone grows into.
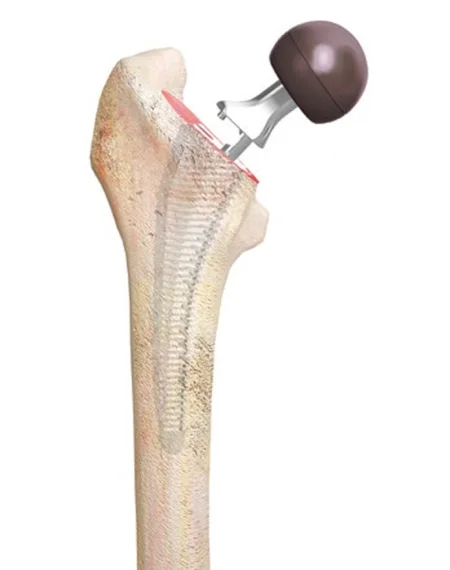
Most systems are modular: the stem, neck, head and liner come separately in many sizes and are assembled in the patient. A part is press-fit, impacted into the bone with no cement, or cemented, by the bone's quality and the patient's age, health and activity, and the surgeon first tests the fit with trials, copies of each size.
Bone cement
Bone cement, polymethylmethacrylate (PMMA), is a grout that fills the space between an implant and the bone, not a glue. A sterile powder (with barium sulfate so it shows on X-ray) and a liquid monomer, mixed, give off heat, turn into a dough and harden in roughly 10 to 15 minutes; some cements carry an antibiotic, which lowers the risk of infection in joint replacement.
It is a hazardous chemical, for the team and for the patient.
- For the team: the liquid is highly flammable, and its vapor irritates the eyes, airway and skin, can cause an allergy, and over time may harm the kidneys, liver, nerves and a pregnancy. Keep the room ventilated, and no one in the room wears soft contact lenses while it is mixed.
- For the patient: pushing cement and implant into the bone can drive marrow and fat into the bloodstream. Bone cement implantation syndrome is a sudden drop in blood pressure, fluid in the lungs and cardiogenic shock, and cardiac arrest and death have happened. Low-pressure pulsed lavage of the canal first lowers the risk, and the anesthesia provider is told before the cement goes in.
Mix it exactly as its maker's instructions say, in a closed mixer whose vacuum pulls the vapor away through a charcoal filter and removes the air bubbles that would weaken the cement.
- Attach the mixer's vacuum tubing and pass the other end to the circulator for the vacuum pump.
- Pour in the powder and the liquid, close the lid and turn the handle until the cement is a dough; for a cement gun, move the cartridge straight to the gun.
- Time the mix with the surgeon, so the cement is ready the moment it is needed: it sets whether you are ready or not.
- Change your gloves when you are done handling it, remove the cement that squeezes out around the implant before it hardens, and discard the leftover by facility policy.

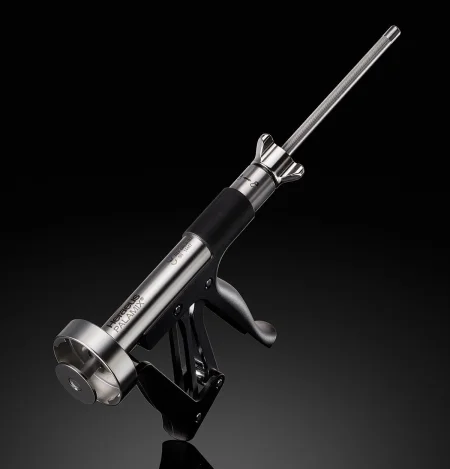
never mix bone cement in an open bowl. The closed mixer and its vacuum keep the vapor away from the team.
Bone grafts and substitutes
A bone graft fills a gap left after bone is lost or removed, helps a fracture or a fusion knit, and rebuilds bone at revision surgery; chapters 25 and 29 teach the kinds of grafts and their care on the field.
- Autograft: the patient's own bone, most often from the iliac crest, also the tibia or a rib: cancellous bone from the ilium, olecranon or distal radius, strong cortical struts from the tibia, fibula, iliac crest or a rib, cut with an osteotome and mallet, curettes, gouges or a power saw.
- Allograft: donor bone from a tissue bank accredited by the American Association of Tissue Banks, kept frozen, then thawed, cultured and washed in antibiotic solution on the field. The record names the bank, the type of graft, its tissue number and its expiration date.
- Graft substitutes: ceramics (calcium phosphate, calcium sulfate, bioactive glass) and polymers, as paste, putty, blocks, granules or chips, easing the shortage of banked bone.
- Reamer irrigator aspirator (RIA): takes a large graft from inside the femur or tibia, reaming the canal while washing and suctioning the bone into a filter.
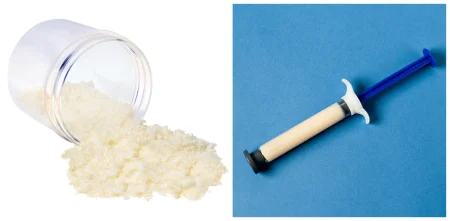
Keep a graft on the back table in a basin, under saline-moistened sponges or in antibiotic solution as the surgeon wants, never soaked unless asked and never moistened with sterile water, which kills its cells. The graft site is prepped separately and kept covered with sterile towels until it is closed. If the receiving site is infected or diseased, the donor site gets separate instruments, and the team changes gowns and gloves before taking the graft.
11Arthroscopy
Arthroscopy is minimally invasive surgery of a joint, to diagnose and to repair; most open soft tissue operations on joints can now be done this way, most often in the knee, the shoulder and the wrist. It means smaller incisions, less pain and scarring, fewer complications and a faster recovery; its drawback is the small, delicate instruments, which can scuff the cartilage. Chapter 21 teaches scopes, the camera chain and distention in general; here is what a joint adds.
Equipment and instruments
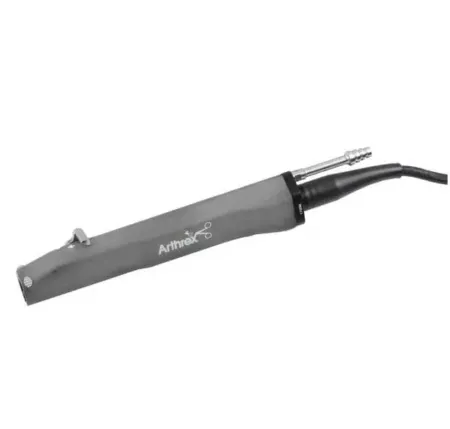
- Arthroscopes of 30 and 70 degrees, on a tower with the monitor, light source, camera and shaver console, and a pump with inflow and outflow (egress) tubing and cannulas.
- Probe: the instrument used most. Its small right-angled tip feels the tissues, finds tears and moves structures aside.
- Basket forceps (punches): open-bottomed jaws that bite off tissue and let it drop, so the instrument need not come out to be cleaned; suction punches bite and suction the bits away.
- Grasping forceps to hold tissue while it is cut, and knives (straight, hooked or curved, magnetic so a broken tip can be found) and scissors passed through a cannula or sheath.
- Motorized shaver: a spinning inner blade inside a windowed tube, with suction that draws tissue into the window and carries the bits out to a trap; burr tips shave bone. A foot pedal sets its speed.
- Radiofrequency devices to cut, ablate and coagulate, suture anchors with their inserters and drills, and suture passers.
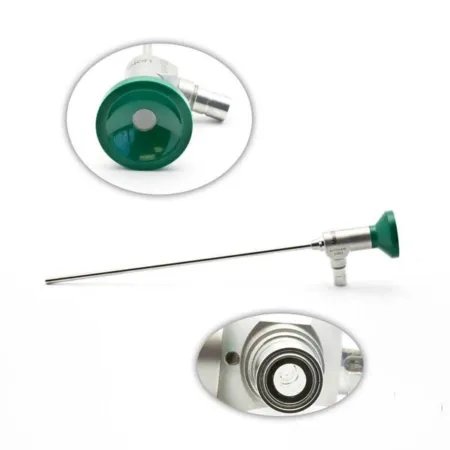
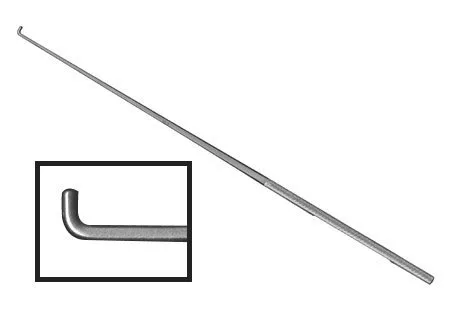
Distention
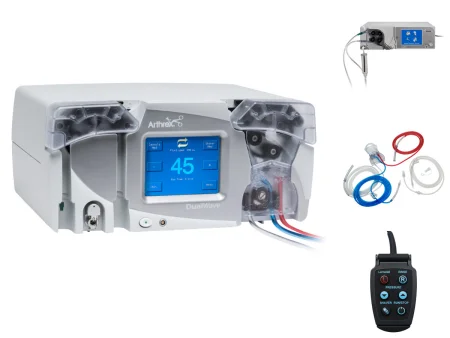
Saline or lactated Ringer's runs into the joint to open it and wash blood and debris from the view, through the scope's sheath or its own cannula, from a pump or by gravity from 3- or 5-liter bags about 3 to 4 feet above the joint. Its pressure also presses on small bleeding vessels (tamponade), so the inflow is kept up with the outflow. Warm the fluid to body temperature, 37°C, and no warmer, as chapter 21 teaches for every distention fluid, because cold fluid running through a joint chills the patient.
When the shaver is running, its suction pulls fluid out, so the scope's outflow is closed; otherwise the joint is over-suctioned and dirty fluid can be pulled back in. The drapes are impervious, with pouches for the runoff, and a tourniquet is often put on but inflated only if bleeding blocks the view.
Making the portals
The surgeon marks the joint lines and the portal sites. A spinal needle may be used to fill the joint with fluid first. A #11 blade makes a stab wound, a sharp trocar in its sheath goes just through the capsule, and a blunt trocar takes the sheath the rest of the way into the joint; then the scope goes in and the light cord, camera and tubing are connected. Under the scope's view, a spinal needle finds the best angle for each working portal. In a long case where cannulas are swapped often, a switching stick holds the path while one cannula is exchanged for another.
Your role
Pass off and help connect the light cord, camera, shaver cord and tubing, have several anchors ready for a repair, change shaver blades and burs as asked, and keep the fluid flowing. At the end, a long-acting local anesthetic may go into the joint, and the portals are closed with a suture or skin strips under gauze, padding and an elastic wrap. Scopes, light cords and cameras are delicate and heat sensitive: handle them as their makers direct.
12Shoulder and clavicle
The shoulder moves more than any other joint and is held together mostly by soft tissue, so many shoulder cases repair the rotator cuff, the labrum or the capsule, and it is the hardest joint to rehabilitate.
Position: beach chair or lateral. In the beach chair, the patient sits up about 45 to 60 degrees, the head and neck neutral, the operative shoulder slightly off the table's edge, the other arm on a padded armboard, a pillow under the knees, the heels padded, a footboard if needed, the genitals free of pressure and a safety strap on; chapter 31 teaches the sitting position's risks. In the lateral position, a beanbag holds the patient, the down-side axilla and leg are padded, and the arm may hang in a suspension system with 5 to 15 pounds of weight to open the joint.
Prep and drape: from the chin to the waist, front and back, with the axilla and the whole arm; the hand and forearm go in an impervious stockinette and the arm is draped free.
Wound class: I, clean, for closed fractures and elective cases; an open fracture is III when fresh and IV when old, with dead tissue; an infected joint or bone is IV.
Shoulder arthroscopy and acromioplasty
What and why: arthroscopy shows the inside of the shoulder and the space beneath the acromion, to diagnose a chronic problem and treat it: loose bodies, adhesions, inflamed synovium or bursa, an unstable joint, and a torn labrum, biceps tendon or rotator cuff. An acromioplasty removes bone spurs from the underside of the acromion that pinch (impinge on) the supraspinatus tendon, causing pain, swelling and weakness. It is done alone or with a cuff repair, open or through the scope.
Before surgery and setup: X-rays and MRI; general or regional anesthesia, and an examination under anesthesia before the prep. Have the arthroscopy set with 30- and 70-degree scopes, an 18-gauge spinal needle, a #11 blade, a marking pen, the shaver and burr, an arthroscopic electrosurgery probe, switching sticks and 3000 mL bags of lactated Ringer's; the surgeon may ask for epinephrine in each bag, after checking with the anesthesia provider.
Key steps: the scope goes in from the back and a working portal in front, as under Arthroscopy above. The surgeon explores the joint while the arm is moved and rotated (you may be the one turning it, so know the movement words). For an acromioplasty, the shaver or burr shaves the spurs from under the acromion. At the end, a long-acting local anesthetic may go into the joint, the portals are closed and dressed, and the arm goes into a sling.
After surgery: most patients go home the same day, and physical therapy follows; infection and bleeding are the risks.
Rotator cuff repair
What and why: a tear usually starts where the supraspinatus tendon attaches to the greater tuberosity and can spread to the other cuff tendons. Partial tears come mostly from long wear in middle age and later; complete tears can follow an injury in young throwing athletes, and the patient may be unable to start raising the arm. Many tears heal with physical therapy and anti-inflammatory drugs; surgery follows when they do not.
Approach and setup: open or arthroscopic; either way, the tendon goes back onto the humerus with sutures through bone or with suture anchors, often with an acromioplasty. Have a major orthopedic set and a shoulder set, a small drill, a burr, possibly a microsagittal saw, heavy nonabsorbable suture with free needles and suture anchors, with mesh on hold; for an arthroscopic repair, the arthroscopy setup and an anchor system.
Key steps (open): through a front incision, the deltoid and the coracoacromial ligament are divided (keep plenty of laps ready), and a Gelpi or Beckman retractor shows the cuff. The acromion's spurs are removed, and holes or anchor pilot holes go into the humerus. Braided polyester sutures are passed through bone and tendon, tagged with hemostats, and tied with the arm raised to ease the tension. A divided deltoid is sewn back through drill holes, the wound is washed with antibiotic irrigation and closed, and the arm goes into a sling or immobilizer. In the arthroscopic repair, the anchors go into the greater tuberosity through the portals.
After surgery: a small tear may start moving in 3 or 4 days; a large one is kept still for 2 to 8 weeks, and some patients never regain full activity.
Bankart repair
What and why: the labrum, the rim of cartilage that deepens the shallow glenoid, and its ligaments help hold the humeral head in the socket. When they tear away from the front of the glenoid (the Bankart lesion), the socket becomes shallower and the head is forced out again and again: a recurrent dislocation. A Bankart repair fixes the labrum and capsule back to the rim of the glenoid.
Setup and key steps (open): a major orthopedic set, shoulder instruments such as a humeral head retractor, a power drill and burr, suture anchors or a tacking device, and free needles. Through an incision near the axillary crease, the capsule is opened; a rasp, osteotome or curette roughens the glenoid rim to raw, bleeding bone so the capsule can heal to it; holes are drilled in the rim (have several anchors ready); and the capsule and labrum are sutured to it. The surgeon tests the repair through the shoulder's range, and a sling or soft immobilizer goes on.
Arthroscopic repair: through a back portal for the scope and a front working cannula, the glenoid below the labrum is freshened with a rasp, shaver or burr, holes are drilled, and usually about three anchors pull the labrum back to the rim.
After surgery: the arm rests in a sling, motion starts within days, and a return to contact sports or heavy work takes about 6 months.
Shoulder arthroplasty: total, hemi and reverse
What and why: a shoulder replacement relieves pain and restores use when arthritis, most often osteoarthritis, has destroyed the joint, or for rheumatoid arthritis, avascular necrosis or a badly broken humeral head.
- Total shoulder arthroplasty: a metal ball on a stem, press-fit or cemented, replaces the humeral head, and a polyethylene cup the glenoid.
- Hemiarthroplasty: only the humeral side is replaced, as for a badly comminuted humeral head.
- Reverse total shoulder arthroplasty: for a large rotator cuff tear or a cuff no longer intact: the ball (a glenosphere on a baseplate) goes low on the glenoid and the cup on the humeral stem, so the deltoid raises the arm in place of the cuff.
Before surgery and setup: beach chair at about 45 degrees, with sequential compression devices, the arm in a padded or hydraulic positioner. Have a major orthopedic set and a shoulder arthroplasty set, a high-speed drill, an oscillating saw, reamers and the system's broaches, trials and implants, and cementing supplies; allow plenty of table room, a magnetic instrument pad so instruments do not slide off, and holsters for the ESU and suction, which run all case.
Key steps:
- A deltopectoral incision, between the deltoid and the pectoralis major, holding the cephalic vein aside and watching for the axillary and musculocutaneous nerves. The subscapularis is tagged and released, the capsule opened, and an elevator dislocates the humeral head.
- Bone spurs come off with a rongeur, and the head is cut through a cutting guide with the saw while you irrigate; keep the head moist on the back table. The canal is reamed and broached in rising sizes, with a trial head on the last broach.
- The glenoid's labrum and cartilage are removed, and it is reamed and drilled through a guide for the pegs; after a trial, the glenoid part is cemented, with a small elevator ready for the cement that squeezes out.
- The humeral stem is impacted, press-fit or cemented, the final head chosen with trials, and the shoulder reduced. The subscapularis is repaired with heavy suture, and fluffs, an ABD pad and a sling or immobilizer go on.
In a reverse shoulder, the baseplate is set low on the glenoid and the glenosphere attached to it.
After surgery: rehabilitation can take about 16 weeks to bring back near-full motion. Complications include infection, axillary nerve injury, a loose glenoid part, an unstable joint, a rotator cuff tear, a fracture around the implant and loss of motion.
Clavicle ORIF
What and why: the clavicle is one of the most often broken bones, usually from a blow to the clavicle or shoulder, and most are treated in a figure-of-eight splint. ORIF is done for a nonunion, a break pressing on the vessels or the brachial plexus, an outer-end fracture with the coracoclavicular ligaments torn, or pieces held apart by trapped soft tissue.
Position and setup: supine or half sitting, a sandbag or folded sheet under the shoulder and the head turned gently to the other side, so the brachial plexus is not stretched, with the whole arm prepped and draped. Have soft tissue and bone instruments, bone reduction forceps and clamps, K-wires to hold the reduction for a while, Steinmann pins or a small plate and screws to hold it for good, a power drill, and bone graft for a nonunion.
Key steps: through a short incision, the surgeon reaches the clavicle without stripping its periosteum and reduces the break with bone-holding forceps. A small semitubular plate with two or more screws on each side goes on the front of the bone, or a threaded Steinmann pin crosses the break. Every hole is drilled with great care, because the subclavian vein and the top of the lung lie just beneath. After closure, the arm goes into a sling.
13Arm, elbow and forearm
Position, prep and drape: supine on a hand table for the forearm; for the elbow, supine with the arm across the chest, prone with the elbow bent over a small table, or lateral; supine near the table's edge for the humerus; a tourniquet on the upper arm when the site allows. The whole arm is prepped, with the axilla and chest for a high incision, the hand usually excluded.
Wound class: I, clean, for closed fractures and elective cases; an open fracture is III when fresh and IV when old, with dead tissue; an infected joint or bone is IV.
Proximal humerus ORIF
What and why: the upper humerus breaks at the surgical neck, often with a tuberosity, into two, three or four parts. A displaced, comminuted fracture may need ORIF or a nail placed closed; one too shattered to fix gets a prosthesis. Surgery is done soon, before scar, stiff muscles and soft bone make it harder.
Setup: bone instruments, a proximal humerus locking plate system, K-wires, sutures for the rotator cuff, and the C-arm on the side opposite the surgeon.
Key steps: through a deltopectoral approach, heavy sutures in the cuff tendons pull the broken tuberosities into place; the fracture is reduced and held with K-wires under fluoroscopy; the plate goes on the greater tuberosity, behind the biceps tendon, with locking screws into the head and screws into the shaft, each checked so none enters the joint; and the cuff is repaired with its sutures before closure and a sling. Early rehabilitation begins with assisted range-of-motion exercises.
Humeral shaft fracture: intramedullary nail
What and why: most humeral shaft fractures heal with closed reduction and a brace or cast, with little risk of nonunion or infection. Surgery is for one that cannot be reduced closed or has not healed, usually with a locked intramedullary nail, its screws above and below the break stopping rotation and pulling apart; a compression plate is kept for a break that reaches the lower humerus or for failed treatment.
Setup: a radiolucent table and the C-arm, soft tissue and large bone sets, the nail system, a power drill for the locking screws, and cement on hold for a pathologic fracture.
Key steps (antegrade): with traction on the arm, an incision from the outer edge of the acromion over the greater tuberosity; an awl opens the canal there, checked in two views; a ball-tipped guidewire goes to within 1 to 2 cm of the olecranon fossa and measures the nail; the canal is reamed gently in half-millimeter steps to a little larger than the nail; the nail is driven across the break; and the locking screws go in, the upper ones through the guide on the handle and the lower ones freehand under fluoroscopy, each by drill, measure and insert. The radial nerve can be trapped or injured. A nail can also go in from below (retrograde), prone or lateral.
Olecranon ORIF
What and why: the olecranon breaks from a fall onto the point of the elbow. A small piece may be removed and the triceps sewn back onto the ulna; a larger one is reduced and fixed. The surgeon may also cut the olecranon on purpose (an osteotomy) to reach a lower humerus fracture, then fix it the same way.
Setup and key steps (tension band wiring): prone, the arm on an armboard or hand table, with soft tissue and bone sets, heavy stainless steel wire with a wire tightener, K-wires and a K-wire driver, cancellous screws, reduction clamps and a power drill. The break is exposed and reduced; steel wire passes through a hole drilled across the ulna below it; a cancellous screw or two smooth Steinmann pins cross the break from the tip; and the wire is crossed in a figure of eight around them and tightened, the pins bent over to hold it. A long arm splint goes on, and because moving the elbow squeezes the break through the wire, motion starts early.
Radial head arthroplasty
What and why: a smooth, round radial head lets the forearm turn and steadies the elbow. A radial head fracture that cannot be fixed, often with other elbow injuries, is treated by removing the head or replacing it with a more durable metal implant; the radial head is never removed in a child.
Setup and key steps: supine with the arm across the chest or on a hand table, or lateral, with a tourniquet, a soft tissue set, a small bone set, an oscillating microsaw, burrs and rasps, and the implant system with its trials. A lateral incision between the extensor carpi ulnaris and the anconeus opens the capsule; the broken head is removed and the neck cut evenly (save every fragment, so the surgeon can piece them together and be sure none is left in the joint); burrs or rasps shape the canal; a trial is moved through bending and turning under fluoroscopy before the final implant; and the outer ligaments are repaired and a long arm splint applied with the elbow at 90 degrees. Pain relief is usually excellent; loosening of the stem is the long-term concern.
Radius and ulna shaft ORIF
What and why: the radius and the ulna work together to turn the palm up and down. Nearly every adult who breaks both forearm bones needs surgery, usually ORIF with a dynamic compression plate; a cast alone is used only for children, and an external fixator only for a while in a badly injured or heavily contaminated case.
Before surgery and setup: the X-rays in the room, radiology on standby, often a Bier block. Have a small fragment set with 3.5 mm dynamic compression plates, plate benders and a malleable template, sharp and blunt bone reduction forceps, the drill, guides, depth gauge, taps and hexagonal screwdriver, K-wires and the C-arm.
Key steps (radius):
- The arm is emptied with an Esmarch bandage and the tourniquet inflated; if both bones are broken, both incisions are made at the start. For the lower half of the radius, a front (volar) incision between the brachioradialis and the flexor carpi radialis protects the radial nerve; for the upper half, an incision on the back.
- The periosteum is stripped where the plate will sit, a small curette clears the clot, and two bone-holding forceps reduce the break.
- The plate, usually five or six holes, is bent to the template and the radius's bow. The screws go in one at a time by drill, measure, tap, insert: the first in the center of its hole (neutral), the next off center (eccentric) in the other piece so it compresses the break as it tightens. Fluoroscopy checks the plate and the surgeon checks the forearm's rotation.
- The wound is irrigated, the tourniquet let down to find bleeders, and the wound closed under a flat dressing, sometimes with a long arm splint.
After surgery: most patients go home the same day and have good motion in 10 to 12 days. Complications include bleeding, infection, malunion and nonunion.
External fixation of the forearm
A frame on the forearm is a temporary repair for a severe open fracture or one with heavy soft tissue damage, using threaded self-drilling, self-tapping pins. With the arm on a hand table and the hand excluded, a stab incision goes over each pin site, spread bluntly to the bone. For each pin, a drill sleeve and trocar go to the bone, a pilot hole is drilled and measured with the depth gauge, and the pin goes in by hand or by drill, its depth checked under fluoroscopy. The pins are clamped loosely to a bar, which the surgeon pulls to reduce the fracture while the assistant holds it and the clamps are tightened. The pin sites are not sutured; each is wrapped with petrolatum gauze (Xeroform), as for the distal radius fixator below.
14Wrist and hand
Hand surgery combines orthopedics with the surgery of vessels and nerves, much of it under loupes or a microscope. The team sits at the hand table, and you may steady the hand as well as irrigate and retract; keep delicate tendons, nerves and vessels moist with saline from a small bulb or syringe, and use fine, low suction. Chapter 38 teaches the hand's soft tissue operations and chapter 42 carpal tunnel release. Replantation (reimplantation) reattaches a finger, hand or limb cut off in an injury: the bone is joined with pins or wires, then the tendons, vessels and nerves are repaired under the microscope with fine double-armed sutures.
Position, prep and drape: supine with the arm on a hand table, a tourniquet on the upper arm, the hand and forearm prepped, and the arm draped on the table. A rolled towel under the wrist steadies it, or the hand hangs in a traction device.
Setup: short instruments, a small bone set, a small drill with fine K-wires or Steinmann pins, small plates and screws, bipolar electrosurgery, vessel loops to hold tendons aside, and fine sutures.
Wound class: I, clean, for closed fractures and elective cases; an open fracture is III when fresh and IV when old, with dead tissue; an infected joint or bone is IV.
Wrist arthroscopy
What and why: wrist arthroscopy finds and treats problems inside the wrist: torn ligaments, including the triangular fibrocartilage complex (TFCC) on the little-finger side of the wrist, worn joint surfaces, loose bodies and inflamed synovium, and it helps line up some fractures. Studies have found it more accurate than an arthrogram for finding a ligament tear.
Setup and key steps: a 2.5 to 3 mm arthroscope, small probes, baskets, graspers and shaver blades, radiofrequency probes, 18-gauge needles, sterile finger traps and a traction tower or overhead pulley, with fluid by gravity or pump. Under a regional block or general anesthesia, the hand hangs from finger traps on the thumb, index and long fingers, the elbow bent about 90 degrees and 4 to 10 pounds of traction opening the wrist. The portals go in on the back of the wrist between the extensor tendon compartments, named for them, such as the 3-4 portal.
After surgery: complications include skin and nerve injury from the traction, injury to the tendons, nerves and vessels at the portals, and, rarely, compartment syndrome in the forearm from fluid leaking into it during fracture work.
Arthroplasty of the wrist and hand
- Finger joint replacement: for pain or deformity of the knuckle (metacarpophalangeal) or finger joints from rheumatoid or degenerative arthritis. Through incisions on the back of the fingers, the joint ends are cut away, the canals reamed, sizers tried, and a flexible silicone implant seated, with the tendons and ligaments repaired around it. A bulky dressing and a short arm splint follow. Weak grip and pinch are the common problems afterward.
- Thumb basal joint (carpometacarpal) arthroplasty: for arthritis at the base of the thumb, the trapezium is removed, sometimes with a ligament rebuilt and part of the flexor carpi radialis tendon tucked into the space.
External fixation of a Colles' fracture
What and why: most Colles' fractures are reduced closed and held in a cast. An external fixator suits a comminuted fracture that enters the joint: it interferes little with the joint, lets the patient move early and needs no cast. K-wires may be added.
Before surgery and setup: X-rays in two views, and CT or MRI, help the surgeon choose between a fixator and ORIF; the anesthetic may be a Bier block or general. Have a basic orthopedic set, a power drill, a drill bit box and drill guide, K-wires or Steinmann pins, a pin cutter, the fixator (usually in its own sterile package) and its wrenches, the C-arm and petrolatum gauze.
Key steps:
- The fracture is reduced under fluoroscopy, sometimes with finger-trap traction.
- A small incision over the second metacarpal; two pins go into it, through a drill guide matched to the bit, at an angle of about 45 to 60 degrees, into but not through the far cortex. The metacarpal pins go first, which sets the fixator's length.
- A second incision on the forearm, with blunt dissection to the radius, sparing the sensory branch of the radial nerve. Two pins go into the radius above the fracture, about 8 cm from the radial styloid.
- Clamps and the frame are fitted over the pins. With the fracture held reduced, the clamps are tightened with wrenches, and the frame is adjusted until the fluoroscopy shows the length and angles are right.
- A final X-ray confirms the pins and the reduction. Petrolatum gauze is wrapped around each pin; the pin sites are not sutured.
After surgery: the patient moves the fingers right away and usually goes home the same day. The fixator comes off in the surgeon's office at about 8 to 10 weeks, once the bone has healed. Pin site infection, bleeding and nerve injury are the risks.
Scaphoid ORIF
What and why: the scaphoid is the carpal bone most often broken, usually by a fall onto the hand. A simple break is treated in a cast; a displaced or unstable one is fixed, usually with a headless or cannulated compression screw. Its reversed threads at each end pull the pieces together.
Setup and key steps: a hand set, a small drill, K-wires, the screw system, vessel loops, the C-arm, and bone graft instruments on hold. Through a small incision on the front of the wrist, a small branch of the radial artery is tied and divided, the flexor carpi radialis tendon is held aside with a vessel loop and the capsule opened to show the scaphoid. K-wires drilled into each piece reduce the break under fluoroscopy. A threaded guidewire is placed across it, the path drilled with a cannulated bit, a washer put on if the screw takes one, the length measured over the wire, and the screw threaded over it and tightened; the wire comes out with the drill in reverse. Bone graft is packed around the break if needed, and a thumb spica splint or cast goes on.
15Open reduction and internal fixation of the distal radius
This is the Core Curriculum's model case for orthopedics, so it is taught here from start to finish. Chapter 3 teaches the five stages of bone healing, the first objective of this case: inflammation, cellular proliferation, callus formation, ossification and remodeling. At the wrist, the lower end of the radius has two joint surfaces: its end meets the carpal bones, and its inner side meets the ulna.
Pathophysiology
- The fracture: a break of the lower end of the radius, classically the Colles' fracture described above, from a fall onto an outstretched hand.
- Why operate: most distal radius fractures can be reduced closed and held in a cast. Surgery is for one that is badly comminuted and displaced, or broken into the wrist joint, where an external fixator or ORIF holds it.
- Comorbidities: osteoporosis, which the Core Curriculum names: weak bone breaks easily, and the wrist is one of the three places osteoporotic fractures happen most. In one study of volar plating, older age and lower bone density slowed the recovery.
Diagnosis
X-rays of the wrist, from the front and the side, show the fracture and its pattern. CT or MRI may add detail and help the surgeon choose between a plate and an external fixator, and the images go to the OR.
Preparing the patient
- Anesthesia: an axillary block, which numbs the whole arm, general anesthesia, or monitored anesthesia care (MAC).
- Monitoring: depth of anesthesia (BIS), exhaled carbon dioxide (capnography), blood pressure, heart rate, oxygen saturation, breathing rate, temperature and urine output, and the tourniquet's pressure and time.
- Position: supine, the arm on a radiolucent hand table, with an armboard, a safety strap, pillows and padding.
- Tourniquet: on the upper arm, over its padding, before the prep.
- Skin prep: the whole extremity, from the fingertips up to the edge of the tourniquet, starting at the incision site.
- Draping: the tourniquet is sealed off from the field, a stockinette goes on the hand and arm, a sterile sheet covers the hand table, an impervious U-drape seals the upper arm, and an extremity drape goes over the top.
- Verification: the patient's identity, the procedure and the site and side are confirmed, the site marked, and the time out held.
The room, instruments and supplies
Equipment: the ESU generator, lead aprons or shields, positioning aids (an armboard, a safety strap, pillows, padding), a radiolucent hand table, suction, the tourniquet system and the C-arm.
Instruments: a fracture management set: a battery or air-powered drill and the fixation tray with its plates, screws and the drill, measure and tap instruments; and a minor or basic orthopedic tray.
Supplies: a back table extremity pack, a basin set, blades, the ESU pencil with its holder and tip, light handle covers, skin prep, sponges, suction tubing and tip, patient drapes, gowns and gloves. Specialty supplies: bone graft material, a C-arm drape, casting or splint material, K-wires, and a pulsed lavage set as needed. Sutures for the periosteum, the fascia and the skin.
Medications: a local anesthetic, and irrigation with or without an antibiotic.
The operation
The Core Curriculum's steps describe a front (volar) approach and a plate with locking screws for the lower fragment.
- The arm is emptied of blood (exsanguinated) with an Esmarch bandage or by raising it, and the tourniquet is inflated.
- A longitudinal incision is made over the fracture, on the front of the wrist and forearm, and the soft tissue is dissected, the bleeding controlled as the surgeon goes.
- One retractor moves and protects the flexor carpi radialis (FCR) tendon, and another shows the deep sheath beneath it.
- The deep sheath is cut on the inner side of the radial artery, which is protected. Retractors go on each side of the lower radius. The pronator quadratus, the flat muscle over the end of the radius, is lifted off the bone.
- A periosteal elevator strips the periosteum where the plate will sit, and a self-retaining retractor holds the wound open to show the fracture.
- Toothed reduction forceps may turn the radius and move the lower fragment, and a curette cleans clot and debris out of the break.
- The fracture is reduced and held with self-retaining bone clamps. A large fragment may get a screw or K-wires of its own.
- The surgeon shapes a soft, malleable template to the bone, picks the plate that matches it, and bends the plate to the radius with plate benders as needed.
- The reduction is checked on the C-arm.
- The first screw goes through the plate's oblong (glide) hole, which lets the plate slide up or down before the rest are placed: drill through the drill guide, measure, tap if the screws are not self-tapping, and screw. The same drill, measure, (tap), screw sequence follows for every screw.
- Temporary K-wires go into the lower fragment or through the plate and are checked on the C-arm, to be sure the screws will hold well.
- More holes are drilled in the lower end of the plate for locking screws that sit just under the joint surface (subchondral), and the temporary K-wires come out.
- The reduction and every screw are checked again on the C-arm, with views that show no screw has entered the joint.
- The wound is irrigated and the muscles are let back into place; the pronator quadratus may be sewn back over the plate.
- The tourniquet is let down so the surgeon can find and stop any bleeding.
- Every layer is closed: periosteum, fascia, skin.
- The dressing goes on: a nonadherent layer (Telfa or Xeroform), 4x4 gauze and rolled gauze (Kerlix or Kling).
- A semi-rigid splint runs from the hand to mid-forearm with the fingers left free to move, wrapped with an elastic (Ace) bandage.
you are the one who knows what comes next. Have the drill loaded, the depth gauge ready, the tap on its handle and the screw on its driver before the surgeon asks, say each screw size aloud, and keep a list of every plate and screw for the circulator.
Counts: the initial count, then a count as wound closure begins (at the fascia) and as skin closure begins, the Core Curriculum's three; chapter 29 teaches when counts are done.
Wound class: I, clean, for a closed fracture; III, contaminated, for an open fracture with a fresh wound; IV, dirty, when the open wound is old, with dead tissue left in it, which the Core Curriculum puts at more than 4 hours after the injury.
After surgery: to PACU, or to the ICU for a trauma patient with other injuries. Complications include bleeding, compartment syndrome, malunion, nonunion and surgical site infection. Teach the patient to keep the hand raised as the surgeon advises and to report more swelling and pain, tingling or burning, or a splint that stays too tight.
16Pelvis and hip
Falls are a major cause of hip fractures in older people, and high-speed crashes in younger ones.
Position, prep and drape: supine on the fracture table for most hip fractures and femoral nails; lateral on a beanbag or hip positioner for many hip replacements; supine for an anterior hip replacement and pelvic surgery. The prep runs from the waist down the leg, the foot wrapped or the leg draped free, under impervious drapes and an iodophor incise drape.
Wound class: I, clean, for closed fractures, joint replacements and arthroscopy; an open fracture is III when fresh and IV when old, with dead tissue; an infected joint, bone or implant is IV.
Pelvic and acetabular fractures
What and why: a broken pelvis usually comes from high-energy trauma and often travels with injuries to the bladder, urethra, bowel, genitals and large vessels. An unstable pelvic ring can bleed heavily behind the peritoneum, where bleeding is hard to reach, so it can be life-threatening.
External fixation is the quick first repair for an unstable patient, and the sooner it goes on, the better it works. The surgeon reduces the pelvis by hand and checks it on X-ray; K-wires through the skin find the slope of the iliac crest; rows of half-pins are drilled into the front of the crest between its two tables of bone; and frames and a crossbar join them, compressed or distracted to hold the reduction for about 8 to 12 weeks.
ORIF of the pelvis follows once the patient is stable. For a symphysis pubis split open like a book (an open-book fracture): a Foley catheter, a laparotomy prep and drape with the patient supine, a long Pfannenstiel incision with the bladder protected, a Weber or pelvic reduction clamp to close the gap, a curved reconstruction plate and a drain in front of the bladder, with laparotomy, bowel and urology instruments on hold.
Acetabular ORIF: a broken socket is fixed when it is displaced more than 2 mm, has loose bodies in the joint, will not reduce closed, has an unstable back wall or is open, usually after 3 to 10 days in skeletal traction while the patient is stabilized. These cases are long and bloody: keep the room warm, protect the skin from pressure injury, and have cell salvage ready. Have acetabular instruments, pelvic reduction clamps, 3.5 and 4.5 mm reconstruction plates with bending irons, a femoral distractor, K-wires and Steinmann pins, a drill and reamer, fluoroscopy and a total hip set on hold; the fragments are reduced with clamps and K-wires and fixed with contoured plates and long lag screws.
Hip fractures
Hip fractures are named for where they break: the femoral neck, between the trochanters (intertrochanteric), or just below them (subtrochanteric). They are fixed as soon as the patient's condition allows, because lying still brings pressure injuries, lung congestion and clots, and a broken femoral neck can cut off the head's blood supply (avascular necrosis).
Femoral neck: cannulated screws. A nondisplaced femoral neck fracture is often held with cannulated screws: on the fracture table, through a short incision over the greater trochanter, guide pins are drilled up the neck into the head under fluoroscopy and measured, and the screws go in over them, with care that none enters the joint.
Intertrochanteric: sliding hip screw. A large lag screw goes up the neck into the head, and the barrel of a side plate screwed to the femur fits over it: the dynamic, or sliding, hip screw. Key steps:
- On the fracture table, the fracture is reduced with traction and checked on fluoroscopy; a lateral incision goes down to the femur.
- A guide pin is drilled up the neck into the center of the head through an angle guide, often 135 degrees; it stays in most of the case, and the cannulated instruments go over it. A cannulated depth gauge measures it, and a reamer set to that depth reams the channel for the lag screw and the barrel, which may be tapped.
- The plate size is confirmed with the surgeon before the implant is opened. The lag screw goes in over the pin, the barrel slides over it, and the side plate is screwed to the femur once the pin is out and the traction let off.
- After closure, often over a drain, a pad between the legs keeps the hip spread apart.
Intertrochanteric: trochanteric (cephalomedullary) nail. An unstable intertrochanteric fracture is best held from inside the bone, with a nail whose upper end takes a large lag screw up the neck. Through a short incision above the greater trochanter, the top of the femur is reamed over a guide pin, a ball-tip guide rod measures the nail, and the nail goes in; the lag screw goes up the neck through the aiming arm, checked in two views, and the nail is locked at the bottom.
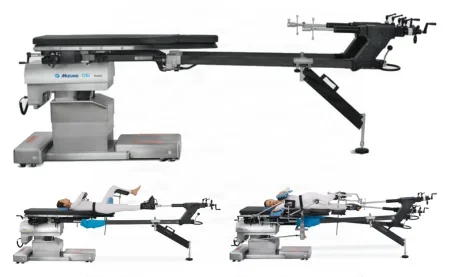
After surgery: many patients bear weight within a day and go home once they can walk on level ground, climb a few steps and get in and out of bed.
Femoral shaft fracture: intramedullary nail
What and why: a broken shaft of the femur, the body's largest load-bearing bone, means a long disability if it is not fixed well. An interlocking IM nail is the standard: it shares the load, and placed closed it keeps the fracture hematoma in place, with little scarring, blood loss or infection.
Before surgery and setup: general or epidural anesthesia, supine on the fracture table with traction, the fracture reduced by hand under fluoroscopy, and the prep from the knee to the trunk. Have a large bone set, hip retractors, the nail system with its long guidewires, a power reamer and drill, a skeletal traction set on hold, and reamers of 8 to 17 mm in half-millimeter steps, the first end-cutting.
Key steps (antegrade): an incision over the tip of the greater trochanter; an awl, or a guide pin and cannulated reamer, opens the canal; a ball-tip guidewire crosses the fracture and the nail length is measured; the canal is reamed to a little larger than the nail, because a nail forced into a narrow canal can split the femur; the nail is driven in with a slap hammer, turned to match the femur's bow; and the locking screws go in, the lower ones by a targeting device or freehand until the holes look like perfect circles on fluoroscopy.
After surgery: the thigh is watched for compartment syndrome, and walking usually starts at once, with weight bearing as the fracture allows; fat embolism (below) is a risk after any long bone fracture.
Total hip arthroplasty
What and why: a total hip replacement puts an artificial ball and socket in place of a hip destroyed by osteoarthritis, rheumatoid arthritis, avascular necrosis or a fracture, when other treatment no longer helps; it is one of the most successful operations in orthopedics. The modular parts are a femoral stem, neck and ball, and an acetabular shell with a liner, the neck's length and angle (its offset) and the ball's size chosen during the case. Either side may be cemented or press-fit (a hybrid usually cements the stem), by the bone's quality and the patient's age and activity. The posterior (posterolateral) approach is the most common and spares the abductor muscles; some studies have linked it with more dislocations, but none has settled which approach is best.
Setup: a major orthopedic set with hip instruments and retractors (Charnley, Cobra and Hohmann), bone hooks and clamps, osteotomes, a power reamer, drill and saw, the system's acetabular reamers, broaches, trials and implants, and pulsed lavage with a 3-liter bag of saline or antibiotic solution; for a cemented case, cement and the mixer, wicks, a cement restrictor and its inserter, and the cement gun. One system's instruments never work with another's, so check at the time out that every one is there.
Key steps (posterolateral, press-fit):
- Lateral on a beanbag, prepped from the waist to the foot, the foot then wrapped in sterile towels and the leg draped free under an iodophor incise drape. Through a posterolateral incision with a #10 blade and the ESU, the fascia lata and the gluteus maximus fascia are divided (have dry laps and suction), a Charnley retractor goes in, and tendons are tagged for repair.
- The hip is dislocated by bending, adducting and internally rotating it while a bone hook lifts the femoral neck, and the neck is cut with the saw under irrigation. Receive the head standing close to the table, so it cannot fall, and keep it moist in case it is needed as graft.
- Cobra or Hohmann retractors show the acetabulum, which is reamed in rising sizes (clean the reamers in a basin of sterile water), and the shell, the size of the last reamer, is impacted and the liner inserted.
- The femoral canal is opened with a hand awl or "cookie cutter" and shaped with broaches, fin-shaped rasps that match the stem, in rising sizes; a trial neck and ball test stability and leg length; then the final stem is impacted and the ball seated with a plastic-capped impactor.
- The tagged tendons and the layers are closed, over a drain if wanted, under a compression dressing, with an abduction pillow between the legs if stability is a concern.
For a cemented stem, the canal is washed with pulsed lavage, brushed and dried with wicks, plugged with a cement restrictor, and the cement injected and pressurized with the gun before the stem goes in.
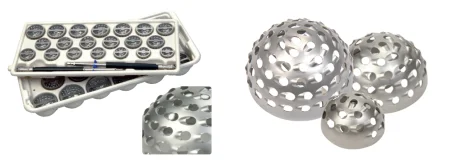
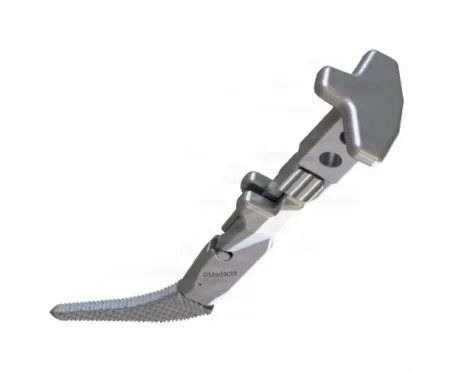
Direct anterior total hip arthroplasty
What and why: the anterior approach reaches the hip from the front, between the tensor fasciae latae and the sartorius, sparing the abductor muscles. Supporters cite fewer dislocations and a faster recovery; the drawbacks are a steep learning curve, a harder femoral exposure with more risk of fracture, and numbness of the outer thigh.
Before surgery: supine on a table X-rays can pass through, a small bolster under the operative side of the pelvis, the leg prepped from above the waist to the ankle. Alert radiology, and arrange the C-arm and its monitor with care.
Key steps:
- Over the femoral neck, found on fluoroscopy, the incision is made; Army-Navy retractors hold the sartorius with the lateral femoral cutaneous nerve and the tensor fasciae latae, and the ESU controls the lateral femoral vessels.
- Curved lighted retractors go around the neck and the capsule is opened.
- The saw and an osteotome cut the neck; a second cut frees a wafer of bone, lifted out on a threaded Steinmann pin, and the head is removed while the team holds the leg neutral.
- The acetabulum is reamed and the cup impacted, and the femur is rasped, trialed for motion and leg length, and fitted, the C-arm checking each stage.
To reach the femur, the table is broken to lower the leg into extension, the leg is adducted and turned outward, and a bone hook, or a hook mounted on the table, lifts the femur.
Robotic and navigated hip and knee replacement
Chapter 21 teaches robotic systems and navigation in general. In joint replacement, the robot works from the patient's own scans.
- Plan: before surgery a CT scan is turned into a model of the bone, and the surgeon plans each cut and the implant's size and position on it.
- Tracking arrays: the surgeon fixes tracking arrays (small frames of markers that the system's infrared camera follows) to the bones, such as the femur and tibia.
- Registration: the surgeon touches many points on the bone with a tracked pointer, and the computer matches the real bone to the model.
- Cutting inside the plan: the draped robotic arm holds the saw or reamer, the surgeon guides it, and its haptic limits stop it from removing bone outside the plan.
Keep yourself, your instruments and the drapes out of the camera's line of sight to the arrays, and never knock an array loose: its base is anchored in the bone, and the computer tracks the bone through it.
Hemiarthroplasty
What and why: a hemiarthroplasty replaces only the femoral head and neck, as for a badly comminuted femoral neck fracture or avascular necrosis, when the acetabulum is still good. The head may be unipolar (one solid ball) or bipolar (a ball that snaps into a polyethylene-lined cup, so they move as one). Have the total hip instruments in the room, unopened, in case the acetabulum proves worn.
Key steps: lateral, prepped from the umbilicus to the foot, by a posterior or anterior approach. The femoral head is removed and measured with a template, loose pieces are cleared from the acetabulum and a trial cup checks the size; the canal is opened with a punch, reamed and rasped, and the stem inserted with or without cement; and after a trial reduction the head is snapped onto the stem and the hip reduced.
Hip arthroscopy
What and why: hip arthroscopy treats labral tears, loose bodies, bony impingement of the femoral neck on the acetabulum (femoroacetabular impingement), cartilage damage, synovial disease and infection.
Key steps: supine on a fracture table or a regular table with a distraction device, against a heavily padded perineal post that must never press on the genitals or the pudendal nerve, the joint opened by traction checked on fluoroscopy. Anterior, anterolateral and posterolateral portals are placed with spinal needles under fluoroscopy and a 70-degree scope, sparing the sciatic and lateral femoral cutaneous nerves, the labrum and the cartilage of the head.
After hip surgery: complications include bleeding, dislocation, infection of the implant, blood clots in the deep veins (deep vein thrombosis), fat embolism, a fracture around the implant, loosening over time, sciatic nerve injury and unequal leg length. Antibiotics continue for 24 to 48 hours after a joint replacement, with clot prevention, teaching on protecting the new hip, and walking within about a day.
17Knee and leg
The knee carries much of the body's weight on the longest levers in the body, so knee problems are disabling.
Position, prep and drape: supine. For arthroscopy, the leg rests in a leg holder or hangs off the side or the lowered foot of the table; for open surgery, the knee sits at a table break or in a positioner so it can bend to 90 degrees; a tourniquet goes high on the thigh. The prep runs from the upper thigh to the ankle or foot, the foot and lower leg wrapped in towels and stockinette and the leg draped free.
Wound class: I, clean, for arthroscopy, ligament repair, joint replacement and closed fractures; an open fracture is III when fresh and IV when old, with dead tissue; an infected joint, bone or implant is IV.
Knee arthroscopy, meniscectomy and meniscal repair
What and why: arthroscopy does the most in the knee: diagnosis, synovial biopsy, loose bodies, inflamed synovium, smoothing the patella, a torn meniscus and the anterior cruciate ligament. A torn meniscus is the most common knee injury needing arthroscopic surgery, the medial far more often than the lateral. A partial meniscectomy, which leaves a rim to carry load and steady the knee, is preferred to removing it all, and a tear in the outer part, which has a blood supply, can be sewn and heals.
Setup: a knee arthroscopy set with a 4 mm 30-degree scope, trocars and cannulas, probes, hook and meniscus knives, scissors, baskets, graspers, a motorized shaver, a spinal needle and saline or lactated Ringer's, with meniscal repair needles and sutures or an all-inside device for a repair. The anesthetic may be general, spinal or local.
Key steps: local anesthetic with epinephrine goes into the marked portal sites, and a swollen knee may first be emptied with a large needle. The inflow cannula goes into the pouch above the patella, the scope in at the joint line and a working portal found with a spinal needle, as under Arthroscopy above. The surgeon probes the menisci and cruciate ligaments, moving the knee to open each space.
- Meniscectomy: the tear's attachment is cut with a hook knife and held with a grasper, the rest cut with scissors or push knives, and the edge smoothed with the shaver.
- Meniscal repair: long needles through a cannula carry absorbable suture across the tear and out through the capsule, where it is tied through a small incision.
At the end, a long-acting local anesthetic with epinephrine may go into the joint, and the knee is dressed with gauze, padding and elastic bandages.
Arthroscopic ACL reconstruction
What and why: the two cruciate ligaments (cruciate means cross shaped) cross in the middle of the knee, and the anterior cruciate ligament steadies it front to back, so it does not buckle. It is the ligament most often torn, usually by a twisting movement in sports, and an unstable knee left alone wears into osteoarthritis. Reconstruction suits an active patient whose instability bothers daily life despite bracing and rehabilitation.
The graft and setup: the patient's own tissue comes first: the middle third of the patellar tendon with a block of bone at each end, or the hamstring or quadriceps tendon; a donor graft (allograft) carries risks of disease transfer and rejection. Have everything for operative arthroscopy plus the ACL guide system with its guidewires and cannulated reamers, a microsagittal saw and small osteotomes, sizer tubes, fixation (interference screws, staples, washers or buttons) and a minor soft tissue set.
Key steps:
- An examination under anesthesia, with the ligaments relaxed, and a diagnostic arthroscopy, treating any meniscus tear first.
- The middle strip of the patellar tendon is cut with a double-bladed or #15 knife and its bone blocks freed with the saw and an osteotome. Receive the graft in a small basin, keep it moist, and save every chip of bone. On the back table, the blocks are trimmed, sized in a sizer tube (usually 10 to 12 mm) and drilled for heavy tagged sutures, and the bone-tendon junction is marked.
- A notchplasty widens the notch with a burr; guidewires are placed in the tibia and femur through the guide and overdrilled with reamers the size of the graft (collect the bone chips).
- An eyed pin pulls the graft through both tunnels, and an interference screw over a small guidewire wedges each bone block tight. After irrigation and closure, a hinged knee brace may go on.
After surgery: crutches and a brace for 2 to 3 weeks, physical therapy from the first week, and full recovery in 4 to 6 months; pain in the front of the knee is the most common lasting complication.
Total and partial knee arthroplasty
What and why: a knee replacement relieves pain and restores motion in a knee destroyed by osteoarthritis, the most common reason, or by rheumatoid or post-traumatic arthritis or avascular necrosis. A total knee replaces all three cartilage surfaces with a metal femoral component, a metal tibial tray with a polyethylene insert, and usually a polyethylene patellar button. A partial (unicompartmental) knee replaces only the medial or lateral side, in a knee whose ligaments are intact, and often needs a total knee later. The parts are cemented or press-fit, and a knee with weak ligaments may need a more constrained, even hinged, design.
Setup: a total knee system set with its cutting guides, trials and implants, a major orthopedic set with knee retractors (such as Hohmann and Blount), osteotomes, double-action rongeurs, a power drill and an oscillating saw, pulsed lavage and the cement mixing system.
Key steps:
- The knee at the table's break or in a positioner, the leg prepped from the foot to mid-thigh, the tourniquet inflated. A midline incision and a medial parapatellar opening turn the patella aside; the fat pad, the ACL and the front of the menisci come out.
- A drill opens the femoral canal for an intramedullary alignment guide (it is irrigated and suctioned of fat), and the femur and then the tibia are cut through their guides with a wide oscillating saw under irrigation, Hohmann retractors protecting the ligaments. Keep every piece of cut bone moist on the back table.
- Spacer blocks test the gaps with the knee bent and straight until the soft tissues are balanced; the tibia is punched for the tray's stem, the patella trimmed, and trials check the alignment and motion.
- The bone is washed with pulsed lavage and dried and the parts cemented, the femoral part impacted with a mallet. Remove the cement that squeezes out before it hardens, and check the joint for cement fragments. After closure, an occlusive dressing and a support bandage go on.
In a robotic knee replacement, the bone is registered to the patient's plan as described above, and the arm or a handheld robotic burr keeps the cuts inside it.
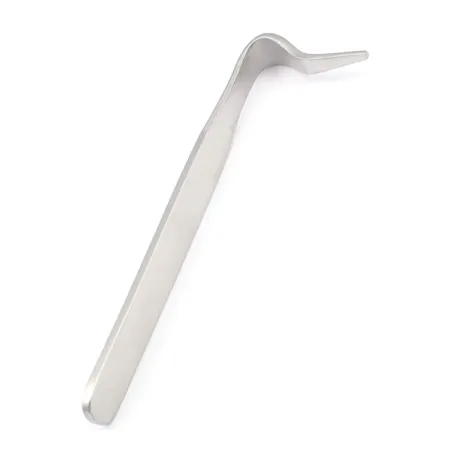
After surgery: in one study, a tourniquet used with tranexamic acid shortened the operation and lessened the drop in hemoglobin. A continuous passive motion (CPM) machine may move the knee in the first days, and clot prevention and early walking follow.
Tibial plateau and patella ORIF
Tibial plateau: the flat top of the tibia breaks when the femur is driven down into it, often when the leg is forced outward with the foot planted. A dislocation may come with it, so the nerves and vessels are checked at once. The depressed joint surface is lifted back up, the hole beneath packed with bone graft from the iliac crest, and the break fixed with buttress plates and cannulated screws, several plates for a severe break; the cruciate attachments and the menisci are repaired at the same time. The patient bears no weight on the leg until X-rays show healing.
Patella: a patella broken into two large pieces is fixed with tension band wiring, a wire loop around its edge or screws, so the knee can move early; removing the patella (patellectomy) is kept for one shattered beyond repair, because the knee loses much of its power to straighten. With the patient supine and a tourniquet, have soft tissue and bone sets, a drill, 18-gauge wire with a wire tightener and heavy needle holders, and reduction clamps. Through a curved transverse incision, the break is reduced; one wire passes around the patellar and quadriceps tendons and a second through the fragments, and both are tightened. After closure a knee immobilizer goes on, and bending the knee now squeezes the fragments together.
Tibial shaft fracture: intramedullary nail
What and why: the tibia breaks open more often than any other major bone, because a third of its surface lies just under the skin, and its poorer blood supply makes delayed union, nonunion and infection common. Closed IM nailing is the treatment of choice: less infection, and the bone's outer (periosteal) blood supply is kept. An external fixator is used instead for gross contamination, severe soft tissue or vessel injury, bone infection or delayed treatment. A nail locked at both ends (static) suits comminuted fractures; one locked only near the fracture (dynamic) suits fractures near either end and nonunions, and a stable fracture without callus may be made dynamic after 3 months by removing the screws at one end.
Setup and position: supine, the hip bent about 45 degrees and the knee 90, on a fracture table with calcaneal pin traction or a foot holder, or on a standard table with the thigh over a padded bolster; a large bone set, the tibial nail system, a power drill, reamers and fluoroscopy.
Key steps: the same as the femoral nail, entering at the knee: a 5 cm incision beside the patellar tendon, a curved awl into the canal just above the tibial tuberosity, a guide rod across the reduced fracture and measured, reaming to about 1 mm wider than the nail (with any tourniquet let down, and the reamings collected), the nail driven in with a mallet until its top is flush with the bone, and the locking screws placed through a targeting guide, each drilled through a tissue protector, measured with the depth gauge and turned in, with an end cap if used.
After surgery: compartment syndrome is the critical early complication, and pain in the front of the knee the most common lasting one.
Above-knee and below-knee amputation
What and why: an amputation removes a limb that cannot be saved, most often for poor circulation (ischemia) from diabetes and vascular disease, and also for trauma, infection, bone tumors and birth defects. The surgeon chooses the lowest level possible, because the level decides how well the wound heals and how well a prosthesis fits. Chapter 40 meets amputation again with vascular disease.
Before surgery, prep and setup: X-rays; spinal, epidural or general anesthesia; supine, a tourniquet perhaps on the upper thigh. A gangrenous or infected part may be sealed off in an impervious cover, such as a Mayo stand cover or an adhesive drape, and not prepped; otherwise prep from the cleanest area to the dirtiest. Hold the leg under the heel, never by the toes, which may come off. Have an amputation set with a Liston knife, a Gigli saw or amputation saw and a power saw, a large bone hook, rasps, culture tubes and a closed suction drain. Amputations move fast to limit bleeding, so keep up with clamps, ties and the ESU.
Key steps (above the knee):
- A fish-mouth incision, the bone cut planned 4 to 6 inches above the knee, with a long adductor flap to cover the bone. The femoral artery and vein are doubly clamped, tied with nonabsorbable suture and divided, and the sciatic nerve clamped and tied.
- The femur is cut with the power or Gigli saw and smoothed with a rasp. Through drill holes, the adductors are sewn to the bone while you hold the femur adducted, and the quadriceps over the end while you hold it straight, to prevent a hip flexion contracture.
- A drain goes in and the wound is closed under a bulky dressing.
Below the knee: a fish-mouth incision about halfway down the leg; the vessels are doubly tied; the tibia and fibula are sawn and rounded; and a long calf muscle flap is brought over the bone ends. The cut muscles are sewn to bone (myodesis), the stronger hold, or to the periosteum or the fascia of the opposing muscles (myoplasty); with severe ischemia, anchoring to bone may be avoided, because the wound is more likely to break down.
When the limb comes off, hand it to the circulator in a plastic bag and confirm aloud that it is the right or the left leg. Check with the pathology department whether the limb may go to the family: some religions require it to be buried with the person.
Wound class: I for a limb with a good blood supply; III or IV, contaminated or dirty, when gangrene is present.
After surgery: often a night in the ICU and a ward stay of 4 or 5 days. The patient may feel the missing limb, or pain in it (phantom limb syndrome), and needs reassurance. The residual limb is protected from weight until it heals, in 3 or 4 weeks, and fitting for a prosthesis starts early. Infection, severe pain and tissue death are the main complications.
18Ankle and foot
Ankle fractures and sprains are common sports injuries, and crashes, uneven ground, trips and falls cause many more; the foot carries the whole body's weight on 26 bones.
Position, prep and drape: supine for most cases, with a sandbag under the hip to turn the leg inward for the lateral ankle; prone for the Achilles tendon; lateral for some calcaneus fractures; a tourniquet on the thigh, or the ankle for a toe. The prep runs from the knee or mid-calf down, and the foot is draped free in a stockinette.
Wound class: I, clean, for closed fractures and elective cases; an open fracture is III when fresh and IV when old, with dead tissue; an infected joint or bone is IV.
Achilles tendon repair
What and why: the Achilles tendon ruptures in active people, usually in jumping sports such as tennis, basketball and volleyball. Surgical repair is the standard for an active patient, sometimes reinforced with a tendon graft or a scaffold.
Before surgery and setup: the tourniquet goes on the upper thigh while the patient is still supine; then the patient is turned prone and prepped from mid-thigh to the foot. Have a minor orthopedic set with tendon instruments (a tendon stripper, a fascia needle, a tendon-pulling forceps, a polyethylene block for trimming a graft) and heavy nonabsorbable suture.
Key steps: a posteromedial incision of 10 to 12 cm beside the tendon opens its sheath (paratenon). The upper end of the tear has pulled back toward the calf, because the tendon is always under tension, and may need the tendon-pulling forceps. The ends are sewn with #1 nonabsorbable suture while the knee is bent and the foot pointed down; a plantaris tendon graft, kept moist on the back table, may be woven through the ends on a fascia needle. A flat dressing and a short leg cast go on with the foot pointed down.
After surgery: casts for about 12 weeks, then an ankle brace until full motion returns, usually within 6 months; the risks are infection, death of the thin skin over the tendon, re-rupture and a weaker push-off.
Ankle arthroscopy
What and why: ankle arthroscopy removes loose bodies and fragments, treats lasting pain or arthritis after an injury and osteochondritis dissecans of the talus, takes biopsies, and checks an unstable ankle before a ligament repair.
Key steps: general anesthesia relaxes the muscles so the joint can be opened; the patient is supine with the knee bent or a sandbag under the buttock, with ankle and thigh holders or a distractor to widen the space between the tibia and the talus, and a thigh tourniquet used only for bleeding that irrigation cannot control. Small scopes of 2.7 to 4 mm go in after the nerves and tendons are marked and the joint is filled with 15 to 20 mL of saline; a rush of saline confirms the sheath is in. The portals are closed with strips or a single suture under a short leg compression dressing.
Ankle (malleolar) ORIF
What and why: an ankle fracture breaks the medial malleolus (tibia), the lateral malleolus (fibula), the posterior malleolus (the back edge of the tibia's joint surface), or several: unimalleolar, bimalleolar or trimalleolar. Because these form the mortise that holds the talus, a displaced fracture is put back exactly, or the ankle wears into arthritis. A bimalleolar fracture may be cast in a patient at high risk from surgery, but one reference reports that about 1 in 10 of these never heal.
Setup and key steps (trimalleolar): a soft tissue set, a small bone set, a small fragment set with plates, screws and pins, a power drill, bone reduction forceps and fluoroscopy. Through inner and outer incisions: the posterior fragment is held with two K-wires and fixed with a screw, or it falls into place once the others are reduced; the lateral malleolus gets one or two lag screws and a one-third tubular plate if oblique, or a plate, long screw or pin if transverse; the medial malleolus is held with two K-wires and fixed with malleolar screws; an unstable syndesmosis (the joint between the tibia and fibula) gets screws or a suture anchor. X-rays are taken in three views, and a splint or cast, short or long, goes on.
Calcaneal ORIF
What and why: the calcaneus breaks from an axial load, as in a fall or a car crash, often with lumbar, pelvic or tibial plateau fractures. A fracture into the subtalar joint is fixed to restore the heel's height, length and alignment, but recovery is long and the result often guarded.
Before surgery and key steps: the heel swells badly, so an open repair is done within the first day or, more often, after 10 to 14 days, when the skin wrinkles again; antibiotics are given and a tourniquet applied. With the patient on the side on a beanbag, an extensile lateral incision goes straight down to bone, and the flap is lifted in one piece, protecting the sural nerve at each end, and held back with K-wires bent over. The broken lateral wall is kept safe on the back table to be put back later. A large threaded Steinmann pin moves the heel fragment into place, K-wires hold the reduced heel and joint surface, and a calcaneal plate (often with locking holes) and screws fix them. Recent studies show fewer wound complications with smaller incisions over the sinus tarsi, a hollow on the outer side of the foot. Wound breakdown and infection are the feared complications, so handle the soft tissue with great care.
Triple arthrodesis
What and why: an arthrodesis is the surgical fusion of a joint. A triple arthrodesis fuses the three joints of the hindfoot, the talocalcaneal (subtalar), talonavicular and calcaneocuboid, by removing their cartilage so the bones grow together, for painful deformity and instability from severe flatfoot, clubfoot, rheumatoid or post-traumatic arthritis or neuromuscular disease. The foot still moves up and down at the ankle, but no longer turns in and out.
Setup and key steps: a foot and ankle set with a small lamina spreader, a power saw and drill, burs, K-wires, a cannulated screw system (or staples or plates), osteotomes, curettes and a bone graft set; prep the iliac crest too if graft is planned. With a thigh tourniquet and the leg prepped to the knee, an anterolateral incision (a Hohmann retractor lifting the peroneal tendons) and an anteromedial one expose the three joints, a lamina spreader opens each, and the cartilage is removed; save all the bone, which is packed into the gaps as graft. Each joint is fixed with large cancellous or cannulated screws, drilled and tapped over guidewires under fluoroscopy, a drain is placed, and a compression dressing and a short leg cast or splint go on.
After surgery: a wheelchair for 4 to 6 weeks, the sutures out at about 3 weeks, and the cast off at about 12 weeks.
Bunionectomy
What and why: a bunionectomy reduces or removes the enlarged inner side of the first metatarsal head in hallux valgus and realigns the big toe, to relieve pain and improve walking. The operations differ in how they realign it: removing the bump, releasing or moving tendons, cutting and shifting the metatarsal (an osteotomy), or fusing the joint at the base of the first metatarsal, a newer operation that corrects the toe in more than one direction.
Setup: a small bone set, a microsagittal or narrow oscillating saw, a power wire driver, K-wires and a drill; plates and screws for an osteotomy or fusion.
Key steps (modified McBride):
- Regional or general anesthesia, a tourniquet, and the foot draped free.
- An incision on the inner side of the first metatarsal, with double hooks or Senn retractors; small bleeders are controlled with a needle-tip ESU.
- The tight tendon and the outer capsule are released, and the inner capsule and periosteum opened to show the bunion.
- The bony bump is cut off with the sagittal saw, its edges smoothed, while the blade is irrigated.
- The capsule and periosteum are closed with fine absorbable suture and the skin with nylon; a flat dressing and fluffs go on.
Amputation in the foot
A toe is often the first level of amputation, as for diabetic gangrene or infection; amputations through the foot (transmetatarsal) or at the ankle (Syme) are done less often, because a prosthesis fits best after a below- or above-knee amputation. The level is set by how healthy the tissue is and by the patient's health and ability to take part in rehabilitation.
19Complications after orthopedic surgery
Each case above lists its own risks, among them infection, bleeding, blood clots and implant problems, and chapter 11 teaches them in general. Three more cross every region, so watch for them and report them at once.
- Fat embolism: after a long bone or pelvic fracture, fat from the marrow can reach the lungs and other organs, usually within 12 to 72 hours, with breathlessness, a fast pulse, confusion or agitation, fever, low oxygen, and tiny red spots (petechiae) on the chest, in the armpits and in the mouth. Careful handling and early immobilizing of a long bone fracture help prevent it.
- Compartment syndrome: after a fracture or under a cast or dressing; its signs and timing are under Open fractures and orthopedic trauma above.
- Nerve and vessel injury: from the injury, from positioning (such as the peroneal nerve at the knee), from the tourniquet, or from the operation itself (such as the radial nerve in a humeral nail or the sciatic nerve in a hip replacement). The limb's pulses, color, warmth, movement and feeling are checked before and after.
Lo que te llevas de este capítulo
- Orthopedics treats bones, joints and the soft tissues that move them, by open, closed and minimally invasive (arthroscopic and percutaneous) approaches. Most cases use a maker's system whose parts fit no other, so check every set and implant before the patient arrives.
- Know fractures by the skin (closed or open), the line (transverse, oblique, spiral, linear), the pieces (comminuted) and the mechanism (impacted, compression, depressed, greenstick, pathologic, stress). An open fracture is contaminated: Class III when fresh, Class IV when old, with dead tissue left in it (the Core Curriculum: more than 4 hours).
- Reduction puts the pieces back in line, closed or open; fixation holds them, inside the body (plates, screws, nails, wires) or outside it (casts and external fixators).
- Every screw that is not self-tapping goes in by drill, measure, tap, insert. Load each instrument before it is asked for, say each screw size aloud, and keep a list of every implant for the record.
- Power instruments go on, come off and pass with the safety lock on, and their cutting tips are irrigated whenever they run. K-wire and pin ends are sharp: cut pieces go into a magnetic container.
- Implants in one repair are one metal, never reused, never straightened once bent, and never sterilized for immediate use except in a documented emergency.
- Bone cement is mixed in a closed vacuum mixer, timed to the surgeon, and announced to anesthesia before it goes in, because it can drop the blood pressure suddenly.
- The distal radius ORIF is the Core Curriculum's model case: a volar approach past the flexor carpi radialis, a plate shaped to the radius, drill, measure, (tap), screw for each hole, locking screws under the joint surface checked on the C-arm, and a splint that leaves the fingers free.
Ponte a prueba5 preguntas rápidas
Gratis para todos. Elige una respuesta para cada una y luego revísalas todas juntas.
En el quirófanoDónde vas a usar esto
Todo el banco de preguntas del capítulo en series de 10, con la respuesta explicada después de cada una.
Parte del programa para educadoresLas palabras del capítulo en tarjetas de estudio: las que fallas vuelven antes.
Parte del programa para educadoresLo asigna tu docente. Cada grupo saca sus propias 25 preguntas del banco del capítulo.
Parte del programa para educadores
Sugerir una corrección
¿Algo está mal, confuso o desactualizado en este capítulo? Avísanos y lo corregimos para todos. Tu correo solo se usa para responderte.