General surgery
Gallbladders, appendixes, hernias, bowel, breast and thyroid: the core cases of general surgery, the anatomy under your instruments, and how to stay one step ahead of the surgeon.
1What general surgery covers
General surgery treats the abdominal wall and the organs inside the abdomen, the breast, the thyroid and parathyroid glands, and the rectum and anus. General surgeons also remove lumps from the skin and the tissue just beneath it, such as lipomas and cysts. More and more surgeons now focus on one area, such as weight-loss, breast or bowel surgery.
General surgery carries the largest case requirement of any specialty. Students in an accredited program complete at least 30 general surgery cases, and 20 of them must be in the first scrub role.
The good news is that general surgery repeats itself. The same steps open and close almost every abdominal case, and the same rules for counts, specimens and contamination apply each time. Cases that share instruments, supplies, positions and steps are taught together as co-related procedures: a small bowel resection, for example, is done much like a colon resection. Any approach other than open, whether laparoscopic, robotic or endoscopic, counts as minimally invasive surgery (MIS). Learn the pattern once, and each new procedure is mostly a new middle. Each case links to its full setup card, with the instrument list and every step; here you get the reasons, and the moments when the scrub matters most.
2Anatomy that matters
The abdominal wall
The abdominal wall reaches from the diaphragm down to the pubis and shields the organs inside, the viscera. Every abdominal case passes through the same layers, from outside in:
- Skin
- Subcutaneous fat, anywhere from a quarter inch to more than 8 inches thick. It holds two sheets of superficial fascia: the fatty Camper fascia and, deeper, the Scarpa fascia.
- Fascia, the tough sheets over the muscles. Near the midline it forms the rectus sheath, which encloses each rectus muscle.
- Muscle: the two rectus abdominis muscles in front, and the external oblique, internal oblique and transversus abdominis at the sides
- Transversalis fascia and preperitoneal fat
- Peritoneum, the serous membrane lining the cavity
The two rectus muscles run from the pubis up to the fifth, sixth and seventh rib cartilages. Above the arcuate line, about a third of the way down from the umbilicus to the pubis, the rectus sheath covers each muscle front and back. Below that line there is no posterior sheath, only the transversalis fascia behind the muscle.
In the midline, the sheaths from both sides fuse into the linea alba, a band of connective tissue with almost no blood vessels. It is the strongest layer of the midline, and a closure holds only as well as this fascia holds. A midline incision goes through it without cutting muscle, which makes it fast and nearly bloodless.
The peritoneum lines the wall and folds over the organs. It makes a slippery fluid that lets the organs slide over each other. The mesentery is a fan-shaped double fold of it that anchors the small intestine (and parts of the colon) to the back wall and carries their blood vessels, nerves and lymph vessels. The greater omentum is an apron of fatty peritoneum that hangs from the stomach over the intestines. The kidneys, the pancreas, most of the duodenum, parts of the colon and the rectum sit wholly or partly behind the peritoneum, in the retroperitoneum. Adhesions are strands of scar tissue that form between these surfaces after inflammation or infection; freeing them is called lysis of adhesions.
The abdomen is mapped two ways. Four quadrants: right upper, left upper, right lower and left lower. Nine regions, made by two vertical and two horizontal lines: the right and left hypochondriac, epigastric, right and left flank, umbilical, right and left groin (inguinal or iliac) and pubic regions. The liver and gallbladder sit in the right upper quadrant, the stomach, pancreas and spleen mostly in the left upper, and the appendix in the right lower.
The GI tract
The gastrointestinal (GI) tract is one long tube: esophagus, stomach, small intestine (duodenum, jejunum and ileum), then the large intestine. References give its length as about 6 to 7.6 meters; after death, once its muscle tone is lost, it measures longer. The ileum ends at the cecum, a blind pouch where the appendix hangs as a narrow blind-ended tube. The colon then runs ascending, transverse, descending and sigmoid to the rectum and anal canal.
Its wall has four layers: the mucosa (the lining), the submucosa (dense connective tissue that binds the lining to the muscle), the muscle layer, and the serosa (the outer covering). The space inside is the lumen. Bacteria live throughout the bowel, most of all in the colon, which is why opening the bowel changes how you handle instruments.
Blood reaches the bowel through the mesentery. The celiac trunk branches to the stomach, liver and spleen; the cystic artery to the gallbladder comes off this tree. The superior mesenteric artery feeds the small intestine, the pancreas and most of the large intestine, including the right colon and the transverse colon. The inferior mesenteric artery feeds the rest: the descending and sigmoid colon and the rectum. When a piece of bowel comes out, its mesentery is divided along with it. Lymph from the bowel drains to nodes beside the mesentery, so in cancer operations that part of the mesentery and its nodes come out with the bowel.
The rectum, the last 10 to 12.5 cm of the bowel, ends at the anal canal. There two sphincters hold stool in: the internal sphincter, smooth muscle that works without conscious control, and the external sphincter, skeletal muscle the patient controls. In the anal canal, the pectinate (dentate) line marks where the gut lining meets skin. Above the line the lining has visceral nerves, which sense little pain; below it, skin nerves feel pain sharply.
Liver, gallbladder and biliary tree
The liver fills most of the right upper quadrant and part of the left. It has right and left lobes and eight segments, each with its own blood supply. Blood comes in through the hepatic artery and through the portal vein, which carries blood from the stomach, intestines, spleen and pancreas, and leaves through the hepatic veins into the inferior vena cava. The liver is very vascular, and a tear can bleed hard.
The liver makes bile, which leaves through the right and left hepatic ducts. These join to form the common hepatic duct. The gallbladder, tucked under the right lobe, stores and concentrates bile and connects through the cystic duct. Where the cystic duct joins the common hepatic duct, the tube becomes the common bile duct. It meets the pancreatic duct and empties into the duodenum at the ampulla of Vater, where the sphincter of Oddi controls the flow.
The gallbladder has a fundus (the rounded end), a body, an infundibulum and a neck that narrows into the cystic duct. Its cystic artery most often branches from the right hepatic artery. The Calot triangle is bordered by the cystic duct, the common hepatic duct and the cystic artery. Surgeons clear the closely related hepatocystic triangle, which has the underside of the liver as its upper border and holds the cystic artery and duct. This small area matters most in a gallbladder operation, because the common bile duct lies right beside it and can be mistaken for the cystic duct.
Gallstones (cholelithiasis) form mainly from cholesterol, from bile pigment, or from a mix of both; cholesterol stones are the most common. A stone stuck in the cystic duct inflames the gallbladder (cholecystitis). A stone in the common bile duct blocks bile and causes jaundice, and a stone that reaches the ampulla can cause pancreatitis.
Pancreas and spleen
The pancreas lies behind the stomach, its head in the C-shaped curve of the duodenum and its tail reaching toward the spleen. Its duct carries digestive enzymes to the duodenum. Its islets release hormones straight into the blood: beta cells make insulin and alpha cells make glucagon.
The spleen sits in the left upper quadrant under the diaphragm, behind the stomach and sheltered by the 10th to 12th ribs. It filters old red blood cells and germs from the blood and stores blood. It is soft and very vascular, so it is easily injured in vehicle crashes and sports accidents. Most people live well without a spleen, but they fight certain bacteria less well, so splenectomy patients are vaccinated, ideally before surgery.
Breast
The breast lies on the pectoralis major muscle, from the second to the sixth rib, with a tail of tissue (the tail of Spence) reaching toward the axilla. It is made of about 15 to 20 lobes of glands, which drain through ducts to the nipple.
Most of the breast's lymph drains to the axillary lymph nodes, so they are where surgeons look for spread of cancer. The axillary nodes are grouped by the pectoralis minor muscle: level I lateral to it, level II behind it, and level III medial to it.
Two axillary nerves must be spared. The long thoracic nerve supplies the serratus anterior; injury leaves a "winged" shoulder blade. The thoracodorsal nerve supplies the latissimus dorsi; injury weakens the arm when it pulls back, pulls in toward the body or turns.
Thyroid and parathyroids
The thyroid is a very vascular gland in the front of the neck. Its two lobes sit beside the trachea, joined by the isthmus across the second to fourth tracheal rings. It makes two thyroid hormones, T4 (thyroxine) and T3 (triiodothyronine), and calcitonin. The strap muscles cover it, and the platysma lies just under the skin.
Two structures make thyroid surgery delicate, and harm to them causes its most typical complications:
- The recurrent laryngeal nerve, a branch of the vagus nerve, runs up in the groove between the trachea and esophagus, behind the thyroid, and moves the vocal cords. Injury on one side causes hoarseness; injury on both sides can block the airway.
- The parathyroid glands, usually four, are tiny glands about 3 mm across on the back of the thyroid lobes, two near the upper poles and two near the lower. They are yellowish to brown. They make parathyroid hormone, which controls blood calcium. If they are removed or lose their blood supply, calcium drops, causing numbness and tingling, then twitching and spasms.
3Incisions, position, prep and drape
Incisions
Abdominal incisions are named for where they lie. The right one gives enough room for the job, can be made longer if needed, and closes securely.
- Midline (upper or lower): through the linea alba, curving around the umbilicus. Fast, with excellent exposure to any part of the abdomen and easy to extend; the standard incision for exploratory laparotomy.
- Paramedian: vertical, about 2 to 5 cm to one side of the midline, through the rectus sheath with the rectus muscle moved aside.
- Subcostal (Kocher): along the lower ribs; the right side for the gallbladder, biliary tree and pancreas, the left for the spleen. It hurts more after surgery. Right and left subcostal incisions joined in the midline make a chevron.
- McBurney: a short oblique cut in the right lower abdomen, about a third of the way from the anterior superior iliac spine to the umbilicus, that splits the muscles along their fibers. It gives limited exposure and is used for open appendectomy. Its transverse version is the Rocky-Davis.
- Inguinal: oblique, just above and parallel to the inguinal ligament, for groin hernias.
- Pfannenstiel: low transverse, about 3 to 5 cm above the pubis in a skin fold; strong, with good exposure of the pelvis.
- Thoracoabdominal: from the abdomen across the costal margin into the chest, with the patient tilted onto one side, for the esophagus, upper stomach and other upper abdominal organs.
- Port sites: small incisions, usually 1 to 2 cm, for laparoscopic cannulas, most often one at the umbilicus for the scope.
Five cases on one abdomen. Tap where the surgeon cuts, and see the incision.
Este laboratorio funciona en el navegador con JavaScript activado.
Este navegador no pudo abrir la sala en 3D. Todo lo que practica el laboratorio está en el capítulo.
Position
Most cases are supine. Each arm rests on a well-padded armboard at less than 90 degrees, or, when the case requires it, is tucked at the side. The table then tilts so gravity moves the organs away from the target: head up (reverse Trendelenburg) for the gallbladder, stomach and thyroid, often with the target side tilted up; head down (Trendelenburg) for the appendix, groin hernias and pelvis. A laparoscopic splenectomy is often done with the patient turned partly onto the right side. Cases that need the perineum, such as a low rectal resection, use lithotomy. Anorectal cases use prone jackknife, lithotomy or a lateral position. The safety strap goes 2 inches above the knees, and when the head is up a padded footboard stops the patient sliding down the table. Before a steep tilt, an anti-skid pad or vacuum positioner keeps the patient from sliding.
Four cases. Tilt the table so the bowel falls away from the target, then look inside.
Este laboratorio funciona en el navegador con JavaScript activado.
Este navegador no pudo abrir la sala en 3D. Todo lo que practica el laboratorio está en el capítulo.
Prep and drape
- Abdomen: from the nipple line to mid-thigh and down both sides to the table. Clean the umbilicus first, with cotton-tipped applicators.
- Groin: the lower abdomen, the groin and the upper thighs, with the genitals when the surgeon needs them. The groin and genitals, being heavily contaminated, are prepped last.
- Breast: for a biopsy, the affected breast and the skin around it, with the axilla for a lesion in the upper outer breast. For a mastectomy, from just above the collarbone down to the umbilicus, and across from the opposite nipple to the table on the operative side, with the axilla and sometimes the upper arm; the arm is draped free in a stockinette. Prep gently over a suspected cancer or a localization wire.
- Neck: from the chin to the nipples, including the sides of the neck and the shoulders.
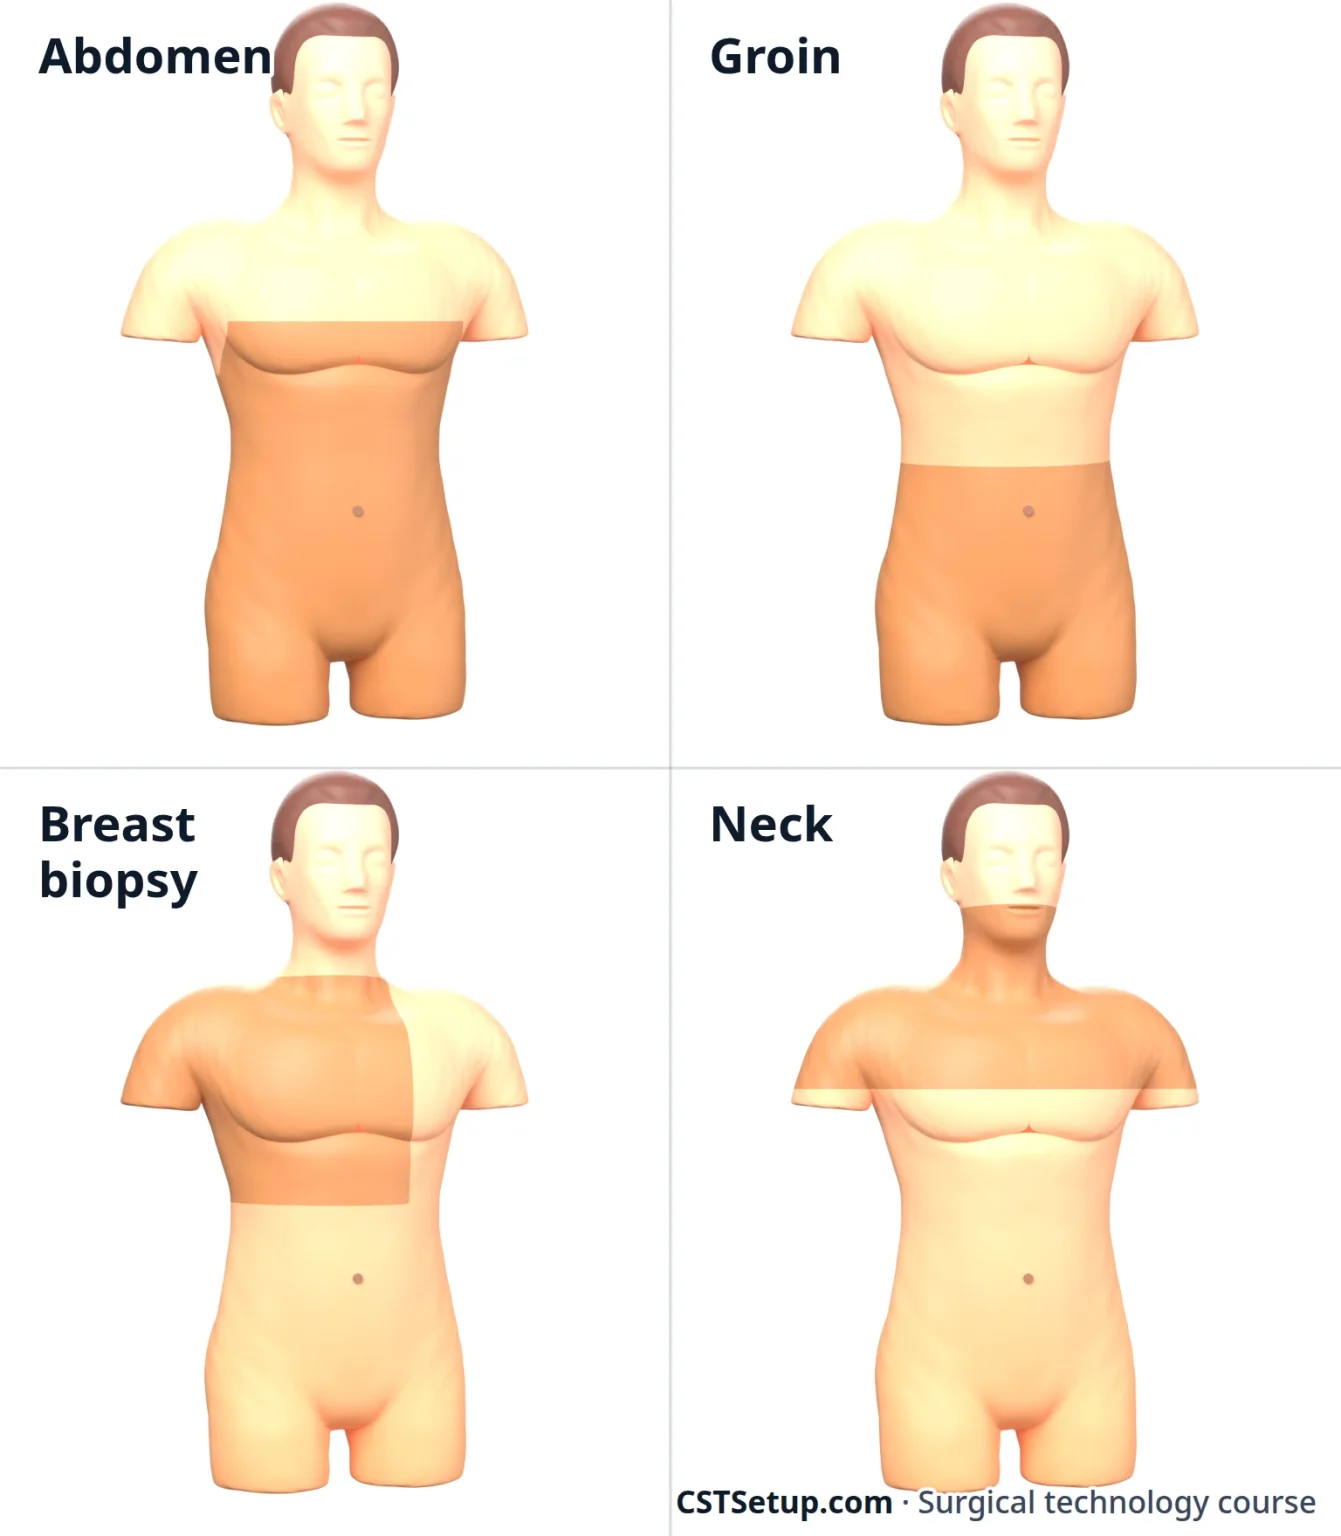
Draping usually begins with four towels to square off the site, then a fenestrated sheet: a laparotomy sheet for the abdomen and groin, a sheet with the arm draped free for a mastectomy, and a thyroid sheet, with its small transverse opening, for the neck.
4Trays and instruments
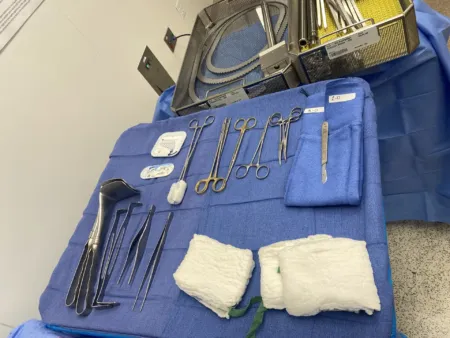
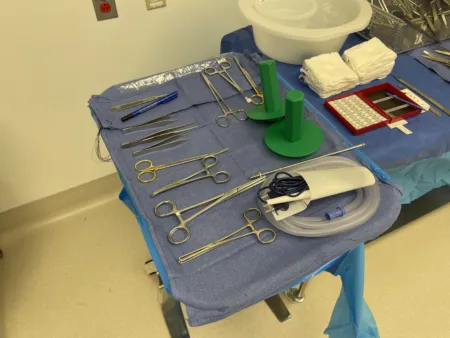
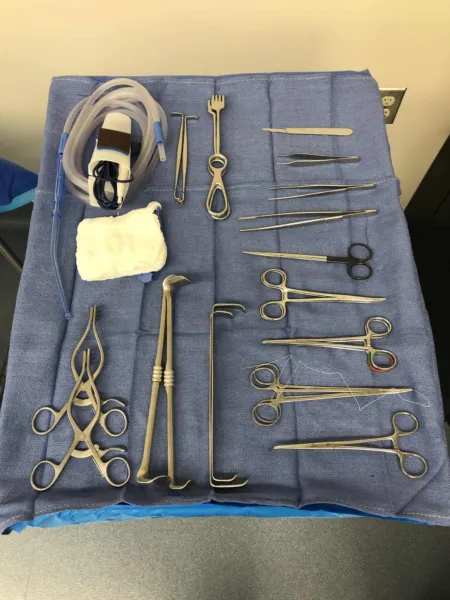
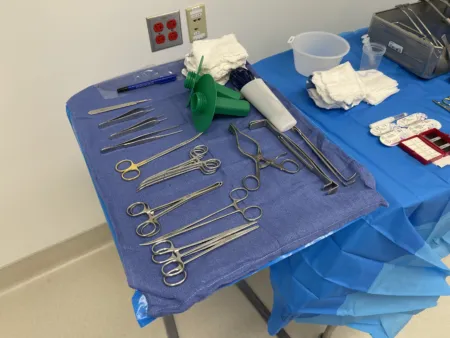
- Minor tray: short instruments for small, shallow cases such as breast biopsies, sentinel node biopsies and anorectal cases, with small retractors such as the Senn, rakes and Weitlaner, fine hemostats, Allis clamps, scissors, forceps and needle holders. Open hernia repairs often use a laparotomy set instead.
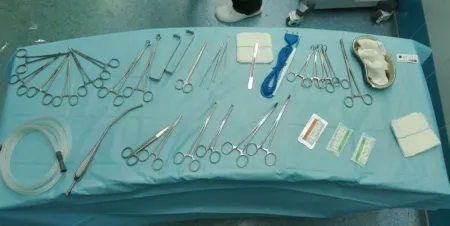
- Major laparotomy tray: the base for every open abdomen. It holds Metzenbaum and Mayo scissors, tissue forceps, hemostats, Pean, Kocher, Allis, Babcock and right-angle clamps, needle holders and towel clips, with Deaver, Richardson, Harrington, Army-Navy and malleable (ribbon) retractors. A self-retaining retractor such as the Balfour or Bookwalter is added.
- Add-ons: long instruments for deep or large patients; a GI tray with intestinal clamps; a biliary tray with gall duct dilators and stone forceps; a thyroid tray; a rectal tray with anal retractors and specula.
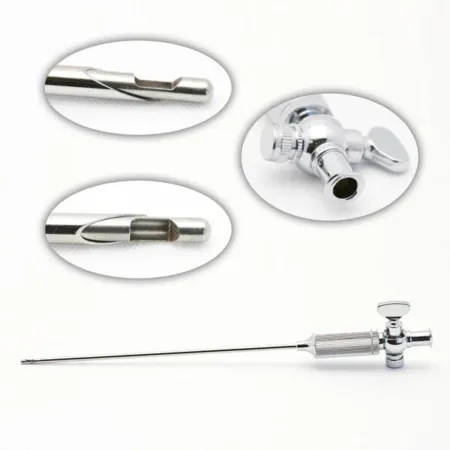
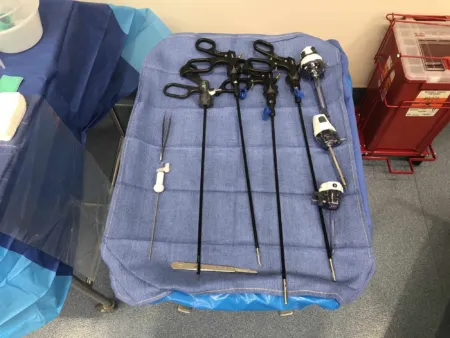
- Laparoscopy tray: Veress needle, trocars and cannulas, scopes, camera and light cord, graspers, a Maryland dissector, scissors, a hook electrode, a suction-irrigator and clip appliers, with a needle holder when suturing is planned.
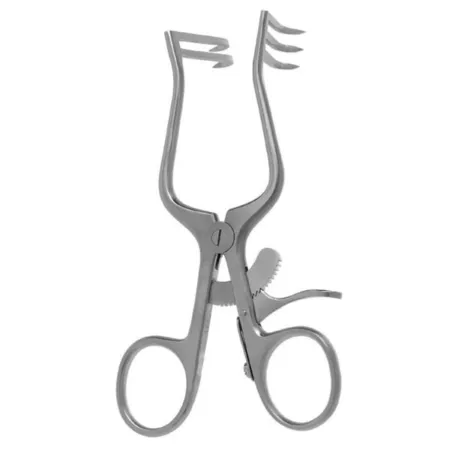
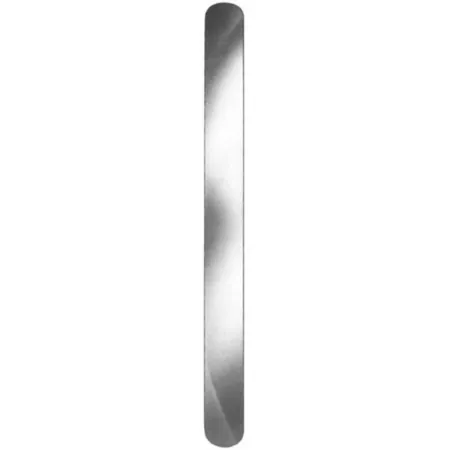
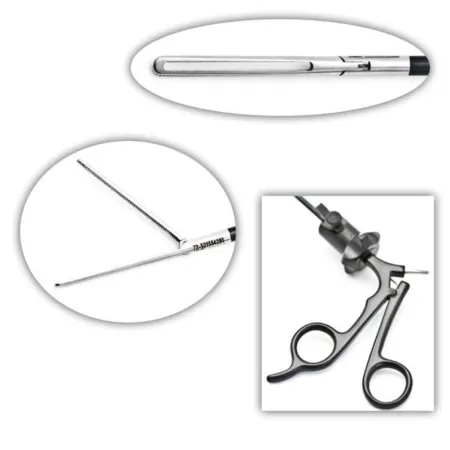
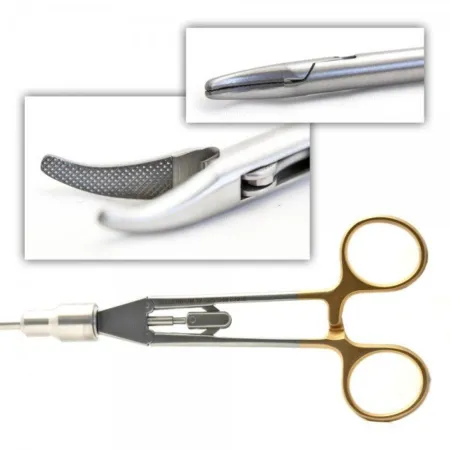
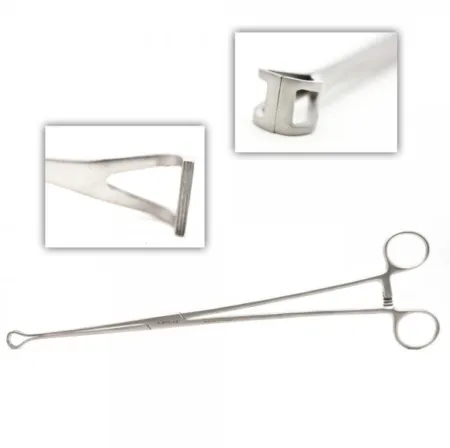
What the common instruments do:
- Kocher: large interlocking teeth at the tip grip tough, slippery tissue such as fascia and muscle.
- Allis: rows of fine teeth hold dense tissue that is being removed, such as breast or thyroid tissue, or bowel during a resection.
- Babcock: rounded, smooth, open jaws lift and encircle delicate tissue such as bowel and the appendix without crushing it.
- Right angle: reaches behind a vessel or duct so a tie or vessel loop can pass around it.
- Kelly and Pean: the clamps used in pairs to clamp tissue that will be cut and then tied or sealed.
- Doyen: an intestinal clamp with smooth jaws for clamping bowel during a resection; noncrushing intestinal clamps leave a small gap so they do not crush the wall. Some have soft rubber shods slipped over the jaws for a snug seal on the tissue.
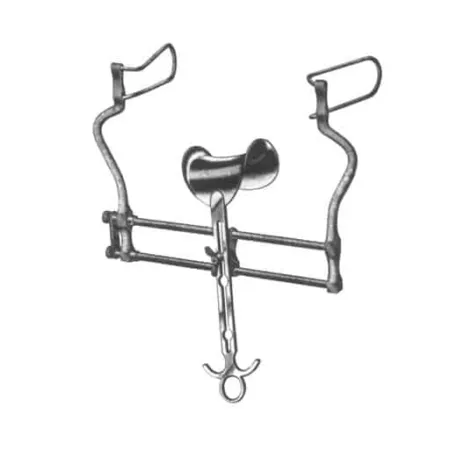
- Balfour and Bookwalter: self-retaining abdominal retractors. The Bookwalter mounts on the table, with blades that lock onto its frame.
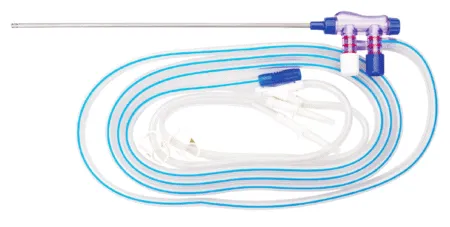
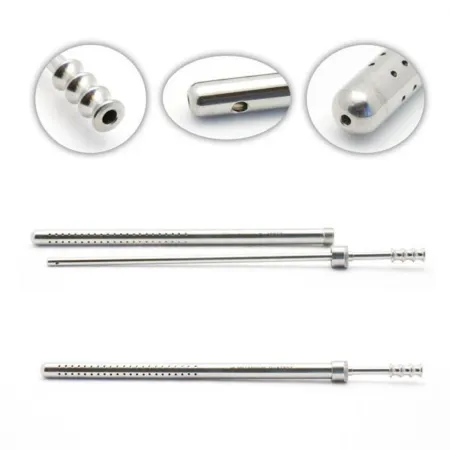
- Poole suction: an inner tube inside an outer sheath with many holes, so a cavity full of fluid empties without strong suction on delicate tissue. With the sheath off, the inner tube works as a plain tip.
Before the peritoneum is opened, any 4x4 sponge not mounted on an instrument comes off the field; from then on, moist lap sponges are used, because a small sponge is easily lost in a deep wound. Keep peanuts and other small dissecting sponges mounted on a clamp, and keep warm saline ready for the laps and for irrigation.
5Energy and staplers
Energy devices
General surgery leans on energy devices to cut and seal; chapter 20 teaches how they work and how to use them safely.
- Monopolar ESU: cuts and coagulates, with the current passing through the patient to a return electrode pad that carries it back to the generator. The laparoscopic hook is monopolar. Keep the pencil in its holster when not in use.
- Bipolar: current flows only between the two tips, so it focuses on the tissue between them.
- Ultrasonic shears (such as Harmonic): a blade vibrates about 55,000 times a second, cutting and coagulating with friction heat and no current through the patient, so no return pad is needed. The blade stays hot longer than an ESU tip, so hold it away from tissue while it cools and rest it on a moist towel between uses.
- Vessel sealers (such as LigaSure): squeeze tissue and pass controlled bipolar current to seal vessels up to about 7 mm, then cut the seal. With ultrasonic shears and staplers, they have replaced many clamp, cut and tie steps.
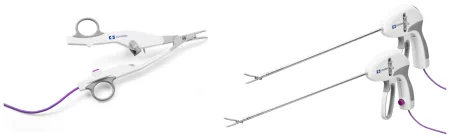
All of these make surgical smoke, so a smoke evacuator is used. Check every laparoscopic energy instrument for breaks in its insulation before you pass it.
Staplers
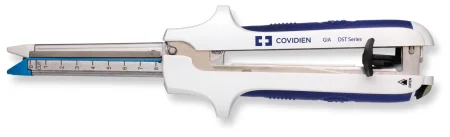
- Linear cutter (GIA): lays two double-staggered rows of staples and cuts between them. It divides bowel with both ends sealed and makes side-to-side joins.
- Linear (TA): lays rows of staples with no cut, to close an end or an opening; the surgeon trims the extra tissue.
- Circular (EEA): joins two hollow structures end to end, often in colorectal surgery. The anvil goes in one end and the body in the other; firing lays a ring of staples and a circular blade cuts away the extra tissue.
- Laparoscopic staplers: linear cutters made to work through a laparoscopic port, often 12 mm.
Staple cartridges (reloads) are color coded by staple size, to match thin or thick tissue. Follow the maker's instructions and read each package so the right size goes in. After a circular stapler fires, the surgeon checks both "donuts" of tissue: each must be a complete ring. Every part of the stapler, and the anvil, must be accounted for.
6Open and laparoscopic approach
Open surgery (laparotomy) gives a full view and lets the surgeon explore by hand, at the cost of a large incision, more tissue injury and a longer recovery. Minimally invasive surgery works through small ports while the team watches a monitor. Most gallbladders and appendixes, most inguinal hernias and much colon surgery are now done this way; at least 70 percent of general surgery procedures use minimally invasive methods. Open surgery stays the choice for some emergencies, such as a patient bleeding after trauma, and for patients whose condition rules out laparoscopy.
Getting in
The abdomen is inflated with carbon dioxide (insufflation), making a pneumoperitoneum. The gas lifts the wall off the organs, which gives room to see and to place the trocars. Carbon dioxide is used because it is nonflammable, nontoxic and quickly absorbed. In adults the pressure is usually held at 12 to 15 mm Hg, with the insufflator set to stop at 15.
Entry is made one of three ways:
- Veress needle: a hollow needle with a spring-loaded blunt stylet that springs forward once the tip enters the cavity, shielding the organs. Test the spring before you pass it by pressing lightly on the tip. The surgeon lifts the wall by hand or with towel clamps, nicks the skin with a #11 blade and passes the needle. A saline drop test from a 10 mL syringe confirms the position: the saline is drawn in on its own. The gas tubing is then attached, and once the abdomen is inflated the needle is swapped for a trocar and cannula.
- Open (Hasson): a short incision down to the fascia, which is opened, with a stay suture placed at each end. The peritoneum is opened under direct view, and the blunt Hasson cannula goes in and is tied to the stay sutures. It suits patients with old scars or likely adhesions near the umbilicus.
- Optical trocar: a bladeless trocar with the scope inside it, so the surgeon watches each layer as it passes, without inflating first.
The trocar is the pointed or blunt rod that makes the path. The cannula is the hollow tube around it, which stays in place as the port, sealed so the gas stays in.
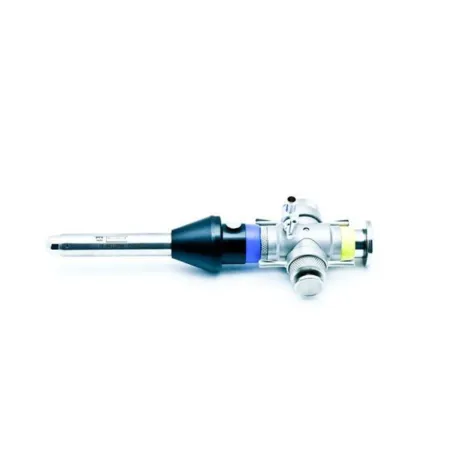
The scrub's laparoscopy jobs
Secure the camera cord, light cord, insufflation tubing and energy cords to the drapes with nonpenetrating clamps, and pass their ends off the field to be connected. White balance the camera if your system does not do it on its own, and keep the scope in warm water or use anti-fog, because a cold lens fogs inside the warm abdomen; dry the lens before you hand it back. You may be asked to run the camera.
Count every sharp and countable item that goes into the abdomen, including needles passed through a port. A missing item must be found, or an X-ray taken, before the wound is closed. The fascia at the larger ports (10 mm, and in some references anything over 8 mm) is closed to prevent a hernia at the port site.
The gas has risks. Too much pressure can force carbon dioxide into the blood and lower breathing and cardiac output, and carbon dioxide absorbed from the abdomen can raise the patient's blood level of it. The gas and the irrigation fluids add to the risk of hypothermia. Leftover gas can irritate nerves and cause shoulder pain after surgery.
Robotic surgery and conversion
In robotic surgery the surgeon sits at a console away from the field, and the robot's arms hold the scope and instruments. The scrub, with the circulator, drapes the arms; places, changes and removes the instruments in the arms; and knows how to move the system away quickly in an emergency such as sudden bleeding.
Any minimally invasive case can turn open because of bleeding, an injury or anatomy the surgeon cannot see clearly. Keep a laparotomy set in the room, move quickly when the surgeon says "open", free the cords and tubing from the drapes and clear them away, and count everything you add.
7Flexible endoscopy
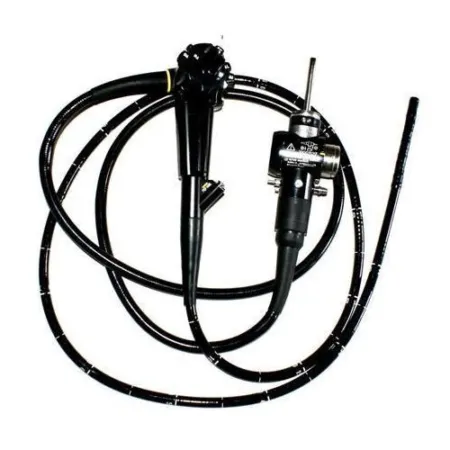
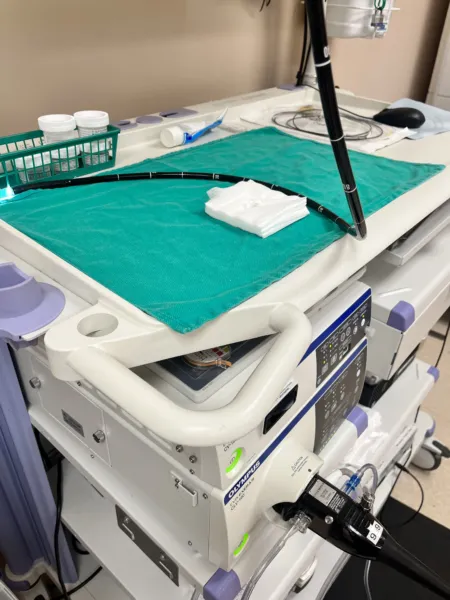
Endoscopy passes a flexible scope through a natural opening, such as the mouth or the anus, to look inside. With imaging (CT, MRI, ultrasound and contrast studies under fluoroscopy), blood tests and the physical exam, it is one of the main ways GI disease is confirmed. The doctor sees the lining, takes biopsies to confirm or rule out cancer, and treats small problems through the scope, often before an open or laparoscopic operation. A stand-alone endoscopy usually happens in an outpatient endoscopy unit or a room near the OR. Chapter 21 teaches the scopes themselves, and chapter 27 how they are cleaned.
Setup: a flexible video endoscope with its light source and video processor, a monitor, suction, irrigation, an air source, an ESU and a camera to record the findings, plus saline containers for biopsies and water-soluble lubricant. Knobs and buttons on the handle bend the tip up, down and to each side and work the air, water and suction. Accessories pass down the working channel: biopsy forceps, brushes for cell samples, snares, retrieval nets, injection needles and dilating balloons, with clips, bands and probes to stop bleeding. The scope gets high-level disinfection between patients, but an accessory that pierces the lining must be sterile. Check that the scope, the imaging system and the recording devices work before the procedure.
Medications and monitoring: most patients receive moderate sedation through an IV, so their airway, vital signs, oxygen saturation and level of consciousness are watched from start to finish. For an upper endoscopy the throat is numbed with a topical spray such as benzocaine.
Your role: pass the biopsy instruments and help thread them into the channel. As a biopsy forceps comes out, keep hold of its tip so the tissue is not lost, free the specimen with a hypodermic needle or by swishing the tip in the specimen cup, and get it into its labeled container at once. Keep the irrigation reservoir full. AST's position is that a CST, directed by the surgeon and within state law and facility policy, may advance, hold and steer rigid and flexible scopes, a colonoscope or duodenoscope included.
EGD, esophagoscopy and ERCP
What and why: an esophagogastroduodenoscopy (EGD) examines the esophagus, the stomach and the first part of the duodenum. Reasons include upper GI bleeding, difficult or painful swallowing, heartburn, pain or vomiting that will not settle, reflux, a swallowed caustic substance, and follow-up of conditions such as Barrett esophagus. Through the scope the doctor can take biopsies, remove polyps, inject or band bleeding varices, place a feeding tube (PEG, below) or a stent across a narrowing, and stretch a stricture with esophageal dilators such as the Maloney, Savary or balloon types. Graduated dilators can also be slid over a guidewire under fluoroscopy.
Position and steps: an IV is started, the throat is sprayed and sedation is given, with the patient in the left lateral position and the neck bent forward. A bite block keeps the patient from biting the scope, and lubricant goes on its tip. The scope is advanced into the duodenum, then drawn back slowly while the lining is studied, with biopsies and treatment along the way. If varices are to be injected, you prepare the sclerosing agent.
Esophagoscopy looks mainly at the esophagus. A rigid esophagoscope can be used, flared at its far end because the esophagus collapses around it, but often the flexible gastroscope does the job as part of an EGD. A rigid setup holds a set of esophagoscopes, light carriers, biopsy forceps and bougies; you insert the light carrier, attach the light cord and lubricate the scope. It helps diagnose cancer, diverticula, hiatal hernia, strictures and varices, and treats by removing a swallowed object or passing a bougie to widen a narrowed esophagus.
ERCP (endoscopic retrograde cholangiopancreatography) uses a duodenoscope, which reaches through the stomach into the duodenum. Dye is injected through the papilla of Vater under fluoroscopy to outline the bile and pancreatic ducts. It helps find the cause of a blocked bile duct, allows biopsy, and lets the doctor cut the sphincter (a sphincterotomy) to pull out duct stones or place a stent. Duodenoscopes are hard to clean: outbreaks of drug-resistant bacteria have been traced to ones that were not fully reprocessed.
After: fluids are offered only once the gag reflex returns, and the patient is watched until the sedation wears off.
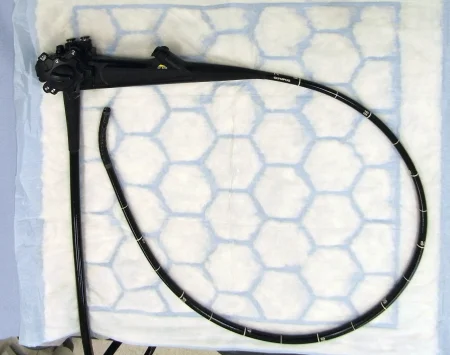
Colonoscopy and sigmoidoscopy
What and why: colonoscopy examines the colon from the rectum to the ileocecal valve. It screens for cancer, finds the source of bleeding or inflammation, removes polyps and takes biopsies. Adults at average risk now start routine screening at age 45. A lesion that will need surgery is often tattooed so the surgeon can find it later. Sigmoidoscopy examines only the rectum and the sigmoid colon.
Preparation and position: the patient limits food and takes a bowel-cleansing prep beforehand. For colonoscopy the patient lies on the left side with the knees bent, under warm blankets, with only the lower back and buttocks uncovered and a small drape over the pelvis. The doctor may ask for the patient to be turned, or for gentle pressure on the abdomen, to help the scope along. Sigmoidoscopy is done prone or in lithotomy, and a cooperative patient can have a flexible sigmoidoscopy without sedation.
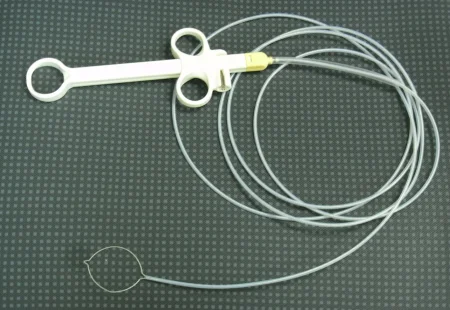
Steps: the lubricated scope is advanced to the cecum, then withdrawn slowly while the lining is inspected and photographed. Air pumped into the colon can cramp, so reassure the patient. Polyps come off with a wire snare, and cup or brush biopsy forceps take tissue.
After: watch for bleeding, pain, signs of a perforation and reactions to the medicines. Perforation, bleeding, breathing trouble, chest pain and reactions to the anesthetic are the rare serious complications of any endoscopy.
Wound class (all flexible endoscopy): no incision is made. The tract is entered through its own opening under control, and the references class an endoscopy of a tract, such as a cystoscopy or a hysteroscopy, as Class II, clean-contaminated.
8Exploratory laparotomy and bowel technique
An exploratory laparotomy opens the abdomen to find and treat a problem when less invasive tests have not made the diagnosis, as after trauma or with a blockage, a perforation or bleeding. Its opening and closing steps are the same for every open abdominal case.
Position: supine, arms on armboards. Prep and drape: the full abdomen; towels and a laparotomy sheet. Setup: a major laparotomy tray, long instruments, a self-retaining retractor, plenty of lap sponges, Yankauer and Poole suction, warm irrigation and culture tubes. Intestinal clamps, staplers, vascular clamps, hemostatic agents and a bowel bag (a plastic bag that keeps bowel lifted out of the abdomen from drying) are opened or kept on hold.
An open abdomen loses heat fast. A forced-air warmer, irrigation kept in a solution warmer and keeping the patient covered before and after surgery protect against hypothermia, and sequential compression devices help prevent DVT.
Opening: the same steps begin every open abdominal case.
- The surgeon cuts the skin with the skin knife (a #20 or #10 blade); the knife goes into a basin and leaves the field once the skin is open. The ESU then goes through the fat, and bleeders are coagulated or clamped.
- The fascia is opened with the deep knife (a #10 blade) or the ESU, and the opening is extended with the ESU or curved Mayo scissors. Off the midline, the muscle is split or held aside. Have small Richardson or Army-Navy retractors ready.
- Before the peritoneum is opened, loose 4x4 sponges leave the field. The peritoneum is lifted with hemostats or smooth forceps, nicked with the deep knife or Metzenbaum scissors while the bowel is held away, and opened wider with scissors or the ESU. Cultures may be taken now. From here on, moist laps only.
- The surgeon explores the abdomen, often with a large Richardson retractor. If the table is tilted, keep the Mayo clear of the patient. Pass moist laps to protect the wound edges, then the self-retaining retractor, and more laps to pack the bowel away from the problem.
For heavy bleeding the area is packed first to slow it; then come suction, clamps, ties or clips and hemostatic agents.
In a badly injured, unstable patient, the surgeon may do damage control surgery: stop the bleeding and the contamination as fast as possible, without trying to rebuild anything, so the patient can go to the ICU to be warmed and resuscitated. Have at least eight moist laps, two suctions and the ESU ready at the incision. All four quadrants are packed (note how many laps go into each), bleeding and bowel spillage are controlled, and the abdomen is irrigated, counted and left open, usually for at least 24 hours. It is covered with layers of plastic drape and drains, a sterile plastic bag sewn to the edges (a Bogota bag) or a wound vacuum system, and closed in stages at later operations. An abdomen left open also guards against abdominal compartment syndrome: swelling from the injury and from the resuscitation fluids pushes the pressure inside a closed abdomen past what the blood vessels can bear, so tissue dies from lack of blood flow and breathing can be blocked. The treatment is to open the abdomen at once.
Closing: the same steps end every open abdominal case.
- The surgeon irrigates with fresh warm saline, which you suction out with the Poole, and checks for bleeding.
- All packs and instruments come out of the abdomen and the closing count begins; it must be complete before the peritoneum is closed.
- The peritoneum may be closed as its own layer, closed together with the fascia, or not closed at all; closing it separately adds no strength. The fascia, the layer that matters, is closed with strong suture, often running. The fat may be closed with fine absorbable suture, and the skin with staples or a buried stitch.
- Retention sutures, heavy sutures through every layer threaded through tubing bolsters or bridges, are seldom used now; they may be placed for a patient at high risk of the wound splitting open.
A viscera retainer may lie over the bowel while the fascia is closed: a flexible, radiopaque pad that keeps the needle from catching bowel, with a ring that stays outside the body until the pad is pulled out.
In a contaminated or dirty wound, the skin may be left open and packed and closed later.
Specimens: whatever is removed. Cultures go to the lab right away in their own tubes.
Counts: before the incision, when closure of the peritoneum begins, when closure of the fascia begins, when skin closure begins, whenever items are added, and when the scrub or circulator changes.
Dressing: a dry dressing with an ABD pad, or negative pressure wound therapy over the closed incision or over an open abdomen.
Bowel technique
Once the GI tract is open, germs from its lumen contaminate whatever touches it, and in a cancer operation, tumor cells can be shed and seed healthy tissue. Bowel technique, also called isolation technique, keeps both away from the clean wound.
- It begins when the GI tract is opened and ends when it is closed. The team says aloud that the bowel is being opened.
- Before the bowel is opened, towels or a plastic wound protector go around the incision to catch spillage.
- Everything that touches the open bowel is dirty: instruments, sponges, suction tip, ESU tip, staplers, gloves and gowns. It stays in one dirty area, such as a second Mayo or a basin, apart from the clean Mayo and back table. The specimen goes into its own dirty basin for the circulator.
- Do not handle the clean setup while the bowel is open. If you need a clean item, pick it up with a sponge stick kept in a small basin for that job, touching only its rings.
- When the bowel is closed, the dirty items, the towels or wound protector, the suction tip, the ESU pencil and the light handles go to the dirty area. The dirty Mayo moves away but stays where you can still count from it. The wound is irrigated, the counts begin, and the change to a clean closure is announced.
- The team changes gloves, and often gowns too. One sterile member stays at the field while the others change, then changes last. New drapes or towels go over the old ones, with new light handles, a new suction tip and ESU pencil, clean sponges and clean instruments for the closure.
AST's 2017 bowel technique guideline has every sterile team member change both gown and gloves, with the scrub changing first and then gowning and gloving the others.
There are two ways to set up for it:
- Single setup: one set of instruments for the whole case. Before the bowel is opened, what the resection needs goes to the Mayo; the back table stays sterile but untouched. Afterward the dirty items leave the field in a basin, the team changes gloves, the wound is redraped, and the Mayo is covered with sterile towels before the closing items come from the back table. A wet Mayo gets an impervious cover so moisture cannot carry germs through.
- Double setup: one setup for the operation through the bowel closure and specimen removal, and a second, covered setup, prepared before the case begins, for the closure. The closing setup may be a minor laparotomy tray.
Either way, a wound protector or towels guard the wound before the resection, and the wound is irrigated before the change to a clean closure.
Wound classes (taught in full in chapter 11) rate how contaminated a wound is, and so how likely it is to become infected:
- Class I (clean): no inflammation, and the respiratory, GI, genital and urinary tracts are not entered.
- Class II (clean-contaminated): one of those tracts is entered under control, without unusual contamination. Surgery of the biliary tract and the appendix belongs here.
- Class III (contaminated): gross spillage from the GI tract, a major break in sterile technique, acute inflammation without pus, or a fresh traumatic wound.
- Class IV (dirty): an infection already present, a perforated organ, or an old traumatic wound with dead tissue.
The bowel is about to be opened. Set up the dirty side, sort what touches it, and close out clean.
Este laboratorio funciona en el navegador con JavaScript activado.
Este navegador no pudo abrir la sala en 3D. Todo lo que practica el laboratorio está en el capítulo.
9Gallbladder and appendix
Laparoscopic cholecystectomy
What and why: a cholecystectomy removes the gallbladder, most often for painful gallstones, cholecystitis or gallstone pancreatitis; a calcified gallbladder is another reason. A stone that blocks the flow concentrates the bile behind it and raises the bilirubin in the blood, causing jaundice. An inflamed gallbladder can rupture and spill bile, which causes biliary peritonitis. High cholesterol and a high BMI make gallstones more likely. Laparoscopy is the standard approach.
Diagnosis: ultrasound, CT, an abdominal X-ray or ERCP, with blood work such as a CBC with differential and electrolytes. In ERCP, a flexible scope reaches the duodenum and dye goes into the ducts through the ampulla of Vater. Stones stuck in the common bile duct are often cleared by ERCP before surgery.
Anesthesia and position: general anesthesia; supine, arms on armboards. After the scope is in, the table goes into reverse Trendelenburg and tilts to the left, which raises the right side and lets the bowel fall away. A nasogastric tube empties the stomach, and a urinary catheter may be placed. Monitoring includes depth of anesthesia (BIS), capnography (carbon dioxide monitoring), blood pressure, heart rate, oxygen saturation, breathing rate, temperature and urine output, and DVT prevention is used.
Prep and drape: the abdomen; folded towels and a fenestrated laparotomy drape.
Room: camera unit, light source, insufflator and carbon dioxide, ESU, video monitors, suction, a pressure bag for the irrigation saline, positioning aids (armboards, a footboard, a head support and a safety strap) and a table that X-rays can pass through. On hold: a C-arm, lead aprons and a smoke evacuator.
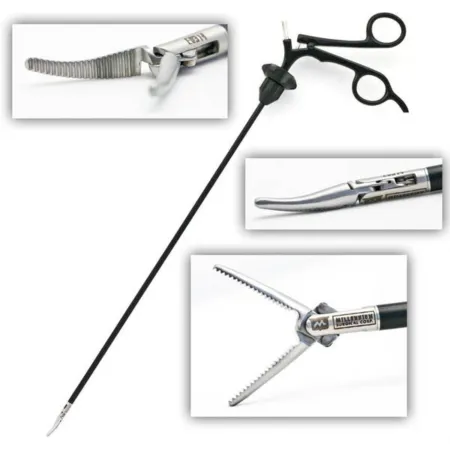
Setup: a laparoscopy tray with a 5 or 10 mm scope, 0 or 30 degrees (the 30-degree scope helps view the gallbladder high in the abdomen); trocars, two 10 mm and two 5 mm, with a Hasson cannula if needed; a Veress needle and 10 mL syringe; a #11 blade; graspers, a Maryland dissector, hook or spatula cautery, scissors, a needle aspirator, ultrasonic shears, a clip applier, a suction-irrigator, a specimen bag, anti-fog and a scope warmer. On hold: cholangiogram supplies, gallbladder and common bile duct instruments, a choledochoscope and stone basket, and a major laparotomy tray with long instruments and a self-retaining retractor in case the case converts.
Medications: contrast and injectable saline for a cholangiogram, IV saline for irrigation, a local anesthetic for the port sites, and topical hemostatic agents.
Key steps:
- A #11 blade incision at the umbilicus. The Veress needle goes in, its position is checked with the 10 mL syringe, and the abdomen is inflated. The needle is swapped for a 10 mm trocar and cannula, and the scope goes in. Hasson or optical entry are the other ways in.
- The other trocars go in under view: 10 mm below the xiphoid, and two 5 mm ports below the right ribs, at the midclavicular line and the anterior axillary line.
- A grasper on the fundus pushes the gallbladder up toward the patient's head; a second grasper pulls the infundibulum out to the side, opening the hepatocystic triangle. The gallbladder may be punctured with the needle aspirator to draw off bile.
- The surgeon clears the triangle with the hook, scissors and a grasper or dissector until the critical view of safety: the triangle cleared of fat and fibrous tissue, the lower third of the gallbladder lifted off the liver, and only two structures, the cystic duct and the cystic artery, entering the gallbladder. Nothing is clipped or cut before this.
- If a cholangiogram is planned (below), it is done now, before the cystic duct is divided: a clip goes on the gallbladder end of the cystic duct, and the duct is opened just below it for the catheter.
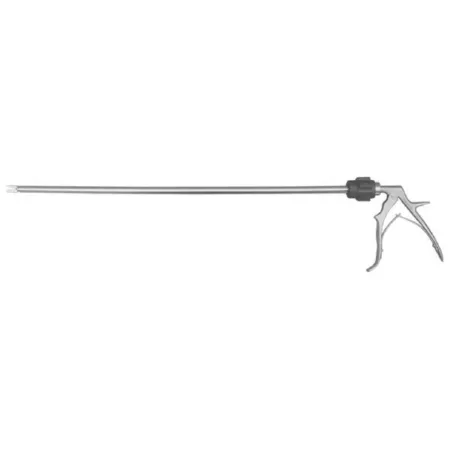
- Clips go on the cystic duct and the cystic artery, commonly two on the side that stays and one on the gallbladder side, and each is cut between them. Keep the clip applier loaded.
- The gallbladder is peeled off the liver bed with the hook or spatula, placed in a retrieval bag and removed, usually through the umbilical port.
- The liver bed and abdomen are irrigated and checked for bleeding, and the gas is let out. The fascia at the 10 mm sites is closed with absorbable suture, and the skin with an absorbable buried stitch.
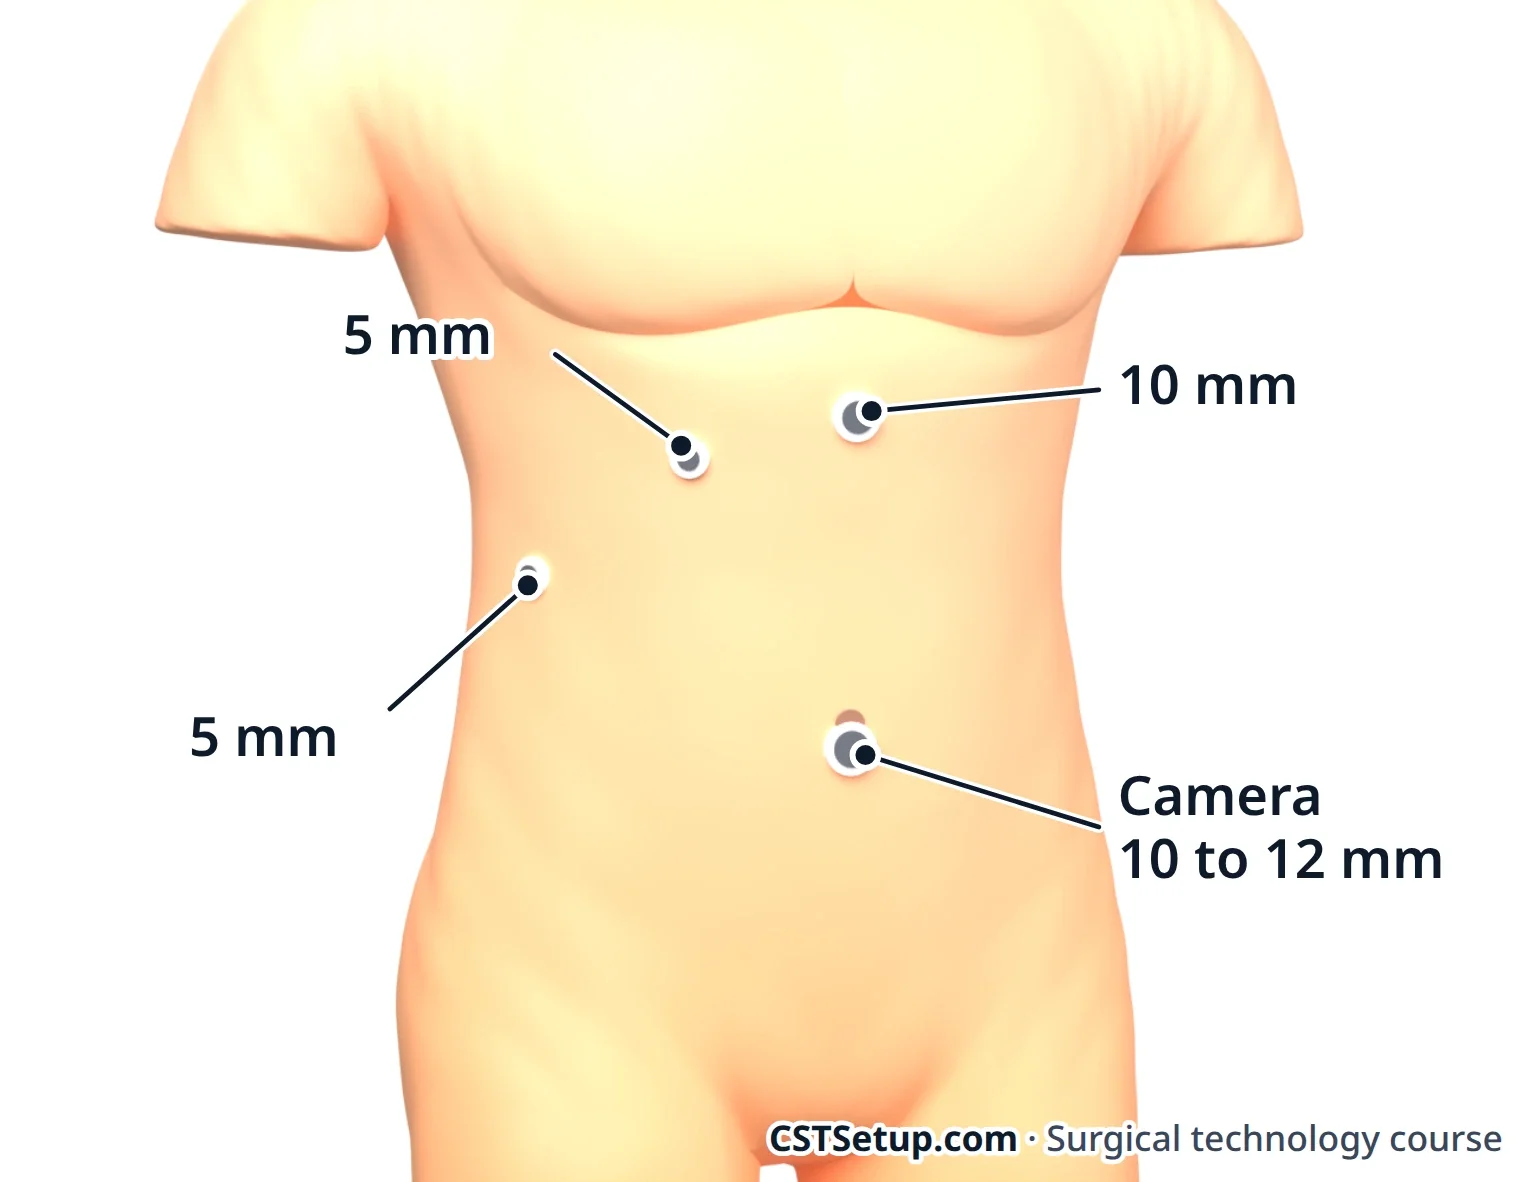
Some surgeons remove the gallbladder robotically, with results like the laparoscopic operation.
Cholangiogram: an X-ray of the bile ducts filled with contrast. It shows stones and the shape of the ducts. Some surgeons do one in every case, and others when the anatomy is unclear or a duct stone is suspected.
The surgeon clips the cystic duct and makes a small cut in it. The catheter comes in through a small puncture in the right upper abdomen, is threaded into the duct and is held with a clip or clamp. Saline goes in first to check its position, then the contrast.
Your setup: the catheter, a stopcock and IV tubing, and two labeled syringes (often 20 mL), one of saline and one of contrast diluted as the surgeon orders. Remove every air bubble from the syringes, tubing and catheter, because a bubble looks like a stone on the image.
Before the X-ray, radiopaque sponges and extra instruments come out of the field, and a sterile drape covers it for the C-arm. Everyone wears a lead apron, stands behind a shield or leaves the room. If stones show, the surgeon may explore the common bile duct: the cystic duct is dilated, a choledochoscope goes in, and a basket or balloon catheter pulls the stones out. Keep the stones dry: they go to the lab with no saline, and never in a preservative, which can dissolve or change them.
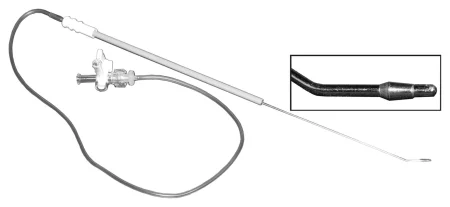
Specimen: the gallbladder and any stones. Receive it in a basin so bile does not spill on the field.
Counts: initial, at fascia closure and at skin closure.
Drains and catheters: a urinary catheter; for a duct exploration, a Fogarty catheter, with a T-tube and drainage bag ready.
Dressing: a nonadherent pad with 2x2 gauze or a clear film, or skin glue or strips.
After surgery: the patient goes to PACU, and most go home the same day. Laparoscopy may be ruled out by suspected gallbladder cancer, cirrhosis with high portal pressure, peritonitis throughout the abdomen, septic shock, late pregnancy, or a heart or lung problem that cannot tolerate the gas. Advanced age and liver cirrhosis can also weigh against gallbladder surgery, and gallstones that cause no symptoms are usually left alone.
Complications: injury to the bile duct or nearby organs, bleeding, an ongoing bile leak, bile or stones spilled into the abdomen, and surgical site infection. The worst is injury to the common bile duct, usually from mistaking it for the cystic duct. That is why the surgeon slows down to reach the critical view of safety, and why a quiet, ready scrub matters most at that moment.
Wound class: II, because the biliary tract is entered; III if bile spills or the gallbladder is acutely inflamed without pus; IV if infection, such as pus, is already present. The Core Curriculum's outline and one surgical technology textbook list an uncomplicated case as Class I, and Class II only when a cholangiogram is done.
Open cholecystectomy
What and why: the open operation treats the same disease. It is chosen when laparoscopy is ruled out, as with suspected gallbladder cancer, late pregnancy, cirrhosis with high portal pressure, peritonitis throughout the abdomen, septic shock, scarring from earlier surgery or a heart or lung problem that cannot tolerate the gas, and it follows a conversion when the surgeon cannot identify every structure through the scope. Since laparoscopy became the standard, open experience has fallen sharply. The large incision means more tissue injury and a longer recovery.
Position, prep and drape: supine, in reverse Trendelenburg; the abdomen is prepped and draped for a laparotomy. The patient has general anesthesia, may get an NG tube, and may receive a prophylactic antibiotic. If a cholangiogram is likely, the bed must let the C-arm in, and the team wears radiation protection.
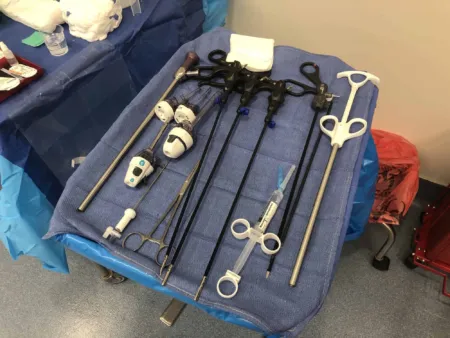
Setup: a laparotomy set and a gallbladder set, with an ultrasonic scalpel, bipolar and monopolar ESU, clips and an applier, Potts scissors and a #11 blade. On hold: long instruments, cholangiogram supplies, the C-arm and its drape, a T-tube and drainage bag, and lead aprons. Gall duct instruments include Bakes dilators, gall duct and stone forceps, duct probes and stone scoops.
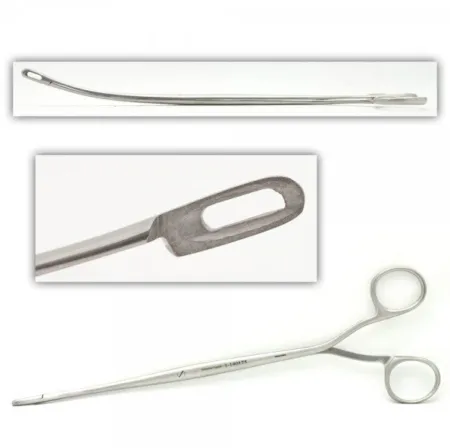
Keep right-angle clamps ready throughout, to reach under and around the ducts and vessels.
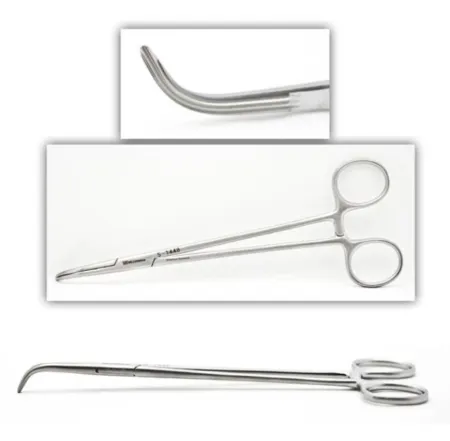
Medications: a long-acting local anesthetic may be injected along a subcostal incision to ease pain afterward. The cholangiogram uses saline and diluted contrast, set up as above.
Key steps:
- An upper midline or right subcostal incision. The subcostal one shows the biliary tree better but hurts more afterward, because the muscle is cut along the rib edge.
- A Deaver or Harrington retractor lifts the liver, and moist laps pack the nearby organs away. A swollen gallbladder may be emptied with a trocar on suction, and the hole closed with a clamp.
- A clamp on the body of the gallbladder gives traction. The surgeon opens the peritoneum over the Calot triangle and dissects with scissors, peanuts on holders and right angles.
- The cystic artery is tied twice or clipped and divided, and the cystic duct is dissected down to where it joins the common hepatic duct.
- A cholangiogram may be done through the cystic duct, with the catheter placed under direct view.
- The gallbladder is freed from the liver bed. Receive it in a basin along with any clamps still on it, so bile stays off the field.
- The liver bed may be sewn, drains leave through a separate stab wound, and the wound is closed in layers.
Common bile duct exploration: when stones sit in the duct, two fine traction sutures lift its wall and the surgeon opens it lengthwise between them. Stones come out with stone forceps, scoops, irrigation or a balloon catheter, or with a choledochoscope and basket. The duct may be closed over a T-tube, whose long arm leaves through the wound to a drainage bag. Duct exploration during surgery is far less common now, because endoscopic procedures before surgery remove most duct stones.
Specimen, counts and dressing: the gallbladder and any stones; counts as for a laparotomy. A bulky abdominal dressing, with each drain sewn to the skin and covered.
Wound class: II, because the biliary tract is entered.
After surgery: the complications are those of the laparoscopic operation, led by injury to the bile duct, bleeding, a bile leak and infection.
Appendectomy, open and laparoscopic
What and why: appendicitis usually starts when the inside of the appendix is blocked. Pressure builds, the wall swells and loses blood flow, bacteria spread, and the appendix can turn gangrenous and burst, causing peritonitis. Most appendectomies are laparoscopic.
Laparoscopic: supine, in slight Trendelenburg with the right side of the table slightly raised. The camera port goes at the umbilicus, with working ports elsewhere, often one in the right upper quadrant and one low in the midline above the pubis. The surgeon finds the cecum and follows it to the appendix base, then makes a window in the mesoappendix, which carries the appendix's artery. It is divided with an energy device or a stapler with a vascular load; then the base is stapled or closed with pre-tied loops. The appendix leaves in a retrieval bag, and free fluid is cultured if there are signs of infection. A perforated appendix or peritonitis may call for open surgery.
Open: a McBurney or Rocky-Davis incision; the muscles are split and held with small retractors. The surgeon lifts the appendix with a Babcock, divides and ties the mesoappendix, crushes and ties the base, and cuts the appendix off. Some surgeons bury the stump with a purse-string stitch in the cecum. The knife, clamps and anything that touched the cut end go into a basin with the specimen: bowel technique on a small scale. The team then changes gloves (and often gowns), and the wound is closed with clean instruments.
Prep and drape: the abdomen; towels and a laparotomy sheet. Medications: in an open appendectomy, antibiotic irrigation, mixed in a small basin on the back table, may be used, especially when the wound is contaminated. Specimen: the appendix, and a culture of any pus or fluid. Counts: initial and closing. Dressing: strips or glue on the ports; a dry dressing on an open wound. After a rupture, the skin may be left open and packed.
Wound class: II if the appendix is not perforated, III if inflamed without pus, IV if there is pus or it has burst. Some references class a ruptured appendix as III.
10Hernia repair
A hernia is tissue, such as fat or bowel, bulging through a weak spot or opening in the wall that should hold it in. It is reducible if it slips back, incarcerated if it is stuck, and strangulated if its blood supply is cut off, which is a surgical emergency because the trapped tissue can die. The weakness may be present from birth or follow an earlier operation or an injury. A hiatal hernia, in which part of the stomach slides up through the diaphragm, is taught with the stomach operations below.
Herniorrhaphy and hernioplasty both mean hernia repair. A repair either sews the patient's own tissue together or adds mesh. Mesh bridges the weak area without tension and becomes filled with scar tissue, so many repairs use it. Synthetic mesh is a permanent implant: confirm its type and size with the surgeon before you open it, and know that its maker's details go into the patient's record. Mesh comes in sheets or patches, cut to overlap the edges of the defect, and is held with tacks, staples or sutures. Hernia sutures are soft and pliable, such as polyester or synthetic absorbable, with fine absorbable suture on the delicate sac. Most simple repairs are outpatient cases, and the patient goes home the same day.
Inguinal hernia
The inguinal canal is a tunnel about 4 cm long, just above the inguinal ligament. It runs from the deep ring to the superficial ring and carries the spermatic cord in males and the round ligament in females.
- Indirect: enters the deep ring and follows the cord, lateral to the inferior epigastric vessels. It may be present from birth and can reach the scrotum or labia. It is the most common hernia.
- Direct: pushes through the back wall (floor) of the canal in the Hesselbach triangle, medial to the inferior epigastric vessels. The triangle is bordered by those vessels, the edge of the rectus muscle and the inguinal ligament. It comes with age and straining, such as heavy lifting.
- Femoral: passes below the inguinal ligament, just medial to the femoral vein. It is more common in women than in men, and far more likely than an inguinal hernia to become incarcerated or strangulated.
Open mesh repair (Lichtenstein): supine; groin prep; towels and a laparotomy sheet. It may be done under general, spinal or local anesthesia. Setup: a laparotomy set, a Penrose drain, mesh and local anesthetic. It is the most common open mesh repair. Steps:
- An oblique groin incision through the fat and Scarpa fascia to the external oblique aponeurosis.
- The aponeurosis is opened along its fibers while the ilioinguinal and iliohypogastric nerves are found and protected.
- The cord is freed and looped with a Penrose drain, dipped in saline first and held with a clamp, for gentle traction.
- An indirect sac is freed from the cord, then pushed back, or opened, emptied, tied off and cut away.
- Mesh is trimmed to lie flat on the floor of the canal, slit for the cord, and sewn to the inguinal ligament below and the internal oblique and rectus sheath above.
- The layers are closed.
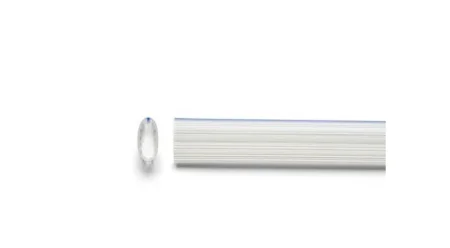
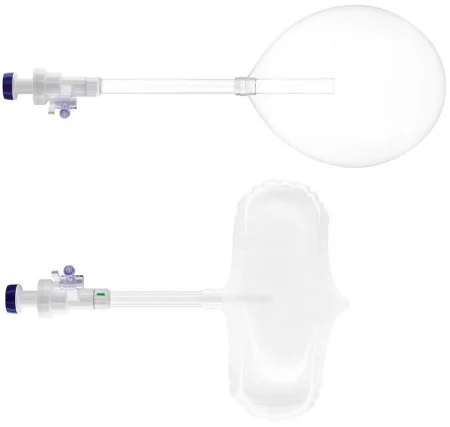
Laparoscopic and robotic repair: the mesh goes behind the abdominal wall, in the preperitoneal space, covering the direct, indirect and femoral openings at once. In a TAPP repair the surgeon enters the abdomen, opens a flap of peritoneum over the groin, places the mesh and closes the flap. In a TEP repair the surgeon stays outside the peritoneum, opening the space with a balloon dissector. The mesh is held with tacks, sutures or glue, and some surgeons leave it unfixed. The patient lies supine with arms tucked, in 20 to 30 degrees of Trendelenburg, with the bladder empty. Most robotic inguinal repairs use the TAPP approach, with an anti-skid pad under the patient for the steep tilt. Laparoscopic repairs mean less pain and a quicker return to activity, though they recur somewhat more often than open repairs.
Specimen: the sac, if removed. Counts: initial and closing, with the Penrose counted as a miscellaneous item. Dressing: strips, glue or a small flat dressing. Wound class: I.
Femoral hernia
What and why: a femoral hernia comes through the femoral canal, below the inguinal ligament. The canal is the smallest, innermost compartment of the femoral sheath, bordered by the femoral vein on its outer side, the lacunar ligament on its inner side, the inguinal ligament in front and the pectineal ligament behind. The weak spot is the transversalis fascia below the inguinal ligament. About 5 percent of groin hernias are femoral; they are more common in women than in men and less common in children. Because they are far more likely than inguinal hernias to become incarcerated or strangulated, repair is always advised.
Approach, position, prep and drape: any inguinal method works: an open tissue or mesh repair, or a laparoscopic or robotic repair whose mesh covers the femoral opening along with the inguinal ones. The open repair goes through the same groin incision as an inguinal repair, so position, prep, drape and anesthesia match it, and a urinary catheter may be placed to keep the bladder empty.
Setup: the inguinal setup of a laparotomy set, a Penrose drain, mesh and local anesthetic, with a shaped 3-D mesh or a plug.
Key steps (open mesh repair): through an inguinal incision, the surgeon frees the femoral sac and pushes it back into the abdomen. A shaped piece of mesh is fitted over the femoral canal and sewn to the Cooper ligament, and the rest is laid along the floor of the inguinal canal, as in a Lichtenstein repair, and anchored with sutures. A mesh plug is another option.
Wound class: I when no bowel is opened. A strangulated hernia is an emergency, because the trapped tissue loses its blood supply and dies. If trapped bowel has died, a bowel resection follows, with bowel technique, and the case becomes at least Class II.
After surgery: the risks are those of an inguinal repair: recurrence, nerve injury and infection.
Umbilical and ventral hernia
An umbilical hernia comes through the umbilical ring in the linea alba. Most in young children close on their own by age 2; in adults they are more common with a high BMI, and their small necks make incarceration more likely. A ventral hernia is a weakness in the front abdominal wall, and an incisional hernia forms at an old surgical incision.
Umbilical repair: supine. A curved incision just above or below the navel (or inside it) keeps the navel with the skin flap. The sac is freed from the back of the navel skin and pushed back. The fascial defect is closed with sutures, or bridged with a mesh plug or patch for a larger hole. The skin is closed with a buried stitch, and a small flat dressing goes on.
Open ventral or incisional repair: a wide prep; a laparotomy set. The surgeon lifts the old scar with Allis clamps and cuts it away (keep it as a specimen), removes old stitches, frees adhesions and finds the fascia edges. Mesh is sewn or tacked across the defect. Mesh can lie on top of the fascia (onlay) or beneath the muscles (sublay): behind the rectus muscle, in the preperitoneal space, or inside the abdomen on the peritoneum (intraperitoneal). Behind the muscle or in the preperitoneal space carries the lowest risk of recurrence and infection. Large repairs may need suction drains.
In laparoscopic or robotic repairs, mesh inside the abdomen has a coated side that faces the bowel to prevent adhesions. It is fixed with sutures brought through the wall with a suture passer and with tacks.
Specimen: the sac or scar. Counts: initial, when closure of the peritoneum begins if it was opened, when closure of the fascia begins, and at skin closure. Wound class: I.
11Stomach and esophagus
The esophagus, about 25 cm long in an adult, passes through the diaphragm to reach the stomach in the left upper abdomen. The stomach has three parts, the fundus at the top, the body and the antrum, with an opening at each end: the cardia, from the esophagus, and the pylorus, into the duodenum. The omentum hangs from its curves and has to be separated whenever part of the stomach is removed or reshaped. Chapter 7 has the full anatomy. These cases use a laparotomy or laparoscopy set with atraumatic GI clamps, long instruments for large patients, and staplers.
Hiatal hernia and Nissen fundoplication
What and why: the esophageal hiatus is the opening in the diaphragm for the esophagus, and a membrane normally anchors the junction of esophagus and stomach there. In a type I, or sliding, hiatal hernia, the hiatus widens and the junction slides up into the chest, which often leads to gastroesophageal reflux disease (GERD). Types II to IV, the paraesophageal hernias, have a true hernia sac: the fundus rolls up beside the esophagus, then the junction follows it, and finally other organs such as the colon or spleen join them. A paraesophageal hernia can inflame the stomach lining (gastritis) or ulcerate it, twist and strangulate the stomach, block its outlet or bleed.
In GERD the lower esophageal sphincter loses its tone and stomach acid washes up and erodes the lining, causing heartburn, regurgitation, chest pain and trouble swallowing; over time it can lead to cancer. A fundoplication (fundus plus plication, a fold) wraps the top of the stomach around the lower esophagus so that it works as a valve. A Nissen wraps all the way around, 360 degrees; a Toupet wraps 270 degrees from behind, and a Dor 180 degrees in front. A hiatal hernia found at the same time is repaired in the same operation.
Diagnosis: EGD, a barium swallow, 24-hour pH monitoring and esophageal manometry. Changes in diet and weight and drugs such as antacids, histamine blockers and proton pump inhibitors come first; surgery follows when they fail.
Position, prep and drape: supine, or in low lithotomy with the surgeon between the legs, in reverse Trendelenburg of about 20 degrees. The prep runs from the nipple line to the pubis. An NG tube is placed if the stomach needs emptying, and a urinary catheter often is.
Setup: a laparoscopy set with a 30-degree scope, two 10 mm and two 5 mm trocars, a fan liver retractor, Babcock graspers, clip appliers, ultrasonic shears, a laparoscopic needle holder and knot pusher, nonabsorbable suture and a Penrose drain. Extra-long instruments and an extra 10 mm trocar are added for an obese patient, and a laparotomy set stays ready in case the case converts.
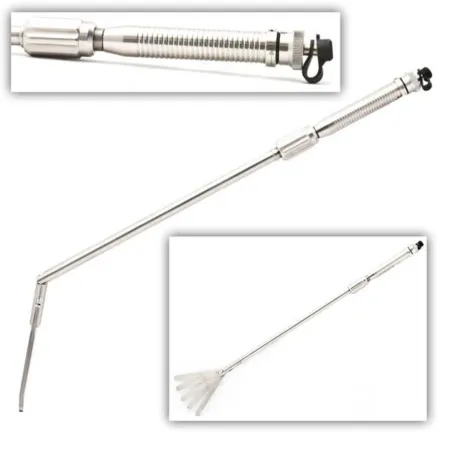
Esophageal dilators: the anesthesia provider passes bougie or Maloney dilators, 32 F to 60 F, down the esophagus during the case, so they are laid out in order of size on a nonsterile table with water-soluble lubricant; they are never passed from the sterile field. Dilators carry expiration dates, so check them ahead of time.

Key steps:
- The ports go in, and a fan retractor lifts the left lobe of the liver to show the hiatus.
- A Babcock on the fundus pulls the stomach down. The surgeon finds the crura, the two muscular pillars of the hiatus, opens a window behind the esophagus and loops a Penrose drain around it for traction.
- The fundus is freed by dividing the short gastric vessels with clips or ultrasonic shears.
- For a paraesophageal hernia, the sac is reduced and cut away, and the stomach is drawn back into the abdomen along with at least 2.5 to 3 cm of the lower esophagus.
- The anesthesia provider passes a large dilator, 56 F to 60 F, in step with the surgeon, who holds the stomach at an angle that lets it pass without a perforation. The crura are sewn together behind the esophagus while the dilator acts as a stent, so the closure is not too tight; a very large defect may be reinforced with biologic mesh.
- The fundus is passed behind the esophagus, wrapped around it and sewn to itself over the dilator. The dilator then comes out, and an NG tube may take its place.
- Bleeding is checked, the ports come out and the incisions are closed.
Wound class: I, because the GI tract is not opened.
After surgery: most patients go home the same day. Complications include a hole in the esophagus or stomach, injury to the pleura, trouble swallowing, death of the wrap, pneumonia, bleeding, infection and symptoms that do not improve.
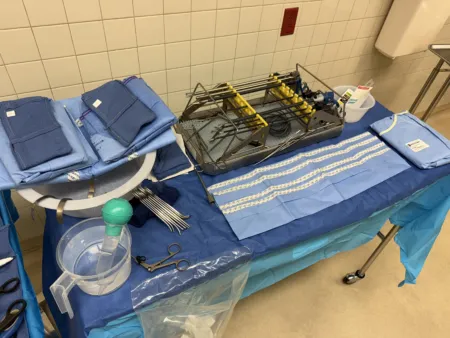
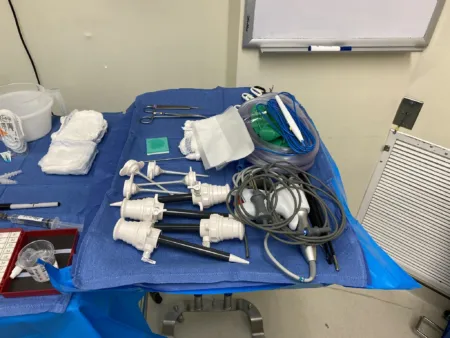
Gastrectomy and gastrostomy
What and why: a gastrectomy removes part or all of the stomach. A partial (distal) gastrectomy treats stomach cancer and ulcer disease that bleeds, perforates or blocks the outlet; such ulcers are commonly caused by H. pylori bacteria and long-term use of anti-inflammatory drugs (NSAIDs). A Billroth I joins the remaining stomach to the duodenum (a gastroduodenostomy); a Billroth II closes the end of the duodenum and joins the stomach to the jejunum (a gastrojejunostomy). The Billroth II is chosen when the disease reaches above the antrum or the duodenum is scarred. A total gastrectomy, for cancer or for bleeding nothing else will stop, is rebuilt with a Roux-en-Y loop of jejunum joined to the esophagus. A gastrectomy may add a vagotomy (cutting the vagus nerve) or a lymph node dissection, and it is now nearly always done laparoscopically or robotically, with open surgery kept for some cases.
Diagnosis: a full endoscopy with endoscopic ultrasound sizes up the disease before surgery, and biopsy confirms or rules out cancer.
Position, prep and drape: supine or in low lithotomy; an upper midline incision for open surgery; an abdominal prep and a laparotomy drape. An NG tube and a urinary catheter are placed, with steps to prevent DVT, hypothermia and pressure injury.
Setup: a laparotomy set with GI instruments, long instruments, a self-retaining retractor, clip appliers and a fine right angle, plus linear cutting and circular staplers in several sizes, vessel loops and a drain. Have plenty of hemostats (Mayo, Crile or Kelly), clips and ties, and suture ligatures for the large gastric vessels.
Key steps:
- The surgeon explores the abdomen and sets the lines of resection.
- The omentum is freed from both curves of the stomach between clamps or with an energy device, and the large vessels are clipped. Label any lymph nodes removed now at once and pass them off.
- Intestinal clamps (Kocher or Allen type) go across the duodenum for a Billroth I or the jejunum for a Billroth II. The bowel is cut between them, the stump is stapled or sewn shut, and the stomach is divided.
- The anastomosis, the new join between stomach and bowel, is stapled with GIA and TA staplers or sewn in two layers. Bowel technique is followed, and a second setup for the closure helps. The team changes gloves (and often gowns) and closes with clean instruments.
- A gastric tube may be brought out through the abdominal wall, drains are placed, and the abdomen is closed and covered with a flat dressing and an ABD pad.
Wound class: II.
After surgery: complications include bleeding, infection and a failed anastomosis, and diet is the patient's biggest adjustment.
Gastrostomy: a surgical opening from the stomach to the skin, used to feed the patient or to drain and decompress the stomach. Common reasons are tumors of the throat, larynx, esophagus or upper stomach and narrowing of the esophagus. It can be made open, endoscopically through the skin or laparoscopically, and it may be added to a gastrectomy.
- Open (Stamm) gastrostomy: supine, prepped from mid-chest to mid-thigh, with a minor set. Through an upper midline incision the surgeon lifts the stomach with a Babcock, makes a small hole and inserts a 20 to 26 French Foley, Malecot or Pezzer catheter, held by two purse-string sutures. The tube leaves through a stab wound in the left upper abdomen, and the stomach is sewn to the abdominal wall. Have several tubes ready but open none until the surgeon chooses, and keep suction ready in case stomach contents spill.
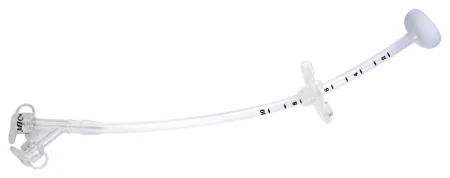
- Percutaneous endoscopic gastrostomy (PEG): a feeding tube placed through the skin into the stomach under endoscopic view, for a patient who cannot eat but whose GI tract works. A prepackaged kit holds a #11 blade, a trocar needle, a long suture or guidewire, the tube and a skin disk, and a gastroscopy setup with a snare is needed too. The patient is supine, the abdomen is prepped and antibiotics are given before the start. In the pull method, the scope inflates the stomach and its light shines through the abdominal wall, showing that nothing lies between stomach and skin; after local anesthetic and a stab wound, a needle enters the stomach, and a suture or wire passed through it is caught in the snare and drawn out of the mouth with the scope. The tube is attached to it and pulled down the esophagus until it comes out through the stab wound; the scope goes back in to check its position, and a skin disk secures it.
- Wound class and complications: Class II, because the stomach is opened; bleeding, infection, skin erosion and leaking are the main risks.
Weight-loss surgery
What and why: bariatric (weight-loss) surgery treats obesity, which is defined by the body mass index (BMI). Morbid obesity means a BMI of 40 or more, with the person at least 100 pounds (45 kg) over ideal weight despite serious attempts to lose it. Patients usually qualify with a BMI of 40 or more, or 35 or more with a related disease such as type 2 diabetes, high blood pressure, high blood fats or sleep apnea. They are screened for commitment, freedom from alcohol and tobacco and psychological readiness, and usually must try other weight-loss measures first. Restrictive operations make the stomach smaller; malabsorptive ones bypass part of the small bowel; some do both.
Positioning and equipment safety: these patients often have diabetes, heart and lung disease, sleep apnea and a difficult airway, so expect the anesthesia provider to need extra help with intubation. Check that the bed is rated for the patient's weight in the position it will be used in, with extensions fitted correctly and well padded. An anti-skid pad or vacuum positioner keeps the patient from sliding during a steep tilt; add padded safety straps, pressure-reducing devices and compression devices that fit. Plan the transfer: a bariatric gurney and table, slide sheets or a lift, and enough people to protect the patient and the staff. Have extra-large blood pressure cuffs, extra-long trocars and long instruments.
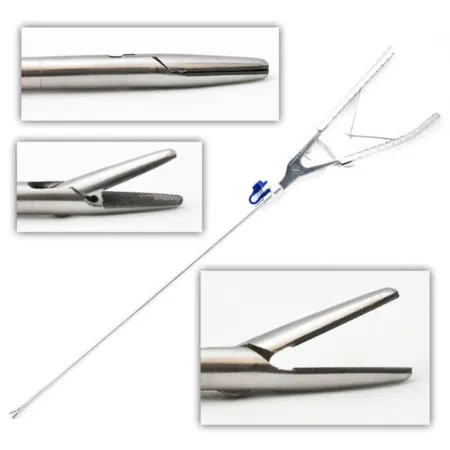
Medications: heparin is given under the skin before surgery, along with compression boots, because the risk of DVT is high. Methylene blue may be instilled to test a new connection for leaks.
Adjustable gastric band: a silicone band with an inflatable inner balloon goes around the top of the stomach to make a small pouch; its tubing runs to a port under the skin, where saline is added or removed to tighten or loosen it. The operation is called a band gastroplasty; it causes no malabsorption and can be reversed. The patient lies in low lithotomy with the surgeon between the legs, secured for reverse Trendelenburg, often on a beanbag positioner. You test the band for leaks and flush it with saline, leave 5 mL in the band and tubing, clamp the tubing, and dip the band in saline before passing it. The surgeon tunnels it behind the stomach and locks it once the anesthesia provider has placed a balloon-tipped gastric tube at the junction of the esophagus and stomach; the stomach is then folded over the band and tacked with nonabsorbable sutures, and the port is sewn to the fascia. The band is filled about 4 weeks later and adjusted under fluoroscopy several times in the first year. Erosion, slipping, port infection and a disconnected tube are typical problems.
Sleeve gastrectomy: staplers reduce the stomach by 70 to 90 percent, and the removed part comes out through a port and goes to pathology as facility policy requires. Both parts are checked for a complete separation with no defects before closing. Leaks, a narrowed outlet and bleeding from the staple line, the short gastric vessels or the spleen are the main risks.
Roux-en-Y gastric bypass: it bypasses most of the stomach. A small pouch, usually under 30 mL, is stapled off the top of the stomach and joined to a divided limb of jejunum (the Roux limb), and the other cut end of the jejunum is joined farther down so the stomach's secretions still reach the intestine. The patient is supine or in low lithotomy with leggings. The setup adds extra-long laparoscopic instruments, a flexible or fan liver retractor, a 30-degree scope, 12 mm ports, an optical trocar or Veress needle, and endoscopic linear staplers. In order: five ports above the umbilicus plus one for the liver retractor; the jejunum divided about 40 cm past the ligament of Treitz; the pouch stapled and sized with a 32 French bougie or a balloon passed by the anesthesia provider; the Roux limb joined to the pouch with staplers, sutures or a circular stapler and tested with methylene blue; and the gaps in the mesentery closed. Weight comes off faster than with a band. The risks include bleeding, leaks, pulmonary embolism, pneumonia, infection, bowel obstruction, internal or incisional hernia, ulcers at the new connection, gallstones, dumping syndrome and vitamin deficiency.
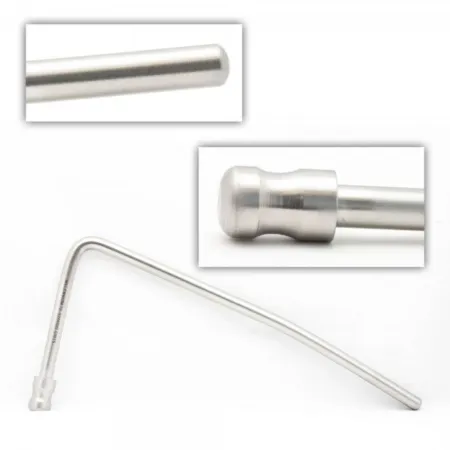
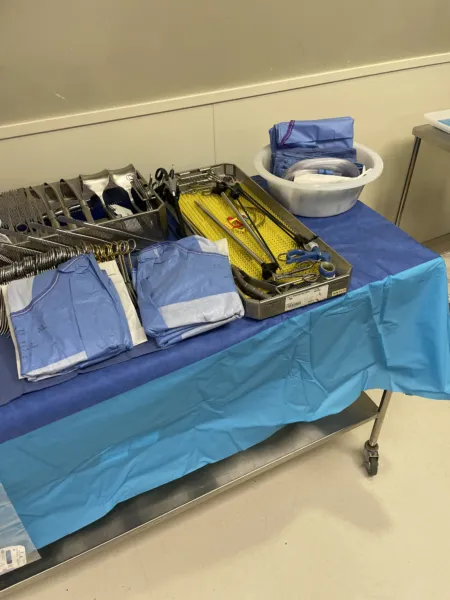
Wound class: II for the bypass and the sleeve, because the stomach is opened; I for a band, which does not open it.
After surgery: reverse Trendelenburg helps the patient breathe, most patients without breathing problems can be extubated in the OR or PACU, and walking early helps prevent clots. Obese patients run higher risks of wound infection, wound separation, pulmonary embolism, breathing failure and anastomotic leaks.
12Bowel resection and anastomosis
A bowel resection removes diseased intestine: cancer, polyps, diverticulitis, Crohn disease or ulcerative colitis, a blockage, a twist of the bowel (volvulus), an injury, or bowel that has lost its blood supply. The ends are joined (an anastomosis), or one end is brought to the skin as a stoma when joining them is not safe. The model case is the open right hemicolectomy. It removes the end of the ileum, the cecum, the ascending colon and part of the transverse colon, for disease of the cecum, ascending colon or hepatic flexure. The same steps apply to other bowel resections, open or minimally invasive.
Open right hemicolectomy
Pathology: the reasons include inflammatory disease (Crohn disease, diverticulitis, ulcerative colitis); a blockage from fecal impaction, intussusception, an adhesion band, a tumor or a volvulus; polyps; pseudomembranous enterocolitis; blunt or penetrating trauma; and vascular disease, such as an arteriovenous malformation, ischemic colitis or a blocked vessel. Polyps may be benign or malignant, and they grow on a stalk (pedunculated) or sit on the wall with no stalk (sessile); the types include polypoid and villous adenomas, mucous polyps, pseudopolyps and familial polyposis. Coexisting conditions to note include coronary artery disease, high cholesterol, high blood pressure and smoking.
Diagnosis: colonoscopy, CT, a barium enema, a chest X-ray and an intravenous pyelogram (IVP), with blood tests such as the CEA tumor marker, electrolytes and clotting times, and a test for hidden blood in the stool.
Anesthesia and position: general anesthesia, and an epidural may be added for pain control; supine, arms on armboards, with a safety strap. Low lithotomy is used when a circular stapler must pass through the anus. A nasogastric tube and a urinary catheter are usually placed. Monitoring covers depth of anesthesia (BIS), exhaled carbon dioxide (capnography), blood pressure, heart rate, oxygen saturation, breathing, temperature and urine output, with steps to prevent DVT.
Prep and drape: the abdomen, with any stoma site marked before surgery, if possible with the patient standing; towels and a laparotomy sheet.
Setup: major laparotomy and GI trays, long instruments, a self-retaining retractor, an energy device (ESU, ultrasonic shears or vessel sealer), GIA and TA staplers with reloads, clips, Poole and Yankauer suction, a dirty setup, and a separate clean closing setup such as a minor laparotomy tray. Keep an extra Poole tip clean for the final irrigation.
Key steps:
- The surgeon opens the abdomen through a midline or paramedian incision, explores it and confirms the extent of the disease. A self-retaining retractor, padded with moist laps, holds the wound open.
- The colon is freed from the side wall while the surgeon protects the right ureter and the duodenum. The surgeon runs the colon by hand to choose where to cut and where to join.
- The mesentery and its vessels are divided: clamp, cut and tie, a vessel sealer or a stapler. Pass clamps in pairs, with ties right behind.
- The bowel is divided, usually with a GIA stapler, or between clamps: noncrushing bowel clamps on the side that stays and crushing clamps on the specimen side. The specimen passes off the field, and bowel technique starts once a lumen is open.
- Anastomosis. Stapled: the stapled ends lie side by side, a corner of each is cut off, one fork of the GIA goes into each limb and fires, and the leftover opening is held with Allis clamps, closed with a TA stapler and the extra trimmed. Hand-sewn: two layers, an inner running absorbable stitch and an outer layer of interrupted stitches through the serosa. A count is done before the anastomosis is finished.
- The gap in the mesentery is closed and the abdomen irrigated with warm saline.
- Bowel technique ends: dirty items out, fresh gloves (and often gowns) and drapes, and closure with clean instruments.
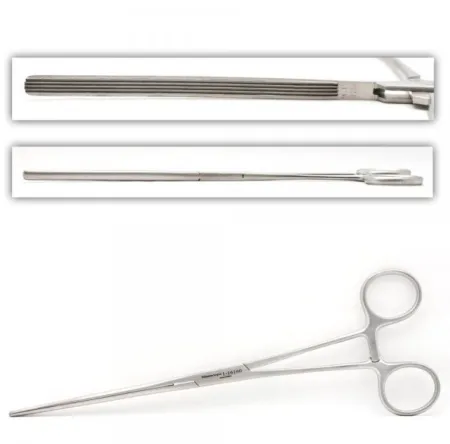
Specimen: the bowel segment, which may go for frozen section as well as permanent section. Counts: initial, at peritoneum closure and at subcutaneous or skin closure, plus a count before the anastomosis is finished; anything added, including the clean closing setup, is counted. Drains: a urinary catheter, and sometimes a closed suction drain. Dressing: an ABD or island dressing with gauze, and the stoma appliance. Wound class: II with controlled spillage, III with uncontrolled spillage, IV with infection already present. After surgery: PACU or ICU. Complications include a leaking anastomosis, bleeding, DVT, bowel that loses its blood supply, wound infection, short bowel (short-gut) syndrome and death. The outlook depends on whether a cancer is still local or has spread to the mesentery or to distant tissues.
Small bowel resection
What and why: a small bowel resection removes a diseased, blocked or dead segment of small intestine and joins the healthy ends. It is a co-related procedure, done much like a colon resection. The small intestine has three parts, the duodenum (20 to 25 cm), the jejunum (about 0.9 m) and the ileum (about 1.8 m), hung from the mesentery, which must be divided from any segment that comes out. Those are lengths in a living person, where muscle tone keeps the whole small intestine at about 3 m; without that tone, after death, it measures about twice as long. Some references give longer figures for the parts, a jejunum of about 2.7 m and an ileum of about 4 m. The usual reasons are obstruction, inflammatory disease such as Crohn disease, and cancer. A blockage may come from bowel trapped in a hernia, a twist (volvulus), one segment telescoping into the next (intussusception, mostly in children) or bowel that stops moving after surgery (paralytic ileus); left alone, it can lead to perforation, dead bowel and peritonitis. A Meckel diverticulum, a pouch on the lower ileum left over from before birth, is another reason: it can block and strangulate the bowel, become inflamed much like an appendix, or bleed.
Diagnosis: a GI contrast series, barium studies and CT.
Position, prep and drape: supine under general anesthesia, with an NG tube and a urinary catheter; a midline or paramedian incision; an abdominal prep and a laparotomy drape.
Setup: a major laparotomy set with intestinal instruments, vascular forceps, vessel loops, clips and GI linear staplers in several sizes, with a Penrose drain on hold and laparoscopic equipment if the case is minimally invasive.
Medications: the prophylactic antibiotic is chosen for the germs of the small bowel; cephalosporins are common for clean-contaminated cases.
Key steps: the surgeon opens and explores the abdomen, protects the wound edges with moist laps or a wound protector and places a self-retaining retractor. Small windows in the mesentery at each end of the diseased segment let a linear stapler fire across the bowel. The segment is freed from its mesentery with clamps and ties, a vessel sealer or ultrasonic shears. The ends are joined end to end, side to side or end to side, stapled or sewn in two layers, and the gap in the mesentery is closed. Bowel technique applies, and the wound is irrigated and closed in layers.
Wound class and after surgery: as for a colon resection: II with controlled spillage, III with gross spillage, IV with a perforation or infection already present. Bleeding, infection, a leaking anastomosis and obstruction from adhesions are the main risks.
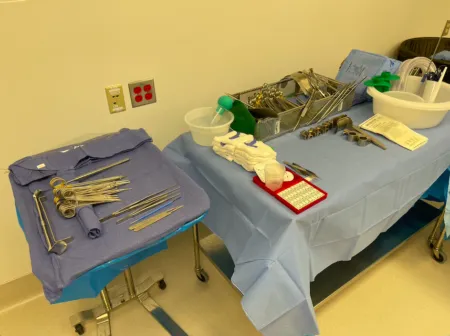
Low anterior resection
What and why: colon resections are named for the part removed: a right hemicolectomy, a transverse colectomy, a left hemicolectomy, a low anterior resection, or an abdominoperineal resection, which takes the rectum and anus and leaves a permanent colostomy. The supplies are the same for all of them.
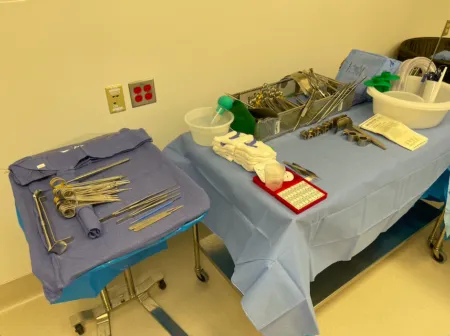
A low anterior resection removes the lower sigmoid colon and the upper rectum, for cancer there or for inflammatory bowel disease; the colon is joined to the rectum if the lower margin is free of cancer and enough length remains. The anal sphincter stays. It may be done open, laparoscopically or with the robot: the anatomy and the disease are the same, and what differs is mostly the equipment and instruments.
Diagnosis and preparation: colonoscopy finds the lesion and often tattoos it, with the workup described for the hemicolectomy. An elective colon resection or low anterior resection also needs a bowel prep the day before: enemas and cathartics to empty the colon, then oral antibiotics that the gut does not absorb, to cut down the live germs. A urologist may first place ureteral stents, which help the surgeon find the ureters.
Position, prep and drape (robotic): modified lithotomy on a vacuum mattress, so the table can tilt to the side in Trendelenburg safely; both arms tucked; a prep from the nipple line to the pubis; laparotomy drapes with pockets.
Setup: for the robot, 30-degree and 0-degree scopes, a robotic stapler, an ultrasonic vessel sealer, a monopolar hook and scissors, bipolar forceps, a 12 mm stapler cannula and a suction-irrigator. For an open case, laparotomy and GI sets, linear and circular (EEA) staplers with EEA sizers, long pelvic instruments and a rigid sigmoidoscope. A separate small table holds the rectal instruments, the sigmoidoscope and the circular stapler for the part done through the anus, and another may hold the closing instruments.
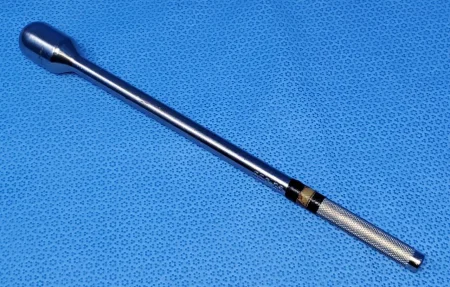
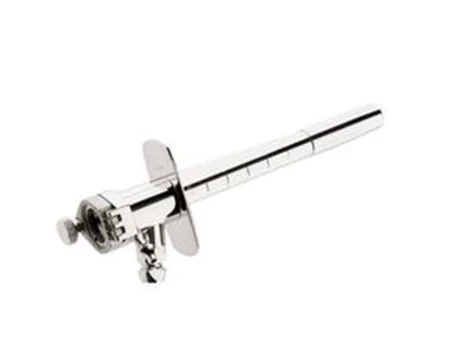
Medications: the anesthesia provider injects indocyanine green (ICG), a fluorescent dye, into a vein, so a near-infrared scope can show whether the bowel ends have good blood flow before they are joined.
Key steps (robotic):
- Pneumoperitoneum, an optical camera port and the other ports; the robot is docked, and the surgeon moves to the console.
- Adhesions are released and the left colon is freed.
- The inferior mesenteric artery and vein are sealed and divided with the robotic stapler.
- The bowel is divided with the stapler, which needs several loads.
- ICG confirms the blood flow, and the anastomosis is made.
- The specimen leaves through a small wound protector in the stapler port.
The open operation: through a midline incision, the surgeon frees the sigmoid colon while protecting both ureters, frees the rectum in the space in front of the sacrum, and divides it with a curved stapler. The anvil of a circular stapler is tied into the colon with a purse-string stitch, and an assistant between the legs passes the stapler through the anus to join colon and rectum. The two donuts must be complete rings and go with the specimen, and every stapler part is counted. With saline in the pelvis, air pushed gently into the rectum shows any leak as bubbles. The assistant who worked below then changes gown and gloves, and fresh drapes cover the legs.
after a circular stapler fires, both donuts must be complete rings. They go with the specimen, and every part of the stapler is accounted for in the count.
Wound class: II.
After surgery: as for any colon resection: a leak, bleeding, DVT, loss of blood supply to the bowel and infection.
Colostomy and ileostomy
What and why: an ostomy brings an opening of bowel to the skin, where it is called a stoma. A colostomy uses colon; an ileostomy uses ileum. An end stoma uses one cut end; a loop stoma brings up a loop, held up by a rod or bridge, and opens it. An ileostomy is built as a raised spout because its liquid drainage burns skin, while a colostomy is sewn flat to the skin. A stoma may be temporary or permanent, and its appliance goes on in the room. A temporary colostomy lets an abdominal infection settle or a lower anastomosis heal; a permanent one is needed when too little colon remains to rejoin safely.
Before surgery: the surgeon and an ostomy nurse choose the site with the patient's lifestyle, age and belt line in mind and mark it on the skin. Take care not to scrub the mark off during the prep. A stoma changes body image, and patients adjust better with support and with teaching from an ostomy specialist.
Setup: laparotomy and GI sets with a linear stapler, 3-0 absorbable sutures to sew the bowel to the skin, a temporary pouch, and for a loop stoma a rod, a length of red rubber tubing or a loop ostomy bridge. Butterfly anchors are among the ostomy supplies too.
End stoma: an Allis or Kocher clamp lifts the skin at the marked site and a disk of skin is cut away; the opening is carried down to the fascia, which gets a cross-shaped cut. A Babcock pulls the bowel through without twisting it or stretching its blood supply, and it is tacked to the peritoneum so it cannot slip back or form a hernia. The main incision is closed and covered first. Then the stapled end is cut off with the ESU (have suction ready), the edges are turned out and sewn to the skin, and a pouch cut to fit goes on clean, dry skin.
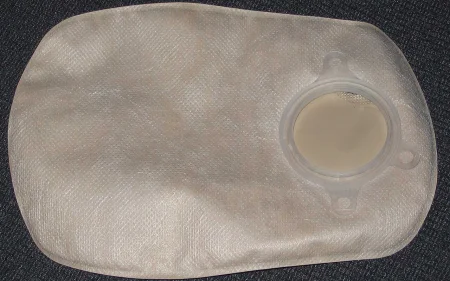
Loop stoma: a Penrose drain around the bowel helps pull a loop up through the opening. A rod or bridge keeps the loop from slipping back; its two wings are sewn to the skin with nonabsorbable suture on a cutting needle. The loop is opened lengthwise and its edges sewn to the skin with absorbable suture on a taper needle, either at once or later: an ileostomy loop left closed is opened (matured) within 24 hours, and a loop colostomy after about 48 hours. The rod comes out after about 5 to 7 days. When the bowel is divided, its far (distal) stump may also be brought out through the skin as a mucous fistula, which is matured at the same operation or, when the bowel is inflamed and swollen, later, once that settles.
Wound class: II when a stoma is made, since the bowel is opened.
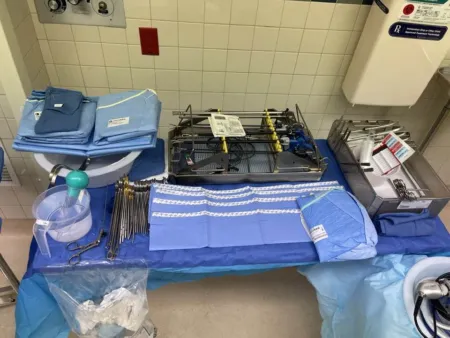
Closing a stoma: closing a colostomy restores the bowel's continuity. A gauze sponge in the stoma opening limits spillage while the surgeon cuts around the stoma, frees it from the abdominal wall with laps around it and trims its edges. It is closed in two layers, or the end is cut off with a stapler and the bowel rejoined, using a circular stapler through the anus, in low lithotomy, when the sigmoid colon or rectum is involved. The fascia is closed with heavy absorbable suture; the fat and skin may be left open to heal from the base or closed, by surgeon preference, and the stoma site is considered contaminated. A temporary ileostomy is traditionally closed about 3 months later, and a contrast study may first check the connection beyond it. A loop ileostomy can be closed through an incision around the stoma, while an end ileostomy needs a laparotomy; the bowel is closed by hand or rejoined side to side with staplers.
13Liver, pancreas and spleen
The liver and spleen are full of blood vessels, and a tear can bleed hard and be difficult to stop, so control of bleeding is a major technical concern. Disease shows up as pain, jaundice, diabetes or weakness, and is worked up with blood tests such as liver function tests and with CT, MRI, ultrasound and contrast studies, plus ERCP to look at the ducts directly. Basic general surgery instruments are used, with vascular instruments for open resections and right-angle clamps for every case. Hemostatic agents on hand include microfibrillar collagen, oxidized cellulose, topical thrombin, absorbable gelatin and fibrin sealant. The anatomy is above, and chapter 7 has more.
Liver resection
What and why: a liver resection removes one or more segments (a segmental resection) or a lobe (a lobectomy). The most common reason is a malignant tumor, usually one that has spread from elsewhere, often from organs that drain into the portal vein; cancer that starts in the liver is rare. Infection, parasitic disease and trauma are other reasons. The best case for resection is a small tumor in a liver without cirrhosis.
Diagnosis: a needle biopsy through the skin, guided by MRI or ultrasound. Ultrasound in the OR maps each segment and its vessels.
Position, prep and drape: supine, sometimes in mild Trendelenburg, with an NG tube and a urinary catheter. The prep runs from the nipple line to mid-thigh. A right subcostal incision, which can be extended across to the left, is common; a midline or paramedian incision also works, and a few cases need a sternotomy or thoracotomy with chest instruments.
Setup: a major laparotomy set with biliary and vascular instruments, noncrushing liver clamps, a self-retaining retractor such as a Bookwalter, a stapler, vessel loops, umbilical tapes and clips, and liver sutures on blunt needles. Equipment includes intraoperative ultrasound, an argon beam coagulator and an ultrasonic aspirator (CUSA), with supplies for warming the patient and replacing blood loss and a smoke evacuator. Confirm blood is available, be ready to set up a cell saver, and keep more than one suction tip.
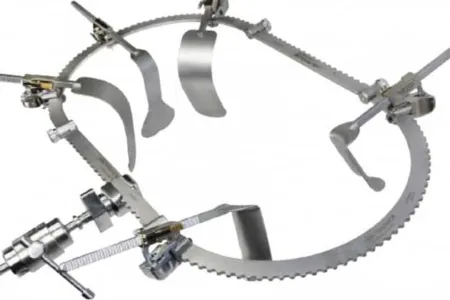
Medications: hemostatic agents (gelatin sponge, oxidized cellulose, microfibrillar collagen) and collagen sheets are ready when the resection begins. Methylene blue, with a 10 mL syringe and a needle, can be injected into a segment's vessels to stain its borders.
Key steps:
- The surgeon opens and explores the abdomen and places moist laps around the neighboring organs and between the liver and the diaphragm before setting the retractor. Sponges are easily left under the diaphragm, so note exactly how many go there.
- Ultrasound finds the tumor's segment. A Harrington or wide Deaver retractor may lift the liver.
- The surgeon may slow the liver's blood flow with the Pringle maneuver, a clamp across the vessels to the liver (the hepatic artery and portal vein) that buys up to about an hour, or with vascular clamps on the segment's own vessels.
- The vessels and duct of the segment are clamped, tied and divided.
- The line is scored with the ESU, and the liver tissue is divided with the CUSA, the ESU, an ultrasonic scalpel or the surgeon's fingers (finger fracture).
- The raw surface is checked for bleeding and bile: a lap held on it and rolled off shows any leak. Bleeding points are sewn, sealed with the argon beam or ESU, or covered with a hemostatic agent.
- Drains along the liver bed leave through separate stab wounds, and the abdomen is closed.
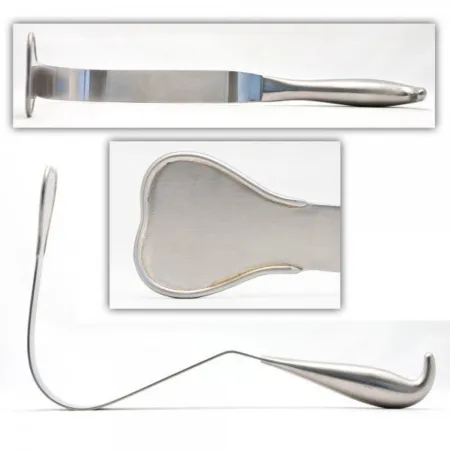
laps tucked between the liver and the diaphragm are easily left behind, so note exactly how many go there and count them all out.
Wound class: I; II if the gallbladder is removed too.
After surgery: the patient goes to PACU or the ICU. Because the liver is so vascular, bleeding can happen during or after surgery, and a fall in blood volume afterward may need the rapid response team. Bile leak, liver failure and return of the tumor are the main complications.
Pancreaticoduodenectomy (Whipple)
What and why: a Whipple procedure is a curative operation for pancreatic cancer. It removes the head of the pancreas, the duodenum, part of the jejunum, the lower third of the stomach, the lower part of the common bile duct and the gallbladder, then rebuilds the biliary, pancreatic and GI tracts. Pancreatic cancer spreads fast and is often found late; most tumors start in the head of the gland and block the bile duct. In a pylorus-preserving version the stomach is not removed. The operation takes 5 to 8 hours.
Diagnosis: a full lab workup, MRI, PET and CT scans, and ERCP with biopsies.
Position, prep and drape: supine, with gel pads or a pressure-reducing mattress on the pressure points, compression devices and a forced-air warmer; an NG tube and a urinary catheter. The prep runs from the nipple line to mid-thigh. An upper midline or bilateral subcostal incision.
Setup: a major laparotomy set with gallbladder, GI and vascular instruments, vessel loops, clips and a linear cutting stapler; long instruments, wide Deaver and Harrington retractors, and a Bookwalter or similar ring retractor; extra suction and sometimes two ESU units; hemostatic agents and drains. Hand out sutures, staples and clips as needed and hold extras in reserve, and keep spare towels and half sheets to keep the field tidy. Ordered blood products must be ready, because the case can need many units.
Key steps:
- A short midline incision lets the surgeon feel for spread. If the cancer has spread, the team may simply close; if not, the incision is lengthened.
- The duodenum is freed by cutting the peritoneum beside it (the Kocher maneuver).
- The structures under the liver are looped with vessel loops. A lymph node removed here goes into its own small container and is labeled at once; the gallbladder is freed.
- The stomach, the bowel beyond the duodenum and the pancreas are divided, and the specimen goes to pathology for frozen section.
- The rebuild usually joins the pancreas to the jejunum first, over a small stent in the pancreatic duct, then the bile duct, then the stomach. Follow bowel technique per facility policy.
- The abdomen is irrigated, two suction drains are placed and the wound is closed in layers.
Wound class: II; III if bowel or bile spills.
After surgery: the patient goes to PACU and often the ICU, with close checks of metabolism, kidney function, infection and fluids, and may stay up to 10 days; chemotherapy and radiation usually follow. Some complication affects 20 to 40 percent of patients: abdominal infection, a pancreatic fistula, diabetes, bleeding, return to the OR, ulcers, poor absorption of food and slow emptying of the stomach; in-hospital deaths are now under 5 percent.
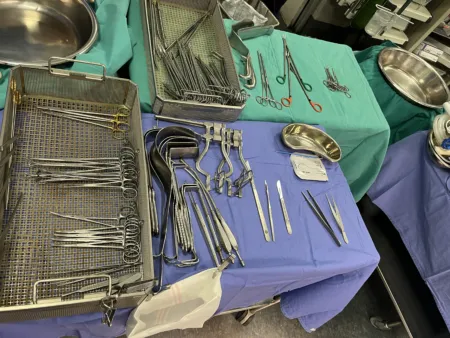
Splenectomy
What and why: the spleen is removed to stop bleeding after trauma or to treat disease. A stable patient with a low-grade injury, graded on CT or ultrasound, is often treated without surgery, and surgeons try to save the spleen because it helps fight infection. Immune thrombocytopenic purpura (ITP), in which changes in the immune system cause a loss of platelets, is the most common disease reason; others are lymphomas and some leukemias, hemolytic jaundice, tumors, cysts and an enlarged spleen. Any accessory spleens are removed too, because they can keep the disease going.
Approach: laparoscopic splenectomy is the standard for benign blood disorders, with less pain, less bleeding and a shorter stay. Open surgery is used for severe portal hypertension, a clotting problem that cannot be corrected, severe ascites, a very large spleen, heavy adhesions and most injuries.
Position, prep and drape: open, supine in reverse Trendelenburg tilted slightly to the right, prepped from the nipple line to mid-thigh, through a midline incision. Laparoscopic, turned onto the right side about 45 degrees, or fully, with the table flexed, the kidney rest raised, a beanbag and safety straps; a flank prep.
Setup: open, a laparotomy set with vascular clamps and forceps, large right-angled pedicle clamps, clips, long instruments and hemostatic agents, plus extra suction, large basins for clots, an autotransfusion system and extra laps. Laparoscopic, a 30-degree scope, trocars, ultrasonic shears, a clip applier, an endoscopic linear stapler with vascular loads and a retrieval bag, with a morcellator on hold.
Medications: the patient is vaccinated against pneumococcus, meningococcus and Haemophilus influenzae type B, ideally before surgery. Blood must be ready, many units after trauma, and a cell saver may return the patient's own blood.
Key steps after trauma:
- A fast midline laparotomy. Have two suctions running as the abdomen opens, a large basin for the clots, and laps ready in quick succession; if the patient is bleeding hard, dry laps may go in first.
- All four quadrants are packed, then the laps come out one quadrant at a time as each is checked.
- The ligaments holding the spleen are divided, a pedicle clamp goes across the splenic artery and vein, and the vessels are tied twice.
- The rest of the abdomen is checked for other injuries, irrigated and closed, with a drain near the splenic pedicle.
During the bleeding, stay focused: watch the wound, listen for instructions and move quickly but carefully.
Laparoscopic steps: the spleen is freed from the colon and stomach, the splenic artery is tied, and a linear stapler seals the vessels at the hilum. The spleen goes into a retrieval bag and is broken up (morcellated) to fit through a port, or lifted out through a hand-assist port; receive it in a basin big enough for the whole organ and bag.
Wound class: an elective splenectomy opens no tract, so it meets Class I, and so can an operation after blunt trauma that meets the same criteria. Otherwise the class follows the injury: a fresh traumatic wound or gross spillage from the GI tract is Class III, and an old traumatic wound with dead tissue is Class IV; one reference lists splenectomy as Class II.
After surgery: trauma patients go to the ICU; after a laparoscopic splenectomy most go home in a day or two. Complications include bleeding, infection, a wound that separates and a weaker defense against infection. Over the long term the patient is at risk of overwhelming infection after splenectomy and of blood clots.
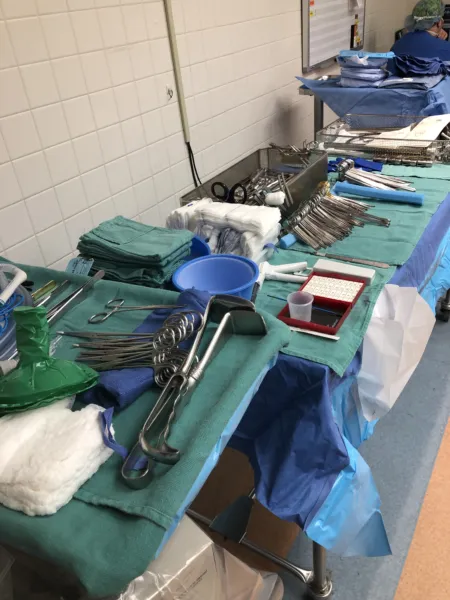
14Breast and thyroid procedures
Breast disease
Most breast surgery that is not cosmetic treats cancer. Invasive (infiltrating) ductal carcinoma is the most common type, about 80 percent of new cases. Ductal carcinoma in situ (DCIS) is cancer cells still confined to the milk ducts, not yet able to spread. The risk rises with female sex and with age, and with a family history, benign breast disease and hormonal patterns such as an early first period and a late menopause; men have under 1 percent of breast cancers.
Benign changes are often grouped as fibrocystic change: fibrous tissue, cysts and solid lumps, of which the fibroadenoma is the most common. Paget disease of the breast is a scaly, raw or bleeding change of the skin of the nipple and areola that signals a much higher chance of a cancer beneath it; treatment removes the nipple and areola, along with any cancer found.
A mass under about 1 cm usually cannot be felt, but mammography can find it. A fine needle can draw cells from a lump, and a stereotactic biopsy takes a core of tissue with the patient lying prone on the mammography table. How far the cancer has spread to the lymph nodes predicts the outcome more than the size of the tumor.
The breast surgery patient
For many patients the breast is tied to body image and identity, so breast surgery can bring anxiety and depression. A patient may fear cancer, losing part of the body, a partner's or family's reaction and a change in how they see themselves. What helps most is a calm presence: listen, give time for questions and worries, respect the patient's feelings, and offer comfort such as warm blankets. After a mastectomy a patient may grieve deeply, and support at that time matters for a healthy self-image. Treatment has moved toward smaller operations, and breast-conserving surgery with a sentinel node biopsy is now the usual choice unless the cancer is advanced.
Breast biopsy
What and why: an excisional biopsy removes a lump or suspicious area whole, with a rim of normal tissue; a lumpectomy (breast-conserving surgery) removes a known cancer the same way. Many lesions are first sampled with a core biopsy needle, often guided by mammography (stereotactic biopsy). A lesion too small to feel is marked first in radiology, with a hooked wire placed the day of surgery or a tiny radioactive seed placed up to 5 days before; wires are becoming less common.
Position: supine or in a modified beach chair, the arm out on an armboard at less than 90 degrees. Prep and drape: the breast and the skin around it, gently, so the wire stays put; towels and a fenestrated sheet. Setup: a minor set with small retractors such as Senn retractors and rakes, Allis clamps, fine hemostats, an ESU, and stitches or ink for marking; a gamma probe in a sterile cover for a seed.
Key steps: the surgeon removes the tissue around the wire, seed or lump in one piece, often with scissors rather than the ESU so the margins are not distorted. The edges are marked with stitches or ink so the pathologist can tell each side. A wire or seed specimen goes for an X-ray to prove the lesion and its marker are inside. If a margin is not clear, more tissue is taken, so keep the field ready until the surgeon closes. Extra "shave" margins may be cut from each wall of the cavity, each labeled by side, and after a lumpectomy clips may mark the cavity walls to guide radiation later.
Specimen: oriented and sent to pathology at once, or placed in formalin right away by facility policy; a delay can change the hormone receptor tests that guide cancer treatment. Counts: sponges and sharps; the wire counts as a sharp. Dressing: strips or a buried stitch, gauze and often a surgical bra. Wound class: I, clean.
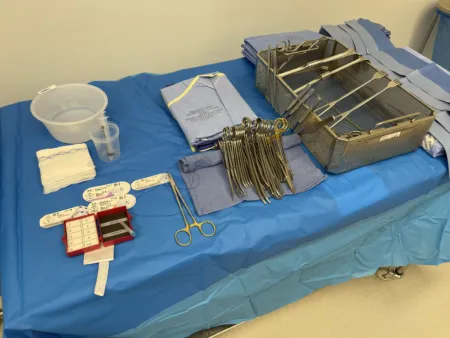
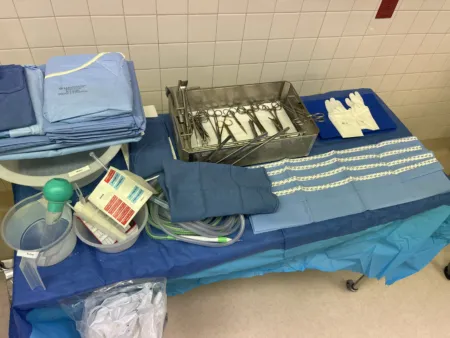
Sentinel node and mastectomy
A sentinel lymph node biopsy removes the first node or nodes that drain the tumor. If they are free of cancer, the rest of the axilla can usually be left alone. A radioactive tracer (technetium-99) is injected before surgery, often hours ahead, and blue dye may be injected before or during surgery. "Hot" nodes are found with a gamma probe in a sterile cover, "blue" nodes by sight. Blue dye can cause allergic reactions, even anaphylaxis, so a crash cart is kept nearby, and it can make the pulse oximeter read falsely low.
Each sentinel node goes in its own container, labeled exactly as the surgeon names it. Never put two nodes in one container. A radioactive specimen's label and paperwork name the tracer. When a mastectomy follows, the node biopsy comes first; its instruments then leave the field, and a fresh setup is used for the breast.
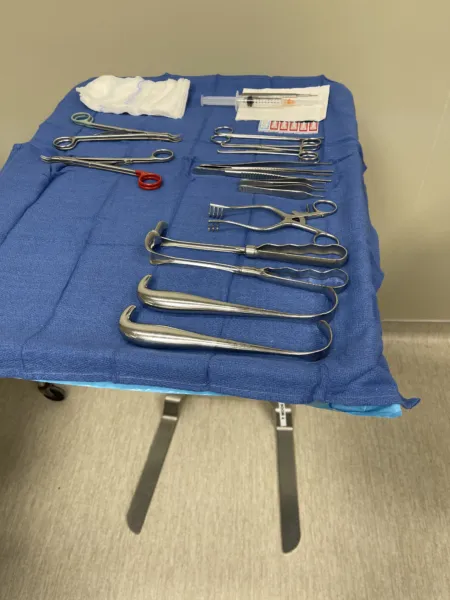
A simple mastectomy removes the whole breast with its nipple and areola and leaves the axillary nodes and chest muscles. A modified radical mastectomy removes the whole breast with a sentinel node biopsy or an axillary node dissection, which usually takes levels I and II, and leaves the chest muscles. A radical mastectomy, which also removes the chest wall muscles, is rare today.
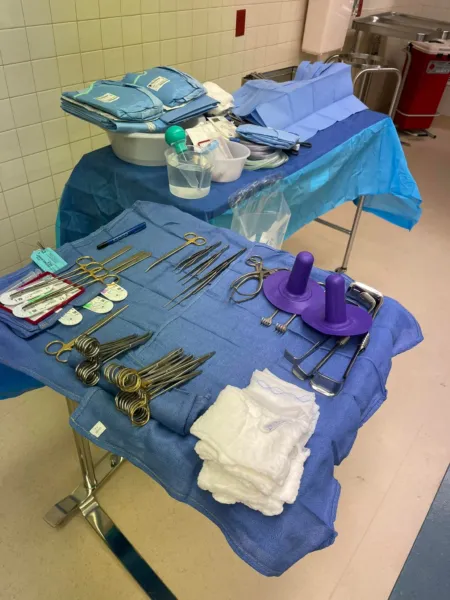
Modified radical mastectomy: supine, the arm out on a padded armboard at less than 90 degrees and often draped free. Setup: a basic set with skin hooks and rakes, small Deaver retractors, two ESU units so one can be cleaned while the other is used, clip appliers, vessel loops and one or two closed suction drains. Steps:
- An elliptical incision around the nipple and tumor, extended toward the axilla.
- Skin flaps are raised with the knife or ESU while hooks or rakes lift the edges. Knife blades dull quickly here, so change them often.
- The breast and its fascia are peeled off the pectoralis major.
- The axillary fat and nodes are removed below the axillary vein, sparing the long thoracic and thoracodorsal nerves.
- The wound is irrigated, and the drains are placed through separate stab wounds and stitched to the skin. Reconstruction may follow on a separate setup; chapter 38 teaches it.
Specimen: oriented (often with a marking stitch) and sent to pathology promptly; the lab also tests it for hormone receptors and HER2. Counts: initial and closing. Dressing: a nonadherent layer, fluffs and a wrap or surgical bra, with the drains attached to their suction. After an axillary dissection, the patient is taught to avoid injections, IV lines, blood draws and blood pressure cuffs on that arm. Complications include bleeding, infection, fluid collections (seromas), death of part of a skin flap, numbness, a stiff shoulder and a swollen arm (lymphedema). Wound class: I, clean.
Thyroidectomy
What and why: a thyroidectomy removes the whole gland (total) or one lobe with the isthmus (hemithyroidectomy, or lobectomy) for cancer or a suspicious nodule, a goiter that presses on the trachea or esophagus, or an overactive gland. Graves disease, the most common cause of an overactive gland, goes to surgery when antithyroid drugs and radioactive iodine have failed or cannot be used. Hashimoto thyroiditis, an autoimmune disease that enlarges the gland and is the most common cause of an underactive one (hypothyroidism), goes to surgery to relieve pressure in the neck. For cancer, a total or near-total thyroidectomy is the usual operation.
Approach: minimally invasive video-assisted thyroidectomy (MIVAT), done through a small neck incision with a scope's help, is now a standard operation. An entirely open thyroidectomy is seldom done, kept for selected cases such as a very large gland, and a MIVAT that must be converted becomes one. Robotic thyroidectomy reaches the gland from a site away from the front of the neck, such as the armpit, behind the ear or through the mouth, an approach patients seek for its cosmetic result; a large goiter reaching behind the breastbone or behind the throat, a tumor of 4 cm or more or one that looks to be invading nearby tissue, and medullary cancer rule it out. For the transaxillary and transoral routes the patient has an EMG breathing tube for nerve monitoring, and a transoral case is prepped and draped from the nose down to the areolae, so the surgeon can still convert to an open operation or take the specimen out through the armpit.
other references still teach the open thyroidectomy through a collar incision as the standard operation; its steps follow below.
Position: supine, a roll behind the shoulder blades to extend the neck, the head on a gel or foam ring, arms tucked, and the head of the table raised (reverse Trendelenburg) to reduce venous congestion. Many teams use a breathing tube with sensors that warn when the recurrent laryngeal nerve is near, and the surgeon may use a nerve stimulator on the field.
Prep and drape: from the chin to the nipples, including the neck and shoulders, the same for a MIVAT in case it is converted; towels and a thyroid sheet. Laps tucked at the sides of the neck go on the count sheet. Setup: a thyroid tray with fine clamps (12 to 15 for the vessels), right angles, neck retractors such as the Green and Lahey retractors, and a thyroid tenaculum such as the Lahey; bipolar, ultrasonic shears or a small vessel sealer; clips; peanuts on clamps.
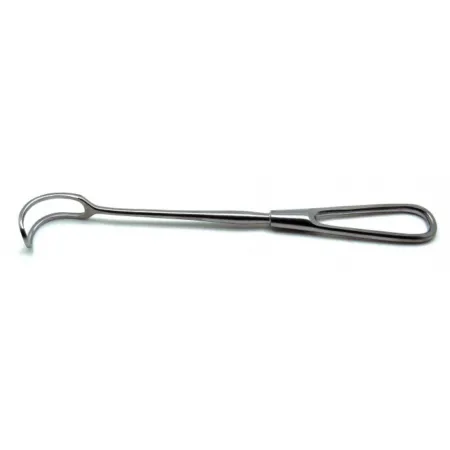
For a MIVAT, add a 5 mm 30-degree scope, spatula and suction dissectors, endoscopic scissors and forceps, small retractors (such as Farabeuf or Miccoli retractors) and a small clip applier, with the ultrasonic scalpel. Keep the open thyroid instruments ready, and follow fire precautions with the light cord and scope.
Key steps (MIVAT):
- A horizontal incision of about 1.5 to 3 cm above the sternal notch, and the fascia between the strap muscles is opened.
- The lobe is freed from the strap muscles with small spatulas, and retractors hold the muscles aside.
- The scope goes in. The surgeon dissects with the spatula and suction dissector, clips and divides the vessels, and finds the laryngeal nerves, perhaps with a nerve stimulator, and the parathyroid glands.
- The lobe is lifted out through the incision and freed from the trachea. Close to the nerve and the parathyroids, the surgeon stops using the ultrasonic scalpel and dissects without heat.
- The isthmus is divided, and for a total thyroidectomy the other lobe comes out the same way.
- The muscle is closed with 4-0 absorbable suture and the skin with a buried absorbable stitch or tissue glue, under flat gauze.
The open operation: a low collar incision in a skin crease, about 2 cm above the joints where the collarbones meet the breastbone. Flaps are raised under the platysma, the strap muscles are separated in the midline, and the lobe is rolled inward. Vessels are tied, clipped or sealed close to the gland while the surgeon protects the recurrent laryngeal nerve and each parathyroid gland; electrocautery is kept away from the nerves. The isthmus is divided. Closure: the strap muscles if they were cut, the platysma, then a buried skin stitch or glue.
If a parathyroid gland comes out with the specimen, the surgeon may reimplant it. Keep it on the field in chilled saline: it is cut into tiny pieces and placed in a pocket in a muscle, usually in the neck (such as the sternocleidomastoid or a strap muscle), marked with a permanent stitch.
Specimen: labeled right or left, sometimes for frozen section. Counts: initial and closing, including the neck laps. Dressing: strips or glue. A neck hematoma can squeeze the airway; it means an urgent return to the OR to open the wound. Keep the back table and Mayo sterile until the patient leaves the room, and send a tracheotomy tray with the patient to PACU, in case bleeding, swelling or nerve injury blocks the airway. Wound class: I, since no tract is entered.
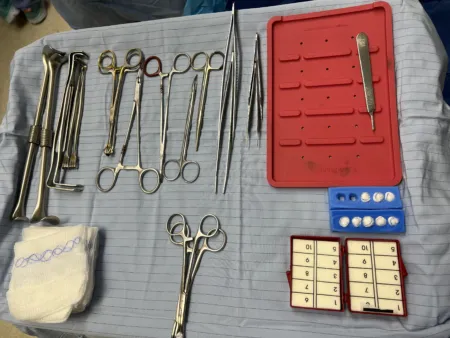
Parathyroidectomy
What and why: a parathyroidectomy removes overactive parathyroid tissue: an adenoma (a tumor that oversecretes the hormone), hyperplasia or a cancer. Too much parathyroid hormone (hyperparathyroidism) raises blood calcium, which can cause kidney stones, thin bones, high blood pressure and abnormal heart rhythms; a calcium level above 13.5 mg/dL can trigger life-threatening dysrhythmias. Thirst, heavy urination, constipation, joint pain and depression are other signs. The glands sit behind the thyroid, as described above; chapter 9 covers the hormones.
Diagnosis: a sestamibi scan or an ultrasound finds the overactive gland and shows where to make the incision. A patient whose sestamibi scan shows nothing is not a candidate for the minimally invasive approach.
Approach: the classic open operation explores both sides of the neck and looks at all four glands. Hyperplasia still needs it: three and a half glands come out, and part of one stays to prevent low calcium. A single adenoma is now usually removed through a small, focused incision, guided by hormone levels measured during surgery and by a gamma probe.
Position, prep and drape: as for a thyroidectomy.
Setup: thyroid instruments with mosquito hemostats and fine ligatures, clips, an energy device, a smoke evacuator and small gauze dissectors. Vascular forceps such as the DeBakey and bipolar and ultrasonic devices are used to free the gland. Have many specimen containers and the blood tubes for hormone levels, make sure the pathologist is ready, and keep instruments for opening the chest (a mediastinotomy) available.
Medications: for a radio-guided operation, technetium-99m sestamibi is given before surgery so a gamma probe can find the gland in the OR.
Key steps (hormone-guided):
- A baseline blood sample is drawn before surgery, and a 2 cm incision is made where the scan pointed.
- Another sample is drawn when the gland is exposed, and the gland is removed.
- Keep the gland in sterile saline on the back table until the result is back: a drop in the hormone level of 50 percent or more confirms the right gland came out. Samples may be drawn 5, 10 and 20 minutes after removal; if the level does not drop, the surgeon explores further.
- A normal gland removed by mistake is minced with a #15 blade and replanted in a small pocket in a strap muscle of the neck.
- Closure is as for a thyroidectomy: the platysma with fine absorbable suture, then a buried skin stitch or skin glue.
a removed parathyroid gland stays in sterile saline on the back table until the hormone result is back. A normal gland taken by mistake can still be replanted.
Specimens: there may be several. When each one is collected, the surgeon, the scrub and the circulator agree on its name, type, source and preservative; it is labeled with the order it was taken (A, B, C), pathology results are read back, and counts are not done while specimens are being handled.
Wound class: I, since no tract is entered.
After surgery: many patients go home the same day. Low calcium can follow when several glands come out, which is why part of one is left; a repeat neck exploration is avoided because it puts the recurrent laryngeal nerves at risk.
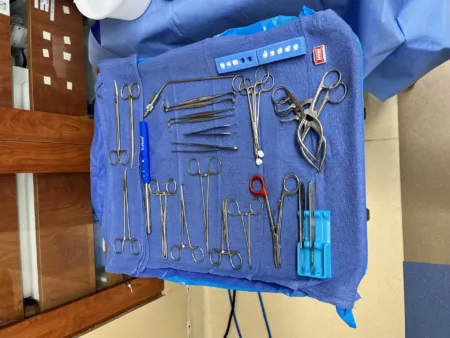
15Anorectal surgery
These cases share a rectal set and the prone jackknife, lithotomy or lateral position, with the buttocks taped apart in jackknife. The anal canal is the end of the GI tract: a hemorrhoidectomy is classed as Class II, clean-contaminated, and a wound with pus already in it, such as an abscess, is Class IV. An anal fissure, a tear in the skin lining the anal canal from the dentate line to the anal margin, comes from trauma, childbirth or hard stools, or with diseases such as Crohn disease; it hurts during and after a bowel movement and often bleeds.
Hemorrhoidectomy
A hemorrhoid is a normal cushion of blood vessels in the anal canal that becomes a problem when it swells, bleeds or slips down (prolapses). Internal hemorrhoids, above the pectinate line, have little pain sense; external ones, below it, are covered with skin and can hurt badly when a clot forms in them. Surgery is for hemorrhoids that diet and office treatments such as banding did not fix.
Position: prone jackknife with the buttocks taped apart, or lithotomy. In jackknife, use chest rolls, padding under the knees and a pillow under the ankles. Prep and drape: the area around the anus first and the anus last; a fenestrated or lithotomy sheet. Setup: a rectal set with a Hill-Ferguson retractor or Pratt speculum, Allis or Babcock clamps, Metzenbaum scissors, an ESU or vessel sealer, local anesthetic (sometimes with epinephrine) and absorbable suture.
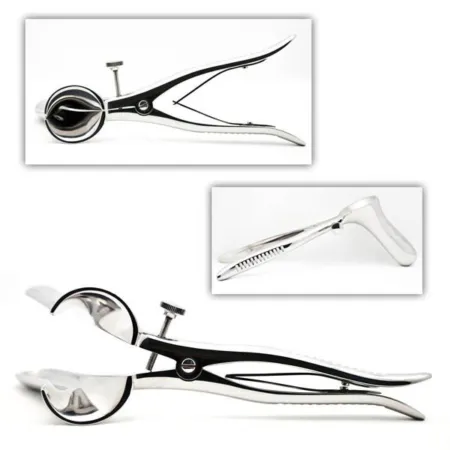
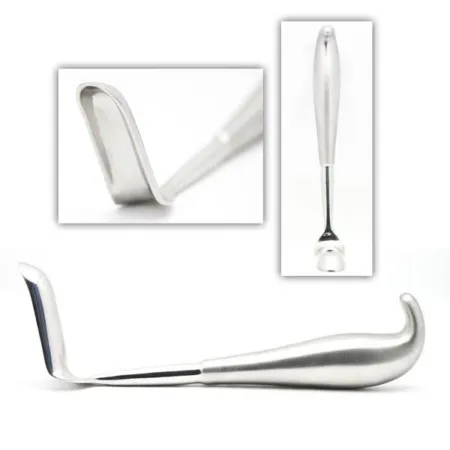
Key steps: each hemorrhoid is grasped, cut out in a narrow ellipse up to its apex, and tied off there. The wound is sewn closed or left open, by surgeon preference. Bridges of normal skin and lining stay between the cuts, so too much skin is not lost and the anus does not scar narrow.
Specimen: the hemorrhoids; if the surgeon marks one with a stitch, its position (such as 12 o'clock) goes on the label. Counts: sponges and sharps; packing left in the canal is never a counted sponge. Dressing: petrolatum gauze in the canal and gauze dressings. Trouble passing urine is the most common problem afterward.
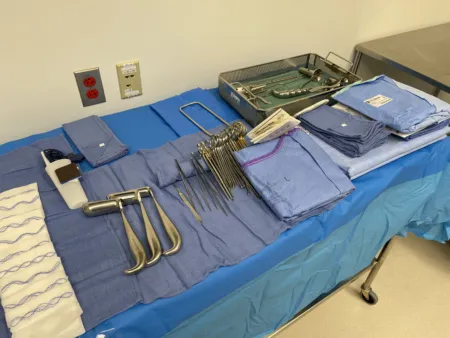
Anal fistula: fistulotomy, fistulectomy and seton
What and why: an anal fistula (fistula-in-ano) is a tract from an opening inside the anal canal to an opening on the skin beside the anus. It is a long-lasting form of a perianal abscess that did not heal after draining, which can start in a blocked, infected anal gland, and it is linked with Crohn disease, tuberculosis, cancer and trauma. Fistulas are grouped by how they cross the sphincter muscles: intersphincteric, transsphincteric, suprasphincteric or extrasphincteric. A fistulotomy lays the tract open; a fistulectomy cuts it out and leaves the wound open to heal by granulation. A tract that crosses the sphincter needs a more careful operation, because cutting too much muscle causes incontinence.
The seton: a thread, suture or soft rubber loop tied through the tract, which keeps it draining while scar tissue slowly closes it. Tightened over several visits, a seton can divide the muscle so slowly that it heals behind the cut, which protects continence.
Diagnosis: anoscopy, examination under anesthesia, probing of the tract and a hydrogen peroxide injection study, with MRI or ultrasound for a complex fistula.
Position, prep and drape: jackknife or lateral, the buttocks taped apart, and a fenestrated sheet; a simple excision can be done under regional anesthesia with sedation.
Setup: a minor rectal set with fistula probes, a lighted retractor, a monopolar ESU, curettes, an ultrasonic scalpel for some cases, and a vessel loop for a seton. A probe with an eye at its tip can pull the seton through the tract.
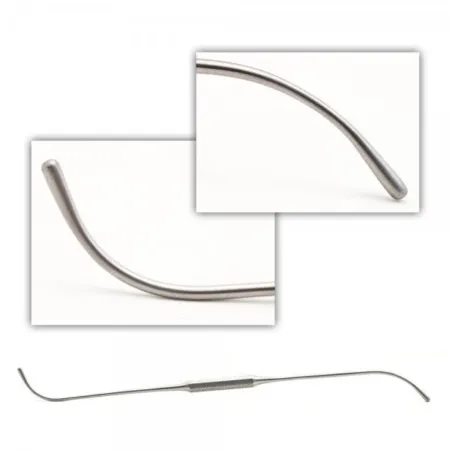
Key steps: the surgeon passes a probe to find each end of the tract. The tract is laid open, or cored out with the ESU, and the wound is left open to heal. For a seton, the loop is threaded through the eye of the probe, drawn around the muscle and tied with several knots, the end stitched so it cannot come untied.
After surgery: the open wound heals by granulation, and a seton needs follow-up visits to tighten or replace it.
Pilonidal cystectomy
What and why: a pilonidal sinus forms in the skin over the sacrum and coccyx, in the cleft of the buttocks; blocked, it becomes a pilonidal cyst, and infected, a pilonidal abscess. Ingrown hairs cause it, and it is more common in men, mostly in their 20s and 30s. A pit is often seen in the midline about 5 cm above the anus. An abscess that does not heal can leave a chronic draining tract, which can be mistaken for an anal fistula. An acute abscess is drained; the cyst and its tracts are cut out once the infection has settled.
Position and setup: jackknife, with the buttocks taped apart and secured to the sides of the table. A minor set and rectal instruments, methylene blue, a 10 or 20 mL syringe and a blunt-tipped needle.
Medications: methylene blue injected into the tracts stains them so none is missed.
Key steps: the surgeon finds the tracts with a probe, opens over it and injects the dye. An elliptical incision goes down to the fascia, granulation tissue is scraped out with a curette, and the cyst and every tract are removed. The skin is closed, after freeing its edges to take off the tension, or the wound is left open to heal by granulation.
Wound class: the area is skin, not the GI tract, so the class follows what the surgeon finds; an abscess or an infected tract is an infection already present, Class IV.
After surgery: removing the whole cyst and every tract prevents it coming back.
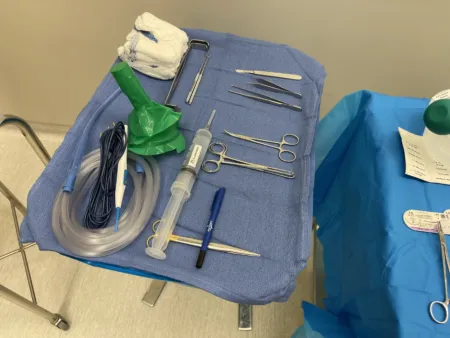
Sphincteroplasty
What and why: a sphincteroplasty is surgical repair of a sphincter. An anal sphincteroplasty repairs the anal sphincter for fecal incontinence, which can follow a birth defect, an injury during childbirth, an accident or an earlier operation, radiation, infection, a tumor, years of straining or aging. Digital examination, defecography, anal manometry and ultrasound show which part of the continence mechanism is at fault. Direct repair of the muscle is the usual operation.
Position, prep and drape: jackknife prone, lithotomy or a modified lateral position. Antiembolism stockings and a urinary catheter may be used; every bony point is padded and a return electrode pad is applied. The prep and drape are as for a hemorrhoidectomy.
Setup: the hemorrhoidectomy setup plus two skin hooks and two sharp Senn retractors.
Key steps: a curved incision around half of the anus, over the torn part. The scarred ends of the muscle are freed, keeping the scar, which holds stitches better than muscle alone, and then sewn together, overlapped when there is enough length. The perineal body may be rebuilt, and the skin is closed loosely or left partly open to drain. A colostomy may divert the stool while a large repair heals.
After surgery: results tend to fade with time, and in one series full continence returned in only about half of patients.
16Pediatric general surgery
Chapter 13 covers a child's temperature, fluids and airway, and chapter 18 their care as people. Two operations on young infants are taught here: pyloromyotomy and omphalocele repair. You may also meet anal atresia (imperforate anus), in which the normal anal opening is missing or closed at birth; it ranges from low to high lesions, and the repair closes any fistula and brings the rectum through the external anal sphincter.
Pyloromyotomy
What and why: in infantile hypertrophic pyloric stenosis, the muscle of the pylorus thickens and narrows the outlet of the stomach. It is the most common cause of a blocked stomach outlet in children and the most common condition needing surgery in the newborn. Signs start at 2 to 6 weeks of age: forceful (projectile) vomiting without bile after feeds, poor weight gain, and dehydration with a loss of chloride and potassium (hypochloremic, hypokalemic metabolic alkalosis). It is about four times more common in boys. A pyloromyotomy splits the thickened muscle and leaves the lining (mucosa) intact; the laparoscopic operation has replaced the open one as the standard.
the open pyloromyotomy is still taught as an option, and some facilities still do it.
Diagnosis and preparation: the physical exam or imaging confirms it, and fluid and electrolyte problems are corrected before surgery. The stomach is emptied just before induction and the NG tube removed.
Position, prep and drape: supine but turned across the table, so the surgeon works from the feet and the anesthesia provider keeps the airway; a small roll may lift the pylorus, and the monitor goes above the head. The chest and abdomen are prepped with povidone-iodine and draped for a laparotomy.
Setup: a 3 or 5 mm trocar, 3 mm laparoscopic instruments, a pyloric grasper, a pyloric spreader, a small knife and blunt graspers.
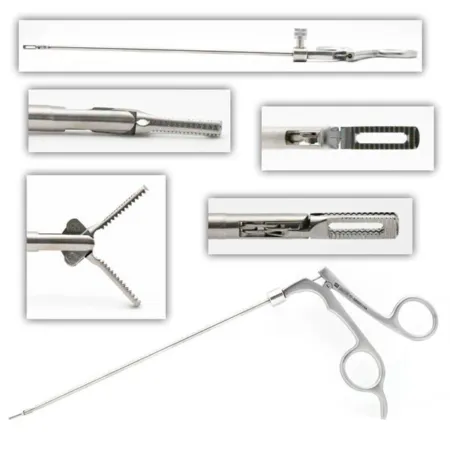
Medications: local anesthetic is injected at the trocar sites.
Key steps:
- A trocar goes in at the umbilicus, and the abdomen is inflated to no more than 10 mm Hg.
- Two stab incisions take the instruments, and the grasper steadies the pylorus.
- The muscle is cut along the pylorus from the stomach end to the duodenal end, with the ESU or a small blade.
- The spreader widens the cut until the mucosa shows.
- Air is pushed into the stomach through an orogastric tube; bubbles at the cut would mean the mucosa is torn.
- The fascia at the umbilicus is closed to prevent a hernia, and the skin gets strips or glue.
Wound class: I while the mucosa stays intact, because the lumen is not entered.
Omphalocele repair
What and why: in an omphalocele, the abdominal organs develop outside the body, inside a sac of peritoneum and amnion at the base of the umbilical cord, with no skin over it. It ranges from a few loops of bowel to a giant sac holding the liver and spleen, through a defect of 2 to 15 cm. About 30 percent of these babies have a chromosome disorder (trisomy 13, 18 or 21), and heart, bone and muscle, and urinary defects are also linked to it. Gastroschisis is different: the opening is to the right of the cord, and no sac covers the bowel.
Before surgery: IV fluids, antibiotics and an NG tube; surgery prevents rupture of the sac and infection. The sac is covered with moist sponges or plastic wrap until the operation, and a ruptured sac makes it an emergency. The exposed surface loses heat fast, so warming is a priority. Nitrous oxide is avoided, because gas in the bowel makes it harder to fit back inside, and the rectum may be irrigated with warm saline to empty it.
Position, prep and drape: supine; the abdomen, cord and sac are prepped gently with povidone-iodine, a urinary catheter is placed, and great care is taken not to break the sac; a laparotomy set and drape.
Primary closure: for a small defect (under about 2 cm), soon after birth. The sac is removed from the skin edge and the umbilical vessels are tied. The skin is freed on both sides to make room, the organs are returned, and the fascia is closed, bridged with mesh or biologic material if needed; a purse-string stitch may close the skin.
Staged closure: for a large or ruptured omphalocele, a silo of Silastic sheeting is sewn to the edge of the defect and hung above the baby. Over days to weeks in the NICU, gravity and daily tightening ease the organs back inside, watching that the tighter abdomen does not hamper breathing. The abdominal wall is then closed in the OR; if everything cannot go back, only the skin is closed, and the hernia that results is repaired later in childhood.
Wound class: the class follows what the surgeon finds; an intact sac with no bowel opened, closed at the same operation, meets the definition of Class I.
Lo que te llevas de este capítulo
- General surgery has the largest case requirement of any specialty. Learn the open abdomen once, with the fascia holding the closure, and every case becomes a new middle; flexible endoscopy through a natural opening often confirms the disease first.
- Laparoscopy starts with a Veress needle, an open Hasson entry or an optical trocar. In a laparoscopic cholecystectomy, nothing is clipped or cut until the critical view of safety shows only the cystic duct and artery entering the gallbladder.
- Babcocks and noncrushing clamps protect bowel that stays. Bowel technique starts when the GI tract is opened and ends when it is closed: dirty stays dirty, then fresh gloves (often gowns), drapes, tips and instruments for a clean closure. Circular stapler donuts must be complete rings.
- Groin hernias: indirect lateral to the inferior epigastric vessels, direct medial to them through the Hesselbach triangle, and femoral below the inguinal ligament, the most likely to strangulate. A hiatal hernia is closed and wrapped over an esophageal dilator that the anesthesia provider passes from a nonsterile table.
- Morbid obesity is a BMI of 40 or more. Before a band, sleeve or bypass, check the bed's weight rating, have an anti-skid or vacuum positioner and padded straps, and open long instruments.
- The liver, spleen and pancreas bleed: have hemostatic agents, blood and a cell saver ready, count every lap placed under the diaphragm, and remember that splenectomy patients need vaccines.
- Breast and neck: breast tissue goes oriented and fast, and each sentinel node gets its own container. A thyroidectomy is now often video-assisted (MIVAT) through a small incision, with the open set ready; the surgeon guards the recurrent laryngeal nerves and the parathyroids, and a removed parathyroid stays in saline until the hormone drop confirms it.
- Anorectal cases are done in prone jackknife, lithotomy or lateral position, and a seton keeps a fistula draining. A pyloromyotomy splits the pyloric muscle and leaves the mucosa intact; a large omphalocele is closed in stages with a silo.
Ponte a prueba5 preguntas rápidas
Gratis para todos. Elige una respuesta para cada una y luego revísalas todas juntas.
En el quirófanoDónde vas a usar esto
Todo el banco de preguntas del capítulo en series de 10, con la respuesta explicada después de cada una.
Parte del programa para educadoresLas palabras del capítulo en tarjetas de estudio: las que fallas vuelven antes.
Parte del programa para educadoresLo asigna tu docente. Cada grupo saca sus propias 25 preguntas del banco del capítulo.
Parte del programa para educadores
Sugerir una corrección
¿Algo está mal, confuso o desactualizado en este capítulo? Avísanos y lo corregimos para todos. Tu correo solo se usa para responderte.