CSTSetup
Free · HSPA's CRCST hands-on areas

The sterile processing skills checklist.

Every hands-on skill in HSPA's five CRCST areas, written out as a step-by-step check-off sheet. Read them all right here, or download the PDF and print it for your lab.

400 hoursthe hands-on hours the CRCST asks for, across these five areas
All 5 areasdecontamination, preparation and packaging, sterilization and disinfection, storage and distribution, quality assurance
361 stepsacross 32 skills, each one something an evaluator can watch
Hands-on skill · Decontamination1 of 32

Dressing for decontamination

CRCST hands-on area · Decontamination, dress code and personal behaviors

Fig. 1 · Dressing for decontamination, one of 32 sheets (example names)Tick the last three steps
The checklist

All 32 hands-on skills, step by step.

In HSPA's five CRCST areas. Open an area, then a skill. Each one names the task it covers, so it lines up with your syllabus.

Decontamination · 9 skills

Decontamination · Skill 1 of 9

Dressing for decontamination

CRCST hands-on area · Decontamination, dress code and personal behaviors

11 steps
  1. Starts in the department's own scrubs, shoes and head coverFacility scrubs put on at work, a bouffant cover over all head hair, a cover for any beard, and sturdy non-skid shoes kept for work.
  2. Takes off jewelry and checks their nailsNo rings, watch, necklace or bracelets. Nails short and clean, with no polish and no artificial nails.
  3. Washes hands at the hand-washing sinkNever at a sink used for instruments. Soap and friction for at least 20 seconds.
  4. Puts on a fluid-resistant gown or jumpsuit and closes it all the way
  5. Puts on a mask over the nose and mouthTied or looped on, and pressed to fit over the nose.
  6. Adds goggles or a face shieldGoggles wrap around the sides of the face. A face shield goes on with the mask, never in place of it.
  7. Covers both shoes completely with skid-resistant shoe coversEven when the shoes are only worn at work.
  8. Puts on decontamination gloves last, with the cuffs over the gown cuffsThick utility gloves that resist cuts and tears, so fluid cannot run into the glove or up the sleeve.
  9. Changes any piece that tears or gets heavily soiledScrubs that get wet underneath are changed too.
  10. Takes the gear off at the exit, in orderShoe covers, gloves, eye protection, gown, mask, then head cover, handling only the clean parts such as ties, bands and ear pieces.
  11. Washes hands as soon as the gear is off
Decontamination · Skill 2 of 9

Collecting and transporting soiled items

CRCST hands-on area · Decontamination, point-of-use preparation and transport

11 steps
  1. Collects soiled items soon after the caseThey go straight to decontamination, with no stops on the way.
  2. Checks that the instruments are contained before moving themA closed case cart is best. An open cart needs a solid bottom shelf and a cover over everything. Bins are lidded, leakproof and puncture resistant; bags are tied shut.
  3. Checks that the biohazard label shows on the cart or container
  4. Checks that the point-of-use steps were doneFluids and soaking solution emptied, disposable sharps gone, trash and linen bagged apart, reusable sharps kept separate.
  5. Checks that the instruments are being kept moistEnzyme foam, gel or spray, or a towel wet with water, with no pooled liquid.
  6. Secures the load so nothing slidesSets sit flat and stay together, and nothing can shift or fall when the cart moves.
  7. Takes the soiled route and the soiled elevatorAway from patient care areas and busy halls. Soiled items never share a cart or a trip with clean or sterile ones.
  8. Moves heavy carts safelyChecks the weight, lines up the wheels for door thresholds and uneven floors, and takes items off if the cart is hard to push.
  9. Hands items over only at soiled receivingAnything carried by hand goes on the cart or counter set aside for receiving.
  10. Empties the cart or container completely, then has it cleaned before reuseIn the cart washer or by hand, as its IFU directs. Nothing is left inside a cart that goes through the cart washer.
  11. Follows the extra rules when soiled items leave the buildingDepartment of Transportation packaging and labels, soiled and clean kept fully apart, and the vehicle cleaned between a soiled load and a clean one.
Decontamination · Skill 3 of 9

Receiving and sorting soiled items

CRCST hands-on area · Decontamination, soiled receiving

12 steps
  1. Puts on full decontamination gear before touching anything
  2. Opens closed carts and containers slowlyItems may have shifted on the way. Lifts each set out onto a flat surface near the sink.
  3. Never reaches into a basin or container without seeing inside itPours off solution that hides the contents, or uses sponge forceps, and takes items out one at a time.
  4. Takes out any disposable sharps left in the setsBlades come off with a blade remover or a needle holder, never with fingers, and go in the sharps container.
  5. Gets rid of fluids, trash and disposablesFluids as policy directs. Tray liners, indicators, disposable filters and other single-use items are thrown out.
  6. Scans or logs each set inInto the department's tracking system, so the set can be traced through every step.
  7. Works the sets in order of needChecks the OR schedule and talks with the OR and the clean-side lead. Trays for a waiting case, loaners and time-sensitive items go first.
  8. Checks that each set is complete and tags damaged itemsAccounts for every part, reports anything missing, and tags broken items for repair. Tagged items are still cleaned.
  9. Opens hinged instruments and takes multi-part ones apartAs the IFU shows, with small parts in a holder that stays with their instrument.
  10. Separates reusable sharps and delicate instrumentsSharp ones are placed so no one is cut reaching for them. Delicate ones are kept away from heavy ones.
  11. Takes rigid containers apart for cleaningLifts out the inner baskets, removes the filter retention plates, throws out disposable filters, and checks any valves.
  12. Reads each item's IFU and sends it to the right cleaningManual, ultrasonic or washer. Items that cannot go under water, such as power equipment, cameras and cords, go to their own sink area.
Decontamination · Skill 4 of 9

Manual cleaning of instruments

CRCST hands-on area · Decontamination, manual preparation and cleaning processes

12 steps
  1. Sets up three sinks that run from dirty to cleanA wash sink with cleaning solution, an intermediate rinse of tap or softened water, and a final rinse of critical water (distilled, deionized or reverse osmosis).
  2. Picks the cleaning chemical the device's IFU calls forReads the label, uses a low-foaming product so sharps stay in sight, and never mixes two chemicals.
  3. Measures water and chemical to the label's dilutionFills the sink to its marked level and adds the measured amount.
  4. Checks the water temperature with a thermometerWarm water in the detergent label's range, commonly 80°F to 110°F (27°C to 44°C), and never above 140°F (60°C).
  5. Lowers instruments in gently, heaviest firstNever pours them in. Hinged instruments wide open, multi-part ones apart with their parts kept together, and every surface under the solution.
  6. Sets aside anything that cannot go under waterPower equipment, cameras, cables and cords are cleaned on their own.
  7. Brushes every instrument below the water lineBack and forth, so no spray rises into the air. Most attention on tips, hinges, box locks, teeth and serrations, working with the grain of the metal.
  8. Uses only soft tools the IFU allowsNylon brushes and low-lint cloths. No abrasive pads or cleaners, and a metal brush only if the IFU names one. Never saline, iodine or hydrogen peroxide.
  9. Flushes channels and crevices a brush cannot reachWith a syringe or the water irrigator, aimed away from people.
  10. Rinses in the intermediate sink, then in the final rinse sinkUntil no detergent is left. Items headed for a washer are rinsed too.
  11. Looks over each item for soil and cleans it again if any is leftUnder good light. Damaged items are tagged for repair once they are clean.
  12. Changes the wash and rinse water oftenWhenever it looks soiled and on the department's schedule, so soil and chemicals do not build up.
Decontamination · Skill 5 of 9

Cleaning lumened devices

CRCST hands-on area · Decontamination, manual cleaning of lumened devices

12 steps
  1. Reads the IFU for the device's brushes, soak and flush stepsMany laparoscopic and robotic devices also need their own adapters and limits on air and water pressure.
  2. Takes the device apart as far as the IFU allowsKeeps the parts together.
  3. Submerges the device and flushes cleaning solution through the lumenUntil no air is left inside, so the solution reaches every inner surface. A vertical soaking cylinder helps if there is one.
  4. Soaks it for the time the IFU gives
  5. Picks a brush that fits the lumenBristles touch the walls all the way around without being crushed, and the brush is long enough to come out the far end.
  6. Brushes the lumen with the device under the solutionPushes the brush all the way through several times, rinsing the bristles between passes.
  7. Keeps brushing until the brush comes out clean
  8. Brushes and flushes every port, jaw and side channel as well
  9. Flushes the lumen with solution, then with rinse waterA syringe or the water irrigator, aimed away from people. The last flush is critical water.
  10. Checks that the lumen is cleanRuns a fresh brush or an approved lint-free pipe cleaner through it, or looks inside with a borescope if the department has one. Any soil means it is cleaned again.
  11. Throws out a worn brushSingle-use brushes go in the trash. Reusable brushes are cleaned at least daily and whenever soiled.
  12. Sends it to mechanical cleaning with the lumens on the irrigation ports, when the IFU calls for itManual brushing and flushing still come first.
Decontamination · Skill 6 of 9

Using the ultrasonic cleaner

CRCST hands-on area · Decontamination, ultrasonic cleaners

12 steps
  1. Checks that each item may go in the sonicThe IFU must allow it. Chrome-plated and ebonized instruments, items made of plastic, cork, glass, wood or rubber, fiber optic devices, and needles not cleared by their maker stay out.
  2. Fills the tank to its fill line with a detergent made for ultrasonic cleanersLow foaming, at the dilution on the label.
  3. Degasses each fresh bath before the first loadLid closed and no instruments in the tank, for the time the IFU gives (often 5 to 10 minutes). Only once the tank is full, never while it fills.
  4. Checks the bath temperature80°F to 109°F (27°C to 43°C) unless the IFU says otherwise. Above 140°F (60°C), protein sets on the instruments.
  5. Confirms the cavitation test is currentRun and recorded on the department's schedule (AAMI: at least weekly, preferably daily). A unit that fails is not used.
  6. Precleans every item firstBlood and tissue off, and any point-of-use foam or spray rinsed away.
  7. Loads the sonic's own fine-mesh basketBox locks open, instruments spread out and not stacked, within the load limit.
  8. Keeps metals apartStainless steel never runs with aluminum, brass or copper.
  9. Lowers the basket slowly with the unit offEvery item fully under the solution, lumens filled, hands kept out of the bath. On an irrigating sonic, each lumen goes on its port, unused ports are closed, and the flow is checked.
  10. Closes the lid and runs the cycle for the time the IFU givesThe lid stays shut while it runs, to hold in aerosols.
  11. Rinses the items after the cycleBy hand if the unit has no rinse of its own, and always before they go into another cleaner.
  12. Changes the solution after each use and cleans the tank"Each use" as the department defines it. Checks the drain screen for debris at every change.
Decontamination · Skill 7 of 9

Loading and running a washer-disinfector

CRCST hands-on area · Decontamination, washer disinfectors

11 steps
  1. Checks the washer before the first load of the daySpray arms attached and turning freely, jets and nozzles clear, traps and screens cleared of debris, and no white scale on the chamber walls.
  2. Checks the chemical supplyDetergent and other drums are not close to empty, so air does not get into the feed lines.
  3. Checks that today's cleaning test was run and passedWasher-disinfectors are tested each day they are used, and never less than weekly (AAMI). A failed test goes to the manager, and the washer is not used.
  4. Sends only items the IFU clears for the washerElectrical, battery and air-powered devices stay out unless their IFU allows it. Heavy soil and lumens are hand cleaned first.
  5. Opens and takes apart every instrumentHinged instruments open, multi-part ones apart, small parts in a lidded part holder, delicate items in lidded perforated baskets.
  6. Opens up each trayLids and covers off, multi-level trays separated, each one on the rack by itself. Trays are never stacked.
  7. Loads without overloadingNothing sticks up or out where a spray arm travels. Light items are held down with a screen.
  8. Connects lumened devices to the irrigation lines on the rackWith the adapter the IFU names.
  9. Picks the cycle for the loadThe instrument cycle for instruments and mixed loads, the utensil cycle for basins and containers, and a delicate cycle where the IFU calls for one.
  10. Checks the printout when the cycle endsThe thermal disinfection temperature and every other setting were reached. Initials the printout, and reports any missed setting to the supervisor.
  11. Keeps the clean load moving one wayIt leaves toward prep and pack and never comes back through the dirty side.
Decontamination · Skill 8 of 9

Cleaning powered surgical instruments

CRCST hands-on area · Decontamination, cleaning powered surgical instruments that cannot be immersed

10 steps
  1. Reads the IFU for the handpiece, its attachments, and its hose, cable or batteryPower equipment never goes under water, in an ultrasonic or in a washer unless the IFU says it may.
  2. Takes off the cutting accessories and the working batteryBlades, burrs, bits and attachments come off. A dead battery marked for decontamination goes in to cover the contacts.
  3. Protects the connections from fluidA marked decontamination hose on an air-powered handpiece. An electric cable stays connected if the IFU says so, and its pins are never bent.
  4. Wipes the casing, hose and cable with the approved detergent on a soft, lint-free clothExtra care at the hose and cord ends. Dark surfaces get a close look, since blood is hard to see on them.
  5. Brushes the tip, lumens, attachments and burr guardsWith the brush size and type the IFU names, and a syringe of detergent for spots a brush cannot reach.
  6. Cleans immersible accessories in the sinkChucks and any other parts the IFU allows go under the solution. Drill and saw attachments are usually cleaned without immersion.
  7. Rinses without soaking the deviceWipes with a clean damp cloth, or uses running water only where the IFU allows it, never toward the battery contacts.
  8. Dries it with a clean, lint-free cloth
  9. Checks hoses and cords for nicks, cuts, tears or a bubbled casingTags anything damaged for repair before it goes to assembly.
  10. Uses no solvent or lubricant the IFU does not nameLubricates with only the product and amount it gives. Some powered devices take none.
Decontamination · Skill 9 of 9

Leak testing and cleaning a flexible endoscope

CRCST hands-on area · Decontamination, leak testing and cleaning flexible endoscopes

12 steps
  1. Wears full protective gearGloves, gown, mask with a face shield or goggles, and shoe and hair covers.
  2. Checks that the scope was precleaned at the bedsideThe insertion tube wiped with the approved enzymatic detergent and the suction channel rinsed with clean water right after the procedure.
  3. Takes off the valves, caps and other removable parts
  4. Leak tests the scope before it goes under waterWith the leak tester the scope's maker names, pressurized to the pressure in the IFU.
  5. Runs the type of leak test the IFU calls forDry: holds each movable part in each direction for at least 15 seconds while watching the gauge; a falling pressure means a leak. Wet: lowers the distal end into clear water with no chemicals, then the whole scope, flushes the channels with a syringe to clear trapped air, and watches for bubbles, above all at the bending section and the control knobs.
  6. Lifts the scope out of the water and releases the pressure before disconnecting the testerNever disconnects it under water, or water can get inside the scope.
  7. Removes a scope that fails from useIt is not cleaned by immersion. It is decontaminated as far as possible, as OSHA requires, and sent for repair.
  8. Immerses the scope and its valves in the enzymatic detergent the maker approvesMixed as the label directs, with every channel filled using a syringe or the irrigation tubes, for the soak time in the IFU.
  9. Cleans the outside under the solutionWipes the outer surfaces with a sponge or a soft cloth that sheds no lint, and uses a soft brush on the valves, ports and crevices.
  10. Brushes every channel with a brush of the right diameter and lengthPushes it through until it comes out the far end, rinses the bristles, pulls it back, and repeats until the brush comes out clean.
  11. Rinses the scope and valves in treated waterFlushes every channel to clear the detergent, then repeats with fresh water as the IFU directs.
  12. Throws out the used detergent, then moves the scope on to high-level disinfection or sterilizationThe detergent is used once. Single-use brushes go in the trash; reusable ones go for cleaning and then high-level disinfection or sterilization after every use.

Preparation and packaging · 9 skills

Preparation and packaging · Skill 1 of 9

Inspecting and testing instruments

CRCST hands-on area · Preparation and packaging, instrument inspection and sharpness testing

12 steps
  1. Reads the IFU and works under a lighted magnifierLooks with the naked eye first, then with the magnifier or borescope the IFU calls for.
  2. Checks every instrument for soilBox locks, serrations, teeth and hinges. A dirty instrument goes back to decontamination with its whole tray, and is never cleaned in the prep area.
  3. Checks lumens with an inspection swab or a borescopeOne swab per channel, a little narrower than the channel and longer than it, pulled through from the tip end. Any color or debris on the swab means the item is dirty.
  4. Looks for damage and wearCracks (at the box lock, and at the base of forceps first), bent or misaligned tips, loose screws, weak springs and parts that stick.
  5. Closes each jaw instrument and looks at the tipsThe tips meet evenly and the serrations or teeth mesh with no gaps.
  6. Checks the box lock and the ratchetOnly a very small amount of play when one handle is pushed up and the other down. The ratchet clicks shut with moderate pressure and holds on the first tooth without springing open.
  7. Tests cutting instruments on the right test materialScissors 4.5 inches and longer: red (latex) or orange (latex-free) material. Scissors 4 inches and shorter: yellow. The tips cut through cleanly two to three times. Rongeurs and bone cutters bite an index card; curettes, chisels and osteotomes shave a plastic dowel rod.
  8. Checks the finish for rust, pitting and stainsRubs the spot with a pencil eraser: smooth metal underneath is a stain, tiny pits are corrosion. Peeling chrome or chipping color coating means repair.
  9. Checks any marking tapeLoose, peeling or damaged tape comes off and is replaced.
  10. Tags and pulls any damaged, worn or dull instrumentA repair or sharpening tag goes on it, and a matching instrument takes its place in the set.
  11. Lubricates only where the IFU calls for itAn instrument lubricant approved for the sterilization method, on the hinge and the moving parts.
  12. Sends anything dropped on the floor back to decontamination
Preparation and packaging · Skill 2 of 9

Testing insulation on laparoscopic instruments

CRCST hands-on area · Preparation and packaging, laparoscopic instrument insulation testing

11 steps
  1. Tests every insulated instrument each time it is processedOn the clean side, before the set is assembled.
  2. Checks that the instrument is cleanDark insulation hides soil, so hooks, spatulas and jaws get a close look.
  3. Checks the insulation at the tipIt sits snug against the metal collar with no gap. Grips the insulation and tries to slide it back: if it moves, the instrument fails.
  4. Looks along the shaft and the handleNo cuts, cracks or nicks in the insulation, and no chips or cracks in the insulated handle.
  5. Readies the tester as its IFU directsBattery charged, ground lead and probe connected, and gloves on before handling the leads.
  6. Clamps the ground lead to bare metal on the instrument
  7. Sets the voltage the tester's IFU gives for the probe in use
  8. Checks that the tester reacts to bare metalTouches the probe to the uninsulated tip. No spark or alarm means the leads are checked again before any testing.
  9. Passes the probe slowly over the whole insulated lengthFrom tip to handle and all the way around. Bipolar forceps: each tine, inside and outside.
  10. Treats any alarm or flashing light as a failTags the instrument for repair and keeps it out of the set.
  11. Turns the tester off before moving or removing a lead
Preparation and packaging · Skill 3 of 9

Inspecting a rigid endoscope and light cord

CRCST hands-on area · Preparation and packaging, rigid endoscope care and handling

11 steps
  1. Carries the scope by its body, never by the shaft
  2. Checks that the scope is cleanThe window at the tip and the eyepiece window included. Wipes them with 70% isopropyl alcohol on a soft cloth if needed.
  3. Checks the shaft and the tip for damageNo dents, bends or cracks in the tube, and no sharp edges at the tip from a shaver or electrosurgery.
  4. Checks both windows for chips and cracks
  5. Tests the image through typed print about 1 inch awayThe view is round, bright and clear, with no blur or dark areas in the middle or anywhere around the edge. Looking across the room is not a test.
  6. Tests the light fibersPoints the tip at a light and looks at the light post: the fibers glow white, with few or no dark ones. A yellow or orange glow means it goes for repair.
  7. Checks the fit with its sheath or bridgeThe two go together with little or no force.
  8. Checks the light cord's cover and endsCoating whole with no cuts, the right adapters on, the scope end screws onto the scope, and the length matches the tray list.
  9. Tests the light cord's fibersHolds one end toward a room light and looks at the other end. Black spots are broken fibers; at about 20 percent broken, the cord is replaced. Never looks into a cord plugged into a running light source.
  10. Tags a failed scope or cord for repairRepairs go only to a qualified repair source.
  11. Secures the scope in its protective trayLocked in place, so a tipped or dropped tray does not move it. Nothing is stacked on it.
Preparation and packaging · Skill 4 of 9

Assembling a set from its count sheet

CRCST hands-on area · Preparation and packaging, instrument tray assembly procedures

11 steps
  1. Works from the current count sheet, never from memoryThe sheet gives the tray name, each item with its quantity, size and catalog number, where it goes, the packaging, the indicator and the cycle.
  2. Checks the tray or basketClean, undamaged and the one the sheet names. Silicone mats sit with their holes lined up over the tray's drain holes.
  3. Makes sure every item is completely dryWater left on instruments can make the cycle fail.
  4. Identifies, inspects and checks off each instrument by typeNever assembles by counting a total. Each one is matched to its line on the sheet.
  5. Keeps hinged instruments open and unlockedOn stringers, racks or tray pins, with curved tips all facing one way.
  6. Places heavy instruments on the bottom or sides of the trayDelicate and sharp tips go in tip guards, mats or foam approved for the sterilization method, never latex tubing.
  7. Puts multi-part instruments together to test them, then takes them apartUnless the IFU says otherwise. Small parts such as wing nuts go in an approved holder kept beside the instrument.
  8. Nests tissue and dressing forceps looselyA little space between each pair so the sterilant reaches every surface.
  9. Places an internal chemical indicator where the sterilant reaches lastOne on each level of a tray with several levels, made for the sterilization method and cycle.
  10. Keeps the tray within weight and uncrowdedNo more than 25 pounds for a containerized tray, counting the container. No gauze sponges as padding; towels only as the metal mass and the packaging IFU allow.
  11. Marks a tray that is missing an itemNotes what is missing on the tray and tells the user department. Nothing is swapped in unless that department approves.
Preparation and packaging · Skill 5 of 9

Preparing a rigid container

CRCST hands-on area · Preparation and packaging, rigid container system inspection

11 steps
  1. Checks that the container suits the set and the sterilizerApproved for the sterilization method, with its IFU on file, including any longer exposure or dry time it needs.
  2. Checks that the container is clean and dryIt is cleaned between every use.
  3. Checks the body, lid, handles and latchesNo broken welds or latches and no sharp edges. Handles move up and down easily, latch springs are in place and handle rivets are tight.
  4. Checks the lid gasketClean, with no cracks, nicks or ridges.
  5. Checks each filter plate or valveThe retention plate is flat, seats over the filter and locks, and the retention post does not move. A valve is clean, unchipped and stays put once seated.
  6. Puts in new disposable filtersChecked for holes, sized to fit with no folded or crimped edges, and approved for the sterilization method. A reusable filter is not past the uses its IFU allows.
  7. Places the internal chemical indicator in each basketIn the spot the sterilant reaches last, one on each level.
  8. Keeps the loaded container within weightNo more than 25 pounds, container included, and never more instruments than will sterilize and dry.
  9. Closes the lid and fits the tamper-evident locksSeated securely, so the container cannot be opened without breaking them.
  10. Adds the external indicator and the labelA color-changing indicator on the outside, and the label with the contents and load information.
  11. Carries the container by both handles, never by the lid
Preparation and packaging · Skill 6 of 9

Wrapping with the envelope fold

CRCST hands-on area · Preparation and packaging, flat wrapping with the envelope fold

12 steps
  1. Chooses a wrap approved for the sterilization methodCellulose-free for hydrogen peroxide or ozone. Big enough to cover the item fully without extra bulk; a wrap that will become a sterile field hangs at least 6 inches below the table edge.
  2. Checks the wrap before useNo holes, tears or worn spots, and not past any expiration date. A reusable woven wrap has been laundered and passed over a light table. A wrap that touched the floor is thrown away.
  3. Lays the wrap as a diamond with the item in the centerThe item sits square to the edge of the table.
  4. Brings the bottom corner up over the itemIt covers the item completely, and its tip folds back to make a flap for opening.
  5. Folds the left corner over and turns its tip backThe fold covers the whole item.
  6. Folds the right corner over the left one and turns its tip back
  7. Brings the top corner down and tucks it under the side foldsA small tab stays out for opening.
  8. Wraps the second sheet the same wayFor a sequential wrap; woven fabric is always wrapped twice. A bonded double wrap is folded once, as one sheet.
  9. Keeps the package snug but not tightToo tight or too loose and the sterilant cannot do its job.
  10. Folds in the same order every timeSo whoever opens it knows what comes next.
  11. Seals it with chemical indicator tapeNever pins, staples or clips.
  12. Labels it on the tape or a label, never on the wrap itself
Preparation and packaging · Skill 7 of 9

Wrapping with the square fold

CRCST hands-on area · Preparation and packaging, flat wrapping with the square fold

12 steps
  1. Chooses a wrap approved for the sterilization method and sized to the trayThe square fold suits large packs and trays. A wrap that will become a sterile field hangs at least 6 inches below the table edge.
  2. Checks the wrap before useNo holes, tears or worn spots, and not past any expiration date. A reusable woven wrap has been laundered and passed over a light table. A wrap that touched the floor is thrown away.
  3. Lays the wrap square to the table edge with the tray in the centerThe tray sits parallel to the edges of the wrap.
  4. Folds the edge nearest them over the tray and back on itselfThis cuff is used later to open the pack. The fold covers the whole tray.
  5. Brings the far edge down over the tray and folds it backIts cuff overlaps the first one.
  6. Folds the left side over the tray and back into a cuff
  7. Folds the right side over the left one and back into a cuffEach fold covers the whole tray.
  8. Wraps the second sheet the same wayThe last fold on the right is tucked under. A bonded double wrap is folded once, with its last fold tucked under.
  9. Keeps the package snug but not tightToo tight or too loose and the sterilant cannot do its job.
  10. Folds in the same order every timeSo whoever opens it knows what comes next.
  11. Seals it with chemical indicator tapeNever pins, staples or clips.
  12. Labels it on the tape or a label, never on the wrap itself
Preparation and packaging · Skill 8 of 9

Packaging in a peel pouch

CRCST hands-on area · Preparation and packaging, peel pouching techniques

12 steps
  1. Picks the pouch made for the sterilization methodPaper-plastic for steam and ethylene oxide; spunbond polyolefin and plastic (Tyvek) for hydrogen peroxide and ozone. They look alike, so the label is read. Pouches are for small, light items.
  2. Sizes the pouch to the itemAbout 1 inch of space in all between the item and the seals, half an inch on each side, so it neither strains the seams nor slides around. Never overfilled.
  3. Checks the pouch for holes, tears and an expiration date
  4. Places the item with its handle at the end that peels openOn a premade pouch that is the chevron end, so finger rings come out first.
  5. Turns tips toward the plastic sideSharp tips go in tip protectors approved for the method, and hinged instruments are held open.
  6. Puts in an internal chemical indicator that shows through the plastic
  7. Presses the air out gently before sealing
  8. Seals it with a tamper-evident sealA heat sealer set to the IFU's temperature, pressure and contact time, or a self-seal strip folded down without gaps. Never staples, pins or clips.
  9. Checks the whole sealSmooth and complete, with no bubbles, creases, wrinkles or gaps.
  10. Uses a double pouch only to present several items or a multi-part instrumentThe sealed inner pouch fits the outer one without folding, with the paper sides together and the plastic sides together.
  11. Labels it only on the plastic sideOr on a spot the maker provides, with an approved felt tip marker. Never on the paper side and never with a ballpoint pen.
  12. Keeps paper-plastic pouches out of wrapped trays and containers
Preparation and packaging · Skill 9 of 9

Labeling packages

CRCST hands-on area · Preparation and packaging, package labeling and load control numbers

10 steps
  1. Labels every package before it is sterilized
  2. Names the contents in standard termsThe tray or item name from the count sheet, standard abbreviations, and no slang or nicknames.
  3. Adds their initials as the packager
  4. Names the sterilizer and cycle the item needsIncluding any extended cycle the item's IFU requires.
  5. Applies the load control (lot) numberWith the labeling gun: sterilizer number, cycle number and the date sterilized. Some departments use a Julian date, where January 1 is day 001.
  6. Adds the storage location or destinationA special request also carries the name of the surgeon or the department that asked for it.
  7. Adds the earliest expiration date when a package holds dated products
  8. Writes clearly with an approved markerA felt tip that is indelible, nonbleeding, nonfading, nontoxic and made for the sterilization method. Never a ballpoint pen.
  9. Puts the label where it will not harm the barrierOn wraps: on indicator tape or an adhesive label, never written on the wrap. On pouches: on the plastic side, never the paper or polyolefin side.
  10. Scans the barcode label into the tracking systemWhere the department tracks sets by barcode.

Sterilization and disinfection · 8 skills

Sterilization and disinfection · Skill 1 of 8

Getting a steam sterilizer ready for the day

CRCST hands-on area · Sterilization and disinfection, cleaning and maintaining sterilizers

10 steps
  1. Lets the chamber cool before cleaning anything inside it
  2. Takes out the chamber drain strainer and cleans itAt least once a day, and more often when loads shed lint or tape. Washed under running water with a mild detergent and a soft brush, after a soak if debris has built up.
  3. Wipes the door gasket and looks it overA clean, damp, lint-free cloth. Looks for any damage, wear or breakdown, which matters most on a sterilizer with a vacuum cycle.
  4. Cleans the chamber walls the way the sterilizer's IFU saysNonabrasive, lint-free products, then a full rinse so no detergent is left to spot instruments and wrappers. Never steel wool or harsh abrasives, which scratch the chamber and invite corrosion.
  5. Cleans and checks the loading carts, carriages and basketsA mild cleaning solution. Nothing is damaged, and each one rolls in and out of the chamber freely.
  6. Checks the recorderEnough printer paper, or a new chart with the date, time and sterilizer noted and the pens writing.
  7. Runs the vacuum leak test on the days it is dueDynamic air removal sterilizers only, in an empty chamber, at least weekly. The result is read against the limit in the sterilizer's operating manual.
  8. Runs the air removal (Bowie-Dick) test before the first loadOn a dynamic air removal sterilizer, every day it is used.
  9. Writes down each check and its resultOn the sterilizer's log, exactly as it happened, even when something failed.
  10. Takes a sterilizer with a problem out of service and tells the supervisorA damaged gasket, a failed leak or air removal test, or a fault on the printout. Repairs beyond daily care go to a qualified service technician.
Sterilization and disinfection · Skill 2 of 8

Running and reading a Bowie-Dick test

CRCST hands-on area · Sterilization and disinfection, dynamic air removal (Bowie-Dick) testing

10 steps
  1. Tests only a dynamic air removal sterilizerSuch as a prevacuum sterilizer. A gravity displacement sterilizer pushes air out by gravity and does not get this test.
  2. Runs it each day the sterilizer is used, before the first loadAt the same time every day, and again after a major repair.
  3. Empties the chamberNothing inside but the loading cart or rack and the test pack.
  4. Uses a Bowie-Dick test packA Class 2 chemical indicator, the specialty kind made to show whether the sterilizer removed the air.
  5. Lays the pack flat on the bottom shelf at the front, over the drainNear the door, as the test pack's directions show.
  6. Runs the air removal test cycleSet as the test pack's instructions say, usually a shorter exposure than a normal cycle. A built-in test cycle is checked against those instructions first. CDC gives 3.5 minutes at 134°C for the towel pack.
  7. Takes out the pack when the cycle ends and opens it to the test sheet
  8. Reads a pass: one even color across the whole sheetThe sterilizer is ready for the day's loads.
  9. Reads a fail: blotches, a lighter spot or patchy colorAir was left behind. The sterilizer comes out of service, the supervisor is told, and no load runs until it is repaired and passes the test again.
  10. Records the result and keeps the sheetOn the sterilizer's log with the date, sterilizer and operator. The sheet is filed with the sterilizer records.
Sterilization and disinfection · Skill 3 of 8

Loading a steam sterilizer

CRCST hands-on area · Sterilization and disinfection, loading a steam sterilizer

11 steps
  1. Checks each package before it goes on the cartDry, closed and undamaged, with an external indicator and a load control label showing the sterilizer, cycle number and date.
  2. Keeps out anything steam cannot sterilizeOils, powders, cork and wood.
  3. Groups items by the cycle each one's IFU calls forAn item with an extended cycle runs in a load of its own, and nothing runs in a cycle that differs from its IFU. As a guide, AAMI's minimum for wrapped instruments is 4 minutes at 270°F in a dynamic air removal cycle, or 30 minutes at 250°F in gravity.
  4. Leaves space between every packageSteam has to reach each pack and condensate has to drain. Nothing touches the chamber walls, and the cart is not overloaded.
  5. Lays perforated instrument trays flat on the shelfA tray stood on edge collects water along its low side.
  6. Stands peel pouches on edge in a basket or rackLined up paper side to plastic side, never laid flat.
  7. Sets basins and containers so air can leave and water can drainBasins on edge and tipped. Cups and other hollow items turned so they cannot hold water. Lids off any airtight container.
  8. Puts hard goods below textiles when a load is mixedSeparate loads are better. Textile packs go on the top shelves with their layers standing up and down. Any shelf liner is an absorbent one.
  9. Adds a process challenge device when the load needs oneEvery load with an implant gets a PCD with both a BI and a Class 5 integrating indicator. The PCD is labeled with the load information and placed where the sterilizer's IFU says.
  10. Fills in the load recordLoad control number, each item with its quantity and department, the cycle, exposure time and temperature, and the operator's name.
  11. Selects the cycle, closes the door and starts itWatches the gauges or display while the cycle runs.
Sterilization and disinfection · Skill 4 of 8

Unloading and cooling a steam load

CRCST hands-on area · Sterilization and disinfection, unloading a steam sterilizer and controlling wet packs

11 steps
  1. Reads the printout before anything comes outTime, temperature and pressure all met what the cycle needed. Signs it to show it was checked.
  2. Holds back a load that missed any parameterTells the supervisor at once. The load is treated as not sterile, and the sterilizer stays out of service until it is fixed.
  3. Opens the door the way the sterilizer's IFU says
  4. Pulls the cart to a quiet spot away from cold airLow traffic, with no air conditioning vent or other cold draft nearby. In a sterilizer without a cart, the load stays in the chamber to cool.
  5. Leaves the packages untouched while they coolA warm pack can still hold steam, and a hand on the damp wrap can carry germs through it.
  6. Gives the load the time it needsSmall sets and peel pouches may need 30 minutes, large sets two hours or longer. The sterilizer, the device, the packaging and the room's temperature and humidity all change the time.
  7. Looks over the load for moisture without touching itDrops of water on a pack or on the cart rails mean every item in the load gets a close visual check.
  8. Treats a wet pack as contaminatedDampness, drops or puddles on or in a pack after the cycle. It is not released; it is reported, logged, and packed and processed again with fresh textiles and new indicators. Several wet packs make the whole load wet.
  9. Checks the external indicator on every packageA package whose indicator did not change fully and evenly stays back.
  10. Moves packs only once they are at room temperatureA warm pack set on a cold surface, or sealed in a plastic dust cover, traps condensation.
  11. Quarantines implants until the BI reads negativeThe rest of the load is released once the printout, indicators and any PCD result have been reviewed.
Sterilization and disinfection · Skill 5 of 8

Running a biological indicator test

CRCST hands-on area · Sterilization and disinfection, biological indicators and process challenge devices

12 steps
  1. Runs a BI test on scheduleOnce a week at the least, better on every day of use, and in every load with an implant.
  2. Picks the BI and PCD made for this sterilizer and cycleSteam BIs carry Geobacillus stearothermophilus spores. A commercial PCD is preferred, and a gravity sterilizer needs one made for gravity. The BI has been stored as its IFU says.
  3. Labels the PCD with the load information before it goes inWritten on the BI the way its IFU allows.
  4. Places the PCD where the sterilizer's IFU saysUsually flat on the bottom shelf near the front, over the drain, in a full load. Never on its side, under a tray or with packs on top of it.
  5. Runs the cycle and checks the printout
  6. Takes out the BI and activates it as its IFU saysSuch as crushing the inner ampule so the growth medium reaches the spore strip.
  7. Sets up a control BI from the same lotOne that has not been through a cycle. A control runs at least each day a BI is tested, and whenever a new lot is started.
  8. Incubates both in the incubator made for that BISteam BIs incubate at 55 to 60°C.
  9. Reads both at the time the IFU givesPass: no color change or growth in the test BI, and growth in the control. A control that does not grow means the test result cannot be trusted.
  10. Reports a positive BI at onceThe load is not released, and the supervisor starts the recall.
  11. Records the results and keeps themBI lot number, load number, test and control results, and the reading of the chemical indicator in the PCD.
  12. Holds implants until the BI is negativeIn a documented emergency an implant may go out on a passed Class 5 indicator and printout, but the BI is still read, and the early release and its reason are written down.
Sterilization and disinfection · Skill 6 of 8

Reading chemical indicators

CRCST hands-on area · Sterilization and disinfection, process indicators (external and internal chemical indicators)

10 steps
  1. Picks the indicator made for the sterilization method and cycleA steam indicator for steam, a hydrogen peroxide indicator for hydrogen peroxide. A Class 6 emulating indicator works only in the one cycle it was made for.
  2. Stores indicators the way their IFU saysPoor storage can make an indicator fail.
  3. Puts an external indicator on every packageA Class 1 process indicator: indicator tape, a label or a printed legend. A peel pouch whose internal indicator shows through the plastic needs none.
  4. Puts an internal indicator in every packageClass 3, 4, 5 or 6, in the spot the sterilant reaches last, which is not always the center. A tray with more than one level gets one on each level.
  5. Reads the external indicator on each package as the load comes outIt shows only that the package went through a cycle, never that it is sterile.
  6. Compares each indicator with the endpoint its IFU showsA full, even color change is a pass.
  7. Holds back any package whose indicator did not change fullyIt is not released or opened, and goes back to be processed again. One failed pack can come from how it was packed or loaded while the rest of the load is fine.
  8. Reads the integrating indicator in the PCD before the load is releasedA passed Class 5 indicator in a PCD allows a load without implants to be released. Its result goes on the load record.
  9. Keeps a returned package with its failed indicator and load labelWhen the OR finds a failed internal indicator, the contents are not used and come back for investigation.
  10. Reports every failed indicator to the supervisorSo the cause can be found: a sterilizer or utility fault, loading, packaging, the wrong cycle, the wrong indicator, or an IFU not followed.
Sterilization and disinfection · Skill 7 of 8

Loading a hydrogen peroxide gas plasma sterilizer

CRCST hands-on area · Sterilization and disinfection, loading hydrogen peroxide gas plasma sterilizers

11 steps
  1. Checks that each device's IFU allows this sterilizer and cycleBoth the device maker and the sterilizer maker set limits on lumen size, length and number, materials, and how many instruments go in one cycle.
  2. Makes sure every item is clean and completely dryWater left on a device can abort the cycle. Dries it the way the IFU suggests.
  3. Keeps out everything the process cannot takeLiquids, powders, anything that soaks up liquid, and anything with cellulose: cotton, paper, cardboard, linen, huck towels, gauze or wood pulp.
  4. Packages in materials made for hydrogen peroxideTyvek pouches, polypropylene wrap, and trays or containers the sterilizer maker approves. Never paper-plastic pouches, cellulose wrappers or muslin.
  5. Uses indicators made for hydrogen peroxideAn external indicator on every package and an internal one at the hardest spot inside.
  6. Labels each package with the load control number
  7. Loads the chamber without crowding itThe sterilant is used up if it reacts with or soaks into the load before it reaches every surface. Items go in as the sterilizer's IFU shows.
  8. Adds a BI test pack made for this sterilizer modelAt least once on each day of use, preferably in every load, placed where the sterilizer's IFU says.
  9. Handles the sterilant cassette safelyLooks at the leak indicators through the clear overwrap first: red means hydrogen peroxide has leaked, and the SDS and department procedure are followed. The machine advances the cassette and drops the used one into a collection box.
  10. Reads the printout at the end of the cycleIt lists every critical parameter. A canceled cycle prints the reason.
  11. Wears gloves to take items out of a canceled cycleLatex, vinyl or nitrile, since hydrogen peroxide may remain. The items are not sterile and are processed again.
Sterilization and disinfection · Skill 8 of 8

High-level disinfection of a heat-sensitive device

CRCST hands-on area · Sterilization and disinfection, safe work practices when performing manual disinfection

12 steps
  1. Confirms the device and the disinfectant go togetherA semi-critical, heat-sensitive item whose IFU names this high-level disinfectant. Never mixes chemicals.
  2. Cleans the device fully first, and takes it apartSoil left on it stops the disinfectant from working. A flexible endoscope is leak tested before it goes into liquid.
  3. Works in the high-level disinfection area, away from cleaningA well-ventilated room (for glutaraldehyde, at least 10 air exchanges an hour) or an enclosed workstation.
  4. Puts on the protection the label and SDS call forFor glutaraldehyde: nitrile or butyl gloves and face and eye protection.
  5. Sets out everything before startingSoaking bin, measuring tools and a timer.
  6. Checks the solution's datesThe activation or opening date and the last day of its reuse life, such as 14 or 28 days. A solution past that date is thrown out.
  7. Tests the solution with its own test strip before each useA strip made for that product. A result below the minimum effective concentration means the solution is discarded, however many days it has left. A new bottle of strips gets its quality control test and is dated when opened.
  8. Checks the solution temperature when the label sets one
  9. Fully immerses the deviceEvery part under the solution, with every lumen and channel filled and no air bubbles.
  10. Times the full contact time from the labelUses a timer. If the surface dries before the time is up, the soak starts over.
  11. Rinses every surface and channel the way the label saysWith the water and number of rinses it gives, keeping the device from touching anything dirty.
  12. Dries and stores it as its IFU says, then fills in the logDate and time, strip result, strip and solution expiration dates, items, exposure time and temperature, and the technician's name. For an endoscope, also the patient and who cleaned it.

Storage and distribution · 3 skills

Storage and distribution · Skill 1 of 3

Putting sterile items into storage

CRCST hands-on area · Storage and distribution, receipt of sterile items into storage and event-related sterility

12 steps
  1. Lets the load cool completely before touching itThe cart stays in the cooling area near the sterilizers until the packs reach room temperature. An infrared meter can check a pack without touching it.
  2. Cleans hands before handling sterile packsHands clean and dry, nails short with no artificial nails, no jewelry, and any badge lanyard tucked away.
  3. Checks every package before it goes on a shelfTape, seals and container locks intact, the filter area of a rigid container undamaged, the outside indicator changed, the load (lot) label in place, dry, no holes or tears, and not past any expiration date.
  4. Lifts each pack and never drags itOne hand lifts the front from underneath and the other goes under the middle. Dragging wears holes in the wrap.
  5. Puts each item in its own labeled place on a clean shelf
  6. Keeps the shelving distancesThe bottom shelf solid and 8 to 10 inches off the floor. Items at least 18 inches below sprinkler heads and at least 2 inches from outside walls and windows, and never near or under sinks, open water pipes or drains.
  7. Stores packs so nothing is squeezed or hangs over the shelf edgeHeavy items on the middle shelves and light ones higher. Wrapped trays are never stacked; rigid containers are stacked only as high as their maker allows.
  8. Keeps anything that is not sterile off the sterile shelves
  9. Closes the shelving after each useOpens closed cabinet doors slowly and shuts them, and pushes movable shelf units back together.
  10. Checks and records the room's temperature and humidityAt least once a day: no warmer than 75°F (24°C) and under 70% relative humidity.
  11. Pulls any package that has had an eventExpired, torn, wet, crushed, dusty, dropped, handled while still warm, or simply in doubt. Reusable contents go back for reprocessing and disposables are thrown away, as policy says. A dropped package never goes back on the shelf.
  12. Cleans the shelves on schedule and records itTakes everything off, wipes the shelf with the approved solution (sides and top too), then the base, the underside and the wheels. Lets it dry fully, then checks each item again as it goes back.
Storage and distribution · Skill 2 of 3

Rotating and restocking supplies

CRCST hands-on area · Storage and distribution, stock rotation and inventory replenishment

12 steps
  1. Counts what is on hand against each item's par levelWorks out how many of each item it takes to bring the shelf back up to par.
  2. Unpacks commercially sterile stock in the break-out areaOuter shipping cartons are opened and thrown out there and never come into sterile storage. Items travel in a clean, closed cart or bin.
  3. Reads each commercially sterile package's labelLot number, expiration date or a sterile-unless-damaged statement, storage limits, and whether it is single-use.
  4. Checks each package before shelving itNo holes, tears, moisture, broken seals or signs of heavy handling.
  5. Takes new stock straight to storage and never leaves it unattendedHandles packages gently and places them loosely, never packed tight.
  6. Puts new stock where it will be picked lastBehind the older stock, or on the left in a left-to-right system, so the oldest is used first.
  7. Lines up dated items by expiration dateThe item that expires first is used first.
  8. Looks for the expiration date on every dated packageMakers print it in different places. An expired item is pulled even when the facility uses event-related shelf life.
  9. Shelves each item in its labeled spotMatching the locator system, nothing hanging over the edge, and no unsterile items mixed in.
  10. Pulls packages that are expired or have had an eventReusable contents go back for reprocessing and disposable ones are thrown away, as policy says.
  11. Writes each pulled package in the contamination event logSo the department can find out why packs are being lost and stop it.
  12. Reports supply problemsLow stock, frequent outages, unusual demand or a storage problem goes to the lead or Materiel Management, as the department directs.
Storage and distribution · Skill 3 of 3

Picking a case cart

CRCST hands-on area · Storage and distribution, case cart system

12 steps
  1. Prints the pick lists from the surgery scheduleOne list a case, built from the surgeon's preference card. A case booked with a possible open procedure may need a second list.
  2. Checks each pick list against the scheduleSurgeon, procedure, room and start time all match.
  3. Starts with a clean, dry cart in good repairDoors close and latch, and the wheels roll smoothly.
  4. Finds each item with the locator system
  5. Checks each package as it is pickedIntact, dry, outside indicator changed and not expired. The oldest is taken first.
  6. Checks off every item on the pick list as it goes on the cartFollows the list every time, even for a case picked many times before.
  7. Tracks down instruments that are not on the shelfSuch as a set still in use or being processed for an earlier case. Loaner sets needed for the case must arrive early enough to be processed.
  8. Tells the OR right away about anything that cannot be suppliedFollows the department's outage procedure and never sends a cart short without saying so.
  9. Loads the cart so nothing is crushedPackages flat, nothing hanging over an edge, and not overcrowded. The doors close without touching any package.
  10. Delivers the closed cart before the case, by the clean routeA clean elevator when there is one, never the soiled one, and the cart is never left unattended on the way.
  11. Sends added items quickly when the OR asks during the case
  12. Handles the cart when it comes backUnopened, intact items go back to stock; opened and soiled instruments go to decontamination. Then restocks and records charges.

Quality assurance · 3 skills

Quality assurance · Skill 1 of 3

Reading cleaning verification tests

CRCST hands-on area · Quality assurance, decontamination area monitoring

11 steps
  1. Runs each machine's cleaning test on scheduleWasher-disinfectors each day they are used, ultrasonic cleaners at least weekly and preferably daily, and any machine after it is installed or has a major repair.
  2. Checks the machine before testing itWasher screens clean and spray arms attached, turning and not clogged. On an irrigating ultrasonic, water flows freely through every tube.
  3. Reads the test device's directions firstEach maker's test is placed, run and read its own way.
  4. Places the test device where its directions sayA routine ultrasonic test runs in an empty tank with at least one device in the middle.
  5. Runs the cycle the department normally uses
  6. Reads the result against the test maker's chartFor example, a color-change vial for an ultrasonic turns from blue-green to yellow when cavitation works and stays blue-green when it does not.
  7. Reads the washer printout after every cycleConfirms the thermal disinfection temperature and every other setting were reached, then initials it.
  8. Inspects cleaned instruments for soil, with magnification where the IFU calls for itA lighted magnifier, or a borescope for lumens. Anything with soil goes back to be cleaned again.
  9. Uses a residual soil test on instruments when policy calls for oneSuch as a protein or blood detection test, since an instrument that looks clean can still hold soil.
  10. Takes a failed machine out of use and tells the manager at onceNothing is cleaned in it until it is fixed and passes the test again.
  11. Records every result, pass or failWith the date, the machine and the technician's initials, written as it really happened.
Quality assurance · Skill 2 of 3

Reporting a failed indicator

CRCST hands-on area · Quality assurance, sterilization monitoring

11 steps
  1. Reads the sterilizer printout before unloadingTime, temperature and pressure all met, then signs it.
  2. Treats a load with a failed printout as unsterileTells the manager or designee at once and takes the sterilizer out of service until the fault is fixed.
  3. Takes the sterilizer out of use after a failed Bowie-Dick testA sheet with blotchy patches that did not change color is a fail. No loads run until the cause is found and corrected.
  4. Pulls any package whose outside indicator did not changeIt is treated as not sterile and is never shelved or sent.
  5. Sends back a package whose internal indicator failedThe contents are not used. The package returns to sterile processing with its indicator and load label so the cause can be found.
  6. Reads each BI with its controlThe control from the same lot must grow and the test BI must not. If the control does not grow, the test result cannot be trusted.
  7. Reports a positive BI right awayTo the supervisor, and to infection prevention as policy says. The sterilizer comes out of service.
  8. Holds the load and starts a recall as policy directsImplants from the load stay in quarantine and are not released.
  9. Helps find the causeSuch as the wrong cycle, BI or PCD, poor placement or loading, packaging, an indicator stored badly, or a sterilizer or utility fault. Sterilizer maintenance is called when no cause is found.
  10. Records the failure exactly as it happenedThe result, the load number, the lot numbers and what was done, even though the test failed.
  11. Keeps the sterilizer out of use until it passes its retestsCDC suggests three negative BIs in a row before it goes back into service. After a major repair, the qualification tests the maker and policy require.
Quality assurance · Skill 3 of 3

Recalling a load

CRCST hands-on area · Quality assurance, sterilization load control numbers and recalls

11 steps
  1. Labels every package with its load control (lot) number before sterilizingThe sterilizer number, the cycle number and the date, or a Julian date.
  2. Fills in the load record for every cycleLoad number, date and time, each item with its quantity and department, exposure time and temperature, the operator, and the BI, test pack indicator and Bowie-Dick results.
  3. Keeps the link from each tray to its patientThrough the tracking system, or the load label placed in the patient's procedure record.
  4. Names what starts a recallA positive BI, an indicator that did not respond, wet packs, or any other sterility problem.
  5. Finds every load involved from the recordsThe failed load, and every load run in that sterilizer since its last negative BI when policy calls for it.
  6. Lists every item in those loads and where it wentFrom the load log and the tracking system: the shelf, a case cart, satellite storage or another department.
  7. Pulls back every item not yet usedFrom sterile storage, case carts, the OR and other units, with help from the staff there.
  8. Sends every pulled item to be reprocessedReusable items go to decontamination. Nothing from a recalled load is used.
  9. Lists the items already used and the patients they were used onGives the list to the supervisor and infection prevention, so patients can be followed up if needed.
  10. Records the recall and keeps the paperworkWhat failed, the loads, what was pulled and used, and who was told. Kept as long as policy and law require; CDC gives 3 years as an example.
  11. Takes part in the review afterwardSo the department can see whether training or sterilizer maintenance needs to change.
Written in our own words for the hands-on work in HSPA's five CRCST areas.Free to read, print and use in your program.
Free download

Download the checklist as a PDF.

All 32 skills, one to a page, with lines for the student, the evaluator, the date, the attempt and the result, and a skills record for each student's file. Type into it on screen or print a stack for check-off day.

Get the free PDF

We email the link to your PDF here.

We email you a link to the PDF. You will also get our occasional emails for educators, and you can unsubscribe any time.

Fig. 2 · A check-off in the program portal, on a lab tablet (example class)

For instructors

Check off the whole class from one tablet.

When students are ready, skip the paper. The CSTSetup program portal has this checklist built in: tap each step as the student does it, mark Passed or Needs work, and the next student who still needs the skill comes up.

  • Ready the day you startEvery class and every student has the checklist. Nothing to copy, build or assign.
  • Make it your program'sChange a step, add your own skills, or turn off the ones you teach another way.
  • Every attempt on recordWho checked it, when, the steps as they stood that day, and the note for Needs work.
  • A printed record for each fileOne page per student with every skill and its result, for the site visit.
  • Students practice the same stepsThey see exactly what you will check, on their phones, before lab.
The rest of the record

The checklist sits beside everything else you track.

Skills and hours for the same students, in one portal, counted toward your standard as they come in.

of 120 hoursDecontamination, example student

Hands-on hours, area by area

Shifts count toward HSPA's 400 hours, area by area, or as one total for CBSPD, the moment you approve them.

Clocked in 6:42 AMAt the clinical site

Clinical hours you can trust

Shifts clocked on site, with the location, so a shift clocked from home stands out.

Scan, tick, confirmno account needed

Shift sign-off in one scan

The lead tech who watched the work scans the student's QR code with their phone camera and signs the shift. No account, no app, no signature sheets.

Program recordevery student, every case

The whole record, in one download

Export every student's hours and progress whenever you want it. The records are yours.

Between check-offs

What students study, in every seat.

Each seat includes CSTSetup Pro for the student, so the setups, instruments and exam practice behind these skills are in their pocket.

Packaging · Skill 4 of 9

Assembling a set from its count sheet

  1. Works from the current count sheet, never from memory
  2. Checks the tray or basket
  3. Makes sure every item is completely dry
  4. Identifies, inspects and checks off each instrument by type

+ 7 more steps on the checklist

Behind every skill, in the student's pocket:

  • 385
    SetupsThe back table and Mayo for real cases, photographed in real operating rooms, every instrument named and the case walked step by step.
  • 3,358
    InstrumentsPhotos, sizes and uses, flashcards, and 3D models to turn in the hand.
  • 7
    Practice testsOne for every cert exam, the CRCST and CSPDT included, scored against the pass mark.
The back table set up for a laparoscopic cholecystectomy in a real operating room Laparoscopic Cholecystectomy · 36 instruments
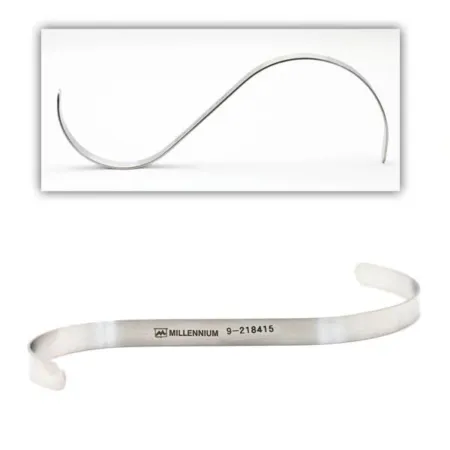
Hasson S Retractor
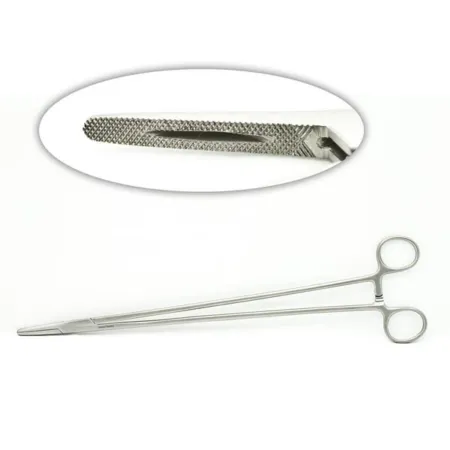
3DMayo-Hegar Needle Holder
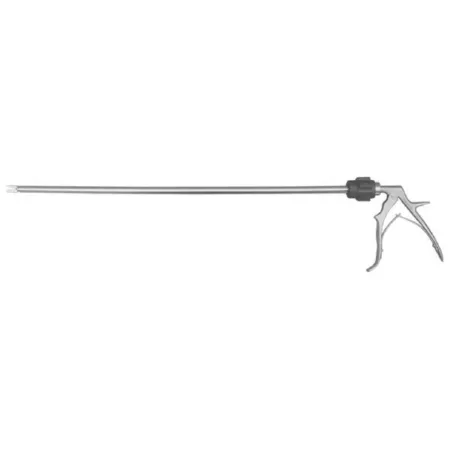
Laparoscopic Clip Appliers
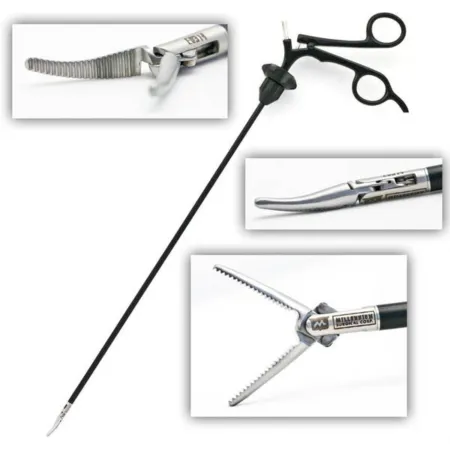
Laparoscopic Maryland Dissector Grasper
Fig. 5 · The lap chole back table and four of its instruments, as a student sees them in Pro

$10.39a student a month, on a year for a class of 5 or more. Pro for the student and the whole record for your program, in one seat.

See seat pricing
Questions

About the checklist.

Is this HSPA's official checklist?

It is our own check-off sheet, written in our own words for the hands-on work in HSPA's five CRCST areas. Every skill names the area and the task it covers, so you can line it up with your syllabus and your records.

Which areas does it cover?

All five of HSPA's CRCST hands-on areas: decontamination, preparation and packaging, sterilization and disinfection, storage and distribution, quality assurance. The CRCST asks for 400 hours of hands-on work across them.

Can we change it for our program?

Yes. Print it, copy it and adapt it however your lab runs. If you use the CSTSetup program portal, you can change any step, add your own skills and turn off the ones you teach another way.

Is it really free?

The checklist, every skill on these pages and the PDF are free. The program portal, where you check students off on a tablet and keep their records, is priced per student.

What does "done" mean for each step?

Every step is something an evaluator can watch happen, written in plain words with a short note on what good looks like. A skill is passed when every step is done.

For programs

Your checklist is already set up.

If you run a program, we will set the portal up with you on a call: your accreditor, your classes and your instructors. Your students join by email.