Before the case
Everything that happens before the first cut: planning the case, readying the room, opening, scrubbing, gowning, setting up, counting, draping and the time-out.
1Why it matters
By the time the surgeon picks up the knife, the scrub has already done much of the case's most careful work: planned it, readied the room, opened and checked every sterile item, scrubbed, gowned, set up, counted and helped drape.
Each of those steps protects the patient. A missing instrument means a delay while the patient is under anesthesiaan-us-THEE-zhuhLoss of feeling or sensation, often brought on by drugs so that surgery or a procedure can be done without pain.an- withoutesthesi/o feeling, sensation-ia conditionFull entry . One contaminated item can cause an infection. A sponge nobody counted can be left inside the patient. A skipped check can mean surgery on the wrong side.
The sterile fieldSTAIR-ul feeldAn area set up with sterile drapes and supplies, kept free of all germs, for a sterile procedure.Full entry is there to lower the patient's risk of a surgical site infection, and AST says every team member must keep strictly to the principles of asepsisay-SEP-sisThe state of being free of germs that cause disease, and the practices used to keep things that way.a- withoutsep- decay or infection-sis conditionFull entry on every case to do it.
This chapter follows the order of a real case:
- Dress for the operating room.
- Plan the case and gather what it needs.
- Get the room ready.
- Open the sterile items.
- Scrub, gown and glove.
- Set up the back table and the Mayo standMAY-oh standA small tray on an adjustable stand placed over or beside the patient during surgery to hold the instruments used most often.Full entry .
- Do the first count with the circulator.
- Gown and glove the team, drape the patient and bring the sterile field to the patient.
- Stop everything for the time-outTYM-owtA pause just before a procedure when the whole team confirms the right client, procedure and site; also, a short break to calm a child.Full entry .
Other chapters hold the pieces this one stands on. The principles of asepsis are in chapter 26, the room's equipment and how to test it in chapter 23, the supplies themselves in chapter 25 and the instruments in chapter 24. Consent and legal records are in chapter 15, communication and handoff reportHAND-off ree-PORTThe passing of information and responsibility for a client's care from one nurse or team to another.Full entry in chapter 16, and transport, positioning, catheters and skin prep in chapter 31. What happens once the case begins, including passing, medications and the closing counts, is in chapter 29.
2Dressing for the OR
Surgical attire keeps the hair, skin flakes (squames) and germs that people shed away from the patient, and it protects you from blood and body fluids. The human body is a major source of germs in the operating room, and germs from the hair, scalp and skin of surgical staff have been linked to surgical site infections.
The rules follow the surgical suite's zones. Street clothes are fine in the unrestricted zone. Scrubs and a head cover are required in the semi-restricted zone. A mask is added in the restricted zone, where the operating rooms are, and anywhere sterile supplies are open. Chapter 17 explains the zones.
Surgical attire
- Head cover: put it on first, before the scrub suit, so hair and dandruff do not fall onto your scrubs. It must hold all of your hair and cover the hairline, the nape of the neck and the sideburns. Current guidance does not favor one style over another: bouffant, hood and skull cap are all made, and your facility decides which kinds are worn, whether reusable cloth caps are allowed and how they are laundered. A reusable cap soiled with blood or body fluid comes off and is laundered by the facility, and every head cover comes off at the end of the shift or when it is contaminated. A religious head covering is covered with a clean head cover the facility approves; extended covers for the head and neck are made for this.
AST's 2008 attire standard recommends a disposable bouffant or hood rather than a surgeon's skull cap, which can leave hair showing, a hood for anyone with facial hair, and no reusable cloth caps; where cloth caps are allowed, it has them laundered daily.
- Mask: it covers your nose and mouth completely and fits closely, with no gaps at the sides and the nose band shaped to your nose. Wear it at all times in the restricted area, including at the scrub sink, and whenever sterile supplies are open. Tie the top ties high and the bottom ties snug, never crossed. A mask is either on or off: never hanging around your neck or folded in a pocket. Use a new one for every case and whenever it gets wet or soiled. Take it off by the ties only, throw it away, and wash your hands.
- Scrub suit: clean, freshly laundered and made of low-lint fabric. Put it on in the changing room after your head cover. Tuck the top into the pants, or wear a top that fits close to the body, so it cannot billow onto a sterile surface. Clothing worn underneath is close-fitting, low-lint and freshly laundered, and a T-shirt stays fully covered. Change at once if blood or body fluid soaks through, and change back into street clothes before you leave the building.
- Warm-up jacket: nonsterile team members, such as the circulator and the anesthesia provideran-us-THEE-zhuh pruh-VY-derThe licensed professional who gives anesthesia and watches over the client's breathing and vital functions during a procedure.Full entry , may wear a clean long-sleeved jacket, buttoned or snapped closed, which cuts down the bacteria and skin flakes shed from bare arms. Current guidance makes no recommendation on long sleeves except that the arms may be covered during the patient's skin prep, so your facility's policy decides. A jacket is laundered like scrubs and never stored in a locker. The scrub takes the jacket off completely before scrubbing, and never ties it around the waist.
AST's 2008 attire standard has every two-piece scrub top tucked into the pants, and recommends that nonsterile team members always wear a long-sleeved warm-up jacket in the semi-restricted and restricted areas.
- Shoes: closed at the toe and heel, solid, supportive and low-heeled. Sandals and soft fabric shoes give little protection from a dropped sharp or a splash. Shoes kept just for the OR are worn only in the department, or covered.
- Shoe covers: fluid-resistant covers, or knee-high boots for big fluid cases, when blood or irrigationeer-ih-GAY-shunWashing out a wound, body cavity, tube or eye with a steady flow of liquid.Full entry may splash. They protect your shoes and feet, but they have never been shown to lower infection rates. Take them off before you leave the department and whenever they are soiled or torn, wearing gloves, and then wash your hands.
Accessory attire
- Identification badge: clipped to your scrubs. A fabric lanyard rubs against your skin, and the sweat and skin oils on it feed bacteria, so a badge and lanyard must be cleaned regularly, with a low-level disinfectantdis-in-FEK-tuntA chemical used on objects and surfaces to kill most germs.Full entry . Many facilities now require a name tag instead.
- Cover apparel: whether you wear a lab coat or cover gown over your scrubs when you leave the department is your facility's policy. If you do, it is clean, and a reusable one is laundered after each day's use. There is no evidence that cover apparel keeps scrubs from being contaminated, and studies found people wearing the same coat for days or weeks before it was washed.
AST's 2008 attire standard recommends a long-sleeved, knee-length lab coat or cover gown, fastened, whenever you leave the department in scrubs, taken off before you come back into the semi-restricted area.
- Eye protection: Occupational Safety and Health AdministrationOH-shuh (said as a word)The US federal agency, part of the Department of Labor, that sets and enforces rules to keep workplaces safe.Full entry requires it whenever blood or body fluid could splash, and AST calls for it on every case. AST's first choice is goggles that are indirectly vented, coated against fogging and snug across the brow. Ordinary prescription glasses do not count, even with side pieces: wear goggles over them or get prescription inserts. AST says safety glasses do not give proper protection against infection, and that a mask with an attached eye shield should not be relied on for optimal protection. A face shield adds protection for the whole face; wear goggles under it, and a face shield never replaces the mask.
Other references still count glasses with solid side shields and a mask with an attached eye shield as eye protection, as the Core Curriculum's 2021 list does; AST's 2017 guideline treats neither as optimal protection.
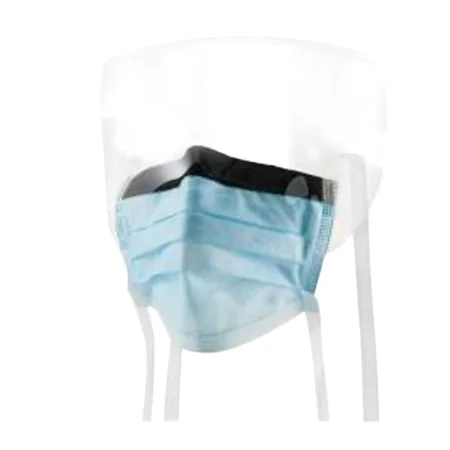
- Helmet or hood system: a helmet with a filtered fan, a clear face shield and a sterile hood or toga, usually worn for orthopedic surgeryor-thuh-PEE-dik SUR-juh-reeSurgery on the bones, joints, ligaments, tendons and muscles.ortho- straightped child (the specialty began with straightening children's bones)-ic relating toFull entry . It goes on over the scrubs, mask and head cover, and the sterile gown goes on over it.
Putting attire on and taking it off
Choose your protection for the case ahead, then dress in order: head cover, scrub suit with the top tucked in or close-fitting, jewelry off or confined, OR shoes and any shoe covers, then mask and eye protection before you enter the restricted area or start your scrub.
Take contaminated protection off in an order that keeps your hands and face clean. Shoe covers come off while you still wear gloves. Gloves come off before your goggles or face shield, because pulling gloves off can spatter blood, and goggles are handled only by the band, ties or earpieces, once your gloves are off. The mask comes off last, by its ties only, and then you wash your hands. At the end of the shift your head cover comes off and your scrubs go into the hamper for used attire, never back into a locker. Anything soiled comes off as soon as you can change it.
Laundering
Scrubs are washed by the facility's laundry or by an accredited commercial laundry. AST does not recommend washing scrubs at home. In one study, home-laundered scrubs carried more bacteria at the start of a shift than other scrubs did after a full day in the OR. Clean scrubs are stored in closed carts or cabinets.
What stays out of the OR
- Long or artificial nails: keep nails short and clean, no longer than 2 mm (0.08 inch), because longer nails hold more germs, are harder to clean and tear gloves more often. Artificial nails, tips, wraps and overlays are never worn by any team member, because they carry more bacteria and fungi. Long nails can also scratch a patient. Nail polish, where your facility allows it, must be fresh and unchipped.
AST's 2008 attire standard sets the limit at the tip of the finger: nails that reach past the fingertip can puncture gloves.
- Uncovered facial hair: a beard is covered completely, with a beard cover or a hood.
- False eyelashes: not worn.
- Jewelry: in the semi-restricted and restricted areas, jewelry comes off or stays confined inside your scrub attire, so it cannot be lost, fall onto the field or shed bacteria into a wound. All jewelry on the hands, wrists and forearms (rings, watches, bracelets) comes off before hand hygiene and the scrub: skin under a ring carries more bacteria, and rings can cause glove holes.
AST's 2017 jewelry guideline recommends taking off all jewelry before entering the OR, confined or not: rings, watches, bracelets, earrings, necklaces, and facial and oral piercings.
- Makeup and perfume: makeup and fragrance are limited by facility policy. Perfumed lotions are not used, because they can make a patient nauseated.
- Street clothes: nonsurgical clothing stays out of the semi-restricted and restricted areas, and personal items such as bags and phones must not contaminate them. A phone or tablet is cleaned the way its maker directs before it comes into the OR.
- Poor hygiene: daily bathing and clean hair cut down the skin oil and bacteria you shed. An inflamed or infected skin condition, or a cough or cold, can spread germs to patients, equipment and coworkers.
- Tattoos: AST's Core Curriculum names two concerns: a tattoo others may find offensive, and a tattoo where the skin is not intact, because broken skin can let germs in. Your facility's policy decides which visible tattoos are allowed.
Head cover first, mask fully on or fully off, hand jewelry off, nails short and natural. Every attire rule stops something you carry from reaching the wound.
3Planning the case
The schedule and the case plan
Assignments are usually posted the day before on a schedule board: the patient's initials, the procedure, the room, the surgeon, the anesthesia provideran-us-THEE-zhuh pruh-VY-derThe licensed professional who gives anesthesia and watches over the client's breathing and vital functions during a procedure.Full entry , the circulator, the scrub and sometimes the planned anesthesiaan-us-THEE-zhuhLoss of feeling or sensation, often brought on by drugs so that surgery or a procedure can be done without pain.an- withoutesthesi/o feeling, sensation-ia conditionFull entry . Check it again during the day, because cases are added, moved and canceled. Plan your time and tasks from it, so that everything is ready close to the start of surgery.
The name of the procedure on the schedule is your first clue: it tells you what you need to start the case plan. Chapter 1 teaches the word parts that medical terms are built from.
Then build a case plan (case planning is the systematic preparation for one procedure), a checklist in your head or on paper for this patient and this surgery:
- the procedure, and whether it is open or minimally invasive
- the planned anesthesia and the diagnosis
- imaging, such as a C-arm
- the patient's age group and weight or body mass index
- the position, the incision, and any special prep or draping routine
- implants, with their type and size if known, and how the wound will be closed and dressed
For implant surgery, make sure every instrument and device in the system is in the building on the day, and allow time to sterilizationstair-uh-luh-ZAY-shunA process that destroys all microorganisms, including spores, on an item; also a permanent birth control procedure.Full entry sets that are used for more than one case.
In many facilities, sterile processing assembles a case cart for each case; gathering the supplies is called picking or pulling a case. You check the cart against the case plan and the preference card, and get whatever is missing, or extra, from the instrument and supply rooms. Carts for emergencies, such as trauma, a craniotomykray-nee-OT-uh-meeSurgery in which a piece of the skull is removed to reach the brain, and usually put back at the end.crani/o skull-tomy cutting intoFull entry , an aneurysmAN-yuh-riz-umA weak spot in the wall of an artery that bulges outward like a balloon.aneurysm a widening (Greek)Full entry or a cesarean birthsih-ZAIR-ee-un berthBirth of a baby through surgical cuts in the belly and the uterus.Full entry , are kept ready to go.
What the surgery sets out to do
Operations can be grouped by their goal. The groups overlap, but operations with the same goal call for similar skills and supplies, so knowing the group helps your plan:
- Diagnostic: finds out what the problem is, as a biopsy or a contrastKON-trastA dye or other substance given before an imaging test so body parts show up more clearly.Full entry study of ducts or vessels does. In many facilities they are done in interventional radiology, and they almost always involve clinicians from other departments. Plan for: the target tissue and the technique; special equipment or drugs; specimens and how they are handled; how the result is recorded (a pathologypuh-THOL-uh-jeeThe study of disease and its causes and effects, or the disease changes found in a person or tissue.path/o disease-logy study ofFull entry report, a video, a fluoroscopic image); where it takes place and whether the pathologist knows; whether earlier images are in the room; and the anesthesia.
- Repair: restores function, in any kind of tissue, such as a herniaHER-nee-uhA bulge of an organ or tissue through a weak spot in the muscle or tissue wall that normally holds it in.Full entry repair with synthetic mesh or an orthopedicor-thuh-PEE-dikHaving to do with the bones, joints, muscles, ligaments and tendons, and the branch of medicine that treats them.orth/o straightped/o child (the field began with straightening children's bones)-ic relating toFull entry repair with a plate or screws. Plan for: what is repaired, the special instruments, the materials, how the repair is held (sutureSOO-cherA stitch, or the thread used to stitch, that holds the edges of a wound or incision together.Full entry , screws, fibrin glue), whether a recent injury limits positioning, and imaging.
- Removal: takes out tissue, an organ or a foreign body, such as a gallbladder, a metal shard or a bullet. Plan for: what is removed, the approach, whether a frozen section is needed, whether the wound is contaminated (removing a foreign body is), and how any forensic items are sent.
- Reconstruction: remodels or replaces tissue, for function or appearance, in one operation or in stages, often with specialty instruments, sometimes from more than one specialty. Plan for: the specialty instruments and whether they are on hand, imaging, any special precautionprih-KAW-shunA step taken ahead of time to prevent harm, such as the infection-control practices used with every client.Full entry the surgeon asks for, and implants or graftGRAFTTissue or a man-made material moved into place in surgery to replace or repair a damaged part.Full entry , with their handling.
The language of surgery
Surgeons share a vocabulary for what they do, the common language of every operating room. Knowing it helps you follow the case:
- amputationam-pyoo-TAY-shunThe removal of all or part of a limb or other body part, by surgery or by injury.Full entry : remove a limb or a digit. For other body parts the word is remove.
- anastomosisuh-nas-tuh-MOH-sisA connection between two tube-shaped structures, such as two ends of bowel or two blood vessels, made by surgery or found naturally.Full entry : joining two hollow structures, such as two ends of bowel or a vessel to another vessel, with suture or staples, usually to restore continuitykon-tih-NOO-ih-teeBeing unbroken over time; in health care, care that stays connected as a client moves between people and places.Full entry after a section is taken out.
- Approximate: bring tissue edges together, as when the skin edges are sutured.
- dissectdy-SEKT, or dih-SEKTTo cut apart or separate tissues carefully during surgery.Full entry : separate structures carefully. Sharp dissectiondy-SEK-shunA tear in the inner layer of an artery wall that lets blood split the layers apart; also, the cutting apart of tissue in surgery.Full entry uses scissors; blunt dissection teases tissue apart with a dissecting sponge on a clamp, a blunt instrument or the fingers, where cutting is not needed or would cause too much bleeding.
- debridementdih-BREED-muntThe removal of dead, damaged or infected tissue from a wound so it can heal.Full entry : cutting away dead tissue or removing debris from a wound, with sharp instruments or water under pressure. Traumatic and infected wounds usually need it.
- Debulk: remove a large part, but not all, of a tumor.
- Dog ear: an unwanted pucker in the skin left by poorly placed sutures. It is corrected, because puckered edges do not come together as the wound heals.
- Elevate: lift a structure without removing it, often with a retractorrih-TRAK-terA surgical instrument that holds back tissue or organs so the surgeon can see and reach the operative site.Full entry or an elevator, as when the periosteum is lifted off a bone before the bone is cut.
- Excise: cut out tissue, usually a small or superficial lesionLEE-zhunAn area of tissue that has been damaged or has changed from normal, such as a sore, wound, lump or spot.Full entry such as a mole.
- Exposure: a clear view of the area. "I need better exposure" usually means better retractionrih-TRAK-shunA drawing back or pulling in of tissue; in breathing, the skin sinking in between, below or above the ribs with each breath.Full entry .
- Exteriorize: bring a structure partly outside the body, such as a loop of bowel, or the uterus during a cesareansih-ZAIR-ee-unRelating to the birth of a baby through a surgical cut in the mother's abdomen and uterus.Full entry .
- Ligate: tie off a vessel, duct or tissue bundle with suture.
- resectionrih-SEK-shunSurgery to remove part of an organ or tissue.re- back, againsect to cut-ion processFull entry : removing a large portion or segment, often followed by repair, as in a bowel resectionBOW-ul ree-SEK-shunSurgery to remove a section of the small or large intestine.Full entry joined by an anastomosis.
- Surgical field and surgical wound: the field is the space taken up by the draped patient, the draped tables and equipment and the sterile team; the wound is the spaces and tissue reached through the incision.
- Undermine: separate one tissue plane from another, such as skin from fasciaFASH-ee-uhA sheet or band of tough connective tissue that covers and separates muscles and organs.fasci/o bandFull entry , by opening flat scissors between them.
- Visualize: see in detail. Direct visualization means with the naked eye, without magnification.
The preference card
A surgeon's preference card lists what one surgeon uses for one procedure: the equipment, the instruments, the supplies, the suture, the drugs and solutions (irrigationeer-ih-GAY-shunWashing out a wound, body cavity, tube or eye with a steady flow of liquid.Full entry , medications and skin prep), the positioning aids, the dressings and any specialty supplies, and the surgeon's glove and gown size and draping routine. It also lists hold items, things kept in the room unopened unless they are needed.
Pull the items on the card, then cross-check everything that was gathered against the card so nothing is missing when the case starts. Check medication doses on the card too. Cards go out of date and can be wrong. When one is, note the correction and give it to the person who updates the cards. If a surgeon has no card for a case, ask the surgeon.
The card exists so that the surgeon's needs are ready before they are needed. A delay from poor planning lengthens anesthesia time, which adds risk for the patient, upsets the schedule and costs money.
A new card starts with the surgeon: the information comes straight from the surgeon and is entered by a qualified member of the department, often into an electronic card linked to scheduling and billing. Spelling, drug names and strengths must be exact.
Keeping cards updated and accurate is a team effort. CSTs work with the surgeons when cards are reviewed, and current cards plus good communication with the surgeon help cut waste and supply costs. AST suggests auditing cases before a card is revised and considering two changes: listing only the items used more than 90 percent of the time, and marking items used half the time or less as hold items.
The patient
The card is the same for every patient; the patient is not. AST's Core Curriculum asks you to plan for:
- Allergies: to drugs, latexLAY-teksNatural rubber made from the sap of the rubber tree, used in some gloves, catheters and other medical supplies.Full entry , iodineEYE-uh-dyneA mineral the thyroid gland uses to make thyroid hormone; it is also used to kill germs on the skin and in some contrast dyes.Full entry , tape or other materials. Allergies are flagged on the chart, often with a bright label. A latex allergyLAY-teks AL-er-jeeAn allergic reaction to proteins in natural rubber latex, found in some gloves, catheters and other products.Full entry calls for a latex-safe room: latex-free gloves, and every reasonable effort made to keep latex away from the patient.
- comorbiditykoh-mor-BID-ih-teeA disease or condition that a person has at the same time as another, main condition.co- togethermorbid disease-ity state ofFull entry : other conditions the patient lives with. Diabetes, obesity, malnutrition, tobacco use and a weakened immune system all raise the risk of a surgical site infection. Arthritis means extra care with every move and position.
- Height and weight: a patient with a very high body mass index may need a high-capacity table (some bariatric tables hold 1,200 pounds), lifting equipment and extra-long instruments, and positioning devices sized to fit.
- Physical limitations: painful joints, as in arthritis, and other limits change how the patient can be moved and positioned, so the right aids are in the room before the patient arrives.
- Age: babies, children, older adults and frail patients lose body heat quickly under anesthesia, so plan for warming.
Planning for a child
Children are especially at risk because of their age, size and stage of development. Plan the setup for the child's size, from infant to teenager:
- Instruments: pediatric sets may be smaller in every dimension or only at the tips, and adult eye and microsurgical instruments are often used in pediatric plastic and urologic surgery. A general set swaps Kelly and Crile clamps for more mosquito clamps, uses short Babcock and Allis clamps and smaller retractors, and keeps plastic shods ready for the tips of fine hemostatHEE-moe-statA clamp with finger rings and a locking ratchet used in surgery to grasp and close off bleeding vessels.hem/o blood-stat stopping, standing stillFull entry . laparoscopiclap-uh-roh-SKOP-ikDone through a few small cuts in the abdomen with a thin camera and long instruments, instead of one large opening.lapar/o abdomen-scopic viewingFull entry trocarTROH-karA sharp or bladed instrument inside a tube (cannula), used to pierce a body wall and leave the tube in place as a port.Full entry and scopes are sized to the child, with shorter instruments and finer tips.
- Sponges: smaller laparotomylap-uh-ROT-uh-meeSurgery that opens the abdomen through a large cut to reach the organs inside.lapar/o abdomen-tomy cutting intoFull entry and gauze sponges, still only radiopaqueray-dee-oh-PAYKBlocking x-rays, so the material shows up white on an x-ray image.radi/o radiation, x-rayopaque not letting throughFull entry ones in a body cavity. A dissecting sponge still goes on a clamp, but a shorter one, and short sponge forcepsFOR-sepsA hand instrument with two blades or arms used to grasp, hold or pull tissue or objects.Full entry hold the gauze.
- Suture: smaller sizes for delicate tissue, absorbable more often except in heart, bone and reconstructive surgery. Monofilament nylon or polypropylene is common for skin, and the skin is often closed with a subcuticular suture and skin adhesive.
- Drugs: doses are ordered by the child's weight in kilograms, and the surgeon, the circulator and the scrub each verify the dose. Running totals of drugs such as local anestheticLOH-kul an-es-THET-ikA drug that blocks feeling in one part of the body without making the person unconscious.Full entry and vasoconstrictors are kept as the case goes, to prevent an overdose (chapter 12).
- Pressure: never rest heavy instruments or cords on the small body under the drapes, and never lean on it. Pressure can bruise, and pressure on the chest can hamper breathing.
- Positioning: have child-size gel or foam padding ready, because a child's skin is delicate. Move the joints only within their normal range, since a child's joints are very flexible but fragile. Never use adhesive tape to position a child, because it can badly injure the skin; soft hook-and-loop straps made for the pads are used instead.
Anesthesia for children, including parents at inductionin-DUK-shunThe starting of a process on purpose, such as bringing on labor or putting a client under anesthesia.Full entry , is in chapter 13. Transport by crib or isolette, and return electrodes in child sizes that are never cut, are in chapter 31.
Reading the chart
AST supports the CSTsee-es-tee (said as letters)Certified Surgical Technologist, a credential for surgical technologists; in maternity care, contraction stress test.Full entry reviewing the patient's chart, lab values and other test results before surgery. The chart is the record of the patient's care, and it tells the team what they need to know. Look for:
- Allergies, often on a bright label on the chart.
- Diagnostic tests and interventions: lab results, imaging reports and an electrocardiogramih-lek-troh-KAR-dee-oh-gramA test that records the heart's electrical activity as waves on paper or a screen.electr/o electricitycardi/o heart-gram recordFull entry , if ordered.
- History and physical: the patient's health history and exam, which help you predict the equipment and the problems the case may bring.
- Signed consents: for surgery, anesthesia and any special consent, such as for sterilization or blood. Before the patient is taken to the OR, the team checks the consent with the patient and against the history and physical and the schedule, so the procedure and side match, and any difference is resolved first; the form must be complete, signed, dated and witnessed before preoperative medication is given. Types of consent and who may witness them are in chapter 15.
- Surgeon's orders, and any advance directivead-VANS dih-REK-tivA legal document in which a person states their wishes for medical care, for a time when they cannot speak for themselves.Full entry , a document stating the care the patient wants if they cannot speak for themselves.
4Getting the room ready
The environment
- Air: an operating room has at least 20 air changes an hour of highly filtered air, and its air pressure is kept higher than the corridor's (positive pressure), so air flows out, not in, when a door opens. Some rooms add laminar air flow, a curtain of ultraclean air around the field; the tables go inside the curtain, and nobody stands between the curtain and the field.
- Doors: kept closed to hold the positive pressure.
- Temperature: usually 68 to 75 degrees Fahrenheit (20 to 24 degrees Celsius), adjusted when needed to keep the patient warm.
- Humidity: 20 to 60 percent relative humidity. Too dry, and static electricity builds; too damp, and molds and water-loving bacteria grow. Some supplies, such as sterilizationstair-uh-luh-ZAY-shunA process that destroys all microorganisms, including spores, on an item; also a permanent birth control procedure.Full entry indicators and electrodes, are made to be stored within their maker's humidity range.
- Damp dusting: before the first case of the day, the lights, furniture and fixed equipment are wiped with a clean, lint-free cloth and a hospital-grade disinfectantdis-in-FEK-tuntA chemical used on objects and surfaces to kill most germs.Full entry .
- Clutter: furniture and equipment the case does not need come out of the room.
Furniture and equipment
- Check that everything the case needs is in the room: IV poles, stools, the electrosurgeryee-LEK-troh-SUR-jer-eeUsing high-frequency electric current through a handheld tool to cut tissue or seal bleeding vessels during surgery.Full entry , suction and any specialty equipment.
- Group the furniture that will be draped (the back table, the Mayo standMAY-oh standA small tray on an adjustable stand placed over or beside the patient during surgery to hold the instruments used most often.Full entry and the ring stand) together, as far from the door and the traffic as you can, because opening doors and moving people stir up air and dust.
- Keep anything that will be sterile at least 12 inches from walls and nonsterile furniture.
- Put kick buckets, linen hampers and trash away from traffic and from the sterile furniture. The hampers get biohazard bags, and each kick bucket is lined with an impervious biohazard bag.
- Place the OR table under the lights where the surgeon wants it, with room for the anesthesiaan-us-THEE-zhuhLoss of feeling or sensation, often brought on by drugs so that surgery or a procedure can be done without pain.an- withoutesthesi/o feeling, sensation-ia conditionFull entry equipment, clean linen, arm boards and the safety strap, and have the positioning devices ready, sized to the patient. Keep a clear path from the door to the table, so the patient can be brought in and moved across.
- Have the patient's images ready, printed or on the room's computer. For a laser case, post the warning signs outside the doors and have the protective equipment ready (chapter 20).
- Test the equipment before the patient arrives: the electrosurgical unit, the monitors, suction (a new liner in the canister, tubing connected, pressure checked, and a separate suction for anesthesia), the tourniquet, the microscope and power equipment. A gas tank for power tools should be at least half full. Chapter 23 covers how each one is tested.
Yourself
Before you open anything, you are in clean attire, you have washed your hands, and your mask and eye protection are on.
Economy of motion
AST asks the scrub to set up with economy of motion: getting the most done with the fewest, safest movements. Its principles are:
- Think fast, but move carefully.
- Keep motions simple, useful, few and not repeated.
- Divide the back table into sections and work one section at a time.
- Follow the same logical order every time.
- Handle each item once. Once it is placed, leave it there.
- Move as little as you can, and face the sterile fieldSTAIR-ul feeldAn area set up with sterile drapes and supplies, kept free of all germs, for a sterile procedure.Full entry .
- Stay aware of the whole room: where nonsterile people are moving, and what around you is sterile and what is not. This spatial awareness becomes a sixth sense with practice.
A routine saves time and protects asepsisay-SEP-sisThe state of being free of germs that cause disease, and the practices used to keep things that way.a- withoutsep- decay or infection-sis conditionFull entry , because every extra move is another chance to contaminate something. The routine bends for the surgeon's preferences, an emergency and differences between products, so plan for those too.
Timing
Sterile supplies are opened as close to the start of surgery as possible, usually within 30 minutes. The scrub helps open, then scrubs about 10 to 20 minutes before surgery, depending on how complex the case is. Allow at least 20 minutes to set up a major case. The patient usually arrives while you are setting up, so keep noise and conversation down, and hold any request for more supplies until the circulator has finished checking the patient in and caring for them.
A sterile field is set up for one patient and one operation only. The longer it stands open, the more dust can settle on it, and one study found open trays growing contamination within 30 minutes that kept climbing over four hours.
Watching the field
Three habits keep a field safe once it is open:
- Item inspection: nothing goes onto the field until it has been checked (see the next section).
- Traffic: only the people working the case come and go, as little as possible. In one study of door openings during surgery, about a quarter were for supplies that should have been in the room already.
- Surgical conscience: you admit and fix every break, seen or unseen. Chapter 26 explains it.
Once the field is set up, someone watches it every minute. The scrub stays with it, even through a delay, and does not sit down. A field nobody watched is treated as contaminated and broken down.
5Opening the case
Check before you open
Before any sterile item is opened, the person opening it checks it. AST's Core Curriculum groups the checks this way:
- Expiration date, if it has one. On commercial products the date is usually about the product breaking down rather than about sterilitysteh-RIL-ih-teeThe state of being completely free of living germs, including spores; also, being unable to have children.Full entry , but an item past its date is not used. Sterility itself is event related: a package stays sterile until something happens to it, such as a tear or moisture (chapter 26).
- Integrity: the plastic dust cover is whole and sealed; a container's locks, latches and tamper-evident seals are intact; the package has no holes, tears, punctures, water marks or fraying; the wrapper is unbroken.
- Sterility: the outside indicator has changed color; inside, each tray's own indicator has changed too; no instrument is clamped shut (a closed ratchet); there are no foreign particles such as lint, hair, bone or tissue; there is no strike-through or moisture.
- Filters: a rigid container's filters are in place, whole and dry.
If any check fails, the item does not go on the field. Tell the circulator, and send reusable items back to decontaminationdee-kun-tam-ih-NAY-shunRemoving or destroying germs, chemicals or radioactive material from a person, surface or object to make it safe.de- removecontamination being made uncleanFull entry to be processed again.
Where and how items are opened
- Place each item where it will be opened: the back table pack on the back table, the basin set in the ring stand, instrument sets on flat surfaces, the skin prep tray on the prep table, and items for later within the circulator's reach. Every surface is clean and dry.
- Group like items, the same way on every case: all the drapes in one area, and the sharps in one corner of the back table with nothing opened on top of them, so you never find a blade by surprise.
- Open drapes in reverse order of use, so the last drape needed lands first and the first drape needed ends up on top.
- Back table pack: opened in place on the back table; its wrapper becomes the sterile table cover.
- Envelope-folded packs: the far flap first, then the sides, and the near flap last, toward you.
- Peel packs: peeled apart and the item flipped onto the field, or held for the scrub to lift out. The sealed edge is the line between sterile and nonsterile. Heavy or awkward items in peel packs, such as several clamps, are opened into a basin or handed to the scrub, because they can punch through the table cover.
- Container systems: checked, then the lid is lifted straight up, the opener steps back, and the lid is set aside safely.
- Fluids: poured only once, into a container the scrub holds out or sets at the table's edge. Whatever is left in the bottle is thrown away, never poured again, and the cap is never put back.
- Medications: passed to the field with surgical asepsisSUR-jih-kul ay-SEP-sisPractices that keep an area or object completely free of microorganisms; also called sterile technique.a- withoutsepsis decay, infectionFull entry , such as through a sterile transfer device or with a sterile syringe and needle, then labeled at once. Chapter 12 covers drugs on the field.
- Sharps: best handed straight to the scrub, or opened onto a spot on the back table where they cannot be missed.
- Heavy instrument trays: opened on their own small table.
- Hold items: extra sutureSOO-cherA stitch, or the thread used to stitch, that holds the edges of a wound or incision together.Full entry , special equipment and implants stay unopened until it is clear they will be needed.
- Waste: clean wrappers go in the clean trash, not the kick bucket, which is kept for sponges. Break tape on a wrapper rather than tearing the wrapper.
Chapter 26 shows the hand movements for each kind of package. The rule behind them all: stand close enough to land the item on the field, never reach over the field, and keep your nonsterile body at least 12 inches from it.
The opening sequence
Open in the same order every time, from large to small, so each item lands on a sterile surface that is already open and nothing is piled into a tower that can topple:
- Back table pack.
- Basin set, placed in the ring stand.
- Small wrapped items, such as the towel pack.
- Peel packs, including suture.
- Instrument sets and container systems.
Open your own gown and gloves on a surface of their own, such as the Mayo standMAY-oh standA small tray on an adjustable stand placed over or beside the patient during surgery to hold the instruments used most often.Full entry , with the gloves beside the gown, not on top of it. They never go on the back table, whether you will do a wet scrub or a waterless one. Water dripping from your arms would land on the field, and reaching onto the back table as a nonsterile person breaks the rule against reaching over a sterile fieldSTAIR-ul feeldAn area set up with sterile drapes and supplies, kept free of all germs, for a sterile procedure.Full entry .
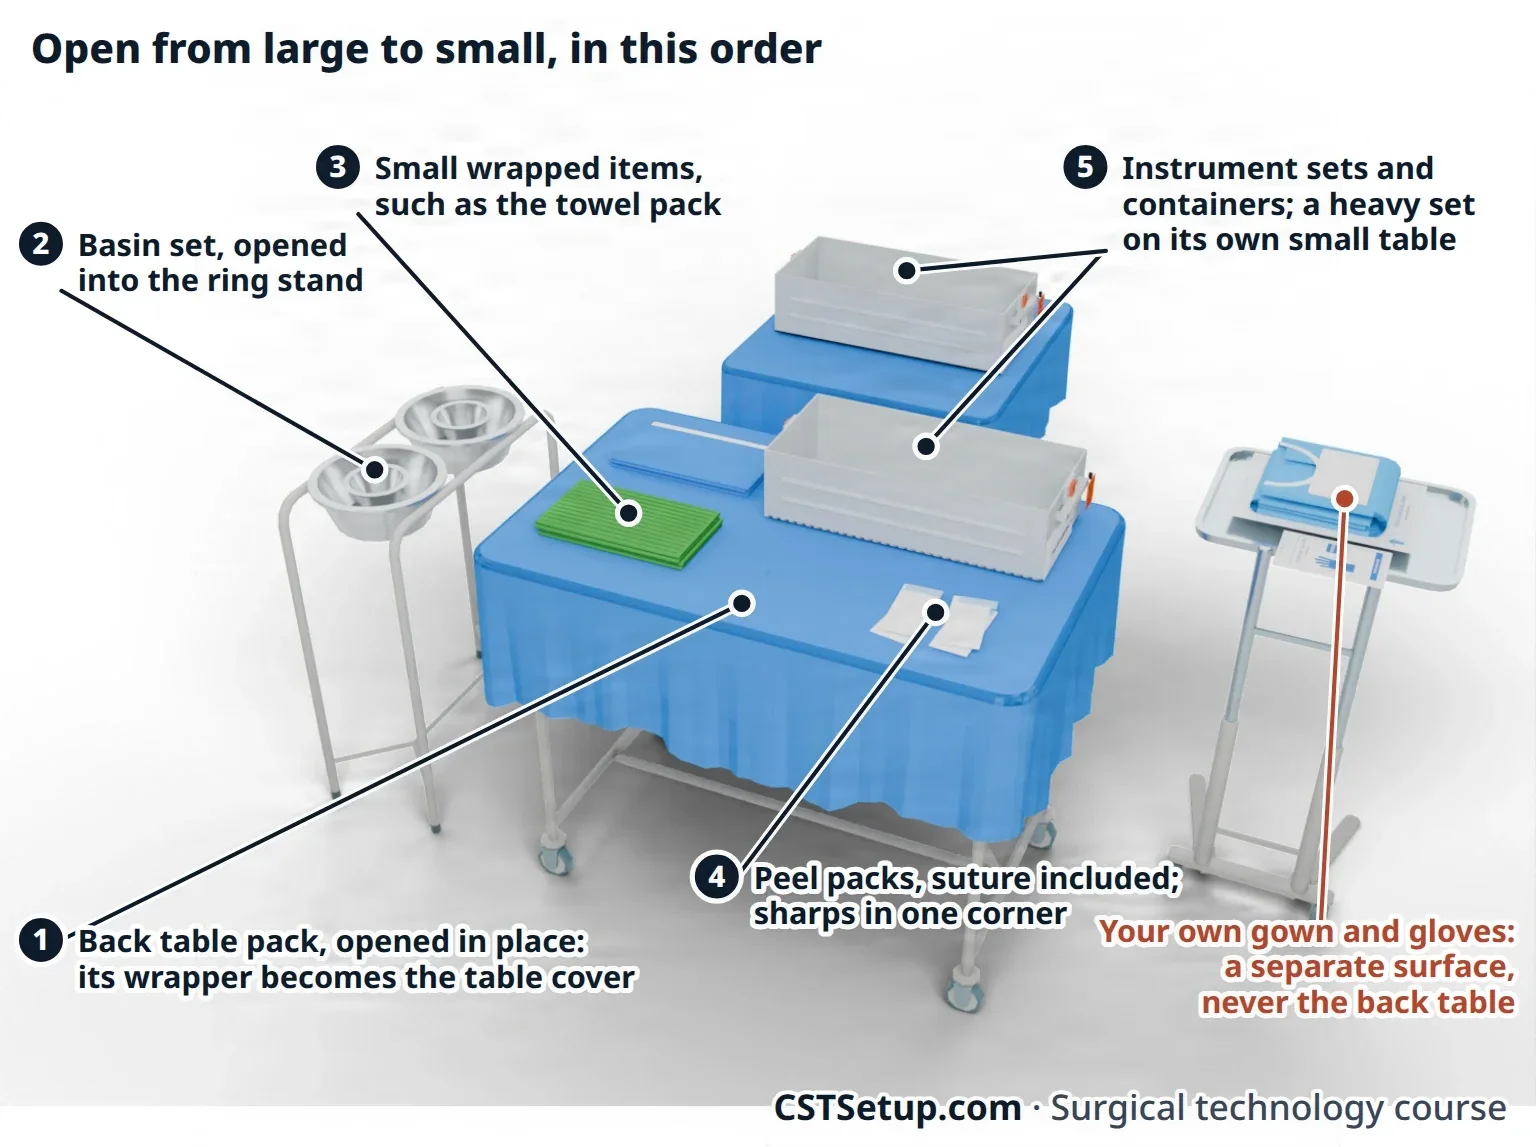

Back table pack, basin set, small wrapped items, peel packs, instrument sets. Your own gown and gloves go on a separate surface, never on the back table.
When something goes wrong while opening
Contamination during opening happens. Fix it at once, and tell the people it affects. AST's Core Curriculum names five situations:
- An item falls on the floor: a package wrapped in woven fabric is contaminated. One in an impervious wrapper may be opened and used right away if it is whole and landed on a dry spot, but it never goes back on the shelf.
- An item hangs below the edge of the sterile field: the part below the tabletop is nonsterile and is never pulled back up. Replace the item.
- An item touches a nonsterile surface: remove it, remove anything it touched, and change the gloves of anyone who handled it.
- An item's integrity is compromised, such as a torn, wet or punctured package: it is not used.
- Foreign particles are present, such as hair, lint or bone in a set: the whole package or set counts as nonsterile. Hand it off to the circulator and change your gloves.
The same goes for a set with an unchanged internal indicator, a clamped instrument, a wet tray or a torn container filter: the whole tray is contaminated. Hand it off and change your gloves. Chapter 26 covers breaks in technique in full.
Some references treat a dropped pack as contaminated whenever it had only one wrapper or looks damaged.
6Caring for your hands
Your hands are the tools that touch everything in surgery, and intact skin is your first defense against germs. Skin that is cut, burned or cracked lets germs in and lets fluid out, putting both you and the patient at risk.
Hand and skin care
- Fingernails: short and clean. Clean under them with a disposable nail cleaner, because most of the germs on your hands live under the nails.
- Cuticles: keep them clean and in good condition. Trim a cuticle only with care, so it does not tear and become infected.
AST's 2008 attire standard advises never trimming or cutting the cuticles, keeping them clean and intact, because broken skin lets germs in.
- Skin: use only a lotion your facility approves. Some lotions weaken the scrub antiseptic chlorhexidine, petroleum-based lotions break down latexLAY-teksNatural rubber made from the sap of the rubber tree, used in some gloves, catheters and other medical supplies.Full entry gloves, and scented ones can make patients nauseated.
- Overly dry skin becomes sore and cracks open. Care for your hands every day, at work and at home.
- dermatitisder-muh-TY-tisInflammation of the skin.dermat/o skin-itis inflammationFull entry : irritated or broken-down skin, which can become infected, from frequent hand hygiene and scrubbing. Alcohol hand rubs and cooler water help prevent it. See a dermatologist about any skin problem, because the fix may be as simple as a different glove.
- Allergic reactions: latex can cause three kinds of reaction. Irritant contact dermatitisKON-takt der-muh-TY-tisInflammation of the skin caused by direct contact with a substance that irritates it or to which the person is allergic.derm/o, dermat/o skin-itis inflammationFull entry , the most common, is dry, red, itchy, cracked skin but is not a true allergy. Allergic contact dermatitis is a delayed reaction to chemicals used to make gloves. A true latex allergyLAY-teks AL-er-jeeAn allergic reaction to proteins in natural rubber latex, found in some gloves, catheters and other products.Full entry is a reaction to the latex proteins themselves, usually within minutes, and can cause urticariaur-tih-KAIR-ee-uhHives: raised, red, itchy welts on the skin.urtic nettle, the stinging plant-aria conditionFull entry , trouble breathing and anaphylaxisan-uh-fuh-LAK-sisA sudden, severe allergic reaction that affects the whole body.ana- away, against-phylaxis protectionFull entry . Latex-free gloves are provided for any worker with a latex sensitivitysen-sih-TIV-ih-teeHow strongly something responds; in lab work, which drugs stop a germ, or how well a test finds people who have a disease.Full entry .
- Non-intact skin: inspect your hands and forearms before every scrub. Abrasions, burns, cuts, an infection or any open lesionLEE-zhunAn area of tissue that has been damaged or has changed from normal, such as a sore, wound, lump or spot.Full entry may keep you off the sterile team, depending on how much skin is damaged.
The medical hand wash
The everyday hand wash removes dirt and the germs you pick up as you work. Hand hygiene, whether washing with soap and water or using an alcohol hand rub, is the single most important way to prevent infection in health care. Gloves never replace it.
Hand hygiene and personal protective equipment are both part of standard precautions, which are used with every patient in every care setting.
Wash your hands:
- before and after contact with each patient, in the OR too
- after taking off gloves, sterile or exam
- after touching blood, body fluids or a contaminated object
- before you open sterile supplies
- when you start work, and when you come back from a break, from eating or from the restroom
To wash: take off your rings and watch, wet your hands with comfortable, not hot, water, apply the antimicrobialan-tee-my-KROH-bee-ulA drug or substance that kills or slows the growth of microorganisms such as bacteria, viruses, fungi or parasites.anti- againstmicro- smallbi/o life-al relating toFull entry soap, and rub every surface of your hands and fingers, and under your nails, for at least 20 seconds. Rinse, dry with a paper towel, and turn off a hand-operated faucet with the paper towel.
The CDC's 2002 hand hygiene guideline and AORN's 2021 guidance set the minimum at 15 seconds of rubbing.
An alcohol-based hand rub (hand sanitizer) can take the place of washing when your hands are not visibly dirty. Use the amount the maker recommends to cover every surface of your hands and wrists, and rub until dry. Rubs with 60 to 95 percent alcohol work best. When your hands are visibly soiled or have blood on them, wash with soap and water instead, because dirt and protein weaken the alcohol's action.
7The surgical scrub
The surgical scrub, also called surgical hand antisepsis, is done by every member of the sterile team who will wear a sterile gown and gloves. It removes dirt and the passing (transientTRAN-zee-entLasting only a short time and then going away.Full entry ) germs from your nails, hands and forearms, brings the germs that live in your skin (resident flora) down to an irreducible minimum, and keeps acting on the skin to slow their regrowth. That lasting action matters, because bacteria multiply quickly in the moist space between glove and skin, especially if the glove is punctured.
Getting ready to scrub
- Open your own gown and gloves in the room first, on their separate surface.
- Choose your scrub product. Your facility provides antiseptics approved by the FDA that act fast against a broad range of germs, keep working (persistent) and build up with use (cumulative). Common choices are chlorhexidine gluconate, iodophors such as povidone-iodinePOH-vih-done EYE-uh-dineA brown antiseptic solution of iodine used to kill germs on the skin before procedures and on wounds.Full entry , and alcohol-based products that contain chlorhexidine.
- Take off all jewelry from your hands and arms, so the antiseptic reaches every part of the skin.
- Roll your scrub sleeves up if needed, so you can reach 2 inches above the elbow, and tuck in your scrub top, or make sure it fits close to your body, so it stays dry.
- Put on your mask and eye protection before you begin.
- Inspect your hands, arms, nails and cuticles.
Two methods
Current guidance gives two ways to do surgical hand antisepsis, and your facility chooses the method and the product:
- Timed scrub: you scrub with an antiseptic soap and a soft, nonabrasive sponge for the time the antiseptic's maker sets, usually 2 to 6 minutes in all, giving each finger, the hand and the forearm four sides. The American College of Surgeons recommends at least 2 minutes. Long scrubs, such as 10 minutes, are not needed: studies found a 5-minute scrub works as well as a 10-minute one, and a shorter scrub does less damage to the skin.
- Waterless and brushless (surgical hand rub): clean under your nails under running water first, and wash your hands and forearms with soap and water if they are visibly soiled, because a rub does not remove dirt. Dry them completely with a paper towel. Then apply an alcohol-based surgical hand rub, one approved for surgical hand antisepsis, exactly as its maker directs, covering every surface of the hands and arms and keeping them wet for the stated time (2 to 3 minutes is typical). Let them air dry completely before you gown: no towel. When properly done, a hand rub works as well as a scrub on hands that are not grossly soiled.
A sponge, not a brush: brushes can damage the skin, and damaged skin sheds more germs. AST also accepts a scrub with no brush or sponge at all.
The counted brush stroke method gives each area a measured number of strokes with a scrub brush; one skills checklist gives the nails 30 strokes and every other area 20, from the fingers to 2 inches above the elbow. AST's 2008 standard and the 2021 Core Curriculum still accept it beside the timed method.
The critical elements
Whatever the method, these rules do not change:
- Wash first if your hands are visibly soiled, with soap and water.
- Clean under each nail with a disposable nail cleaner under running water. Throw it away, never into the scrub sink.
- Start at the fingertips and end 2 inches above the elbows. Never go back to an area you have already scrubbed.
- Four planes: think of each finger, the hand and the forearm as having four sides, and scrub every one, including the web spaces between the fingers.
- One side at a time: scrub one hand and arm completely, then the other.
- Hands above elbows, elbows bent, so water runs off your elbows and away from your clean hands, and keep your arms away from your scrub suit. A wet scrub top can soak through your gown later.
- Keep scrubbed skin off the sink, the faucet and your scrub suit. An area that touches one is contaminated, so scrub that area again.
- Follow the antiseptic maker's instructions and your facility's policy, and turn the water off when you are not using it.
AST's 2008 standard prewashes the hands and forearms with soap and water before every scrub, whether or not they look soiled, and the 2021 Core Curriculum lists the prewash among the critical elements. Some references also wash before every hand rub.
When you finish, walk to the room with your hands up and in front of you, between your waist and mid-chest, and back through the door.
Drying your hands and arms
After a wet scrub, dry your hands and arms with the sterile towel from your gown pack:
- Pick up the towel, lift it up and away from the table, and step back from the table.
- Let it open lengthwise, and bend forward a little so it cannot touch your scrub suit.
- With one end, blot one hand and then the arm, moving from the hand toward the elbow and never back.
- Hold the dry hand under the other end and dry the other hand and arm the same way.
- Drop the towel into the kick bucket or hand it to the circulator.
The most common mistake is letting the towel brush the scrub suit; keep it out in front of you, where you can see it.
8Gowns and gloves
Choosing a gown
Sterile gowns are single-use nonwoven fabric or reusable woven fabric, and many have an extra fluid-proof layer across the front. The gown is a wraparound style that covers your back, though the back still counts as nonsterile. Gowns should resist fluid, tears and punctures, shed no lint, and resist flame.
Gowns are rated for how well they block fluid, from Level 1 (minimal protection) to Level 4 (high protection), under the ANSI/AAMI standard. The critical zone is where blood is most likely to hit. It usually takes in the front of the gown between the chest and the knees, plus each sleeve from the cuff to above the elbow, and the gown's label shows it.
Select a gown by:
- Procedure type: open or minimally invasive, how long it lasts, and how much blood loss and irrigationeer-ih-GAY-shunWashing out a wound, body cavity, tube or eye with a steady flow of liquid.Full entry are expected.
- Protection level: matched to the expected exposure. Little fluid reaches the gown during eyelid surgery, so a basic gown is enough; a hip replacement calls for maximum reinforcement. Choosing the right level also controls cost.
- Surgeon preference: each surgeon's gown and glove sizes are on the preference card.

Choosing gloves
- Material: natural rubber latexLAY-teksNatural rubber made from the sap of the rubber tree, used in some gloves, catheters and other medical supplies.Full entry , or a synthetic such as nitrile or neoprene, which protects as well and is the choice for anyone with a latex sensitivitysen-sih-TIV-ih-teeHow strongly something responds; in lab work, which drugs stop a germ, or how well a test finds people who have a disease.Full entry . Vinyl gloves are not recommended, because they break down quickly.
- Powder-free: the FDA has banned powdered gloves, because glove powder carries latex proteins into the air and causes adhesionad-HEE-zhunA band of scar tissue that joins two surfaces inside the body that are normally separate.ad- towardhes stick-ion conditionFull entry and inflammation in patients.
- Thickness: thin gloves give more feel for delicate work; thicker gloves suit heavy instruments or heavy bleeding. For orthopedicor-thuh-PEE-dikHaving to do with the bones, joints, muscles, ligaments and tendons, and the branch of medicine that treats them.orth/o straightped/o child (the field began with straightening children's bones)-ic relating toFull entry work AST suggests a glove liner or a cloth outer glove between or over the standard pairs.
- Long-cuff gloves reach far up the forearm, for manual procedures inside the uterus, such as removing a retained placentapluh-SEN-tuhThe organ that grows in the uterus during pregnancy and passes oxygen and food from the parent's blood to the fetus.Full entry by hand.
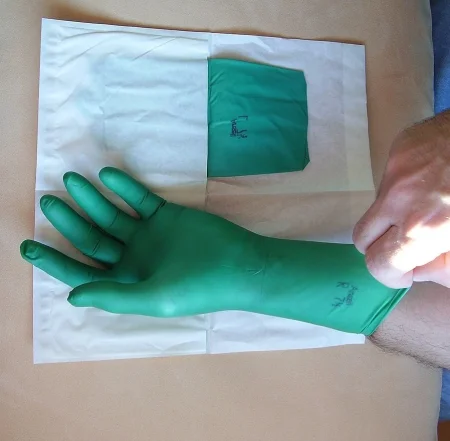
- Double gloving: AST recommends two pairs of gloves for every operation, with a colored inner pair. The second pair cuts the number of holes that reach the inner glove, a sharp that passes through the outer glove leaves some of its blood behind, and a hole in the outer glove shows up against the color underneath. Change any glove you doubt.

Gowning yourself
Chapter 26 explains which parts of a gown are sterile. In short: you lift the gown by its inside just below the neckline, step back, let it unfold, and slide your arms into the sleeves, stopping before your hands pass the seam where sleeve meets cuff. The circulator pulls it onto your shoulders by the inside and fastens the neck and inner waist ties.
Closed gloving
When you glove yourself, as the first scrub of the case must, use closed gloving: your bare hands never touch the outside of a glove. When another scrubbed person is there to help, being gloved by them (assisted gloving, under Gowning and gloving the team) is preferred, because the gown cuffs are not sterile. In closed gloving your hands stay inside the sleeves the whole time:
- Through the sleeve, open the glove wrapper.
- Turn one sleeved hand palm up. Pick up the matching glove through the other sleeve and lay it on that palm, palm down, fingers pointing toward your elbow, with its cuff lying over the gown cuff.
- Through the sleeve, hold the glove's lower cuff with the hand underneath. With the other sleeved hand, take the top layer of the glove's cuff and stretch it over your hand and the gown cuff.
- Push your hand out through the gown cuff into the glove as you pull the glove on, and work your fingers into place.
- With the gloved hand, glove the other hand the same way.
- Put on the second, outer pair over the colored first pair.
AST's 2014 gowning standard recommends closed gloving as the way to put on gloves, because the fingers, hands and wrists are never exposed.
Turning the gown
The last step is turning: closing the wraparound back. Stand at least 12 inches from anything sterile and face the field. Hand the tab on the front tie to the circulator. The circulator walks around behind you while you stand still, then you turn slightly and take the sterile tie while the circulator pulls the tab free, and you tie the gown. AST has you stay still so the back of your gown never faces the field, you do not stir up dust or make the gown billow, and the two of you move together.
The traditional method, which other references still teach, has the scrub turn: the circulator holds the tab while the scrub makes a three-quarter turn, so the flap wraps around the back, then takes the sterile tie as the circulator pulls the tab free.
Open gloving
Open gloving is for sterile tasks without a gown, such as a skin prep, a urinary catheter or a small procedure. During surgery it is a last resort for changing a glove. Here the inside of the glove, which your bare hand touches, becomes nonsterile; the outside stays sterile, and so does the wrapper except its outer inch:
- Clean your hands. Open the glove wrapper by its edges.
- With one hand, pick up the other glove by its folded cuff, touching only the inside, and pull it on without unfolding the cuff.
- Slide the fingers of the gloved hand under the cuff of the second glove, touching only its outside, and slide your bare hand in.
- Pull the second glove on and unfold its cuff, then turn the first cuff up with your gloved fingers, never touching bare skin.
Gowning and gloving the team
The scrub usually gowns and gloves the surgeon and assistants, and in a contamination the scrub may need the same help. This moment often sets the tone for the whole case: the surgeon greets the team and may ask for special equipment.
- Towel: after a wet scrub, open a towel and lay one end over the person's outstretched hand.
- Gown: hold the gown by its outside, inside facing the person, with your gloved hands tucked under a wide cuff made from the neck and shoulders. They slide their arms into the sleeves. Their hands stay inside the cuffs, at or past the fingertips. The circulator pulls the gown on from behind and ties it.
- Gloves: by custom, right hand first. Hold the glove open by spreading the cuff with your fingers underneath it and your thumbs out of the way, palm facing the person. They push their hand in, gown cuff and all, and you pull the glove cuff up over the gown cuff and let it go gently, without a snap. Repeat for the left, then the outer pair.
- Turn: once they are gloved, turn the gown with them and hand them the tie.
When you reglove someone after a contaminated glove, their gown cuff stays at the wrist, and the glove goes on over it the same way.
If your hand slips past the gown cuff, or a glove touches anything you are not sure is sterile, stop and fix it before you go on. If there is any doubt about a glove, change it.
Taking off gown and gloves
At the end of the case the gown and gloves come off together, so that your bare hands touch only their insides:
- Grasp the front of the gown with your gloved hands and pull it away from your body, so the fasteners at the neck and waist break. If the neck ties cannot break, another team member undoes them, or you undo them without touching your neck.
- Roll the gown off your arms inside out into a bundle, so the dirty outside ends up inside.
- As the gown comes off, peel the gloves off with it, turning them inside out. Your bare hands touch nothing but the insides of the gown and gloves.
- Place the bundle in the biohazard bag or linen hamper; never fling or snap a gown or glove into a bin, which spatters blood. Then wash your hands.
AST's 2014 gowning standard takes the gown off before the gloves. The gloves then come off one at a time: grip the first glove at the palm with the other gloved hand and peel it off inside out (glove to glove), then slide a bare finger under the second cuff and peel it off (skin to skin).
AST's position is that the scrub keeps gown and gloves on, and the Mayo standMAY-oh standA small tray on an adjustable stand placed over or beside the patient during surgery to hold the instruments used most often.Full entry sterile with a few instruments ready, until the patient has left the room, in case the wound must be reopened quickly or an emergency tracheotomytray-kee-OT-uh-meeThe surgical cut made into the windpipe through the front of the neck.trache/o windpipe-tomy cutting, incisionFull entry is needed. Chapter 30 covers breaking down the field.
9Setting up the back table
Right after you gown and glove, organize the field. Arranging the sterile items on the back table, the Mayo standMAY-oh standA small tray on an adjustable stand placed over or beside the patient during surgery to hold the instruments used most often.Full entry and any other tables is called the sterile setup. Do not start shifting the pile of supplies around aimlessly: that adds motion and risk without moving the setup forward. Work in sections, and put each item in its final place once.
First, make room
Drape the Mayo stand early, which enlarges your sterile work area (see the next section). Extra tables for more instrument sets or power equipment go right beside the back table so the sterile fieldSTAIR-ul feeldAn area set up with sterile drapes and supplies, kept free of all germs, for a sterile procedure.Full entry stays continuous.
Order of use
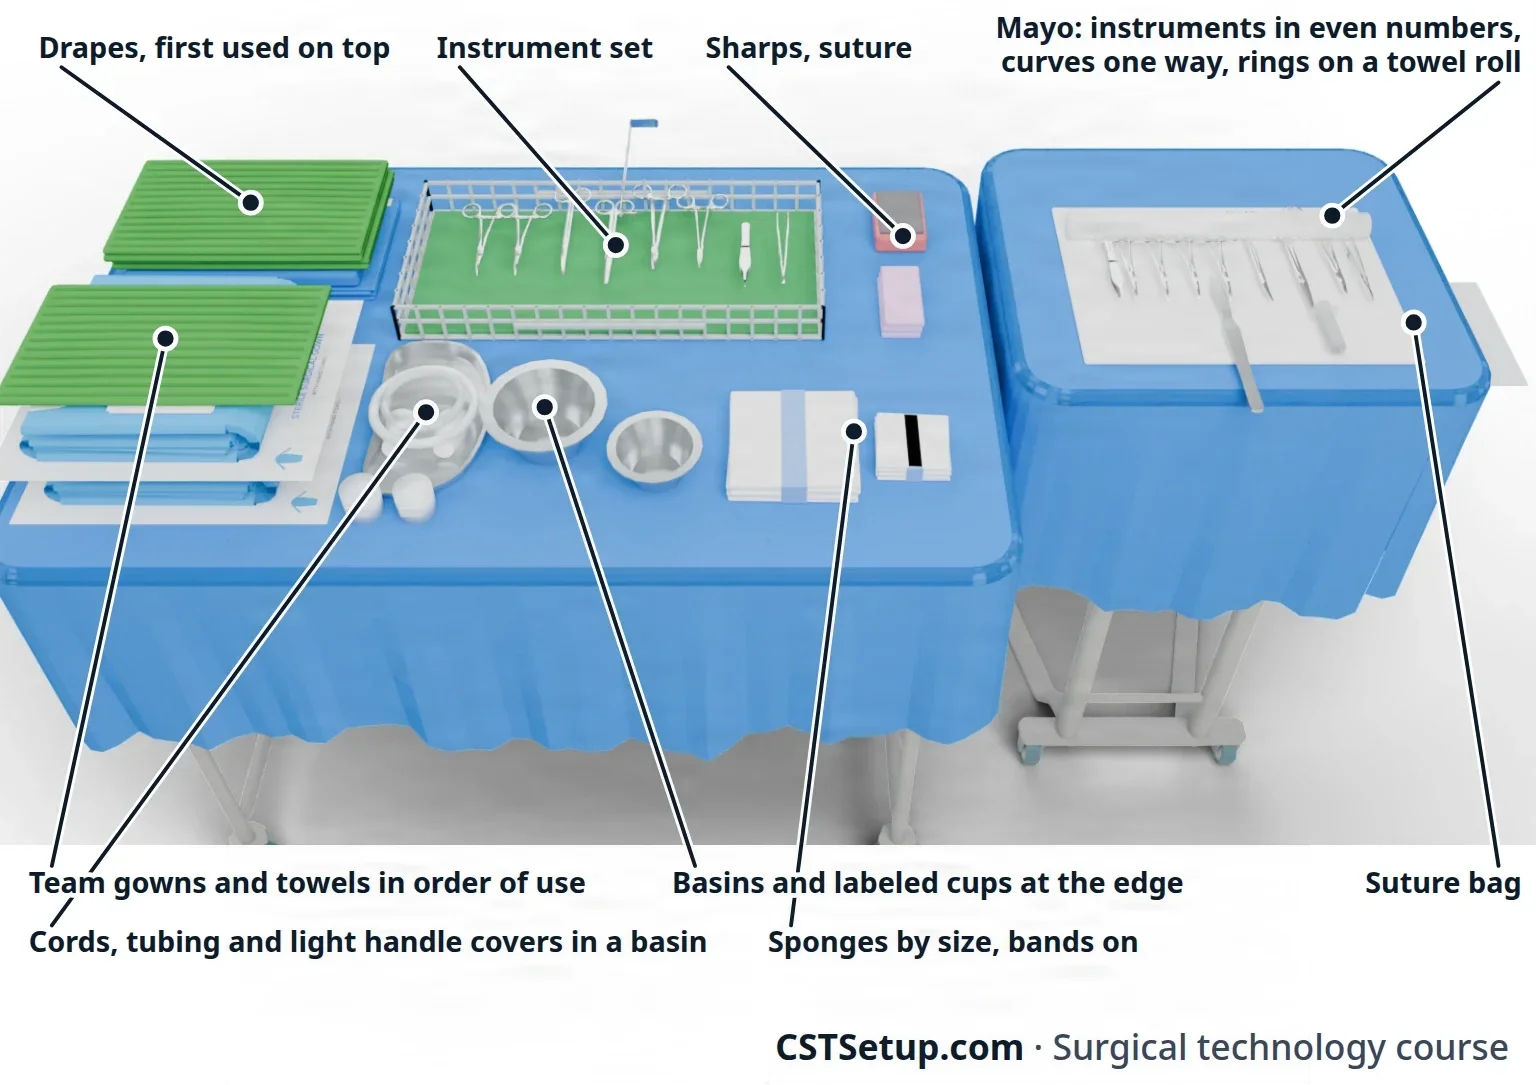
Arrange the items needed first at the top of your routine. A typical order, which can change with the procedure, the surgeon's preference and facility policy:
- Gowns and gloves for the rest of the sterile team, stacked in the order you will hand them out, such as towel, gown, towel, gown.
- Drapes, with the first one used on top and the last on the bottom, and the four towels to square off the incision ready to hand up.
- Light handle covers.
- Cords and tubing, such as the electrosurgeryee-LEK-troh-SUR-jer-eeUsing high-frequency electric current through a handheld tool to cut tissue or seal bleeding vessels during surgery.Full entry pencil and the suction tubing with its tip attached, kept in a corner or an empty basin. Drapes and gowns never sit on a basin of fluid, where they can soak through.
Then come the instruments, sponges, sharps and sutureSOO-cherA stitch, or the thread used to stitch, that holds the edges of a wound or incision together.Full entry needed to start, so the case can begin even if the rest of the setup is not finished.
Like items together
Group similar items, the same way every case:
- Basins and cups, by purpose: irrigationeer-ih-GAY-shunWashing out a wound, body cavity, tube or eye with a steady flow of liquid.Full entry , medication, specimens.
- Drapes.
- Instrument sets.
- Sharps, near the back table's sharps container, usually in a corner.
- Sponges, in an upper corner, left to right by size, such as laparotomylap-uh-ROT-uh-meeSurgery that opens the abdomen through a large cut to reach the organs inside.lapar/o abdomen-tomy cutting intoFull entry sponges and then 4 by 4 sponges, with their bands left on until you count them.
- Suture, in the order the surgeon will use it, and it may sit in a small basin or tray.
Reinforce the table
As space opens up, lay cloth towels edge to edge over the back table cover to reinforceree-in-FORSTo repeat and support teaching or care that has already been started, so the client remembers and follows it.Full entry it. Thin paper towels are not strong enough. Some back table covers come already reinforced.

Basins, cups and labels
- Take the kidney basin and the medicine cups out of the basin set.
- Set each medicine cup, and any graduated pitcher, at the very edge of the table so the circulator can pour without reaching over the field; then move it in.
- Place the basins so the circulator can pour water and saline without reaching over the field. Use one basin for irrigating the patient and a second only for wetting sponges, because sponges shed lint into the fluid, and lint left in a wound contributes to foreign-body reactions.
- Keep sterile water for soaking instruments, never saline, which corrodes steel.
- Water and saline are poured only when you are there to receive them, and the wound irrigationwoond ir-ih-GAY-shunFlushing a wound with a steady stream of fluid, usually sterile normal saline, to wash out debris and germs.Full entry is kept separate. You measure and record the irrigation as it is used, so blood loss can be worked out accurately (chapter 29).
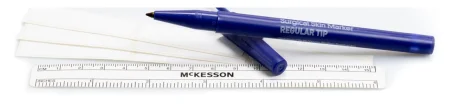
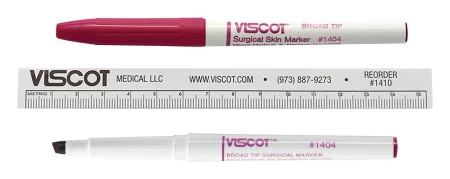
- Have a sterile skin markerMAR-kerSomething that can be measured, such as a substance in the blood, that shows a disease or body process is present.Full entry and labels ready whenever dyes, medications or solutions will be used.

Medications on the field
Make a zone on the back table for labeled drugs and the labeling supplies. When the circulator delivers a drug, you both confirm its name, strength (dose) and expiration date, and you label its cup or syringe right away. Label every medication and solution on the field, and the basin, cup or syringe that holds it, even if it is the only one. The label gives the drug's name, its strength, the amount if the container does not show it, and any diluent, and it never covers a syringe's markings. Anything unlabeled is thrown away. Empty vials and containers stay in the room until the case ends. During the case you are responsible for every drug on your back table: know each one's name and strength, any mixing it needed, how it is delivered and how much has been used. Chapter 12 covers drugs on the field in depth.
Instruments
- Before a set goes on the back table, check that its internal indicator has changed, and that it holds no hair, bone or tissue.
- Lift a basket out of a rigid container straight up, without the basket or your gloves touching the container, and hold it away from your gown until the circulator has checked the filters and the container's bottom for moisture. If anything fails, hand the tray off and change your gloves.
- Before you take out any ringed instrument, check that none is clamped shut. One ratcheted instrument makes the whole tray contaminated, because the sterilantSTAIR-uh-luntA chemical that kills all forms of microbial life, including bacterial spores.Full entry could not reach the closed surfaces.
- Sort instruments by category as you remove them. If trays must be stacked, the heavier ones go on the bottom. Learn where each instrument sits on the back table, so you never hunt for one during the case.
- Lay instruments on a stringer on a rolled towel, then take the stringer off.
- Keep heavy instruments, such as retractorrih-TRAK-terA surgical instrument that holds back tissue or organs so the surgeon can see and reach the operative site.Full entry , in the tray or flat on the table, with sharp retractors and bone hooks turned so nobody grabs a point.
- Lay forcepsFOR-sepsA hand instrument with two blades or arms used to grasp, hold or pull tissue or objects.Full entry flat; never hang them over the tray's edge.
- Group curved instruments with the curves facing the same way.
- Take off every tip protector and sleeve and remove it from the field. They do not show on x-ray and could be left in the wound.
- Assemble any instrument that needs it, and test instruments as you go: scissors close smoothly, jaws close with no gaps and the tips meet, ratchets hold, and power equipment works before the patient comes in. A damaged instrument goes to the circulator, and if it is counted, it stays in the room until the end of the case.
Keep it standard
Some facilities require a standard setup, so that anyone who takes over at a break or a shift change knows where everything is. Even when yours is your own, keep it the same every time. Once the setup is done, handle things as little as possible.
A second back table, when needed, is opened with the other supplies. If you drape it yourself, unfold the cover toward you first, to cover the front of the table, then away.
10Setting up the Mayo stand
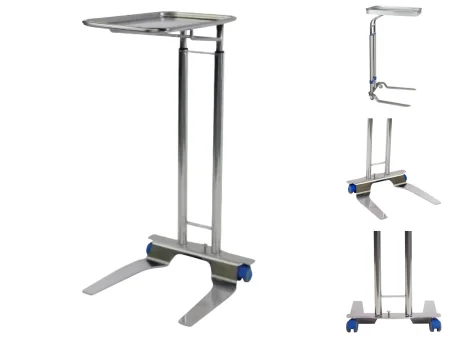
The Mayo standMAY-oh standA small tray on an adjustable stand placed over or beside the patient during surgery to hold the instruments used most often.Full entry is your personal workspace, kept for the instruments and supplies needed right away and over and over. Each scrub develops a Mayo setup that works, unless the facility requires a standard one, but it is always neat: a messy Mayo leads to lost needles, needlesticks and slow passing.
Draping the Mayo
- Hold the folded Mayo cover with your gloved hands well inside its cuff.
- Slide the open end over the front of the tray and push it on, unfolding it over the frame as you go.
- The circulator can help by pulling the lower part down by its edge.
Because the stand is covered by a closed sleeve and goes over the patient only after draping, AST counts its underside as sterile too. The draped upright counts as sterile at or above the height of the OR table (chapter 26).
You may hear that the underside of the Mayo stand is nonsterile because the scrub cannot see it. That question was debated for years; AST's 2017 guideline settles it as sterile, because the closed drape encloses the stand.
Lay one or two cloth towels over the covered tray. They cushion the instruments and make it harder for a sharp to punch through the cover. For microsurgery, eye and ear cases, use a lint-free nonwoven cover instead, so fine instruments do not snag.
What goes on the Mayo
- The starting instruments: knife handles with blades loaded, forcepsFOR-sepsA hand instrument with two blades or arms used to grasp, hold or pull tissue or objects.Full entry , dissecting scissors, clamps, shallow retractorrih-TRAK-terA surgical instrument that holds back tissue or organs so the surgeon can see and reach the operative site.Full entry , a couple of sponges and the first ties, with the electrosurgeryee-LEK-troh-SUR-jer-eeUsing high-frequency electric current through a handheld tool to cut tissue or seal bleeding vessels during surgery.Full entry pencil and holster ready to go up.
- The rest of the most-used instruments, picked for this procedure and this surgeon. A laparoscopiclap-uh-roh-SKOP-ikDone through a few small cuts in the abdomen with a thin camera and long instruments, instead of one large opening.lapar/o abdomen-scopic viewingFull entry Mayo looks very different from an open one.
How it is arranged
- Place instruments in even numbers, grouped as they are on the back table.
- Close ringed instruments to the first ratchet only, so the surgeon can open them fast.
- Rest the ring handles over a rolled towel or foam roll, not over the edge of the stand.
- Keep the curves facing one way.
- Place sharps so you can pick each one up safely and set it in the neutral zone or pass it.
- Include the skin markerMAR-kerSomething that can be measured, such as a substance in the blood, that shows a disease or body process is present.Full entry , the local anestheticLOH-kul an-es-THET-ikA drug that blocks feeling in one part of the body without making the person unconscious.Full entry on its syringe and the skin knife, then move them to the back table after their first use.
- Keep most sutureSOO-cherA stitch, or the thread used to stitch, that holds the edges of a wound or incision together.Full entry on the back table and bring it to the Mayo as it is needed. Free ties can come out of their packets, sorted by size, and lie between the folds of a towel (a suture book), or stay in their packets on the Mayo or in a small basin. A suture reel can sit on the Mayo, and needled sutures wait in a small basin on the back table.
- Hang the suture bag on the side of the draped Mayo stand away from the incision, so empty packets and loose ties cannot fall into the wound. If a needle goes missing and the bag must be searched, hand it to the circulator to empty.
The Mayo changes as the case moves along; instruments come and go to and from the back table.
11The surgical count
A surgical count makes sure that every sponge, sharp, instrument and small item that could be left inside the patient is accounted for at the end of the case. A retained surgical item can cause pain, infection, a perforationper-fuh-RAY-shunA hole that goes all the way through the wall of an organ or tissue.per- throughforat bored (a hole)-ion processFull entry organ, a blockage and another operation, and it is one of the most often reported sentinel eventSEN-tih-nul ee-VENTAn unexpected event in health care that causes a client's death, permanent harm or severe temporary harm.Full entry . Sponges are the item most often left behind.
The scrub and the circulator count together. The law does not say how counts are done or who does them, only that nothing meant to come out may be left in, so every member of the team shares the responsibility, and any of them can be held liable. Chapter 15 covers the legal side.
Some cases carry more risk of a wrong count or a retained item: emergencies, an unexpected change in the operation, more than one surgical team, very long procedures, unexpected blood transfusionBLUD trans-FYOO-zhunGiving blood, or a part of blood, from a donor into a person's vein.trans- acrossfus/o pourFull entry and patients with severe obesity.
What is counted
AST's Core Curriculum lists four groups, in this order:
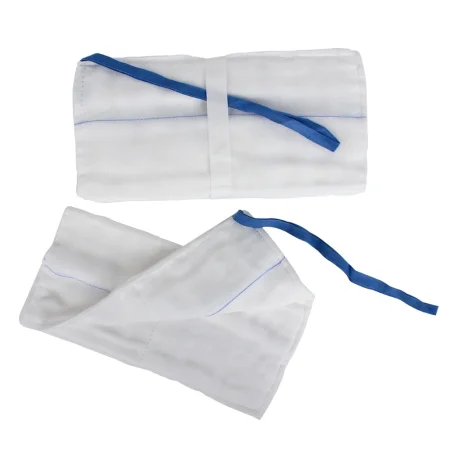
- Sponges: every radiopaqueray-dee-oh-PAYKBlocking x-rays, so the material shows up white on an x-ray image.radi/o radiation, x-rayopaque not letting throughFull entry soft good used in the wound, such as laparotomylap-uh-ROT-uh-meeSurgery that opens the abdomen through a large cut to reach the organs inside.lapar/o abdomen-tomy cutting intoFull entry sponges, 4 by 4 gauze sponges, dissecting sponges and neurosurgical patties, plus towels used inside the wound and packing.
- Sharps: sutureSOO-cherA stitch, or the thread used to stitch, that holds the edges of a wound or incision together.Full entry needles, hypodermic and free needles, blades, electrosurgeryee-LEK-troh-SUR-jer-eeUsing high-frequency electric current through a handheld tool to cut tissue or seal bleeding vessels during surgery.Full entry tips, saw blades and drill bits.
- Instruments, including every separate part of an instrument that comes apart, such as the blades and wing nuts of a self-retaining retractorrih-TRAK-terA surgical instrument that holds back tissue or organs so the surgeon can see and reach the operative site.Full entry .
- Accessories (miscellaneous items): anything else that could be lost in the wound, such as vessel loops, umbilical tapes, suture reels, rubber shods, clip cartridges, the electrosurgical scratch pad and trocarTROH-karA sharp or bladed instrument inside a tube (cannula), used to pierce a body wall and leave the tube in place as a port.Full entry sealing caps.
How to count
- Two people, at the same time: the scrub and the circulator count each group together (concurrent counting).
- Seen and heard: both people look at every item, and both count out loud. Use an instrument as a pointer if it helps.
- One at a time: separate every sponge as you count it, so two stuck together are never counted as one.
- By type, in a set order: count all of one kind, then the next, the same way every time.
- Field, Mayo, back table, off the field: your facility's policy sets the order; a typical order for counts during the case starts at the patient and works outward: the surgical field, then the Mayo standMAY-oh standA small tray on an adjustable stand placed over or beside the patient during surgery to hold the instruments used most often.Full entry , then the back table (and the basins and sharps container), then anything off the field, such as sponges in the kick bucket or a dropped needle.
- No distractions: the room stays quiet and nobody interrupts.
- Record at once: the circulator writes each count on the count sheet or count board as soon as each type is counted.
- Confirm: the scrub and circulator report the result to the surgeon, whether the count is correct or not.
A simple routine for each group: say what you are counting ("lap sponges"), make sure the circulator can see, separate each item as you count it, say the number, and wait while the circulator writes it down.
When counts are done
Counts are tied to events in the case (they are event related), and facility policy decides the details. Anyone on the team may ask for a count at any time. Sponges and sharps are counted:
- Before the procedure, to set the baseline (the initial count).
- Before a cavity within a cavity, such as the uterus, is closed; instruments are not counted at this point.
- When closure of the wound begins.
- As skin closure begins, or when the case ends and counted items are no longer being used.
Instruments are counted for every procedure in which a body cavity is open, before the incision and before the cavity is closed. The final count is complete only when every sponge, sharp and instrument used to close the wound has come back to you. Chapter 29 walks through the closing counts as they happen.
AST's 2006 counts standard ties the closing counts to the layers: when closure of the peritoneumpair-ih-toh-NEE-umThe thin membrane that lines the belly cavity and covers most of the organs inside it.peri- aroundton stretched-eum a structureFull entry (or the first layer of any cavity) begins, when closure of the fasciaFASH-ee-uhA sheet or band of tough connective tissue that covers and separates muscles and organs.fasci/o bandFull entry (or the layer before the subcutaneous tissuesub-kyoo-TAY-nee-us TISH-ooThe layer of fat and loose connective tissue under the skin that attaches the skin to muscle.sub- undercutane/o skin-ous relating toFull entry ) begins, and when skin closure begins. It also counts instruments on every procedure, minimally invasive ones included, because an unexpected event can widen the operation.
Add counts:
- whenever new counted items are added to the field, recorded and added to the total (10 sponges plus 10 more makes 20)
- when a scrub or circulator is permanently relieved, before the new person takes over
- at set intervalIN-ter-vulThe time or space between two events, such as between two contractions in labor or between two waves on an ECG.Full entry during a long procedure
- whenever a discrepancy is suspected, and whenever anyone asks
Counts, and events that call for one, such as a permanent relief, are kept out of the critical moments of a case: the time-outTYM-owtA pause just before a procedure when the whole team confirms the right client, procedure and site; also, a short break to calm a child.Full entry , a critical dissectiondy-SEK-shunA tear in the inner layer of an artery wall that lets blood split the layers apart; also, the cutting apart of tissue in surgery.Full entry , confirming and opening implants, the start of anesthesiaan-us-THEE-zhuhLoss of feeling or sensation, often brought on by drugs so that surgery or a procedure can be done without pain.an- withoutesthesi/o feeling, sensation-ia conditionFull entry or waking up from it, and the handling of specimens.
The first count
Do the initial count with all the counted items on the back table, before you set up the Mayo stand, and before the patient comes in when you can.
- Sponges: break the band on each pack only when you count it, and throw the band away. Separate every sponge as you count it.
- Suture needles: show the circulator the needle count on each packet, and check the number when the packet is opened. Some guidance has you open packets with several needles and count each needle with the circulator before the incision, so the number on the label is proven, not assumed; facility policy decides whether you do.
- Instruments: take the count sheet from the set and hand it to the circulator, then count against it item by item. Never assume the sterile processing count is right.
Problems at the first count
- A package with the wrong number (nine sponges in a pack of ten, or four needles in a pack of five): never assume a maker's count is right. A count is wrong with too many as well as too few. Take the whole package out of the count and off the field. The circulator bags it, labels it as incorrect, and sets it apart. If the patient is not yet in the room, it leaves the room; once the patient is in, it stays in the room, apart, until the case ends, in case some of it reached the field.
- An instrument count sheet that does not match: count again. If it still differs, write the actual number, initial it, and follow your facility's reporting procedure. Extra instruments are added and counted.
- An item dropped during setup: the circulator picks it up and keeps it in a safe place in the room, where it stays part of the count.
Documentation
Every count goes into the patient's intraoperativein-truh-OP-er-uh-tivHappening during surgery, from when the client is brought into the operating room until they are moved to recovery.intra- within, duringoperative of surgeryFull entry record: what was counted, how many of each item, the names and titles of the people who counted, whether each count was correct, what was done about a wrong count, and why any count was not done. The scrub signs next to the counts, with credentials, and so does every relief person who counted.
Never count from memory, and never trust a package label or a count sheet without checking it. Every item is seen by two people and counted out loud, every time.
Keeping counts right
- Keep every counted item in the room until the final count is correct, including bagged sponges, full sharps containers, broken pieces, and the linen and trash.
- Keep the running total in one place, and never subtract an item from the count.
- Never cut or alter a counted sponge, and never use counted sponges for the skin prep or the dressing. Keep the plain (non-radiopaque) gauze used for the prep apart from the counted sponges before the case begins, and the anesthesia provideran-us-THEE-zhuh pruh-VY-derThe licensed professional who gives anesthesia and watches over the client's breathing and vital functions during a procedure.Full entry does not use counted items.
- Use only radiopaque sponges in the wound.
- Keep sharps in a needle counter or on a magnetic pad, and pass them one for one.
- When an instrument or needle breaks, tell the surgeon and the circulator, collect every piece, and hand them off or secure them in the sharps container.
- Drop used sponges into the kick bucket; the circulator then sorts them into a pocketed sponge holder, one per pocket, markerMAR-kerSomething that can be measured, such as a substance in the blood, that shows a disease or body process is present.Full entry showing.
- Some facilities add technology to the manual count: bar-coded sponges that are scanned, or sponges with a radiofrequency chip that a wand passed over the patient can find. It adds to the manual count, which is still done.
How items get lost
Items are more likely to be lost, and counts to go wrong, when a case runs longer than 8 hours, when staff change several times, when a sponge is used outside the usual routine (such as a loose 4 by 4 in a body cavity instead of one mounted on a clamp), when items added to the field are not written down, when nobody keeps track of sponges as they are used, when the field is cluttered, when a count skips steps, and when music, talk or phones make the count hard to hear. Sponges turn up in drape folds, under basins, among the prep sponges and on the floor under the table. Small needles snag on drapes and spring off the field, and small instrument parts drop into the wound.
A wrong count
A wrong count is never accepted or ignored. The scrub or circulator tells the surgeon, who acknowledges what is missing, and the count is repeated. If it is still wrong, everyone searches:
- The circulator calls for help and searches the room: the floor around the table, the kick buckets, and the linen and trash, with the trash emptied onto an impervious drape and gone through piece by piece. A magnetic roller can sweep the floor for metal, and the team shows the soles of their shoes.
- The scrub organizes the field and searches it: the drape folds, the back table and the Mayo, moving trays and basins to look underneath. Team members step back a little, because sponges often turn up between a person and the table.
- The surgeon stops closing if the patient's condition allows, searches the wound and stays until the item is found or is known not to be in the patient.
If the item is still missing, imaging is done before the wound is finally closed, if the patient's condition allows, and a radiologist reads it; for an unstableun-STAY-bulDescribes a client whose condition is changing quickly or is hard to predict.Full entry patient, an x-ray is taken as soon as it can be, wherever the patient goes next. The smallest needles may not show on an x-ray. When the item is found, that whole type of item is counted again. Every step is documented, and a count that is never resolved is recorded with everything done to find the item, how the patient was told and the plan for follow-up.
AST's 2006 counts standard has the x-ray taken every time an item is missing, before the wound is closed and before the patient leaves the room.
12Draping
Drapes make the sterile fieldSTAIR-ul feeldAn area set up with sterile drapes and supplies, kept free of all germs, for a sterile procedure.Full entry . They wall off the incision from the rest of the patient's body and from everything nonsterile, protecting the wound from the patient's own skin germs and from the team and the room. They also give the team a wide sterile surface to work on.
Drape materials
Drapes are woven cloth, nonwoven synthetic fabric or plastic. Woven drapes are treated to resist fluid but are not waterproof, wear out with laundering, and need extra layers where fluid will collect. Nonwoven drapes are single-use and impervious or nearly so. Plastic drapes cover contoured areas and equipment.
The qualities AST's Core Curriculum lists, and why each matters:
- Anti-static: so the drape does not make sparks that could ignite the drapes or flammable gases.
- Fire retardant (flame resistant): so the drape resists catching fire from a laser beam or an electrosurgeryee-LEK-troh-SUR-jer-eeUsing high-frequency electric current through a handheld tool to cut tissue or seal bleeding vessels during surgery.Full entry spark, though no drape is fully laser-proof.
- Impervious: fluid cannot pass through, which prevents strike-through.
- Lint-free: lint carries germs through the air and into the wound.
- Permeable: lets fluid through, so a permeable drape alone cannot stop strike-through.
- Puncture resistant: resists tears and holes, which would contaminate the field.
- Semi-permeable: resists fluid without being fully waterproof, as some nonwoven and treated woven drapes do. Drapes also need to be porous enough to let body heat escape.
The types of drapes (fenestrated, incise, plain non-fenestrated sheets, specialty drapes and towels) are described in chapter 25.

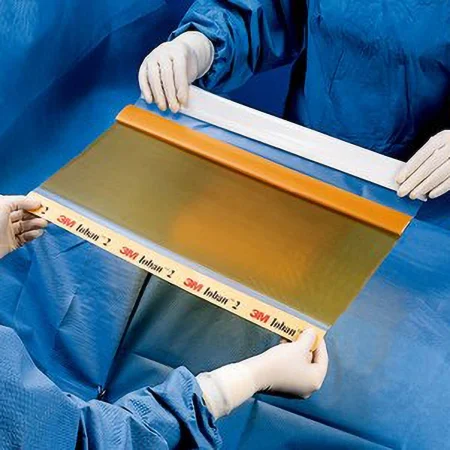
Draping furniture
- Back table: draped by opening the back table pack, whose wrapper becomes the table cover (chapter 26).
- Mayo standMAY-oh standA small tray on an adjustable stand placed over or beside the patient during surgery to hold the instruments used most often.Full entry : covered with its sleeve, hands inside the cuff (see Setting up the Mayo stand).
- Ring stand: the wrapped basin set is placed in the ring stand and its wrapper opened over it, so the stand is covered and the basins sit inside.
Draping equipment
- C-arm: a clear plastic tubular drape covers the C so the surgeon can move it beside the field. Like other large equipment used in the sterile field, it is draped before surgery. For a cross-table view, some teams slip a fresh drape over the end of the C and drop it off afterward, so the dirty lower part never comes near the patient.
- Microscope: a fan-folded plastic sleeve with pockets for its parts. The scrub starts it over the top of the scope with hands in a wide cuff, the circulator pulls it down by its lower part, sterile caps go over the lenses, and the drape's own tapes hold it in place. Drape it before the prep if it will be used right away; if it will not be needed for an hour or more, it can be draped during the case.
- Robot: the maker's drapes fit each part. The patient cart is draped away from the table and brought in only after the patient is positioned and draped. Each arm is fully extended and draped on its own, the scrub sliding the drape on while the circulator pulls it through by the inside, never so tight that it limits how the arm moves. The camera arm and the endoscopeEN-duh-skohpA thin tube with a light and a camera that is passed into the body to look inside an organ or cavity.endo- within-scope instrument for viewingFull entry are draped too. Drape the robot as a practiced team, following the maker's steps.
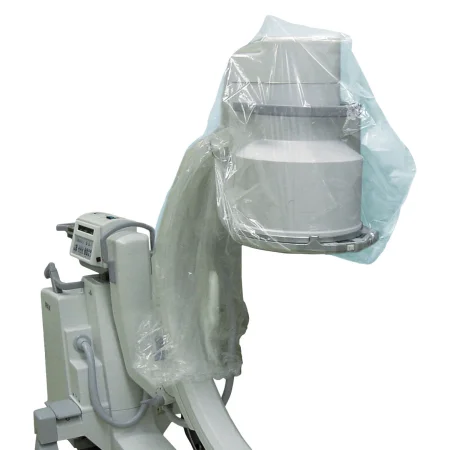
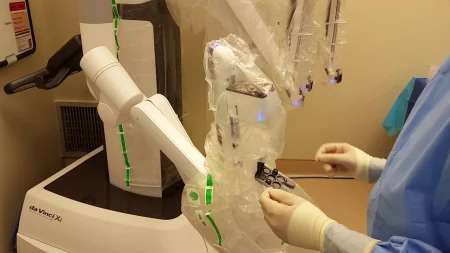
Draping the patient
Draping follows the skin prep, once the prep is completely dry. You prepare the drapes on the back table, hand them to the surgeon and assistant in the right order, help place each one, and keep everything sterile.
- Plan ahead: confirm the procedure, stack the drapes in reverse order of use, and keep extra towels and sheets ready.
- Handle drapes as little as possible, and keep them folded until they are at the site. Shaking or flapping a drape stirs up air that carries dust and lint.
- Keep your distance: stay about 12 inches from the table while draping, and never reach across an undraped patient; walk around instead. Stand on the same side as the surgeon when you hand up the towels.
- Cuffing: roll the edge of the drape or towel over your gloved hands, so your gloves never touch the patient's skin or the table.
- Fan folds and layers: drapes are fan-folded so each can be set down folded and opened one fold at a time, under control. Each drape is one layer, laid in a standard order that starts at the incision and works outward. Disposable top drapes carry printed arrows for the head and foot ends.
- Placement: hold drapes high, above the table. Set the folded drape where it belongs, with the opening over the incision, then unfold it toward the edges, from the site outward. Once a drape is placed, it is never moved: shifting it drags its nonsterile underside onto the field.
- Passing towels: four towels frame the incision, which is called squaring the incision. Fold the top edge of each towel down about 4 inches and hand the towels up one at a time, holding the top corners: the first three with the fold facing away from the surgeon, the fourth with the fold facing the surgeon. An adhesive towel usually goes up with its sticky side away from the surgeon, and you peel the backing off once the surgeon holds it. Routines vary by surgeon and facility.
- Fixation: hold towels and drapes with nonperforating towel clamps only. A clamp that pierces the drape makes a path for germs. Towels may also be held by an incise drape or by skin staples; a stapled area is then covered with an impervious drape.
- Edges: once placed, the edges of a drape and anything hanging below the table are nonsterile. Keep your hands above table level.
A 2014 textbook routine folds a 2-inch cuff on each towel, with the first towel's cuffed edge facing away from the scrub and the next three facing toward the scrub; the first towel goes on the side of the patient nearest the person draping.
Taking the drapes off at the end of the case is in chapter 30.
Draping by region
- Abdominal: a plain sheet goes over the lower body, from the pubisPYOO-bisThe front part of each hip bone, low in the pelvis; the two meet in the middle at the pubic symphysis.pub/o pubisFull entry down over the foot of the table, and four towels square off the incision (some surgeons place the towels first). An incise drape may go over the towels. The fenestrated laparotomylap-uh-ROT-uh-meeSurgery that opens the abdomen through a large cut to reach the organs inside.lapar/o abdomen-tomy cutting intoFull entry drape goes on last, its opening over the incision, unfolded toward the head and the feet, and the anesthesia provideran-us-THEE-zhuh pruh-VY-derThe licensed professional who gives anesthesia and watches over the client's breathing and vital functions during a procedure.Full entry takes the top edge to make the anesthesiaan-us-THEE-zhuhLoss of feeling or sensation, often brought on by drugs so that surgery or a procedure can be done without pain.an- withoutesthesi/o feeling, sensation-ia conditionFull entry screen. The same method drapes the back, flank and chest. A cesareansih-ZAIR-ee-unRelating to the birth of a baby through a surgical cut in the mother's abdomen and uterus.Full entry drape is a laparotomy drape with a fluid collection pouch built in.
- Extremity: a towel wraps the tourniquet. While the circulator holds the leg or arm up, a sheet goes on the table under it. An impervious stockinette rolled up from the foot or hand covers what will not be operated on. Split or U-drapes wrap around the limb, and the limb passes through the stretchy opening of an extremity drape.
- Head: for the face, two folded sheets go under the head while anesthesia lifts it, and the top sheet wraps over the forehead and is clamped. A craniotomykray-nee-OT-uh-meeSurgery in which a piece of the skull is removed to reach the brain, and usually put back at the end.crani/o skull-tomy cutting intoFull entry drape has a round opening and a fluid pouch near the head end. Eye, ear and nose drapes have small openings or a split, and adhesive towel drapes wall off the eyes, nose and mouth for ear surgery.
- Hip: split or U-drapes encircle the hip, the foot is wrapped in towels or an impervious stockinette, and a fenestrated drape leaves a wide area around the joint showing.
- perinealper-ih-NEE-ulHaving to do with the perineum, the area between the genitals and the anus.Full entry : with the patient in lithotomylih-THOT-uh-meeA position lying on the back with the hips and knees bent and the legs raised and spread apart, often in stirrups.lith/o stone-tomy cutting intoFull entry , an adhesive towel across the perineumpair-ih-NEE-umThe area of skin and muscle between the genitals and the anus.perine/o perineumFull entry walls off the anus from the vulva for gynecologygy-nuh-KOL-uh-jeeThe branch of medicine that cares for the female reproductive organs and breasts.gynec/o woman-logy study ofFull entry surgery, towels square off the perineum, leggings cover the legs and stirrups, a drape or fluid pouch goes under the buttocks, and a perineal drape goes on with its opening at the perineum. A combined abdominal and perineal case uses a drape with two openings.
- Shoulder: with the patient sitting up in the beach chair position, the lower arm is wrapped and covered, two U-drapes surround the shoulder, and a fenestrated shoulder drape with an impervious insert goes over them.
Fire safety while draping
Drapes are fuel, and the operating room has oxygen and ignition sources such as the electrosurgical pencil, lasers and light cables.
- Let the skin prep dry completely, and its fumes clear, before the drapes go on; check that no prep solution has pooled under the patient.
- Do not trap flammable fumes or oxygen under the drapes. Tent the drapes so vapors can escape, and keep oxygen from building up underneath.
- Moisten towels and sponges that will sit near an ignition source. For laser cases, the towels that square off the incision are moistened with sterile water, and aluminum-coated drapes, which deflect laser energy, are used when laser surgery is planned. Still, no drape fully resists a laser beam, and even fire-resistant drapes can burnBURNAn injury to the skin or deeper tissues caused by heat, chemicals, electricity, radiation or friction.Full entry .
- Keep the electrosurgical pencil in its holster whenever it is not in use.
When a drape is contaminated
- Touched something nonsterile while being placed: discard it and get a new one.
- Suspected contamination after placement: cover the spot with another impervious drape, or replace the drape.
- Pierced by a perforating towel clamp: AST says to remove the clamp, pass it off, and replace the drape. Covering the holes with towels is not enough.
- Moved after placement: treat it as contaminated, because its underside has touched nonsterile surfaces.
- Your glove touched the patient's skin or the table: change the glove.
A 2014 textbook still says to cover the holes with a sterile towel or drape after a piercing towel clamp is removed.
13Bringing the field to the patient
Officially, surgery starts when anesthesiaan-us-THEE-zhuhLoss of feeling or sensation, often brought on by drugs so that surgery or a procedure can be done without pain.an- withoutesthesi/o feeling, sensation-ia conditionFull entry starts. Under general anesthesiaJEN-er-ul an-es-THEE-zhuhDrug-induced loss of consciousness and feeling over the whole body, so a person feels nothing and is not aware during surgery.an- withoutesthesi/o feeling, sensation-ia conditionFull entry , positioning begins once the patient is endotracheal intubationen-doh-TRAY-kee-ul in-too-BAY-shunPutting a breathing tube through the mouth or nose into the windpipe (trachea).endo- withintrache/o windpipe-al relating toFull entry and stable; a surgeon who helps position the patient performs hand antisepsis afterward, then comes back to be gowned and gloved. The circulator preps the skin as soon as the position is secure and the anesthesia provideran-us-THEE-zhuh pruh-VY-derThe licensed professional who gives anesthesia and watches over the client's breathing and vital functions during a procedure.Full entry confirms the patient is stable, and draping follows at once.
Finalizing the sterile fieldSTAIR-ul feeldAn area set up with sterile drapes and supplies, kept free of all germs, for a sterile procedure.Full entry happens in this order: the patient is prepped (chapter 31), the scrub gowns and gloves the team, the patient is draped, and the sterile field is moved to the patient.
- The Mayo standMAY-oh standA small tray on an adjustable stand placed over or beside the patient during surgery to hold the instruments used most often.Full entry usually goes first. Before it moves in, pass the ends of any cords and tubing that will lie under it off the foot of the table to the circulator. Lift its front a little, without disturbing what is on it, and roll it into place over the draped patient. You stand behind it, facing your instruments and the field.
- The ring stand and the back table follow. Roll them in with your gloved hands on their draped tops. The circulator can help by holding them below the level of the drape. Place the back table so you can reach it without turning your back to the rest of the field.
- Cords and tubing: hand the plug ends of the suction tubing, electrosurgeryee-LEK-troh-SUR-jer-eeUsing high-frequency electric current through a handheld tool to cut tissue or seal bleeding vessels during surgery.Full entry cord and other cords off the field to the circulator, and fasten them to the top drape with nonpenetrating clamps, leaving enough slack. Whatever hangs below the table edge is nonsterile and is never pulled back up.
- Electrosurgical pencil: clip its holster to the drape, preferably with a non-metal, nonpiercing clamp, where the surgeon can reach it. Never wrap the cord around a metal clamp.
- Light handle covers: put them on the light handles, or hand them to the surgeon.
- Neutral zone: agree with the surgeon on its spot for passing sharps (chapter 25).
- Sponges: place sponges on the field for the surgeon and assistant, and have the scalpel ready to pass.
AST counts the cords and tubing under the Mayo stand as sterile because their ends were passed off the foot of the table before the stand moved in. Then everything stops for the time-outTYM-owtA pause just before a procedure when the whole team confirms the right client, procedure and site; also, a short break to calm a child.Full entry .
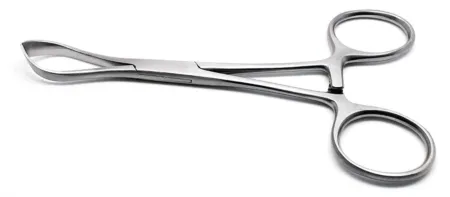
14Identification and the time-out
Why documentation matters
The patient's chart is both the team's source of information and the legal record of the care given. Your part starts with reading it (see Reading the chart) and goes on through the counts and the checklist. Chapter 15 covers legal documentation.
Identifying the patient
Wrong-patient, wrong-procedure and wrong-site surgery can happen in any facility. Identifying the patient correctly helps prevent them, and it matters for drugs, blood and specimens too.
- Two identifiers: confirm identity with at least two, such as the full name, date of birth, hospital number, phone number, address or photo. Never use the room number, which changes when the patient moves.
- Identification band: every surgical patient wears one, usually on the arm away from the surgery. Try not to remove it; if it must come off, it stays with the chart, ready to go back on.
- Standard procedure: introduce yourself by name and role. Ask the patient to say their name, date of birth, the procedure and its site, rather than asking them to agree with what you read out. Compare the answers with the band, the chart, the consent and the surgery schedule.
- A patient who cannot answer: ask a family member or other designated representative, and check the band against the chart and the consent. For a child, confirm with the parent or legal guardian.
- Emergency: a patient may come straight from the emergency department or trauma bay, without a full chart, and may not be able to speak. The band is still checked, and the identifying information travels with the patient, written plainly.
If anything does not match, the surgeon is told and the patient does not go into the operating room until it is resolved. Where policy allows, the CSTsee-es-tee (said as letters)Certified Surgical Technologist, a credential for surgical technologists; in maternity care, contraction stress test.Full entry may record the identification in the intraoperativein-truh-OP-er-uh-tivHappening during surgery, from when the client is brought into the operating room until they are moved to recovery.intra- within, duringoperative of surgeryFull entry record.
The Universal Protocol
The Joint Commissionthuh JOYNT kuh-MISH-unAn independent US organization that inspects and accredits hospitals and other health care organizations against safety and quality standards.Full entry Universal Protocol, required in accredited facilities since 2004, has three steps:
- Preprocedure verification: the history and physical, consent, lab results and imaging are present, labeled for this patient and consistent, and the equipment, implants and devices the case needs are available.
- Site marking: the person who will do the procedure marks the site so there is no doubt, with initials, "yes" or a line at the incision, especially for left or right, more than one structure, or spine levels. The patient takes part when possible, so the marking is usually done in the holding area, with an indelible markerMAR-kerSomething that can be measured, such as a substance in the blood, that shows a disease or body process is present.Full entry approved for the skin, the same way throughout the facility. The mark must stay visible after prep and draping, and nothing is marked on the side not being operated on.
- time-outTYM-owtA pause just before a procedure when the whole team confirms the right client, procedure and site; also, a short break to calm a child.Full entry : the final check, immediately before the incision.
The time-out
- Purpose: the last chance to catch the wrong patient, procedure, side or site.
- When: with the patient positioned, prepped, draped and, when general anesthesiaJEN-er-ul an-es-THEE-zhuhDrug-induced loss of consciousness and feeling over the whole body, so a person feels nothing and is not aware during surgery.an- withoutesthesi/o feeling, sensation-ia conditionFull entry is used, asleep, just before the skin incision. All other activity stops, except in a life-threatening emergency.
- Who: the whole team takes part: the surgeon, the anesthesia provideran-us-THEE-zhuh pruh-VY-derThe licensed professional who gives anesthesia and watches over the client's breathing and vital functions during a procedure.Full entry , the circulator, the scrub and anyone else involved. A designated team member leads, and the surgeon doing the procedure must be present.
- What is confirmed: the patient's identity, allergies, the procedure, the operative site and side, the correct position, and the equipment and supplies (including implants) the case needs. The WHO and AORN checklists also confirm the antibiotic and the imaging, and AORN's adds the fire risk.
- Agreement: every member actively confirms and agrees. If anything does not match, the procedure does not start. The scrub can call for a time-out if nobody else does.
- More than one: separate teams doing separate procedures each do a time-out, and a case needing two consents, such as a cesarean birthsih-ZAIR-ee-un berthBirth of a baby through surgical cuts in the belly and the uterus.Full entry followed by a tubal ligation, has two.
- Facility policy: your facility's policy sets how the time-out is done.
In a time-out, everyone stops, listens and speaks up. A surgical technologistSUR-jih-kul tek-NOL-uh-jistA member of the operating room team who prepares the sterile field and instruments and hands them to the surgeon.Full entry who notices a mismatch says so, and the case waits until it is resolved.
The Surgical Safety Checklist
The World Health Organization's Surgical Safety Checklist builds the time-out into three pauses, and AORN's Comprehensive Surgical Checklist combines it with the Universal Protocol in one tool:
- Sign in, before anesthesiaan-us-THEE-zhuhLoss of feeling or sensation, often brought on by drugs so that surgery or a procedure can be done without pain.an- withoutesthesi/o feeling, sensation-ia conditionFull entry begins: the patient confirms identity, site, procedure and consent; the site is marked; the pulse oximeter works; allergies are known; the airway and the risk of major blood loss have been checked.
- Time out, before the incision: the team introduces themselves by name and role; confirms the patient, site and procedure; and reviews the critical events ahead. The surgeon covers critical steps, length and expected blood loss, anesthesia covers patient concerns, and the nursing team, scrub included, confirms sterilitysteh-RIL-ih-teeThe state of being completely free of living germs, including spores; also, being unable to have children.Full entry (the indicators) and equipment. The team also confirms the antibiotic and that the right images are displayed.
- Sign out, before the patient leaves the room: the procedure name, the counts complete, the specimens labeled, any equipment problems, and the key concerns for recovery.
15Special situations
Emergencies
In an emergency there may be only minutes between the call and the patient's arrival, and the scrub may still be gowning as the surgeons walk in. Emergency case carts help, and so do assistant circulators. Take what is surely needed, hold the rest, and open likely extra sets onto small tables at the edge of the field rather than crowding the back table.
Set up in order of immediate use, so that the case can start at any moment. An item that is "up" is up on the Mayo, ready to use:
- Gowns, gloves and drapes, in order of use.
- Draping.
- electrosurgeryee-LEK-troh-SUR-jer-eeUsing high-frequency electric current through a handheld tool to cut tissue or seal bleeding vessels during surgery.Full entry pencil and suction up on the field.
- Light handles in place.
- The knife loaded and ready.
- Four laparotomylap-uh-ROT-uh-meeSurgery that opens the abdomen through a large cut to reach the organs inside.lapar/o abdomen-tomy cutting intoFull entry sponges on the field and four more in warm saline.
- Superficial and self-retaining retractorrih-TRAK-terA surgical instrument that holds back tissue or organs so the surgeon can see and reach the operative site.Full entry .
- hemostatHEE-moe-statA clamp with finger rings and a locking ratchet used in surgery to grasp and close off bleeding vessels.hem/o blood-stat stopping, standing stillFull entry .
Once the wound is open, be ready to clear out free blood and pack the wound: a problem nobody can see cannot be managed, so good retractionrih-TRAK-shunA drawing back or pulling in of tissue; in breathing, the skin sinking in between, below or above the ribs with each breath.Full entry , light and clearing of blood and clots are vital. A patient who arrives with the chest already opened in the emergency department needs retraction and exposure first, then fast control of bleeding.
When the patient's life cannot wait, the initial count may be waived, because the time it takes would be an unacceptable delay. The omission is documented on the operative record, and an incident reportIN-sih-dent rih-PORTA written record of an unexpected event in a health care setting that caused or could have caused harm.Full entry explains why. Later counts are done as the situation allows, including a count at closure, and an x-ray may be taken at the end of the case to show that nothing was left behind. Each facility sets its own protocol for waived counts.
AST's 2006 counts standard says an x-ray must still be taken whenever the initial count was skipped.
Cesarean birth
A scheduled cesareansih-ZAIR-ee-unRelating to the birth of a baby through a surgical cut in the mother's abdomen and uterus.Full entry , such as a repeat one under spinal or epidural anesthesiaep-ih-DOOR-ul an-us-THEE-zhuhPain relief or numbness from an anesthetic drug given through a thin catheter into the space just outside the covering of the spinal cord.epi- upon, overdur/o dura (the tough covering of the spinal cord)-al relating toFull entry , gets a routine setup. An emergency cesarean happens very fast. Under general anesthesiaJEN-er-ul an-es-THEE-zhuhDrug-induced loss of consciousness and feeling over the whole body, so a person feels nothing and is not aware during surgery.an- withoutesthesi/o feeling, sensation-ia conditionFull entry , time is critical, to keep the anesthetican-us-THET-ikA drug that causes loss of feeling, with or without loss of consciousness.an- withoutesthesi/o feeling, sensation-ic relating toFull entry from reaching the baby and to correct the emergency. A few instruments open the abdomen and deliver the baby, so get those ready first, and keep the setup neat so everything can be found quickly. A checklist for emergency cesareans helps the team.
Trauma
In trauma, the injuries are often not known until the patient arrives, and emergency surgery is often exploratory. So plan by the region of the body involved, such as the abdomen, chest or limbs, rather than by a named procedure. The surgical priorities are to stop bleeding and limit contamination, and they change fast.
Plan the setup:
- Instruments: start from a basic set and add for each body system involved; a patient with several injuries may need several systems' sets. Keep specialty sets unopened on a cart in the sterile core, close at hand without crowding the field. If the patient is known to have, say, both chest and abdominal injuries, open both sets and prepare them as time allows.
- Sponges: far more than usual. A routine abdominal case may start with 10 to 20 laparotomy sponges; a trauma case should have at least 40 ready at the start, with many packs in reserve, and a large wound may use 100 or more. If there was no initial count, at least record the number of sponge packs (of 5 or 10) as they go onto the field, and the circulator gathers used sponges into the holder to count when there is a chance. Sponges packed into the abdomen may stay until the next operation, usually within 24 hours. Whenever possible, every effort is made to account for each one.
- Suction and fluids: two separate suction systems, each with its own tubing, tip and irrigationeer-ih-GAY-shunWashing out a wound, body cavity, tube or eye with a steady flow of liquid.Full entry device, and plenty of irrigation, every solution kept warm to fight hypothermiahy-poh-THER-mee-uhA body temperature that has fallen below the normal range.hypo- belowtherm/o heat-ia conditionFull entry . Antibiotic irrigation is likely near the end of an open-wound case. The circulator may keep the empty bottles together, to count when there is time and track blood loss.
- sutureSOO-cherA stitch, or the thread used to stitch, that holds the edges of a wound or incision together.Full entry and hemostasishee-moh-STAY-sisThe stopping of bleeding, either by the body's own clotting process or by medical or surgical methods.hem/o blood-stasis stopping, standing stillFull entry : hemostasis is a priority in every trauma case. Keep suture ligatures and free ties ready the whole case: 2-0 and 3-0 nonabsorbable ties at once, size 0 for a major vessel, and two sizes of tapered curved needles for suture ligatures. Nonabsorbable suture is favored in an open wound or possible bowel contamination, because infection quickly dissolves absorbable material. Have two electrosurgical units, one held in reserve. Expect topical hemostatichee-moh-STAT-ikStopping bleeding; also, a product or agent used to stop bleeding.hem/o blood-stasis stopping, standing still-ic relating toFull entry , though thrombinTHROM-binAn enzyme in the blood that turns fibrinogen into fibrin, the threads that hold a blood clot together.thromb/o clot-in substanceFull entry -based sealants and dry hemostats may not work when the blood is not clottingKLOT-ingThe process by which blood thickens into a gel to plug a damaged vessel and stop bleeding; also called coagulation.Full entry normally (coagulopathy). The skin closure is chosen at the end; a damage control wound may be left open. Drains are sutured in with 2-0 or 3-0 nonabsorbable suture on a 3/8-circle cutting needle.
- Drains and dressings: trauma causes severe swelling. A chest wound needs a closed chest drainage system, and abdominal and soft tissue wounds may need suction drains or wound vacuum-assisted closurewoond VAK-yoom uh-SIS-tid KLOH-zhurA wound treatment that uses a sealed dressing connected to a suction pump to draw fluid out and help the wound heal.Full entry . Dressings, and the items for an abdomen left open on purpose, are gathered near the end, once the extent of the injuries is known. Damage control and staged abdominal closure are in chapter 32.
- Cell salvage: assume it may be used for severe bleeding. Have the unit on standby, unopened unless the surgeon asks for it (chapter 23).
- Forensic evidence: have rubber shods ready for any instrument that will touch a bullet or fragment. Handling and labeling forensic evidence is in chapter 29.
Care of the trauma patient before the incision:
- Moving: one person, the anesthesia provideran-us-THEE-zhuh pruh-VY-derThe licensed professional who gives anesthesia and watches over the client's breathing and vital functions during a procedure.Full entry or the surgeon, directs every move, because moving can extend hidden injuries. Splints, spine supports and cervicalSER-vih-kulRelating to the neck, or to the cervix, the lower end of the uterus.cervic/o neck, cervix-al relating toFull entry collars stay on until the anesthesia provider and surgeon say they can come off. Position changes, such as raising or lowering the legs, are made slowly with monitoring in place, because they can shift fluid and blood clots. A pregnant patient is kept in the left lateral position, so the vena cavaVEE-nuh KAY-vuhOne of the two large veins that return oxygen-poor blood from the body to the right atrium of the heart.Full entry is not compressed.
- Warmth: keep the patient covered as much as possible, with warm blankets ready, and prewarm the IV and irrigation fluids. The room is warmed ahead, to no higher than 85 degrees Fahrenheit (29.4 degrees Celsius), and kept warm until active warming devices bring the patient back to a normal temperature.
- Airway: an emergency tracheostomytray-kee-OS-tuh-meeA surgical opening through the front of the neck into the windpipe, usually holding a tube that the person breathes through.trache/o windpipe-stomy surgical openingFull entry or cricothyroidotomy done in the emergency department may be changed in the OR, and the anesthesia provider may need your help and instruments.
- Tests and images: blood tests are repeated at intervalIN-ter-vulThe time or space between two events, such as between two contractions in labor or between two waves on an ECG.Full entry , a runner may carry samples to the lab, and images may come up on the room's computer or have to be fetched.
- Support: a conscious patient may be frightened and confused. Whenever lifesaving work allows, reassure them and tell them where they are and what is happening.
- Records and consent: consent comes from the patient if able, or from responsible individuals by hospital policy. Every step of care is documented, and so is the collection of forensic evidence.
The decision to modify the skin prep belongs to the medical and nursing team. The surgeon may call for fewer drapes than usual, perhaps only the top drape, so have a choice ready, and take the surgeon's direction, usually given while the patient is moved onto the table, rather than discussing it once the patient is in the room. A patient with injuries at two sites gets two separate setups, each used only at its own site.
Once the case starts, retraction usually comes before hemostasis, but bleeding heavy enough to drain the patient's blood volume is packed first to slow it. Infection is the second leading cause of death in trauma patients, so bowel technique is used as far as time allows, along with debridementdih-BREED-muntThe removal of dead, damaged or infected tissue from a wound so it can heal.Full entry and irrigation. Keep watching the wound even while you clear instruments or prepare supplies: a hidden injury or a sudden change in the patient can change the plan at once.
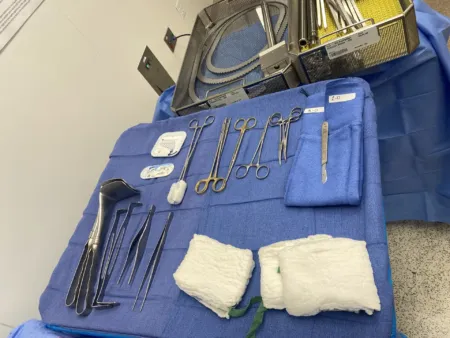
Converting to an open procedure
Any laparoscopiclap-uh-roh-SKOP-ikDone through a few small cuts in the abdomen with a thin camera and long instruments, instead of one large opening.lapar/o abdomen-scopic viewingFull entry case may have to become an open one, because of scar tissue, unclear anatomy, contamination, bleeding that cannot be controlled, or a patient who cannot tolerate the gas or the position. Keep a laparotomy set readily available. Whether it is opened and counted before the case starts depends on policy, or else on the patient, the team's experience and how difficult the case is expected to be, but every countable item opened onto the field is counted before the procedure begins.
Priority of tasks
When time is short, set priorities. Prepare first what the start of the case needs: gowns, drapes, light handles, cords and the first instruments. That way the case can begin even if the rest of the setup is not done, and you finish the rest as secondary preparation. Planning your tasks from the schedule makes this easier.
Multiple setups
Some procedures need more than one sterile setup:
- Two operative sites: each site gets its own setup, used only there. Instruments that touched a tumor are never used on another site, so cancer cells are not carried along.
- Bowel technique: when the bowel will be opened, the scrub keeps a second Mayo setup for everything that touches the open bowel, separate from the clean setup used to close. Chapter 29 covers bowel and cancer technique during the case, and chapter 32 walks through bowel technique step by step.
Delays, covering and cancellations
- A delay: stay scrubbed and keep watching the field. Breaking scrub to wait elsewhere leaves the field unwatched and charges the patient for a second gown and gloves.
- Covering the field: a field that will not be used right away, as during a delay, for a closing setup or with several tables, is covered, and so is a field during busy times such as before the incision or while the patient is repositioned. A part of a field in use, such as implants or instruments not needed yet, may be covered too. Use a sterile cover made for the purpose, or two cuffed sterile drapes laid so they can be lifted off without touching the setup (chapter 26 shows how). Covering never replaces watching the field, and facilities decide whether to cover at all.
- A cancellation: if the patient was brought into the room, the field counts as contaminated and is broken down. If the patient never came in, the field may be used for the same or a similar case.
AST's 2019 guideline warns against any cover that hangs below the table edge, because that part is nonsterile and the cover cannot be lifted off without touching the field. Instead it covers the instrument sets and supplies on the back table with cloth towels.
Keeping contamination down
The strategies that keep contamination down run through this whole chapter: open close to the start of the case, keep doors closed and traffic and talk to a minimum, set up one field for one patient, watch it every minute, and fix every break at once.
What to take from this chapter
- Attire keeps what you shed away from the patient: head cover first, mask fully on or off, hand jewelry off and the rest off or confined, nails short and natural, scrubs laundered by the facility.
- Plan from the preference card, the chart and the patient. Check the card against what was pulled, and fix a wrong card.
- Ready the room before you open: positive pressure, doors closed, 68 to 75 degrees Fahrenheit, 20 to 60 percent humidity, sterile furniture grouped away from the door and 12 inches from walls, equipment tested.
- Check every item before it opens (date, integrity, indicators, no closed ratchets, no foreign particles, no moisture), and open in sequence: back table pack, basin set, small wrapped items, peel packs, instrument sets, with your own gown and gloves on a separate surface.
- The timed scrub runs from fingertips to 2 inches above the elbows, four planes, hands above elbows, never back over a clean area. Glove yourself closed when nobody scrubbed can glove you, double glove, and peel the gloves off with the gown at the end.
- Set up in order of use and in zones, handling each item once. Label every medication and solution on the field.
- Count with the circulator, seen and heard, item by item, in a set order: before the procedure, before a cavity within a cavity is closed, when wound and skin closure begin, when items are added and when staff change. Never accept a wrong count.
- Drape with cuffed hands, place drapes once, secure them with nonpiercing clamps, then bring the field to the patient and stop for the time-out.
Check yourself5 quick questions
Free for everyone. Pick an answer for each, then check them all at once.
In the ORWhere you'll use this
The chapter's whole question pool in sets of 10, with the answer explained after each one.
Part of the educators programThe chapter's words on spaced cards: the ones you miss come back sooner.
Part of the educators programGiven by your class's teacher. Each class draws its own 25 from the chapter's pool.
Part of the educators program
Suggest a fix
Something wrong, unclear or out of date in this chapter? Tell us and we will fix it for everyone. Your email is only used to reply.