The assistant circulator
The nonsterile half of the job: getting the patient ready, moving them safely, placing a urinary catheter, positioning them on the table and prepping the skin.
1Why it matters
When a surgical technologistSUR-jih-kul tek-NOL-uh-jistA member of the operating room team who prepares the sterile field and instruments and hands them to the surgeon.Full entry works on the nonsterile side of the room, the role is called the assistant circulator (sometimes the ST circulator). A registered nurse is still the primary circulator and must be immediately available. AORN's position is that an RN circulator should be present for each patient's whole operation.
Federal hospital rules say the circulating nurse must be an RN. A surgical technologist may help the RN carry out circulating duties, as state law and hospital policy allow, under the superviseSOO-per-vyzeTo guide, watch over and check the work of another staff member who is doing a task.Full entry of an RN who is in the operating suite and able to step in at once. Which duties you may do depends on your state, your region and your facility.
The circulator never touches sterile items. You fetch and prepare nonsterile equipment, open sterile supplies for the scrub, help the anesthesia provideran-us-THEE-zhuh pruh-VY-derThe licensed professional who gives anesthesia and watches over the client's breathing and vital functions during a procedure.Full entry , position the patient, prep the skin, place a urinary catheter, receive specimens and help with the records.
Much of this work is direct care of a patient who cannot protect themselves. Once anesthesiaan-us-THEE-zhuhLoss of feeling or sensation, often brought on by drugs so that surgery or a procedure can be done without pain.an- withoutesthesi/o feeling, sensation-ia conditionFull entry is given, the patient can no longer tell anyone about pain or pressure, so the team takes over the job of keeping the skin, joints, nerves, breathing and circulation safe.
This chapter follows the patient from the holding area to the recovery room. Other chapters hold the pieces it builds on: vital sign physiology in chapters 5 and 6, medications and anesthesia in chapters 12 and 13, consent in chapter 15, how electrosurgeryee-LEK-troh-SUR-jer-eeUsing high-frequency electric current through a handheld tool to cut tissue or seal bleeding vessels during surgery.Full entry works in chapter 20, the OR table, the electrosurgical unit, the tourniquet unit and the SCD machine as equipment in chapter 23, asepsisay-SEP-sisThe state of being free of germs that cause disease, and the practices used to keep things that way.a- withoutsep- decay or infection-sis conditionFull entry in chapter 26, opening, counts, the time-outTYM-owtA pause just before a procedure when the whole team confirms the right client, procedure and site; also, a short break to calm a child.Full entry , gowning and draping in chapter 28, specimens in chapter 29, and dressings and room cleaning in chapter 30.
2The job, before, during and after
The Core Curriculum lists the assistant circulator's duties across the whole case.
Before the case
- Prepare the room: choose and place the furniture, choose, place and test the equipment, and choose and open the sterile supplies (chapter 28).
- Take part in the first count.
- Prepare the patient: take baseline vital signs, place a urinary catheter when ordered, support the anesthesia provideran-us-THEE-zhuh pruh-VY-derThe licensed professional who gives anesthesia and watches over the client's breathing and vital functions during a procedure.Full entry (chapter 13), position the patient, apply accessory devices, prep the skin and help with draping.
- Tie the team's gowns.
During the case
- Anticipate what the team will need next.
- Take part in the counts and the records.
- Watch the traffic: keep the doors closed and people coming and going to a minimum.
- Care for specimens (chapter 29).
After the case
- Secure the drains and dressings, support the anesthesia provider, move the patient to the stretcher and take them to recovery.
- Finish the records and help disinfectiondis-in-FEK-shunCleaning a surface or object with chemicals or heat to kill most germs, though not always all bacterial spores.Full entry the room (chapter 30).
The patient is never left alone. Once the patient is on the OR table, at least the circulating person and the anesthesia provider stay in the room until the sterile team starts. A patient left alone can fall, and the team can be held liable for abandonmentuh-BAN-dun-mentLeaving clients in your care without proper notice or a handoff to another qualified caregiver.Full entry .
3Preparing the patient
Much of the preparation happens before the patient reaches you, on the ward, in the holding area or at home. Your job is to know what should have been done and to notice when something was missed. The surgical checklist on arrival confirms that the preoperative steps are complete.
The checks on arrival cover the patient's identity, the procedure and site with the surgeon's mark, the signed surgical and anesthesiaan-us-THEE-zhuhLoss of feeling or sensation, often brought on by drugs so that surgery or a procedure can be done without pain.an- withoutesthesi/o feeling, sensation-ia conditionFull entry consents, any resuscitationrih-sus-ih-TAY-shunEmergency treatment to restore breathing, heartbeat or blood circulation.Full entry orders, the allergies (asked again in the holding area), any medications already given, and the records and images that came with the patient. Chapter 15 covers consent and advance directivead-VANS dih-REK-tivA legal document in which a person states their wishes for medical care, for a time when they cannot speak for themselves.Full entry .
Bowel prep
Many operations need the bowel emptied the day before, which can be done at home with a ready-made product or one the surgeon prescribes. An empty bowel lowers the risk of injuring the colon and gives the surgeon a clearer view. A routine enemaEN-uh-muhLiquid put into the rectum and lower bowel through the anus.Full entry is no longer used, except for some bowel and gynecologygy-nuh-KOL-uh-jeeThe branch of medicine that cares for the female reproductive organs and breasts.gynec/o woman-logy study ofFull entry operations, and a patient having bowel surgery may also be on a low-residue diet. Enhanced recovery pathways for some operations, such as gynecologic surgery, leave the bowel prep out.
Bathing
Patients are told to bathe or shower the night before and the morning of surgery, and to wash the scalp and hair, which removes skin flakes and oil and may not be possible again for days. They are also told not to shave near the surgical site themselves, because shaving raises the risk of infection.
- The surgeon's orders say whether the wash is soap or an antiseptic such as CHG or povidone-iodinePOH-vih-done EYE-uh-dineA brown antiseptic solution of iodine used to kill germs on the skin before procedures and on wounds.Full entry ; a surgeon may order an antiseptic when the risk of a surgical site infection is high. Bathing lowers the number of germs on the skin, and although it has not been proven to prevent infections by itself, its benefit outweighs any harm.
- A patient washing with CHG rinses off all soap and shampoo first, because they weaken it, keeps it out of the eyes and ears, and puts no body lotion on afterward.
The CDC's 1999 guideline, which AST's 2008 skin prep standard quotes, requires every patient to shower or bathe with an antiseptic at least the night before surgery.
Nothing by mouth (NPO)
A patient is kept NPO before surgery so there is little or nothing in the stomach to vomit and breathe into the lungs (aspirationas-puh-RAY-shunBreathing food, liquid, saliva or stomach contents into the airway and lungs; also, drawing fluid out with suction or a needle.Full entry ) under sedationsih-DAY-shunA calm, relaxed or sleepy state brought on by drugs, or the use of drugs to cause it.sed calm, settle-ation processFull entry or general anesthesiaJEN-er-ul an-es-THEE-zhuhDrug-induced loss of consciousness and feeling over the whole body, so a person feels nothing and is not aware during surgery.an- withoutesthesi/o feeling, sensation-ia conditionFull entry .
- The anesthesia team sets the fasting time by the type of surgery and the patient's age and condition, because a long fast can dehydrate children and older adults.
- For healthy patients having planned surgery, the American Society of Anesthesiologists' minimum fasting times, from its 2017 guideline, are 2 hours after clear liquids, 4 hours after breast milk, 6 hours after infant formula, other milk or a light meal, and 8 hours after a full meal. A 2023 ASA update left these times standing and added guidance only on three topics the 2017 guideline had not covered: clear liquids that contain carbohydrate (with or without protein), chewing gum, and how long children fast.
- If you learn that a patient has eaten or drunk when they should not have, the surgeon must be told right away. The case may be rescheduled.
- Patients must not use alcohol, tobacco or recreational drugs for at least 12 hours before surgery, because they can cause problems with the anesthetican-us-THET-ikA drug that causes loss of feeling, with or without loss of consciousness.an- withoutesthesi/o feeling, sensation-ic relating toFull entry and the other drugs given around surgery.
Belongings, prosthetics, jewelry and nail polish
- Belongings and clothing: patients are asked to leave valuables at home. Whatever they bring is collected and either given to a family member or locked up, and the patient is told it is safe and will be returned after surgery. Personal clothing usually comes off, and the patient wears a clean hospital gown.
- prostheticpros-THET-ikDescribes an artificial part made to replace a missing or damaged body part, such as a limb, joint, eye or heart valve.prosthe an addition (from Greek)-tic relating toFull entry : a denture, hearing aids and other removable prosthesispros-THEE-sisAn artificial body part that replaces one that is missing or does not work, such as an artificial leg, joint, eye or heart valve.Full entry come out before surgery whenever possible. Each one is labeled and kept safe so it is not lost or mixed up with another patient's. Dentures can fall back into the throat and block the airway when the jaw relaxes, though some anesthesia provideran-us-THEE-zhuh pruh-VY-derThe licensed professional who gives anesthesia and watches over the client's breathing and vital functions during a procedure.Full entry leave them in until endotracheal intubationen-doh-TRAY-kee-ul in-too-BAY-shunPutting a breathing tube through the mouth or nose into the windpipe (trachea).endo- withintrache/o windpipe-al relating toFull entry because they help a face mask fit. Wigs and hairpins come off too.
- Hearing aids and glasses: let the patient keep them as long as possible so they can hear and see you. A hearing aid may even be left in place so the team can talk with the patient.
- Jewelry: all jewelry, body piercings included, comes off before transport, placed in a labeled container and kept in a secure place. Jewelry can catch on bedding and tear the skin, cause pressure injuryPRESH-er IN-juh-reeDamage to the skin and the tissue beneath it from pressure, or pressure with shear, usually over a bony area or under a device.Full entry in the surgical position, collect pooled prep solution, and cause electrosurgeryee-LEK-troh-SUR-jer-eeUsing high-frequency electric current through a handheld tool to cut tissue or seal bleeding vessels during surgery.Full entry burns in three ways: the active electrode touching the metal, heat from the tissue around it warming the metal, or the metal giving the current another path out of the body. If a piercing cannot come out, tell the circulator, because another kind of energy device may be needed (chapter 20). The skin under it also carries many germs. Jewelry that cannot be removed, such as a dermisDER-misThe thick layer of skin under the epidermis that holds blood vessels, nerves, hair roots and glands.derm/o skinFull entry implant, is recorded, padded so it cannot press on the skin, and reported at handoff reportHAND-off ree-PORTThe passing of information and responsibility for a client's care from one nurse or team to another.Full entry . Some facilities let a wedding ring be taped in place; follow your facility's policy.
- Nail polish and makeup: polish is removed so the nail bed can be seen. The pulse oximeter shines light through the fingernail, and colored polish hides the color change that shows how blood refills the nail. Makeup is left off so the anesthesia provider can watch skin color, and cosmetics can weaken the skin antiseptic. Before some eye surgery, eye makeup is stopped for 5 days or more, so no particles can get into the eye. For surgery on a hand or foot, artificial nails and coatings come off as well.
Voiding
The patient is asked to empty the bladder (void) just before leaving for the OR. An empty bladder gives the surgeon a better view of the abdominal organs and is less likely to be injured. If the bladder must stay empty throughout the case, a urinary catheter may be placed, often in the OR after anesthesia starts.
Communication barriers
Some patients cannot easily understand you or tell you what they need.
- A different language: arrange an interpreter ahead of time, so one is there when the patient needs them.
- Hearing loss: a patient with profound deafness should have an interpreter. Face the patient, speak slowly and clearly, and use hand gestures.
- Sight loss: tell the patient what you are about to do before every move, describe the room, and stay in contact.
- Children: speak in simple, concrete words, stay calm, and never give false reassuranceFAWLS ree-uh-SHUR-ensTelling a person that everything will be fine when there is no real basis for saying so.Full entry . Children take words literally.
- Tell the holding area staff exactly how the patient's hearing or sight is affected, so everyone can help.
Hair removal
AST recommends not removing hair at all. Hair is removed only when the surgeon decides it will get in the way, and only on the surgeon's order. Shaving makes tiny cuts in the skin that germs can grow in, so a razor raises the risk of a surgical site infection.
When hair removal is ordered:
- Do it in the preoperative holding area, where the patient has privacy and good light, never in the OR, and do it as near the start of surgery as you can.
- Use an electric clipper. A depilatory cream is the second choice, and only after a small test patch on the skin, done at least 12 hours before surgery, shows no reaction.
- If the surgeon still orders a shave, it is done as close to surgery as possible, in private, by someone skilled, with the skin and hair wet, taking great care not to nick the skin.
- Never shave eyebrows or remove eyelashes, which may grow back badly or not at all. Thick brows and long lashes may be trimmed carefully with small scissors.
- Pick up loose hair with tape so it cannot reach the wound.
- For head and face surgery, hair can often stay: it is braided or held away from the incision with elastic bands or a water-based, nonflammable gel.
- Hair removed for a craniotomykray-nee-OT-uh-meeSurgery in which a piece of the skull is removed to reach the brain, and usually put back at the end.crani/o skull-tomy cutting intoFull entry belongs to the patient. Bag it, label it with the patient's name and number, and send it with the patient.
- Removing hair from the head can upset a patient, so the surgeon should talk with the patient first about how much will come off.
- Record where the hair was removed, when, how, who did it, and the condition of the skin before and after.
Baseline vital signs
In some facilities the surgical technologistSUR-jih-kul tek-NOL-uh-jistA member of the operating room team who prepares the sterile field and instruments and hands them to the surgeon.Full entry measures the patient's vital signs. You measure them accurately, record them and report them to the RN or the surgeon. You do not interpret them or make a diagnosis from them.
A set taken before the case is the baseline: the numbers every later change is compared with. During the case, the anesthesia provider monitors them electronically. Wash your hands, identify the patient, explain what you are doing, and record or report what you find.
- Temperature: note the route you used, because each route reads a little differently. An oral temperature is normally about 98.6°F (37°C). A baseline also helps rule out an infection before surgery, and AST counts a core temperature below 36°C as hypothermiahy-poh-THER-mee-uhA body temperature that has fallen below the normal range.hypo- belowtherm/o heat-ia conditionFull entry .
- Pulse: feel the radial artery, on the thumb side of the wrist about an inch above the base of the thumb, with the pads of your first two or three fingers. Count for one full minute and note whether the rhythm is regular and the beat strong or weak; later readings may be counted for 30 seconds and doubled when the rhythm is regular. A normal adult pulse at rest is 60 to 100 beats a minute. Anxiety sometimes raises it in a patient coming to the OR.
- Respirations: watch the chest rise and fall and count the breaths for one full minute, noting how deep and how regular they are. Count while the patient is unaware, because people change their breathing when they know they are being watched. A normal adult respiratory rate is 12 to 20 breaths a minute; one reference gives 10 to 20.
- Blood pressure: choose a cuff that fits, because a cuff too small reads falsely high and one too large reads falsely low. Support the arm at heart level, and never use an arm that has a dialysisdy-AL-ih-sisA treatment that removes wastes and extra fluid from the blood when the kidneys can no longer do it.dia- through, apart-lysis separation, looseningFull entry fistulaFIS-choo-luhAn abnormal passage between two organs or vessels, or between an organ and the skin.Full entry or is on the side of a mastectomyma-STEK-tuh-meeSurgery to remove all or part of a breast.mast/o breast-ectomy surgical removalFull entry . Place the stethoscope over the brachial artery at the inner elbow, inflate the cuff, and let the air out slowly. The first tapping sound is the systolic pressure; the point where the sounds disappear is the diastolicdy-uh-STOL-ikRelating to diastole, the part of each heartbeat when the heart muscle relaxes and its chambers fill with blood.diastole the heart's relaxing, filling phase (Greek, to expand)-ic relating toFull entry . Record it as a fraction with the arm and the patient's position, such as "120/80, left arm, supine." The American Heart Associationuh-MAIR-ih-kun HART uh-soh-see-AY-shunA US nonprofit group that funds heart and stroke research and publishes guidelines, including for CPR.Full entry calls a pressure below 120 systoleSIS-tuh-leeThe part of each heartbeat when the heart muscle squeezes and pumps blood out.Full entry and below 80 diastolic normal.
4Transport
Transport means moving the patient from one place to another in the facility, such as from the holding area to the OR. Facility policy decides who transports and how, based on the patient's history and condition. Safety comes first.
Ways to move a patient
- Stretcher (gurney): the usual way to carry a patient who cannot walk.
- The patient's bed: for some patients, and an ICU bed for an unstableun-STAY-bulDescribes a client whose condition is changing quickly or is hard to predict.Full entry patient on complex equipment, as the physician orders.
- Wheelchair: for a patient who needs only a little help, often an ambulateAM-byuh-laytTo walk, or to help a client walk.Full entry surgery patient.
- Walking: some facilities let ambulatory patients walk to the procedure room. Walk slightly behind the patient's shoulder so you can support them, and use a wheelchair if they seem unsteady.
- Crib, isolette or wagon: for babies and young children, often with a parent along.
A patient on a cardiac monitorKAR-dee-ak MON-ih-terA machine that shows the heart's electrical rhythm on a screen without stopping, using electrodes on the chest.Full entry travels with an RN or a physician and two others, whatever the vehicle.
Before you leave
Identify the patient (chapter 28), take the chart and records, which travel with the patient, and tell the nurse in charge that you are taking the patient. Have the stretcher ready with the safety strap, an IV pole, a pillow, a sheet and a blanket.
If the name, number, procedure or site does not match the chart, or the patient has no identification band, do not take the patient: tell the nurse in charge, and call the OR to explain the delay.
The principles of transport
Ergonomics: how the patient and the team are placed
- The patient travels feet first. You push from the patient's head, so you can look ahead for hazards and reach the airway at once if the patient has trouble breathing or vomits.
- Into an elevator, the patient goes head first, with the doors locked open, and comes out feet first, so the patient faces forward again when the doors open.
- With two people, one pushes from the head and the other guides the foot around corners and obstacles. The person at the head warns the other of hazards ahead.
- Raise the stretcher to about the height of your hips before you push it.
Communication
- Introduce yourself, identify the patient before you move them, and explain each action just before and while you do it.
- Warn the patient before bumps, such as the threshold of an elevator.
- Families may walk along as far as the semi-restricted area. Reassure them, tell them how they will get news, and give them a moment alone with the patient before the doors. Never share your opinions of the hospital, the surgeons or your coworkers with the patient or the family.
Dignity
- Keep the patient covered with at least a sheet or blanket. AST recommends a sheet and at least two warm blankets, and asking the patient whether they are warm enough.
- Use the patient elevator. If it is not free, wait until you can keep the patient's privacy.
Safety
- Self-protection: remind the patient to keep hands and arms inside the rails, where walls and doorways cannot hit them.
- Side rails: raise them as soon as the patient is on the stretcher and keep them up the whole time. Make sure the patient's hands are clear before you raise or lower a rail: ask the patient to rest their arms on their abdomen, or move the arm out of the way yourself.
- Slow, controlled movement: avoid quick moves, especially around corners, because after preoperative medication they can make the patient dizzy and sick enough to vomit. Use the mirrors at corners, get a second person for ramps, and never push doors open with the stretcher.
- Wheels and locks: set the brake whenever the stretcher stops and during every transfer. Use the steer setting to travel straight ahead and the neutral setting to maneuver in tight spaces. Steer by the hand grips, not the side rails, which can let go suddenly.
- Head up: unless the patient must lie flat, raise the head of the stretcher so the patient can see where they are going; it also helps a patient who is short of breath.
- The strap: the safety strap goes over the sheet or blanket, above the knees, never across the abdomen, where it can hinder breathing. You should be able to slide two fingers under it; one reference allows three on a stretcher strap.
- Never alone: a patient is never left alone during transport, and one who has had preoperative medication is kept with the side rails up.
- A falling patient: if a patient you are walking with starts to fall, do not try to hold their weight. Spread your feet wide, bend your knees, follow the patient down and ease them to the floor, protecting the head. Call for help and stay with the patient.
Accessory devices and fluid collection devices
- Hang IV bags on a pole at the foot of the stretcher, never at the head, where the pole could hit the patient. AST says the bags hang to the side, never above the patient's head.
- Carry an oxygen tank in its cradle under the stretcher, never on the mattress beside the patient.
- Keep drainage bags, such as a urine bag or a chest drainage unit, lower than the patient, and IV fluids higher. A urine bag never touches the floor. Secure every bag to the stretcher before the patient moves.
Wheelchair
- Lock the wheels before the patient sits down or stands up, and whenever the chair is at rest. Fasten the seat belt.
- Go into an elevator and down a ramp backward.
- Do not pile the chart and belongings in the patient's lap.
- Never use a chair whose brakes, footrests or armrests do not work. Keep the armrests up, cover the patient with a blanket that cannot tangle in the wheels, and remind the patient to keep hands and arms inside the armrests. A standard wheelchair holds about 300 pounds and a bariatric one about 500.
Special patients
- Children travel by stretcher, crib or bassinet, depending on age and condition, often with a parent, and many hospitals let a parent stay through the start of anesthesiaan-us-THEE-zhuhLoss of feeling or sensation, often brought on by drugs so that surgery or a procedure can be done without pain.an- withoutesthesi/o feeling, sensation-ia conditionFull entry . A crib has a clear cover for transport, but a toddler can still climb out fast, and crib bars and bumper pads can trap or strangle a child, so check that the crib meets safety standards and never leave the child alone. Chapter 18 covers how to talk with children of each age.
- Hearing or sight loss: allow more time and more help, keep hearing aids and glasses on as long as possible, warn the patient before every move, and give the holding area a full handoff reportHAND-off ree-PORTThe passing of information and responsibility for a client's care from one nurse or team to another.Full entry (see Communication barriers). A fast transfer without warning can frighten the patient.
- Obesity: obesity is a body mass index (BMI) of 30 or more, and morbid obesity a BMI of 40 or more. These patients have a higher risk of airway problems, sudden blood pressure changes when they are moved, breathing trouble and blood clots. Everything must hold the patient's weight and be ready before the patient arrives: a bariatric stretcher, bed and wheelchair, a bariatric OR table with long safety straps, an extra-large blood pressure cuff and tourniquet cuff, and a lift or other transfer device, with extra people to help.
- Critically ill: at least two people go with the patient besides the one pushing the stretcher or bed, and an unstable patient may need more, such as an RN; a CSTsee-es-tee (said as letters)Certified Surgical Technologist, a credential for surgical technologists; in maternity care, contraction stress test.Full entry can be one of them, working under the physician's direction. Before the move, every batteryBAT-uh-reeIn law, touching a person on purpose without their consent.Full entry -powered device is fully charged. The patient travels with a blood pressure monitor, a pulse oximeter, a cardiac monitor, a defibrillator, airway supplies with an oxygen source that holds a 30-minute reserve, and basic resuscitationrih-sus-ih-TAY-shunEmergency treatment to restore breathing, heartbeat or blood circulation.Full entry drugs. On a portable mechanical ventilationmeh-KAN-ih-kul ven-tuh-LAY-shunBreathing support from a machine, a ventilator, that pushes air into the lungs through a tube or a mask.Full entry , the team confirms its alarms work and sends a fully charged backup battery along. The reason for the transport, its time and the patient's condition go in the record.
- Police custody: one or two officers stay with the patient at all times, and an adult may wear handcuffs or leg restraintrih-STRAYNTAny device, drug or method used to limit a person's movement or behavior that they cannot easily remove or refuse.Full entry , which usually stay on during transport. Let the unit know ahead of time, introduce yourself to the officers and the patient, and explain how you will transport the patient, including the identity check. The officers cooperate with medical care, and you follow their security procedures.
5Transfer to the OR table
Transfer means moving the patient from one surface to another: from the bed to the stretcher, from the stretcher to the OR table, and back after surgery. A move between two flat surfaces side by side is a lateral transfer.
The principles of transfer
- Lock everything: the OR table, the stretcher wheels and any wheelchair are locked before the patient moves.
- Enough people: an awake patient who can move needs at least two people to help, one holding the stretcher steady and one on the far side of the table to receive the patient. A patient who cannot move needs at least four.
- anesthesiaan-us-THEE-zhuhLoss of feeling or sensation, often brought on by drugs so that surgery or a procedure can be done without pain.an- withoutesthesi/o feeling, sensation-ia conditionFull entry at the head: for an anesthetized patient, the anesthesia provideran-us-THEE-zhuh pruh-VY-derThe licensed professional who gives anesthesia and watches over the client's breathing and vital functions during a procedure.Full entry stands at the head, protects the airway and the neck, and directs the move. An awake patient waits for the anesthesia provider's word before moving across. One or more people stand on each side and one at the feet.
- Dignity: keep the patient covered, expose only what must be exposed, and explain each step before you do it. Keep the room quiet.
- Drains and tubes: find every IV line, catheter and drain before you move, including any hidden under the gown. Move the bags and devices first, then the patient. Afterward, check that nothing is kinked and that drainage bags hang below the patient.
- Lift, never slide: dragging the patient across the sheet causes frictionFRIK-shunThe rubbing of one surface against another, such as skin against bed sheets.Full entry and shear, which can tear fragile skin. Use a transfer device for a patient who cannot help.
- The safety strap: apply it across the thighs about 2 inches above the knees the moment the patient lies centered on the table. AST says you should be able to slide two fingers under it easily, so it holds without pressing on the skin.
- Explain the strap: tell the patient honestly that the strap is there for safety. Never joke that you are tying them down.
Self and assisted transfers
In a self transfer, an awake patient moves onto the table under the team's guidance. In an assisted transfer, the team moves a patient who cannot help.
For a self transfer: lock the wheels, brace your bodies against the stretcher and the table so neither can shift, ask the patient to keep the blanket on and move across slowly, help them as needed, apply the safety strap, and only then move the stretcher away.
From the bed to the stretcher it works the same way: make room for the stretcher, lower the near rails of the bed and the stretcher, line them up at the same height and lock both, free every tube and bag, and guide the patient across slowly under the top sheet. Then raise the rails, fasten the strap over the sheet or blanket and add another blanket.
For an assisted transfer, the team uses a transfer device, keeps the patient's spine in line, and moves together on one signal. In a logrollLOG-roleTo turn a client as one unit, keeping the head, neck, spine and hips in a straight line.Full entry , the team turns the patient onto one side as a single unit, slides the device underneath, rolls the patient back onto it, and then pulls the device, not the patient, across to the other surface.
Some patients are at high risk of falling: those with a history of falls or fainting, dizziness, poor vision, confusion or dementiadih-MEN-shuhA long-term, usually worsening decline in memory and thinking that is serious enough to affect daily life.de- away fromment mind-ia conditionFull entry , impairmentim-PAIR-mentA loss or weakening of a body function or ability, such as sight, hearing, movement or thinking.Full entry mobility, or medicines that cause falls. The team transfers these patients rather than letting them move themselves, and someone stays at the patient's side until anesthesia is given or the patient is positioned for draping.
Into and out of a wheelchair
Moving a patient between a bed or table and a wheelchair takes the patient's help, so explain each step before you do it; many older patients are afraid of falling. Get help for a patient at high risk of falling, such as one who is weak, unsteady, heavy or attached to devices.
- Check the chair: its brakes and steering work, and it is rated for the patient's size and weight.
- Free the lines: identify the patient, free every tube and line with enough slack, and move the devices first (tubing, oxygen tank and collection bags), then the patient.
- Sitting to standing: stand in front of the patient with your hands around the torso, under the arms. Bend your front leg slightly and brace your other foot behind you, then rock back slowly and bring the patient up.
- Standing to the chair: with small steps, turn together until the patient's back lines up with the seat. With your feet shoulder-width apart, bend your knees, tighten your stomach muscles and lower the patient slowly with your thigh muscles, keeping your spine in line with the patient's.
- Settle the patient: feet on the footrests, a blanket or sheet over the patient, the belt fastened, and the chart and records with you.
- Chair to bed or table: lower the bed or table as far as it goes, line the chair up beside it and lock the wheels. Ask the patient to push down with the hands if they can, while your arms go under theirs with your hands over the shoulder blades. Brace one foot back, rock back as the patient stands, and turn step by step until the patient is square to the edge, then ease them down to sit. One person supports the back and head while another lifts the legs onto the table, and a third stands on the far side so the patient cannot roll off. Ease the patient down, cover them and apply the safety strap or raise the rails. Give the patient time, and show them where they are going rather than steering them there.
Transfer devices
The device depends on the patient's weight, condition and level of consciousnessLEV-ul uv KON-shus-nisHow awake, alert and aware of their surroundings a person is.Full entry :
- a transfer board of smooth, semi-rigid plastic, or a slick nylon glide sheet;
- a roller board, metal rollers inside heavy fabric, covered with a sheet; AST recommends a roller or other lifting device to move a patient onto the OR table;
- an air-assisted device, a mattress that floats the patient on a thin layer of air;
- a mechanical lift, which AST says should be used for a patient with morbid obesity.
A draw sheet is still used in many places, but safe patient handling programs warn against relying on strength alone. Chapter 23 describes the devices themselves.
Body mechanics for the team
Moving and positioning a patient who cannot help is one of the hardest jobs the team does, and poor body mechanics can injure your neck, shoulders, back and knees. Causes of moving injuries include too few people, missing or unfamiliar equipment, staff who are untrained, rushed, tired or distracted, and poor communication. AST lists the body mechanics that protect you:
- Stand with your feet about shoulder-width apart, with your weight on both feet.
- Get as close as you can to the patient or the body part you are moving.
- Tighten your stomach muscles to support your back, and keep your lower back in its natural curve.
- Lift with your legs. Do not twist at the hips; turn your whole body.
- Move smoothly, together with the team, never with a jerk.
- Push heavy equipment rather than pulling it.
- Slide a patient sideways between surfaces of equal height without bending your knees, and bend your knees for any move up or down. Never lift while reaching forward, away from your center of gravity.
- Know your limits, get enough help, and use a lifting or transfer device whenever you can.
- One person leads, and everyone moves together as one unit under that person's direction.
Lock it, lift it, strap it. Everything locked before the move, the patient lifted and never dragged, and the safety strap on 2 inches above the knees as soon as the patient is centered.
6Urinary catheterization
A urinary catheter is a flexible tube passed through the urethrayoo-REE-thruhThe tube that carries urine from the bladder out of the body.Full entry into the bladder. It either drains the bladder once and comes out (straight catheterizationSTRAYT kath-uh-ter-ih-ZAY-shunPutting a catheter through the urethra into the bladder to drain urine, then taking it out right away.Full entry ) or stays in to drain continuously (an indwelling urinary catheterin-DWEL-ing YUR-ih-nair-ee KATH-uh-terA tube passed through the urethra into the bladder and left in place to drain urine into a bag.Full entry ).
Why a catheter is placed
The Core Curriculum lists the reasons a catheter may be ordered:
- Bladder decompression: an empty bladder is out of the way and less likely to be injured during pelvic surgery.
- Visualization: the surgeon sees the pelvic organs better.
- Monitoring output: urine output shows how well the kidneys are perfusionper-FYOO-zhunThe flow of blood through the body's tissues, bringing them oxygen and nutrients.per- throughfus pour-ion processFull entry and how much fluid the patient has.
- Control of bleeding: after prostatePROS-taytA walnut-sized gland below the bladder in males that surrounds the urethra and makes part of the fluid in semen.Full entry surgery, a large catheter balloon may be used to press on the bladder neck.
- Diverting urine from the wound and promoting healing after surgery on the urinary tract.
- Preventing trauma to the bladder, and keeping it from overfilling in a long case.
- Specimen collection, urine retention and incontinencein-KON-tih-nensLoss of control over the bladder or bowel, so urine or stool leaks out without the person meaning it to.in- notcontin/o to hold back-ence state ofFull entry .
A catheter is never routine. AST tells surgery departments to base their practice on the CDC's guideline, which accepts an indwelling catheter in surgery for a long operation, surgery on the urinary tract, a need to measure urine during the case, large amounts of IV fluid or diureticdy-yoo-RET-ikA drug that makes the kidneys pass more water and salt out of the body as urine.dia- throughur/o urine-etic relating toFull entry , and some needs after surgery, such as recovering from an epidural anesthesiaep-ih-DOOR-ul an-us-THEE-zhuhPain relief or numbness from an anesthetic drug given through a thin catheter into the space just outside the covering of the spinal cord.epi- upon, overdur/o dura (the tough covering of the spinal cord)-al relating toFull entry . The catheter comes out as soon as it is no longer needed; for a surgical patient, within 24 hours after surgery unless there is a reason to keep it longer.
The risk: infection and injury
The bladder and the upper urethra are sterile. Urinary tract infections are the second most common infection caught in healthcare, and most are linked to a urinary catheter. A catheter-associated urinary tract infectionKATH-uh-ter uh-SOH-see-ay-tid YOOR-ih-nair-ee trakt in-FEK-shunA urinary tract infection that develops in a person who has, or recently had, a urinary catheter in place.Full entry (CAUTI) can spread to the kidneys and into the bloodstream.
- Escherichia coliesh-uh-RIK-ee-uh KOH-lyeA rod-shaped bacterium that normally lives in the human intestine, some strains of which cause infection.Full entry , a bowel germ, causes 80 to 90 percent of urinary tract infections. The urinary meatusYOOR-ih-nair-ee mee-AY-tusThe opening at the end of the urethra through which urine leaves the body.Full entry lies close to the rectum, especially in women, so it is easily contaminated.
- The biggest risk factor is leaving an indwelling catheter in too long. A poor insertion technique and a drainage system that is opened also raise the risk.
- Repeated failed attempts scrape the lining of the urethra, which hurts and invites infection, and rough insertion can damage the urethra and the sphincterSFINGK-terA ring of muscle that tightens to close an opening or passage in the body and relaxes to open it.Full entry muscle.
This is why catheterization is a strictly sterile procedure. AST says surgical technologistSUR-jih-kul tek-NOL-uh-jistA member of the operating room team who prepares the sterile field and instruments and hands them to the surgeon.Full entry who insert and remove catheters should be graduates of an accredited program and hold current CSTsee-es-tee (said as letters)Certified Surgical Technologist, a credential for surgical technologists; in maternity care, contraction stress test.Full entry certificationser-tih-fih-KAY-shunA credential from a professional organization showing that a person has met the standards for a specialty.Full entry . Your facility's policy decides who places them.
Before you start
The Core Curriculum names what to consider:
- Physician's order: a catheter needs an order from the surgeon, which may be on the preference card, naming the type of catheter.
- Catheter size: use the smallest catheter that will drain the bladder, which causes the least trauma. Women usually need a 14 or 16 French catheter and men a 16 or 18; children need much smaller sizes.
- Duration: how long it will stay decides whether you need a straight catheter or an indwellingIN-dwel-ingPlaced inside the body and left there for a period of time.Full entry one.
- Modesty: expose only the genitals, and keep the rest of the patient covered.
- Positioning and lighting: place the patient correctly and aim a light so you can see the meatusmee-AY-tusAn opening or passage in the body, such as the urinary opening or the ear canal.Full entry clearly.
- surgical asepsisSUR-jih-kul ay-SEP-sisPractices that keep an area or object completely free of microorganisms; also called sterile technique.a- withoutsepsis decay, infectionFull entry throughout, with a hand wash just before and just after.
- Patient safety: check for allergies to latexLAY-teksNatural rubber made from the sap of the rubber tree, used in some gloves, catheters and other medical supplies.Full entry or to the antiseptic; consider joint limits when you position the legs; insert gently to prevent trauma to the bladder or urethra; and protect against infection. A patient allergic to latex gets a silicone catheter.
Remove any genital piercing before you begin. Like other jewelry, it goes into a closed, labeled container and back to the patient after surgery.
When it is done
- It is usually done after anesthesiaan-us-THEE-zhuhLoss of feeling or sensation, often brought on by drugs so that surgery or a procedure can be done without pain.an- withoutesthesi/o feeling, sensation-ia conditionFull entry starts, so the patient is spared discomfort.
- It comes before the skin prep, except for a patient in lithotomylih-THOT-uh-meeA position lying on the back with the hips and knees bent and the legs raised and spread apart, often in stirrups.lith/o stone-tomy cutting intoFull entry , who is catheterized right after the perinealper-ih-NEE-ulHaving to do with the perineum, the area between the genitals and the anus.Full entry prep, as part of it.
- For a patient who will lie on one side, it is done before the patient is turned.
- Gather, check and open the supplies before the patient is positioned.
Supplies
A sterile catheter kit holds almost everything: sterile gloveSTAIR-ul gluvA glove that has been sterilized and packed so it can touch a sterile field or an open body area without bringing in germs.Full entry to put on by the open-glove method, a drape that goes under the buttocks and a fenestrated drape, antiseptic and swabs or cotton balls with forcepsFOR-sepsA hand instrument with two blades or arms used to grasp, hold or pull tissue or objects.Full entry , a single-use packet of lubricant, a syringe of sterile water for the balloon, a specimen cup, and the catheter with its drainage tubing and bag. AST recommends a catheter already sealed to its tubing, says an antiseptic-coated catheter should not be used as routine, and says an antiseptic lubricant is not needed as routine.
Catheters are sized on the French scale: the larger the number, the wider the catheter. The size is printed on the drainage end, often with a colored ring.
The Core Curriculum sorts catheters into three types:
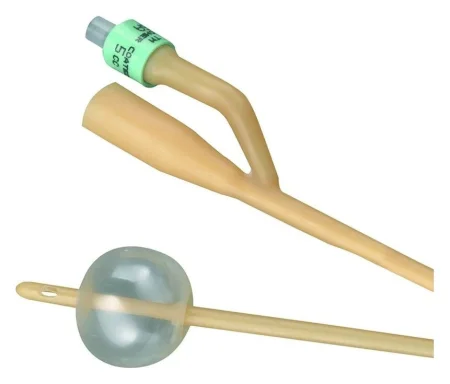
- Indwelling (retention): the Foley catheter, the most common. A small balloon near its tip is filled with sterile water inside the bladder so the catheter cannot slip out. A two-way Foley has two channels, one to fill the balloon and one to drain urine. The balloon port is marked with how much water the balloon takes. AST calls for a 5-mL balloon for an adult and a 1.5- or 3-mL balloon for a child, filled as the maker directs. It says a 30-mL balloon should not be used: filled, it sits high in the bladder, presses on the bladder neck and pelvic floor, causes spasmSPAZ-umA sudden, involuntary tightening of a muscle or of the muscle in a hollow organ or tube.Full entry and leaks, and leaves urine pooled below its drainage eyes.
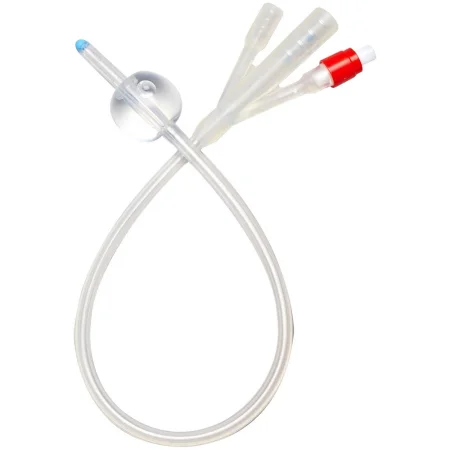
- Irrigating: the three-way Foley adds a third channel to run fluid into the bladder or to give medicine. Its larger balloon, 30 or 75 mL, is used mainly after prostate surgery, on the surgeon's order, where it presses on the bladder neck to stop bleeding. This is how a catheter controls bleeding, one of the reasons the Core Curriculum lists. A large balloon is never used for routine drainage, which takes AST's 5-mL balloon.
- Temporary (straight): a catheter with no balloon, also called a Robinson, intermittent or red rubber catheter. It drains the bladder once and comes right out, for example to empty the bladder before surgery when continuous drainage is not needed.
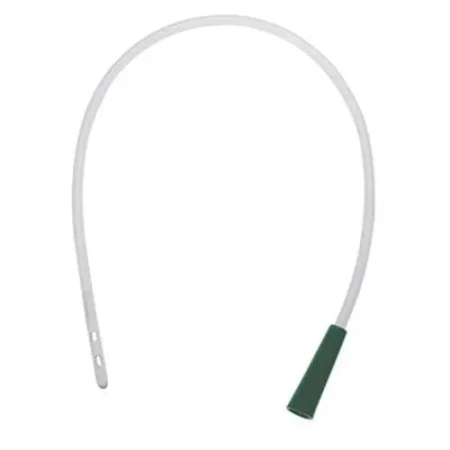
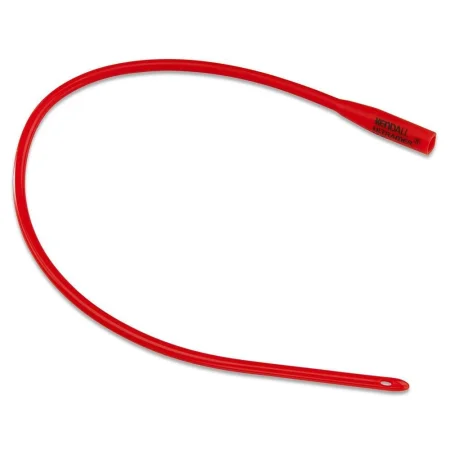
A coudé catheter has a curved tip that follows the curve of the male urethra past an enlarged prostate. Its tip is kept pointing up as it goes in.
Collection devices: the drainage bag, and for close measuring a urine meter, a collection unit marked so small amounts can be read accurately.
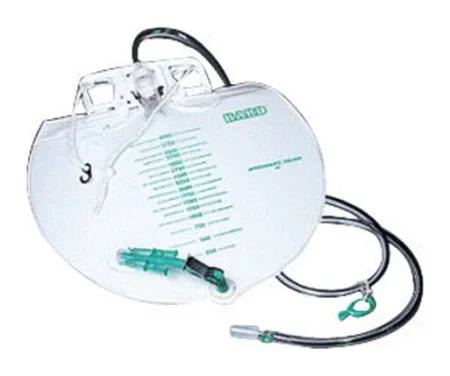
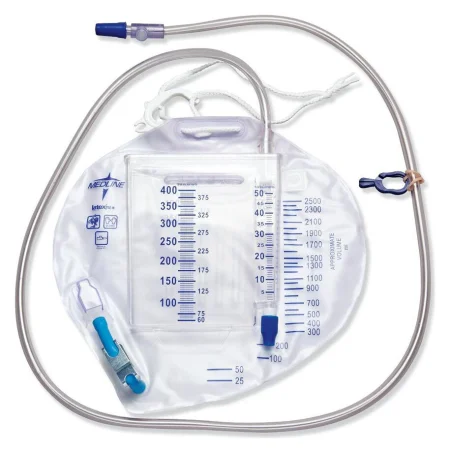
Step by step
- Confirm and prepare. Confirm the order and the catheter, check allergies, and get the anesthesia provideran-us-THEE-zhuh pruh-VY-derThe licensed professional who gives anesthesia and watches over the client's breathing and vital functions during a procedure.Full entry 's word that it is safe to start. Wash your hands.
- Position the patient. A female patient lies on the back with the knees bent and the hips turned out (the frog-leg position); a male patient lies supine. Put a waterproof sheet under the buttocks, aim the light and cover everything but the genitals.
- Open the kit on a small table, flaps away from you first and toward you last, and put on the sterile gloves by the open-glove method (chapter 28 shows the steps).
- Drape. For a female patient, slide the bottom drape under the buttocks touching only its edges, then place the fenestrated drape so the labia show through the opening. For a male patient, the opening goes over the penis.
- Prepare the supplies. Pour the antiseptic onto the swabs or cotton balls, open the lubricant, attach the water syringe to the balloon port, and lubricate the catheter tip. Do not pretest the balloon unless the maker's instructions call for it: some makers test every catheter before packing it, and a silicone balloon is not pretested at all, because the silicone can form a cuff or crease that injures the urethra going in and coming out. Point the drainage end into the tray or connect it to the bag.
- Expose the meatus with your nondominant hand. For a woman, spread the labia; for a man, hold the penis just below the head and pull back any foreskin. This hand is now nonsterile and stays in place until the catheter is in. Your dominant hand stays sterile and touches only sterile supplies.
- Clean the meatus. For a woman, wipe from front to back with one stroke per swab: the far side, then the near side, then down the middle over the meatus. For a man, start at the meatus and wipe outward in widening circles over the head of the penis. Use a fresh swab each time, never bring a used one back over a cleaned area, and drop each one away from the sterile fieldSTAIR-ul feeldAn area set up with sterile drapes and supplies, kept free of all germs, for a sterile procedure.Full entry .
- Insert. Hold the catheter about 2 inches from its tip and slide it in slowly with steady pressure. Never force it. When urine flows, advance it about 2 inches more.
- Inflate the balloon with sterile water, never air or saline, in the amount the catheter maker's instructions give, and never less, because an underfilled balloon can distort. Several references fill a 5-mL balloon with 10 mL, because some of the water stays in the inflation channel. Then pull back gently until you feel it stop against the bladder neck.
- Return any foreskin to its normal position, so it does not cut off the blood supply to the head of the penis.
- Secure the catheter to the thigh with tape or a securing device, with no pull on the urethra.
- Hang the bag below the bladder, off the floor, and measure and record the first urine that drains. Take off your gloves and wash your hands. Record the insertion as well (see Monitoring urine output).
Two 2014 references pretest every balloon before insertion.
When it does not go right
- Resistance: in a man, an enlarged prostate is the usual cause. Pull back slightly and advance slowly again. If it still will not pass, withdraw the catheter and tell the surgeon, who may ask for a coudé catheter.
- No urine in a woman: the catheter may have gone into the vagina. Leave it there as a markerMAR-kerSomething that can be measured, such as a substance in the blood, that shows a disease or body process is present.Full entry , get a new sterile catheter, clean the meatus again and insert the new one into the urethra; remove the first one after.
- Blood: if blood comes back through the urethra, gently withdraw the catheter and ask for a medical assessment right away.
- Contamination: if your sterile hand touches anything nonsterile, stop and change gloves. If the catheter touches anything nonsterile, get a new one.
Keeping the drainage system safe
- Keep the system closed. If it is opened, leaks or is contaminated, the catheter and bag are replaced using sterile technique.
- Keep the tubing from kinking, and keep the bag below the bladder so urine never flows back. This matters most when the patient moves between the stretcher and the table, and whenever the patient is repositioned, check that the catheter still drains.
- During surgery, run the tubing under the leg with a little padding and hang the bag where the anesthesia provider can see it.
- When the bag must be emptied during a long case or in recovery, wear gloves and eye protection, use a clean container, do not splash, and do not let the spout touch the container. Never clamp the catheter or tubing to empty the bag.
- A sterile urine specimen is taken from the needlelessNEE-dul-lesWorking without a needle, such as an IV connector that a syringe or tubing attaches to directly.Full entry samplingSAM-plingTaking a small part of something, such as blood or tissue, or choosing a group of people for a study.Full entry port with a sterile syringe after the port is disinfectiondis-in-FEK-shunCleaning a surface or object with chemicals or heat to kill most germs, though not always all bacterial spores.Full entry .
force a catheter, inflate the balloon before urine flows, or lift the bag above the bladder. Each one can injure the patient or carry germs back into the bladder.
Monitoring urine output
The Core Curriculum breaks monitoring into three parts:
- Assessment: watch the color and amount of urine for any change, and report it to the surgeon and the anesthesia provider.
- Measurement: urine output is often measured every hour. Adult output of at least 30 mL an hour is the usual goal; if it drops, first check the tubing for kinks or blockage. A urine meter makes small hourly amounts easy to read.
- Documentation: record each amount in the operative or recovery record. Record the catheter itself too: the order, the reason, the date and time it went in, its size, the color and amount of the urine at insertion, and the name and credentials of the person who placed it.
7Positioning the patient
Positioning means placing the patient on the OR table so the surgeon can see and reach the surgical site, with the least strain on the patient's body. It is one of the main skills a surgical technologistSUR-jih-kul tek-NOL-uh-jistA member of the operating room team who prepares the sterile field and instruments and hands them to the surgeon.Full entry needs.
The goals of every position are to:
- keep the patient comfortable and treat them with dignity, exposing only what must be exposed;
- protect the airway and the patient's breathing and circulation;
- protect the skin, muscles, nerves, joints and spine from injury;
- give the surgeon access to the surgical site;
- give the anesthesia provideran-us-THEE-zhuh pruh-VY-derThe licensed professional who gives anesthesia and watches over the client's breathing and vital functions during a procedure.Full entry access to IV lines and monitoring sites;
- leave room for equipment such as the C-arm, microscope or robot.
Choosing the position
The Core Curriculum names four things that decide the position:
- The anesthesiaan-us-THEE-zhuhLoss of feeling or sensation, often brought on by drugs so that surgery or a procedure can be done without pain.an- withoutesthesi/o feeling, sensation-ia conditionFull entry method: under general anesthesiaJEN-er-ul an-es-THEE-zhuhDrug-induced loss of consciousness and feeling over the whole body, so a person feels nothing and is not aware during surgery.an- withoutesthesi/o feeling, sensation-ia conditionFull entry , positioning starts after the airway is secured. With a regional block, the patient may be positioned before or after the block.
- The procedure and the incision site, and how long the case will last.
- The patient: anatomical factors (height, weight, range of motion, joint replacements and other implants), physiologicfiz-ee-uh-LOJ-ikRelating to the normal working of the body.physi/o nature, body function-logic relating to the study ofFull entry factors (age, skin condition, heart, lung, circulation and nerve disease, nutrition), and safety factors such as allergies, confusion, fall risk and devices already in place, like a catheter or an ostomyOS-tuh-meeA surgically made opening from an inside organ, such as the bowel or urinary tract, through the belly wall to the outside.-ostomy surgical openingFull entry bag.
- The surgeon's and anesthesia provider's preference.
Read the chart and the schedule ahead of time, so the right table and positioning equipment are in the room and checked before the patient arrives. Check that every device will hold this patient's weight, and never use one for a purpose it was not made for. Chapter 23 covers the OR table and its attachments.
Rules for every position
- Anesthesia leads. Positioning starts only when the anesthesia provider says it is safe, and that provider directs every move of an anesthetized patient. Only the anesthesia provider controls the head, neck and airway.
- Enough trained people, with one person leading and everyone knowing their part.
- Move slowly and as one unit, within the patient's normal range of motion (ROM), the movement each joint normally allows, so the body can adjust its blood pressure and breathing.
- Pad the pressure points and bony prominences, and let no part of the body touch the metal of the table.
- Nothing hangs off the edge of the table or an armboard.
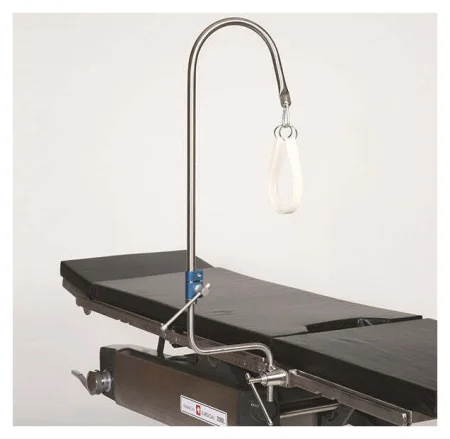
- Arms: on well-padded armboards at less than 90 degrees from the body, palms up, fingers straight. AST prefers no more than about 60 degrees for a supine patient. Keep armboards level with the table.
- Fingers: check that they are clear of the table breaks before any section moves.
- Legs: never crossed.
- Alignment: head, neck and spine straight and in line with the hips and legs, with no twisting.
- Eyes: never pressed. Under general anesthesia the eyelids are taped closed.
- The safety strap: snug, two fingers loose, never so tight it presses on the skin.
- Nothing rests on the patient: no Mayo standMAY-oh standA small tray on an adjustable stand placed over or beside the patient during surgery to hold the instruments used most often.Full entry and no heavy equipment.
- Tubes and lines: protect IV lines, the catheter and drains from being pulled out.
- Children: a child's size and weight decide which positioning aids fit, and infants need extra precautionprih-KAW-shunA step taken ahead of time to prevent harm, such as the infection-control practices used with every client.Full entry . Chapter 28 covers child-size padding and why tape never holds a child in place.
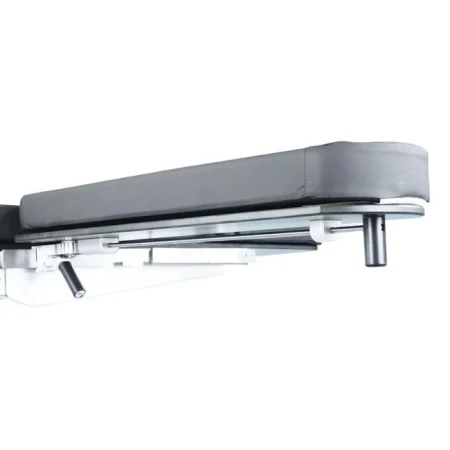
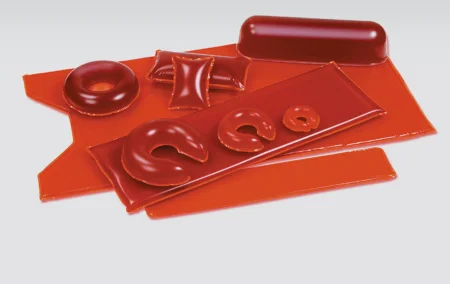
When the patient is positioned, the whole team checks the position before the skin prep starts: alignment, padding, arms on armboards, the safety strap and every device. Anyone who sees something that needs adjusting says so. The position is checked again at the time-outTYM-owtA pause just before a procedure when the whole team confirms the right client, procedure and site; also, a short break to calm a child.Full entry (chapter 28).
The assistant circulator records the position and the equipment: the patient's skin on arrival and on leaving the OR, the type of table, each positioning device and where it was placed, the position and any change of position, and any injury found afterward with what was done about it.
Positioning injuries
Under anesthesia the body can be bent into positions an awake person could never stand, and the reflexREE-fleksAn automatic body response to something that stimulates it, which happens without thought, such as the knee jerk.Full entry that would protect it are gone.
pressure injuryPRESH-er IN-juh-reeDamage to the skin and the tissue beneath it from pressure, or pressure with shear, usually over a bony area or under a device.Full entry . A pressure injury (older names: pressure ulcerUL-serAn open sore where the skin or the lining of an organ has broken down.Full entry , decubitus ulcer) is damage to the skin and the tissue under it, usually over a bony prominence, from pressure alone or pressure combined with shear or frictionFRIK-shunThe rubbing of one surface against another, such as skin against bed sheets.Full entry . Surgical patients get them more often than other hospital patients.
Steady pressure squeezes shut the small vessels that feed the tissue, and tissue starved of blood (ischemiais-KEE-mee-uhToo little blood flow to a part of the body, so the tissue does not get enough oxygen.isch- hold back-emia blood conditionFull entry ) dies; the longer and heavier the pressure, the greater the damage. That is why every bony prominence and every dependent area, the parts the body's weight presses down on, such as the sacrumSAY-krumThe large, triangle-shaped bone at the base of the spine, between the two hip bones.sacr/o sacrumFull entry when the patient is supine, is padded.
- The risk climbs with age, diabetes, poor circulation, a case of three hours or more, chronic low blood pressure, a raised body temperature, poor nutrition, a thin build and the use of a warming blanket. Some specialties, such as heart, vascular and orthopedic surgeryor-thuh-PEE-dik SUR-juh-reeSurgery on the bones, joints, ligaments, tendons and muscles.ortho- straightped child (the specialty began with straightening children's bones)-ic relating toFull entry , carry more risk.
- Most pressure injuries form over bony prominences in the legs. Patients who are older, thin or poorly nourished need extra padding there.
- Muscle and other tissue under the skin are damaged more easily than the skin itself, so an injury may not show at first.
- In a patient with severe obesity, extra foam or gel pads can be compressed under the patient's weight and add to the risk of a pressure injury, and folds of skin should be smoothed out.
Shear and friction. Friction is skin rubbing against a sheet. Shear happens when the skin is held while the body slides, pulling the skin out of place. Both come from dragging the patient, which is why the team lifts.
Joints and muscles. Moving a limb past its range of motion, or losing control of it during a move, can dislocationdis-loh-KAY-shunAn injury in which the ends of bones that meet at a joint are forced out of their normal position.Full entry a joint, tear tendons, ligaments or muscle, or cause a compression injury of those tissues, and can even break a bone. Padding, soft supports and keeping control of every limb prevent them.
Nerve injuries. The nerves most often injured in the OR are the ulnar nerve, the common peronealper-uh-NEE-ulHaving to do with the outer side of the lower leg, near the fibula bone.Full entry nerve and the brachial plexusPLEK-susA network of nerves or blood vessels that branch and join together.Full entry . Nerves are hurt by stretching and by pressure, and the injury can be temporary or permanent. Bending a joint past its normal range (hyperflexion) or straightening it past its range (hyperextension) stretches the nerves around it.
- Brachial plexus: the bundle of nerves from the neck to the arm. It is stretched by an arm abductionab-DUK-shunMoving a limb or part away from the midline of the body, such as raising an arm out to the side.ab- away fromduct to lead-ion actionFull entry (moved out from the body) more than 90 degrees, by turning the head away from an outstretched arm, and by shoulder braces.
- Ulnar nerve: lies close to the skin at the elbow. It is crushed by a poorly placed arm strap, by an elbow pressed against the table, or by someone leaning on a tucked arm. Pad the elbow and keep the palm up on an armboard.
- Common peroneal nerve: wraps around the outside of the knee. Pressure from a stirrup can injure it and cause foot drop.
Eyes and ears. Pressure on the eye can cause a corneaKOR-nee-uhThe clear, dome-shaped layer at the front of the eye, over the iris and pupil.Full entry abrasion or, worse, blindness, most often in the prone position; prone and steep head-down positions can raise the pressure inside the eye even without direct pressure. A donut headrest supports the head in line with the body in most positions except prone. A horseshoe headrest holds a prone patient's forehead and cheeks and leaves the face and airway in view, but the head is not fixed in it and can shift, so it is adjusted carefully and the eyes are checked often. The lower ear must lie flat, never folded under the head.
AST's 2011 positioning standard advises against the donut and the horseshoe headrest, because the head can shift in them until the eye takes pressure, and says to tape the eyes gently shut without padding them.
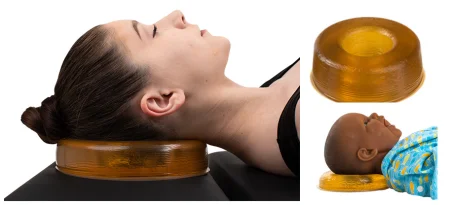
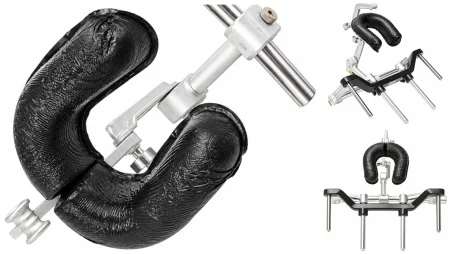
Breathing and blood pressure. In most positions the abdominal organs push up against the diaphragmDY-uh-framThe dome-shaped sheet of muscle under the lungs that is the main muscle of breathing; also the flat side of a stethoscope.Full entry and make breathing harder, especially for a patient with obesity, pregnancy or lung disease. Fast changes of position can drop the blood pressure, which is why every move is slow.
Supine and its variations
Supine (dorsalDOR-sulHaving to do with the back of the body, or the top of the hand or foot.Full entry recumbent): the patient lies flat on the back. It is the most common position, used for surgery of the head and neck, chest, breast and abdomen, for vascular surgery and for some orthopedicor-thuh-PEE-dikHaving to do with the bones, joints, muscles, ligaments and tendons, and the branch of medicine that treats them.orth/o straightped/o child (the field began with straightening children's bones)-ic relating toFull entry operations. Two to four people place it.
- Arms on padded armboards, less than 90 degrees, palms up; or, only when the surgery needs it, tucked at the sides, palms facing the body and elbows padded, held by a draw sheet that runs above the elbow and tucks between the patient and the mattress, never under the mattress, where the arm could slip off.
- A pillow under the knees takes strain off the lower back.
- Heels raised off the table with a gel pad or foam heel wraps, not a pillow that holds them up in midair, which the evidence links to more pressure injuries over the sacrum. Pad the sacrum and the elbows too, and use padded boots when needed so the feet do not drop.
AST's 2011 positioning standard protects the heels with a pillow, an ankle roll or a donut, and a 2022 textbook raises the lower legs on a pillow so the heels hang free over its edge.
- Safety strap 2 inches above the knees.
- The pressure points in supine are the back of the head, the shoulder blades, the bones of the upper spine, the elbows, the sacrum and tailbone, and the heels.
- A patient with heart or lung disease who cannot breathe lying flat may stay propped on pillows until anesthesia begins.
- A pregnant patient, or a patient with severe obesity, lying flat can have the vena cavaVEE-nuh KAY-vuhOne of the two large veins that return oxygen-poor blood from the body to the right atrium of the heart.Full entry and aorta squeezed by the abdomen, which drops the blood pressure and the blood flow to the baby. A wedge under the right hip, or tilting the table about 15 degrees to the left, relieves it.
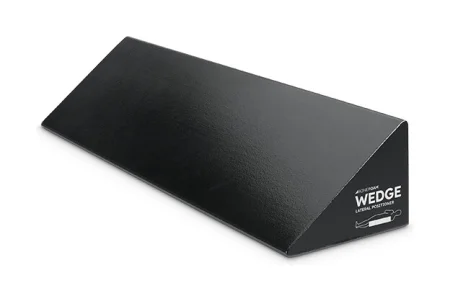
Trendelenburg positiontren-DEL-en-burg puh-ZISH-unA position in which the client lies on the back with the bed tilted so the head is lower than the feet.Full entry : supine with the table tilted head down, so the abdominal organs slide toward the head and away from the lower abdomen and pelvis. It is used for lower gastrointestinal, pelvic and prostatePROS-taytA walnut-sized gland below the bladder in males that surrounds the urethra and makes part of the fluid in semen.Full entry surgery.
- The anesthesia provider starts the tilt, and the table is tipped and leveled slowly.
- It raises the pressure inside the skull and the eyes, and the weight of the organs on the diaphragm makes breathing harder, so it is avoided when possible for patients with head injury or serious heart disease.
- Shoulder braces are not used, because they can injure the brachial plexus. To keep a patient from sliding toward the head in a steep tilt, the team uses an anti-skid pad, a vacuum positioner (bean bag) approved for that position, or a gel overlay with the patient lying directly on it, no sheet in between; padded cross-chest straps may be added once the arms are tucked.
AST's 2011 positioning standard says to avoid shoulder braces when possible, and if they must be used, to pad them and place them on the outer shoulders, away from the neck.
- Bending the knees by lowering the leg section, with the knees over the break, also helps stop sliding. Watch that the patient does not slide toward the head. After 4 hours of steep Trendelenburg, the patient is brought back to supine for 5 minutes.
reverse Trendelenburg positionree-VERS tren-DEL-un-burg puh-ZISH-unA position lying on the back on a bed or table that is tilted so the head is higher than the feet, with the body kept straight.Full entry : supine with the table tilted feet down, used for surgery of the upper abdomen and the neck.
- Blood pools in the legs, so the main dangers are low blood pressure and air entering a vein (venous air embolismEM-buh-liz-umThe blocking of a blood vessel by a mass carried there in the blood (an embolus), such as a clot, fat or an air bubble.embol/o plug-ism conditionFull entry ) when the head is above the heart. Tilt slowly and level slowly.
- A padded footboard keeps the patient from sliding down, with the soles flat against it, and the arms usually lie at the sides.
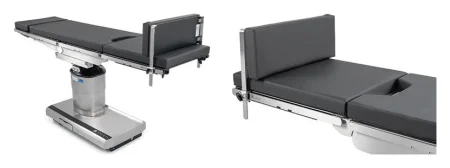
Fowler position (sitting): the patient sits up, with the upper part of the table raised and the knees bent. It is used for some head, neck, face and chest surgery. Semi-Fowler position (beach chair): a partly sitting position, reclined, with the knees bent; it is used for shoulder and breast surgery.
- The table breaks sit under the lower back and the knees. For semi-Fowler, the back of the table is raised about 45 degrees and the knees bent about 30 degrees; for the full sitting position, or some shoulder surgery, it goes up to 90 degrees. It is raised no higher than the surgery needs.
- A wedge under the thighs keeps the patient from sliding down as the back rises. When the back support is removed on one side for shoulder surgery, a second strap around the torso holds the patient.
- As in reverse Trendelenburg, the risks are low blood pressure, blood pooling in the legs and venous air embolism, so every change is made slowly.
- Pad the back of the head, the lower back and the heels, and use a padded footboard.
- The arms rest on armboards or on a pillow across the abdomen, never crossed or stacked.
- The safety strap goes on 2 inches above the knees after the position is reached, so it cannot rub or shear while the table moves.
Fracture (orthopedic) table: used for hip fracturehip FRAK-churA break in the upper part of the thigh bone, near the hip joint.Full entry surgery and other operations on the hip and thigh. The patient lies supine with the operative foot in a padded boot, so the leg can be pulled into tractionTRAK-shunA steady pulling force applied to a body part with weights, ropes and pulleys.Full entry , rotated and released, while the other leg rests in a padded, raised leg holder out of the C-arm's way.
- At least four people move the anesthetized patient across, keeping the head and spine in line, with the center post removed first.
- The well-padded perinealper-ih-NEE-ulHaving to do with the perineum, the area between the genitals and the anus.Full entry post goes back in place so it never presses on the genitals or the pudendal nerve.
- Pad the sacrum, the heels and the other leg. The arm on the operative side goes across the chest in a padded sling or holder clear of the elbow crease, and the other arm on an armboard at less than 90 degrees.
- The surgeon directs the traction. Check the pulses in the legs before, during and after, and be ready to use forced-air warming, because the open position can chill the patient.
Lithotomy
The patient lies on the back with the hips and knees bent and the legs raised and spread in stirrups, so the perineumpair-ih-NEE-umThe area of skin and muscle between the genitals and the anus.perine/o perineumFull entry is open to the surgeon. It is used for gynecologygy-nuh-KOL-uh-jeeThe branch of medicine that cares for the female reproductive organs and breasts.gynec/o woman-logy study ofFull entry , urologic and some rectalREK-tulRelating to the rectum, the last part of the large intestine; also, given or measured through the rectum.rect/o rectum, straight-al relating toFull entry surgery. lithotomylih-THOT-uh-meeA position lying on the back with the hips and knees bent and the legs raised and spread apart, often in stirrups.lith/o stone-tomy cutting intoFull entry can be low, standard, high or exaggerated, depending on how high the legs are raised.
- The buttocks rest at the lower break of the table, never hanging over the edge. At least four people slide an anesthetized patient down to the break on a lift sheet, with the anesthesia provider at the head. A sacralSAY-krulHaving to do with the sacrum, the triangle-shaped bone at the base of the spine between the hip bones.Full entry pad and a gel pad under the upper body protect the spine.
- The stirrups are padded and set at the same height.
- Two people lift both legs at the same time, slowly, each holding the sole of one foot and the calf near the knee, and lower them the same way. Raising one leg at a time can injure the lower back and overstretch the hip. A patient with severe obesity may need two people for each leg.
- The legs go up or down only when the anesthesia provider says it is safe, because moving them shifts blood and changes the blood pressure. As they go up, keep the hips turned slightly outward, and never let the knees or hips drop to the side, which can dislocate a knee or tear the hip joint.
- How far the hips bend depends on the level: the thighs are raised about 30 to 45 degrees in low lithotomy and about 90 degrees from the trunk in standard lithotomy. Only high and exaggerated lithotomy bend the hips further, and time in them is kept short, because bending a hip too far (hyperflexion) can stretch the nerves of the leg.
AST's 2011 positioning standard says the hips are never bent more than 90 degrees.
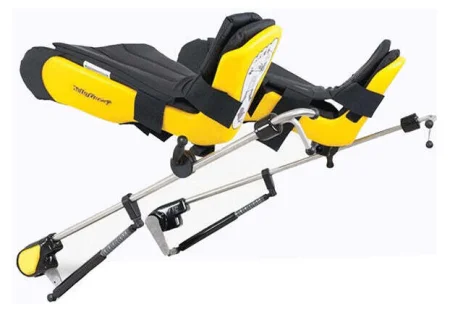
- With candy cane stirrups, the feet hang in slings. Pad the feet, keep the slings off the Achilles tendonuh-KIL-eez TEN-dunThe thick tendon at the back of the ankle that joins the calf muscles to the heel bone.Full entry , and keep the legs from touching the upright posts, which press on the common peroneal nerve. Relaxed legs can also fall too far apart in them and overstretch the hips.
- Knee crutchesKRUCH-izA pair of walking aids, used under the arms or on the forearms, that take weight off one or both legs.Full entry stirrups hold the leg behind the knee, where the weight presses on the nerves and the artery; a gel pad in the crutch lowers the risk.
- Boot stirrups cradle the foot and calf and spread the pressure, and many facilities prefer them because candy canes carry more risk. Line up the big toe, the knee and the opposite shoulder.
- Arms on armboards at less than 90 degrees, or tucked. Check the fingers before the foot of the table is raised again at the end, because the lower break can crush them.
- The safety strap cannot cross the abdomen or chest, so watch the patient closely to prevent a fall.
- In a long case, the calves are pressed on for hours, which raises the risk of a blood clot and of compartment syndromekum-PART-ment SIN-drohmA buildup of pressure inside a closed group of muscles that cuts off their blood supply.Full entry . AST recommends taking the legs down every two hours if a case may last four hours or more. SCDs or compression stockingkum-PRESH-un STOK-ingA tight elastic stocking that squeezes the leg, most firmly at the ankle, to help blood flow back toward the heart.Full entry are used for every lithotomy case.
- At the end, both legs come down together, slowly, and the pulses in the feet are checked. Return the patient to supine as soon as possible.
Prone and its variations
Prone: the patient lies face down, for surgery on the back of the body: the spine, the buttocks and the back of the legs.
- The patient is usually anesthetized and endotracheal intubationen-doh-TRAY-kee-ul in-too-BAY-shunPutting a breathing tube through the mouth or nose into the windpipe (trachea).endo- withintrache/o windpipe-al relating toFull entry on the stretcher, then rolled face down onto the table. AST calls for at least four people, two beside the stretcher and two on the far side of the table, while the anesthesia provider supports the head and neck and keeps the breathing tube in place.
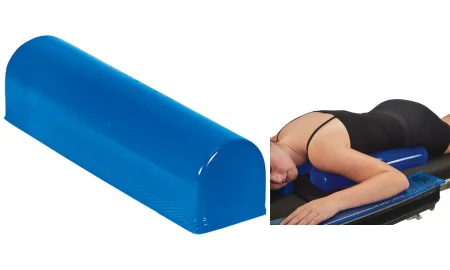
- Chest rolls run along each side from the collarbones to the hip bones (iliacIL-ee-akHaving to do with the ilium, the large, wing-shaped upper part of the hip bone.Full entry crests), lifting the chest and abdomen so the patient can breathe. The breasts are guided gently toward the midlineMID-lineAn imaginary line down the center of the body; also, a type of IV catheter placed in a vein of the upper arm.Full entry , between the rolls, and male genitals hang free in a natural position.
AST's 2011 positioning standard places the breasts to the sides instead.
- The face rests in a padded prone headrest (a face pillow) shaped to keep pressure off the eyes, nose and mouth, with openings for the breathing tube; some have a mirror so the anesthesia provider can see the face. Before the turn, the anesthesia provider puts ointment in the eyes and tapes the lids shut, and protective goggles go on to prevent a corneal abrasion. One person does nothing but hold the head until it is secured in a horseshoe or pin headrest.
- Arms lie at the sides, or are lowered toward the floor and then brought forward slowly onto armboards level with the table, with the shoulders bent no more than 90 degrees, elbows bent, palms down, and pads above and below the elbow.
- Pads go under the knees, and a pillow under the ankles keeps the toes off the table. Check every pressure point: forehead, cheeks, eyes, ears, breasts, genitals, knees and toes.
- The safety strap goes on 2 inches above the knees once the patient is positioned.
- The stretcher stays in the room, so the patient can be turned back quickly in an emergency.
Knee-chest: the patient kneels, with the thighs upright and the head and upper chest resting down. Special frames hold a modified knee-chest position for some spine surgery. The knees carry more pressure in a kneeling position than in any other, so they are padded well, and bending the hips and knees past 90 degrees raises the risk of compartment syndrome.
Kraske (jackknife): prone, with the hips over the middle break and the table bent so the hips are highest and the head and feet lower. It is used for anorectal surgery, such as a hemorrhoidectomy or surgery for a pilonidal sinusSY-nusA hollow space in the body, most often one of the air-filled spaces in the skull bones around the nose.Full entry . All the prone precautions apply. The head turns to the side away from the surgery, the table is bent slowly, and the patient returns to flat prone as soon as possible.
Spine frames and tables: for spine surgery, a frame or spinal table (such as a Wilson frame or an Allen or Jackson table) supports the chest and hips and lets the abdomen hang free, so the patient breathes more easily and bleeds less from the veins around the spine. A spinal table such as the Allen table is assembled and padded carefully before the patient, already intubated, is turned onto it by at least six people. The arms stay at no more than 90 degrees with the elbows slightly bent, the headrest keeps pressure off the eyes, ears and face, the chest support must not press into the armpits or the breasts, male genitals sit in the open part, and the toes stay off the table.
Lateral and its variations
Lateral position (lateral decubitus): the patient lies on one side, for surgery on the chest, the kidney, the hip or the shoulder. The position is named for the side that lies down: in left lateral, the patient lies on the left side.
- At least five people turn the patient: the anesthesia provider at the head, two at the chest and two at the legs, lifting as much as possible to avoid shear and keeping the spine straight.
- A straight line should run from the shoulder through the hip and knee to the ankle. A pillow or head support keeps the neck in line, with the lower ear lying flat.
- An axillary roll goes under the chest just below the armpit, never in it, to protect the nerves and vessels of the lower arm. Use a gel roll made for the job, never an IV bag.
- The arms rest on a double armboard, the lower palm up and the upper palm down.
- The lower leg is bent and the upper leg straight, with pillows between the knees and ankles, and padding at the outside of the lower knee and ankle protects the peroneal nerve.
- A vacuum positioner (bean bag) or padded supports in front and behind hold the patient on the side; only one sheet goes between the patient and a bean bag. The safety strap goes across the thighs 2 inches above the knees, and wide tape fastened to the table, with a sheet or towel between it and the skin, may steady the shoulders, hips and legs. Check the pulse in the lower arm once the patient is positioned.
AST's 2011 positioning standard and a 2022 textbook put the safety strap across the hip instead, with tape when the strap cannot be used.
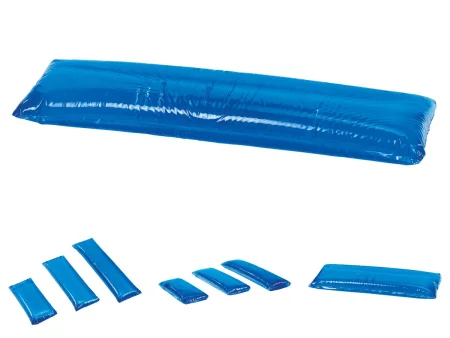
Kidney (lateral kidney): lateral, with the kidney area over the middle break or the kidney lift of the table. A small kidney rest presses against the back and a large one against the abdomen, both well padded. The table is bent as little as possible and straightened as soon as possible.
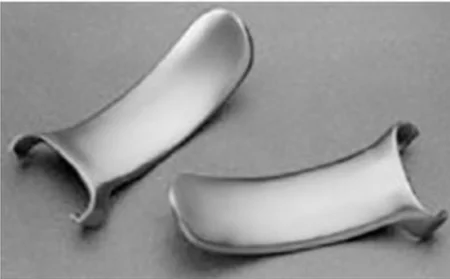
Sims positionSIMZ puh-ZISH-unA side-lying position on the left side with the upper leg bent and the lower arm behind the body.Full entry : a left lateral position with the lower leg straight and the upper knee and hip bent, used for some procedures through the anus, such as an endoscopyen-DOS-kuh-peeA procedure that uses a thin, flexible tube with a light and camera to look inside the body.endo- within-scopy looking with an instrumentFull entry . The patient often stays on the stretcher and is awake enough to help.
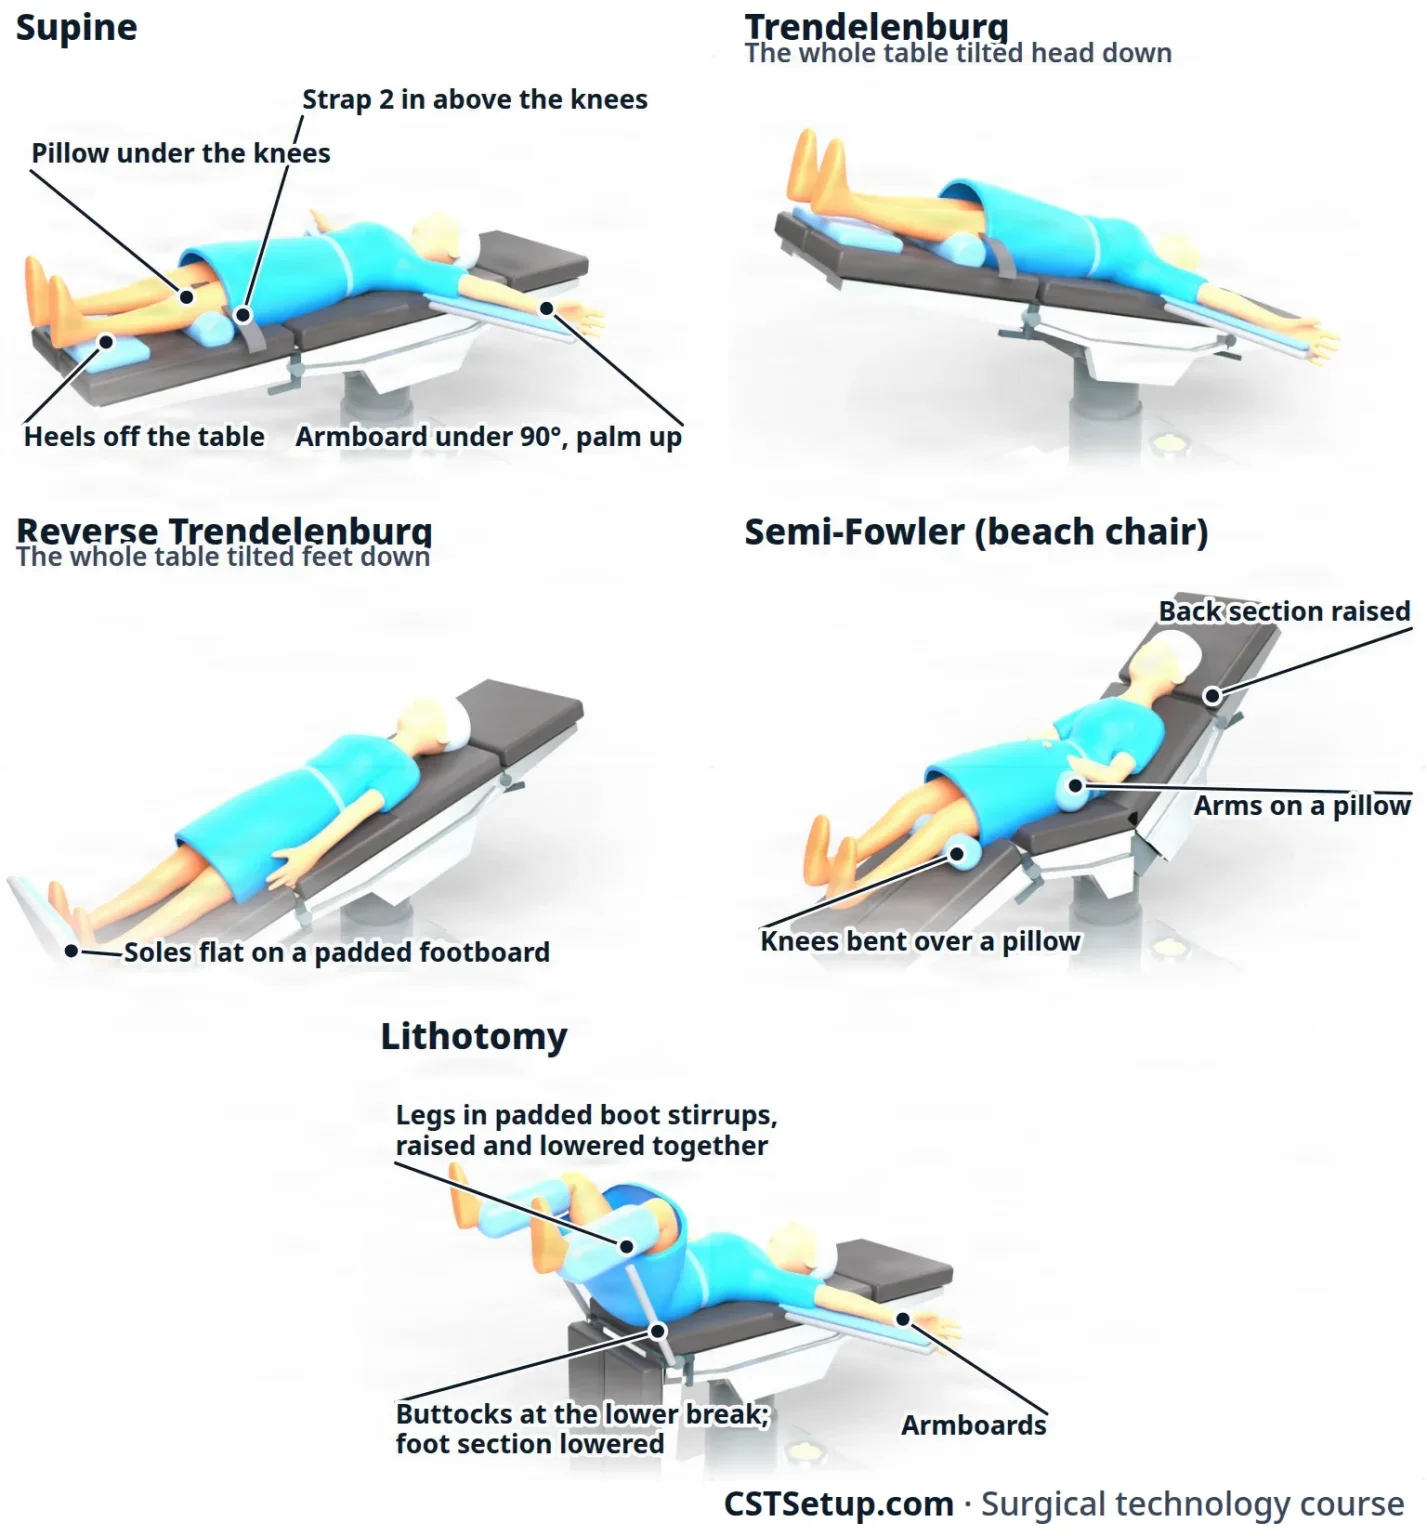
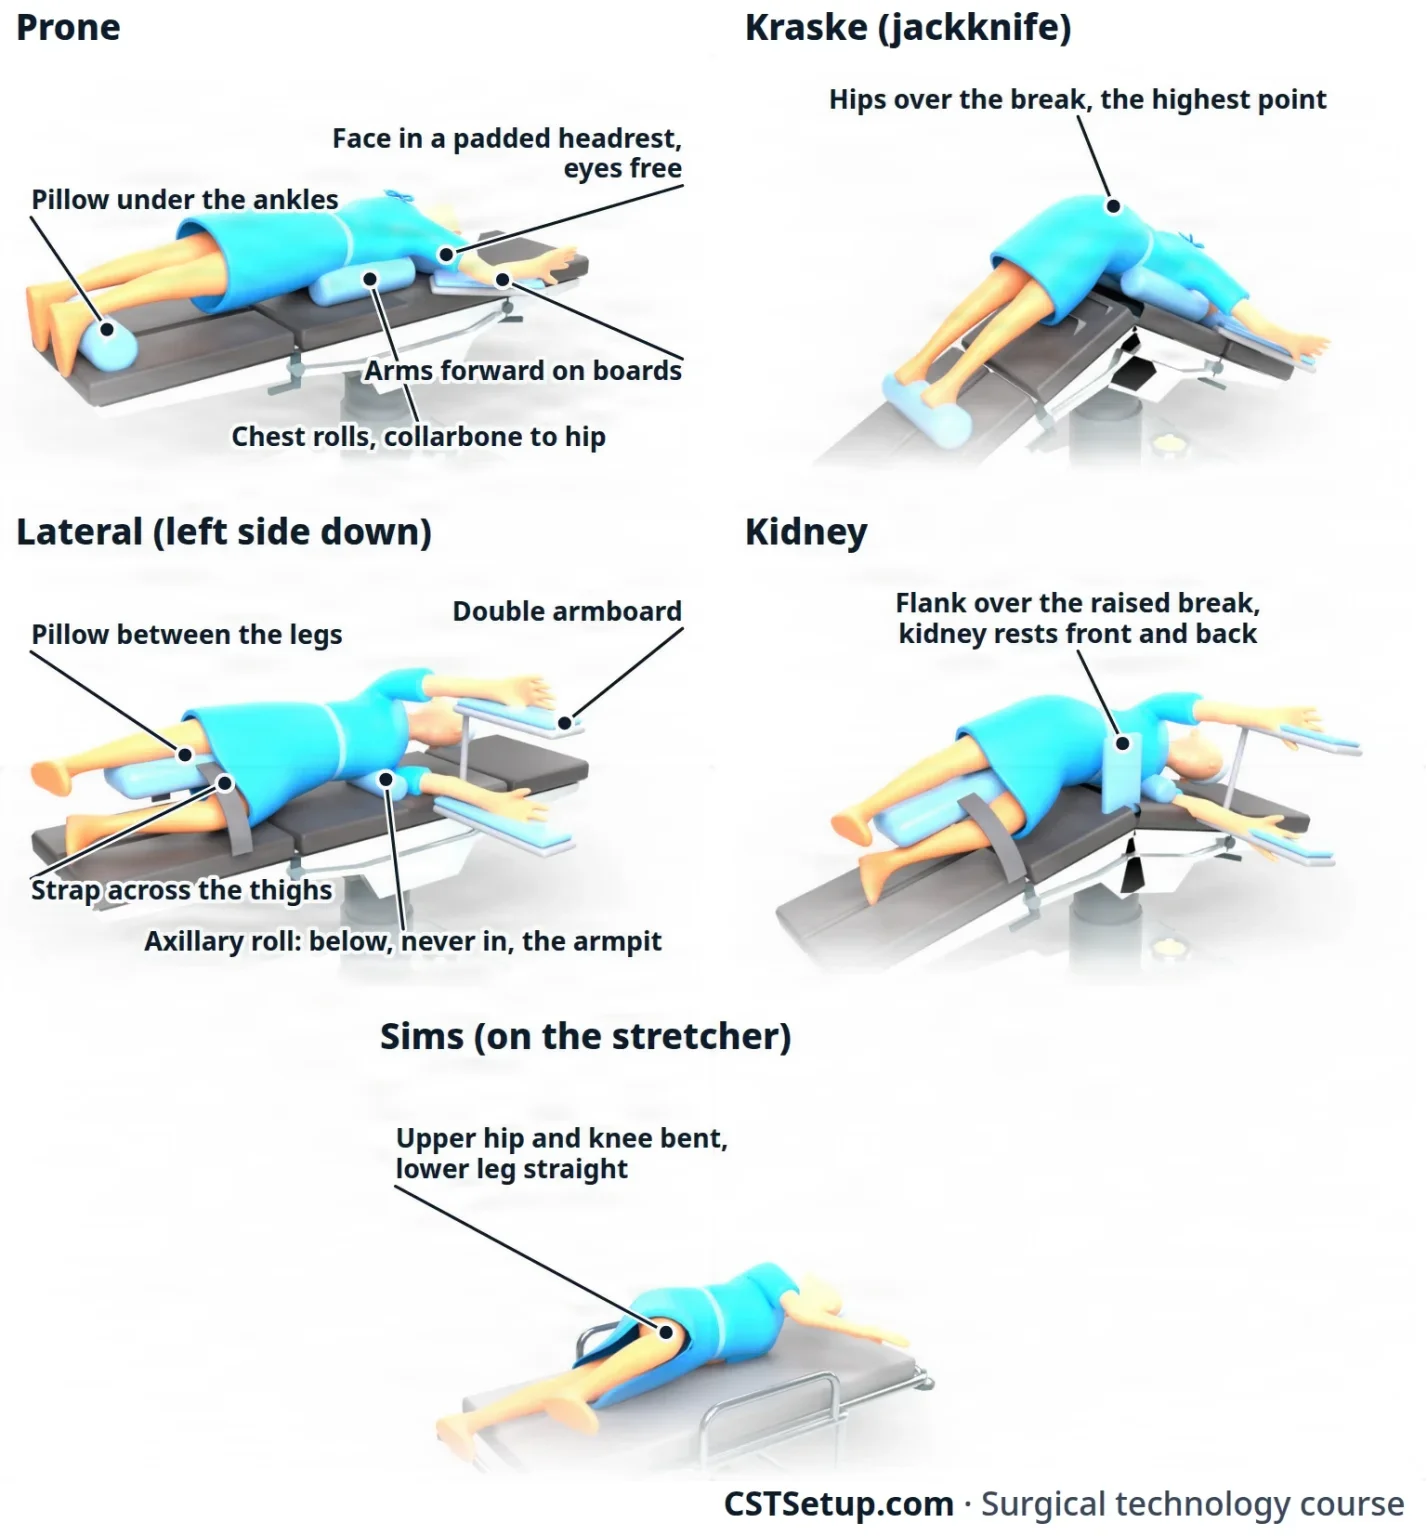
Anesthesia leads, the team moves slowly as one, and the arms stay under 90 degrees. Pad every pressure point, keep the eyes and fingers safe, and check the whole position together before the prep.
8Accessory devices
Accessory devices are the equipment you put on the patient once they are positioned: compression stockingkum-PRESH-un STOK-ingA tight elastic stocking that squeezes the leg, most firmly at the ankle, to help blood flow back toward the heart.Full entry and SCDs, the patient return electrode, the tourniquet cuff and warming devices. The machines that run them are in chapter 23; here you learn to apply them.
Compression stockings and the SCD
A patient who lies still for a long time can have blood pool in the leg veins (venous stasisVEE-nus STAY-sisSlow or pooled blood flow in the veins, most often in the legs.Full entry ), and pooled blood can clot; under anesthesiaan-us-THEE-zhuhLoss of feeling or sensation, often brought on by drugs so that surgery or a procedure can be done without pain.an- withoutesthesi/o feeling, sensation-ia conditionFull entry , muscle tone does less to keep it from pooling. A clot in a deep leg vein (deep vein thrombosisDEEP VAYN throm-BOH-sisA blood clot in a deep vein, most often in the leg or pelvis.thromb/o clot-osis conditionFull entry ) can break loose and travel to the lungs; a clot, air bubble or other material carried along in the blood is called an embolismEM-buh-liz-umThe blocking of a blood vessel by a mass carried there in the blood (an embolus), such as a clot, fat or an air bubble.embol/o plug-ism conditionFull entry . Compression stockings and a sequential compression devicesih-KWEN-shul kum-PRESH-un dih-VYSInflatable leg sleeves that fill with air and squeeze the legs in turns to keep blood moving in the veins.Full entry (SCD) keep the blood moving. They are used for long cases, for patients prone to clots, for every patient with obesity and for lithotomylih-THOT-uh-meeA position lying on the back with the hips and knees bent and the legs raised and spread apart, often in stirrups.lith/o stone-tomy cutting intoFull entry .
Compression (antiembolic) stockings are often put on before the patient reaches the OR.
- Check the legs first: skin, pulses and circulation. Stockings and SCD sleeves are not used over dermatitisder-muh-TY-tisInflammation of the skin.dermat/o skin-itis inflammationFull entry or open skin, on a leg with a recent skin graftGRAFTTissue or a man-made material moved into place in surgery to replace or repair a damaged part.Full entry or poor arterial circulation, or where a deep vein clot is suspected, because handling the leg could break the clot loose.
- Choose the size the patient was measured for.
- Pull each stocking up smooth, with no wrinkles or ridges, and never leave it rolled partway down.
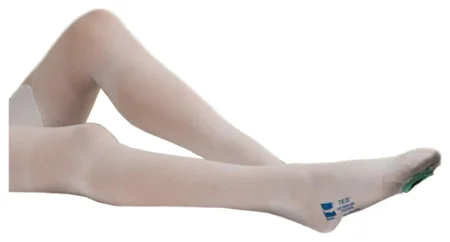
The SCD is a pair of inflatable sleeves that fill with air from the ankle up, squeezing blood toward the heart, then let go so the veins refill.
- Apply the sleeves after the patient arrives in the OR and before surgery begins.
- Lay the leg on the open sleeve so the back of the ankle and the back of the knee match the marks on its lining.
- Wrap it snugly and check the fit: two fingers should slide between the leg and the sleeve. A sleeve or stocking that is too tight can press on the nerve at the outside of the knee.
- Connect the tubing to the pump, matching the arrows, turn it on and watch one full cycle of filling and emptying.
- The anesthesia provideran-us-THEE-zhuh pruh-VY-derThe licensed professional who gives anesthesia and watches over the client's breathing and vital functions during a procedure.Full entry and the RN circulator choose the settings.
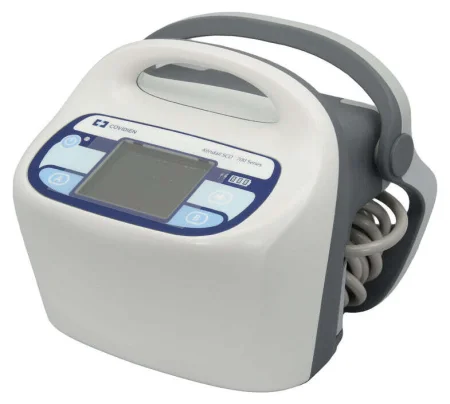
The patient return electrode
In monopolar electrosurgeryee-LEK-troh-SUR-jer-eeUsing high-frequency electric current through a handheld tool to cut tissue or seal bleeding vessels during surgery.Full entry , the current runs from the generator through the active electrode into the patient, and must leave the body safely through the patient return electrode (also called the grounding pad or dispersive electrode). The pad gives the current a wide, safe way out, so it does not crowd into one spot and burnBURNAn injury to the skin or deeper tissues caused by heat, chemicals, electricity, radiation or friction.Full entry the skin. bipolarby-POH-lerHaving two poles or two opposite ends; most often used as a short form of bipolar disorder.bi- twopolar having polesFull entry electrosurgery needs no return electrode. Chapter 20 explains how it all works.
AST's steps for placing it:
- Check it. Make sure it is the type made for your electrosurgical unit and is in date.
- Choose the right size: neonate, infant, pediatric or adult. Never cut or fold a pad to make it fit.
- Wait until the patient is positioned. A pad placed before positioning can shift, wrinkle or lift. Open the package only when you are ready, so the adhesive does not dry out.
- Inspect the pad: no damage, no cracked or dry gel, and an intact cable. Never add gel by hand. A faulty pad is thrown away.
- Choose the site: a large, well-perfusionper-FYOO-zhunThe flow of blood through the body's tissues, bringing them oxygen and nutrients.per- throughfus pour-ion processFull entry muscle, on the same side as the surgery and as close to it as possible. Muscle holds water and carries current well; fat carries it poorly.
- Avoid: bony prominences, scars, cuts and other damaged skin, a metal implant such as a hip replacement, tattoos, and any limb below a tourniquet. Keep the pad away from a warming or cooling blanket.
- Prepare the skin: inspect it and record its condition. It must be clean and dry, with no lotion, blood or prep solution. Clip hair only if it would keep the pad from lying flat.
- Apply it smoothly and check that the whole pad touches the skin, with no gaps, tunnels, tenting or pooled liquid underneath. If only part of the pad touches, the current crowds into that part and can burn.
- Never tape it down. If it comes loose, the surgeon is told, the unit is turned off, and a new pad goes on. A pad is also replaced whenever the patient is repositioned, even if it looks fine.
Also check that the patient touches no metal, such as the table frame, stirrup posts, strap buckles or gown snaps, because metal gives the current another path out. Keep heart monitor electrodes as far from the surgical site as possible. An awake patient should be told the pad will feel cold; under general anesthesiaJEN-er-ul an-es-THEE-zhuhDrug-induced loss of consciousness and feeling over the whole body, so a person feels nothing and is not aware during surgery.an- withoutesthesi/o feeling, sensation-ia conditionFull entry , apply it after the patient is asleep.
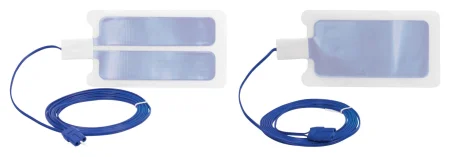
Connecting the active electrode. After draping, the scrub fastens the cord of the active electrode (the electrosurgical pencil) to the drape and hands its end off the field. You plug it into the correct jack on the unit, once the team is in place so nobody trips on the cord. Just before the incision, the cord's connection is checked once more and the scrub briefly tests it. The surgeon's power settings are confirmed before the incision. A bipolar cord must never go into a monopolar jack, because the much higher monopolar output can burn tissue.
The pneumatic tourniquet cuff
A pneumatic tourniquet stops blood flow to an arm or leg so the surgeon works in a bloodless field. It is also used to keep the anesthetican-us-THET-ikA drug that causes loss of feeling, with or without loss of consciousness.an- withoutesthesi/o feeling, sensation-ic relating toFull entry drug in the limb during intravenous regional anesthesia, a Bier block (chapter 13). The surgeon and anesthesia provider decide whether one is used, so never assume it will be. AST says a CSTsee-es-tee (said as letters)Certified Surgical Technologist, a credential for surgical technologists; in maternity care, contraction stress test.Full entry is qualified to apply the padding and cuff under the superviseSOO-per-vyzeTo guide, watch over and check the work of another staff member who is doing a task.Full entry of the surgeon or anesthesia provider, and to set the pressure, after training on the cuff and the machine. Your facility's policy decides who applies it; often it is the anesthesia provider or the RN.
To apply the cuff, follow the maker's instructions and your facility's policy:
- Check the equipment: a clean cuff and tubing with no cracks, holes or tears, connectors that lock, and a system tested for leaks. Preset the pressure the surgeon or anesthesia provider orders; chapter 23 explains how it is worked out.
- Choose the widest cuff that will not get in the way of the surgery, sized to the patient's limb. A patient with obesity may need an extra-large cuff.
- Place it above (proximalPROK-sih-mulNearer the center of the body, or nearer the place where a part is attached.Full entry to) the surgical site, where the surgeon and anesthesia provider plan it, as high on the limb as it will go without pinching skin folds. Never put it over a bony point such as the head of the fibulaFIB-yuh-luhThe thin outer bone of the lower leg, beside the larger tibia.Full entry , or over a nerve near the surface. This is done before the prep.
AST's 2018 guideline places the cuff at the widest part of the limb instead: midway between the shoulder and the elbow on the arm and on the upper third of the thigh, keeping the highest part of the limb for a child.
- Protect the skin first, smoothly, with no folds or pinched skin: a limb protection sleeve matched to the cuff is best, or else at least two layers of wrinkle-free padding. AST says not to use cast padding, sheet padding or Webril, because their loose fibers catch in the hook-and-loop closure and can let the cuff come loose.
A 2022 textbook still wraps Webril cast padding under the cuff, and a 2014 textbook rolled cotton sheeting.
- Wrap the cuff flat and even over the padding, overlapping at least 3 inches but no more than 6. Too much overlap rolls and wrinkles the tissue and raises the pressure there; too little can let the cuff release.
- Check the fit: two fingers should slide easily under the top and bottom edges. One finger means too tight; three means too loose. The tubing lies on the outer side of the limb.
- Connect the tubing firmly to the cuff.
- Seal the lower (distal) edge of the cuff with a self-adhesive plastic drape before the prep, so prep solution cannot run under it and burn the skin. A towel may also be wrapped just above the cuff. Check for seepage after the prep.
For a bloodless field, the cuff is inflated after prepping and draping, at the surgeon's direction. When possible, the limb is first emptied of blood by raising it (you may be asked to hold it up) or by wrapping it in an elastic Esmarch bandage, which is not recommended for a patient with a traumatic injury or one recently in a cast, because it could push a clot loose. The cuff is never pulled up, down or around while on the limb; to move it, take off the cuff and padding, put on new padding and reapply the cuff. When the surgeon is done, the cuff and padding come off as soon as it is deflated, never left on for transport.
Inflation time is kept as short as possible, because the longer the cuff stays up, the greater the risk of nerve and muscle injury. For a healthy adult, the usual limit is about 1 hour on an arm and 2 hours on a thigh. Keep track of the time and tell the surgeon at regular intervalIN-ter-vulThe time or space between two events, such as between two contractions in labor or between two waves on an ECG.Full entry .
AST's 2018 guideline recommends 60 minutes for an adult's arm and 90 for a leg, and 60 minutes for a child, after which the surgeon may let the cuff down for 10 to 15 minutes before inflating it again.
A badly placed cuff, the wrong size, too much pressure, too long an inflation or poor skin protection can injure nerves, blood vessels and tissue, and a poorly applied cuff can blister, bruise or pinch the skin. Record where the cuff went and who applied it, the skin protection used, the pressure, the inflation and deflation times, and the skin and the pulses below the cuff before and after.
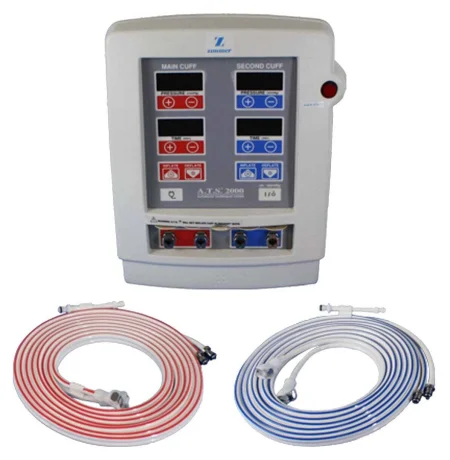
Keeping the patient warm
A patient loses heat fast in the OR: the room is cool, the body is uncovered, anesthesia weakens the body's control of its temperature, and cold prep solution goes on the skin. AST calls a core temperature below 36°C hypothermiahy-poh-THER-mee-uhA body temperature that has fallen below the normal range.hypo- belowtherm/o heat-ia conditionFull entry . Hypothermia increases bleeding and the risk of a wound infection, makes some drugs last longer, and slows recovery.
- Prewarming: AST recommends warming the patient before general, spinal or epidural anesthesiaep-ih-DOOR-ul an-us-THEE-zhuhPain relief or numbness from an anesthetic drug given through a thin catheter into the space just outside the covering of the spinal cord.epi- upon, overdur/o dura (the tough covering of the spinal cord)-al relating toFull entry , for example with a forced-air gown or warming blanket in the holding area. Warming the skin first keeps body heat from shifting outward from the core once anesthesia starts; studies have used anywhere from 10 to 60 minutes.
- Passive warming: warm blankets, and covering as much of the body as you can for as long as you can.
- Forced-air warming: a blanket laid over a part of the body away from the surgical site, before draping, with warm air blown through it. Use only the blanket and hose made for that machine, and follow the maker's instructions. Never blow the hose alone onto or under the patient: the air at the hose is hot enough to burn.
- Circulating-water blankets go on the table before the patient is positioned.
- Warm fluids: irrigationeer-ih-GAY-shunWashing out a wound, body cavity, tube or eye with a steady flow of liquid.Full entry fluid is kept at body temperature, 37°C, and no warmer. For an adult, AST recommends warming IV fluids, in a warming cabinet or fluid warmer, only when more than 2 liters an hour is expected; blood is always warmed before a blood transfusionBLUD trans-FYOO-zhunGiving blood, or a part of blood, from a donor into a person's vein.trans- acrossfus/o pourFull entry .
AST's 2019 normothermia guideline warms irrigation fluid as its maker allows, to 33 to 40°C going by the studies it cites, and one 2022 reference's care plan only keeps it below 40.5°C.
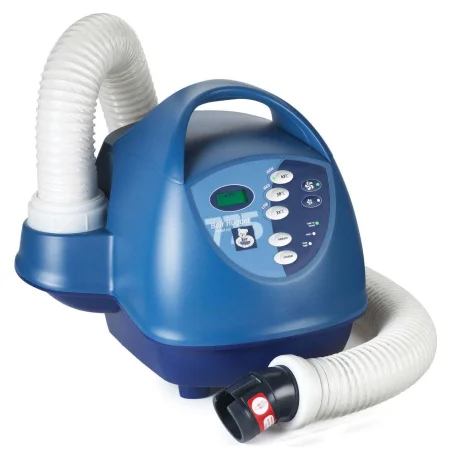
9The skin prep
Why we prep
Most surgical site infections are caused by the patient's own skin germs getting into the wound. Skin cannot be sterilizationstair-uh-luh-ZAY-shunA process that destroys all microorganisms, including spores, on an item; also a permanent birth control procedure.Full entry , but the prep removes dirt and oil, brings the germs living on and in the skin down to the lowest possible number, and keeps them from growing back during surgery.
The prep is done after the patient is positioned and just before draping. It is part of the surgical technologistSUR-jih-kul tek-NOL-uh-jistA member of the operating room team who prepares the sterile field and instruments and hands them to the surgeon.Full entry 's daily work, and the assistant circulator often does it, wearing sterile gloveSTAIR-ul gluvA glove that has been sterilized and packed so it can touch a sterile field or an open body area without bringing in germs.Full entry ; the surgeon may also do it.
How the prep works
The Core Curriculum names three parts of applying a prep:
- Chemical antisepsis: the antiseptic kills germs or stops them growing. A good one is approved by the FDA for skin, works on many kinds of germs, works fast, and keeps working after it dries (residual, or persistent and cumulative, activity) without irritating the skin.
- frictionFRIK-shunThe rubbing of one surface against another, such as skin against bed sheets.Full entry : scrubbing in a circular motion loosens dirt and germs in a two-stage prep.
- Pressure: pressure during the paint prep pushes the antiseptic into skin creases, pores and hair folliclehair FOL-ih-kulA small tube-shaped pocket in the skin from which a hair grows.Full entry . Use gentle pressure on fragile skin, and as little friction and pressure as possible over a suspected tumor, so cancer cells are not spread.
Prep solutions
The surgeon orders the prep solution, based on the surgical site and the patient's allergies. Only antiseptics approved by the FDA for use on skin may be used, and each is labeled with where it may and may not be used. Unless the patient or the site rules it out, an alcohol-based antiseptic, such as CHG or iodineEYE-uh-dyneA mineral the thyroid gland uses to make thyroid hormone; it is also used to kill germs on the skin and in some contrast dyes.Full entry in alcohol, is the first choice, because alcohol-based solutions work better than water-based ones.
- Chlorhexidine gluconate (CHG): kills a wide range of germs and keeps working after it dries. Soap, shampoo and body lotion weaken it; blood does not. It can injure the eye and damage hearing if it reaches the middle ear, so it is never used on the face, in or around the eyes or ears, or in the mouth. A newer pathway for gynecologygy-nuh-KOL-uh-jeeThe branch of medicine that cares for the female reproductive organs and breasts.gynec/o woman-logy study ofFull entry surgery does use a 4% CHG solution, or povidone-iodinePOH-vih-done EYE-uh-dineA brown antiseptic solution of iodine used to kill germs on the skin before procedures and on wounds.Full entry , to cleanse the vagina. It is not used on large open wounds such as burns, or on babies younger than 2 months.
AST's 2008 skin prep standard and a 2014 skills checklist keep CHG off all mucous membranes.
- Iodine-based (iodophor) solutions, such as povidone-iodine: iodine combined with a carrier. Blood and other organic matter can weaken them, though they keep holding back germs while they stay on the skin. A scrub (soap) form must be blotted off before the paint, because its detergent can slow healing. They are not used on babies younger than 2 months.
- 70% isopropyl alcohol: kills germs fast and widely by breaking down their proteins, but has little lasting action on its own. AST says to use it only combined with another antiseptic, such as CHG or iodine with alcohol, which work fast and keep working. Alcohol is never used on mucous membranes, near the eyes or ears, in open wounds, on skin that is visibly dirty, or in the hair, where it can take up to an hour to dry, and it is extremely flammable.
- Parachlorometaxylenol (PCMX, chloroxylenol): considered nontoxic, so AST suggests it as an option for face preps, though it must still be kept out of the eyes. It is also used for some ear, nose and throat surgery. Studies of how well it works disagree.
- Hexachlorophene: once a common prep, it was found to damage the nervous system of babies and is absorptionub-ZORP-shunThe taking in of a substance, such as a drug or a nutrient, into the bloodstream.Full entry through broken skin. It is now prescription only, and no safety agency recommends it as a skin prep.
Check the chart and ask the patient about allergies before every prep. Any allergy to an antiseptic is marked on the chart, its cover and the patient's allergy band. A shellfish allergy is a different matter: no scientific evidence links an allergy to fish or shellfish with an allergy to iodine antiseptics.
AST's 2008 skin prep standard calls for a non-iodine solution when a patient reports a shellfish allergy, and a 2014 skills checklist and a 2021 pharmacology text still ask about shellfish allergy before iodine is used.
Supplies
- Applicators: cotton-tipped swabs for small places such as the umbilicus, gauze sponges held in forcepsFOR-sepsA hand instrument with two blades or arms used to grasp, hold or pull tissue or objects.Full entry , and sponges already soaked with antiseptic (impregnated), including sponges on a handle that hold the solution.
- A disposable prep kit, opened on a small prep table near the patient.
- The solution in a single-use container. Never refill a container or pour antiseptic into a second one, because both can grow germs.
- Sterile gloves and towels.
- Prep sponges are never the counted, x-ray detectable sponges used in surgery, so they cannot be confused with the count. Used prep sponges are thrown away as your facility's policy says, often gathered in the kick bucket and bagged before surgery begins, so they stay apart from the counted sponges and out of the incision.
Before you start
- Communicate: explain the prep to an awake patient and confirm allergies.
- Check: the patient is correctly positioned, the site is verified, jewelry is off, the anesthesia provideran-us-THEE-zhuh pruh-VY-derThe licensed professional who gives anesthesia and watches over the client's breathing and vital functions during a procedure.Full entry says it is safe to start, and the surgeon is ready.
- Look at the skin: note any rash, sore, bruise or discoloration and record it, and tell the surgeon about any sign of infection.
- Remove gross soil: dirt, grease, oil, blood or adhesive comes off first with a nonflammable cleanser.
- Hair: remove it only if ordered, as described earlier in this chapter.
- Protect: cover the return electrode, heart monitor leads and any tourniquet near the prep area with a clear adhesive plastic drape. Expose only the prep area, to save the patient's heat.
- Prepare yourself: know the exact boundaries of the prep, have good light, wash your hands, and put on sterile gloves by the open-glove method. Your arms may be covered during the prep with a clean long-sleeved jacket, closed, so that nothing loose, such as an open jacket or a baggy sleeve, can drag across the prep area.
AST's 2008 attire standard has nonsterile team members wear a long-sleeved warm-up jacket at all times in the semi-restricted and restricted areas, and a 2022 textbook says the circulator must wear one during the prep.
Prepping an abdomen, step by step
There are two methods. A two-stage prep scrubs the skin with antiseptic soap, then paints on antiseptic; it is used when the skin is soiled. A single-stage prep applies antiseptic paint only, usually from a ready-filled applicator, and is used on clean skin. The surgeon usually decides which.
- Square the area with sterile towels at its edges, one at the nipple line and one at the pubisPYOO-bisThe front part of each hip bone, low in the pelvis; the two meet in the middle at the pubic symphysis.pub/o pubisFull entry , cuffing the towel over your gloved hands. The towels catch dripDRIPA continuous IV infusion of fluid or a drug, given slowly over time by gravity or a pump.Full entry before they run under the patient.
- Clean the umbilicus first, with cotton-tipped swabs soaked in the solution, throwing away each swab after use. The umbilicus is dirty, but it is done first so its debris cannot splash onto skin you have already prepped.
- Start at the incision and move outward in widening circles. When the sponge reaches the edge of the prep area, throw it away. Never bring it back toward the incision, which would drag germs from the dirtier edge onto the clean center. Use a new sponge to go over the area again, and apply each antiseptic for the time and in the way its maker's instructions give.
- Cover the whole area: for an abdomen, from the nipple line to the middle of the thighs and down both sides to the table. The prep is much wider than the incision so the surgeon can lengthen it, place ports, change from a laparoscopiclap-uh-roh-SKOP-ikDone through a few small cuts in the abdomen with a thin camera and long instruments, instead of one large opening.lapar/o abdomen-scopic viewingFull entry to an open operation, or bring out a drain.
- Two-stage prep: blot the soap off with a sterile towel, then paint the antiseptic in the same pattern.
- Let it dry. Follow the maker's drying time, and look at the skin to be sure it is dry. Timing alone is not enough, because drying depends on how much solution was used and on skin folds and creases. Wick away extra solution with a sterile towel, and let the fumes clear before the drapes go on.
- Take away the towels carefully, without dragging them across the prepped skin, before the drapes go on.
- Record the prep.
AST's 2008 skin prep standard recommends a prep lasting at least five minutes, until every sponge has been used, while noting that the ideal length has not been established.
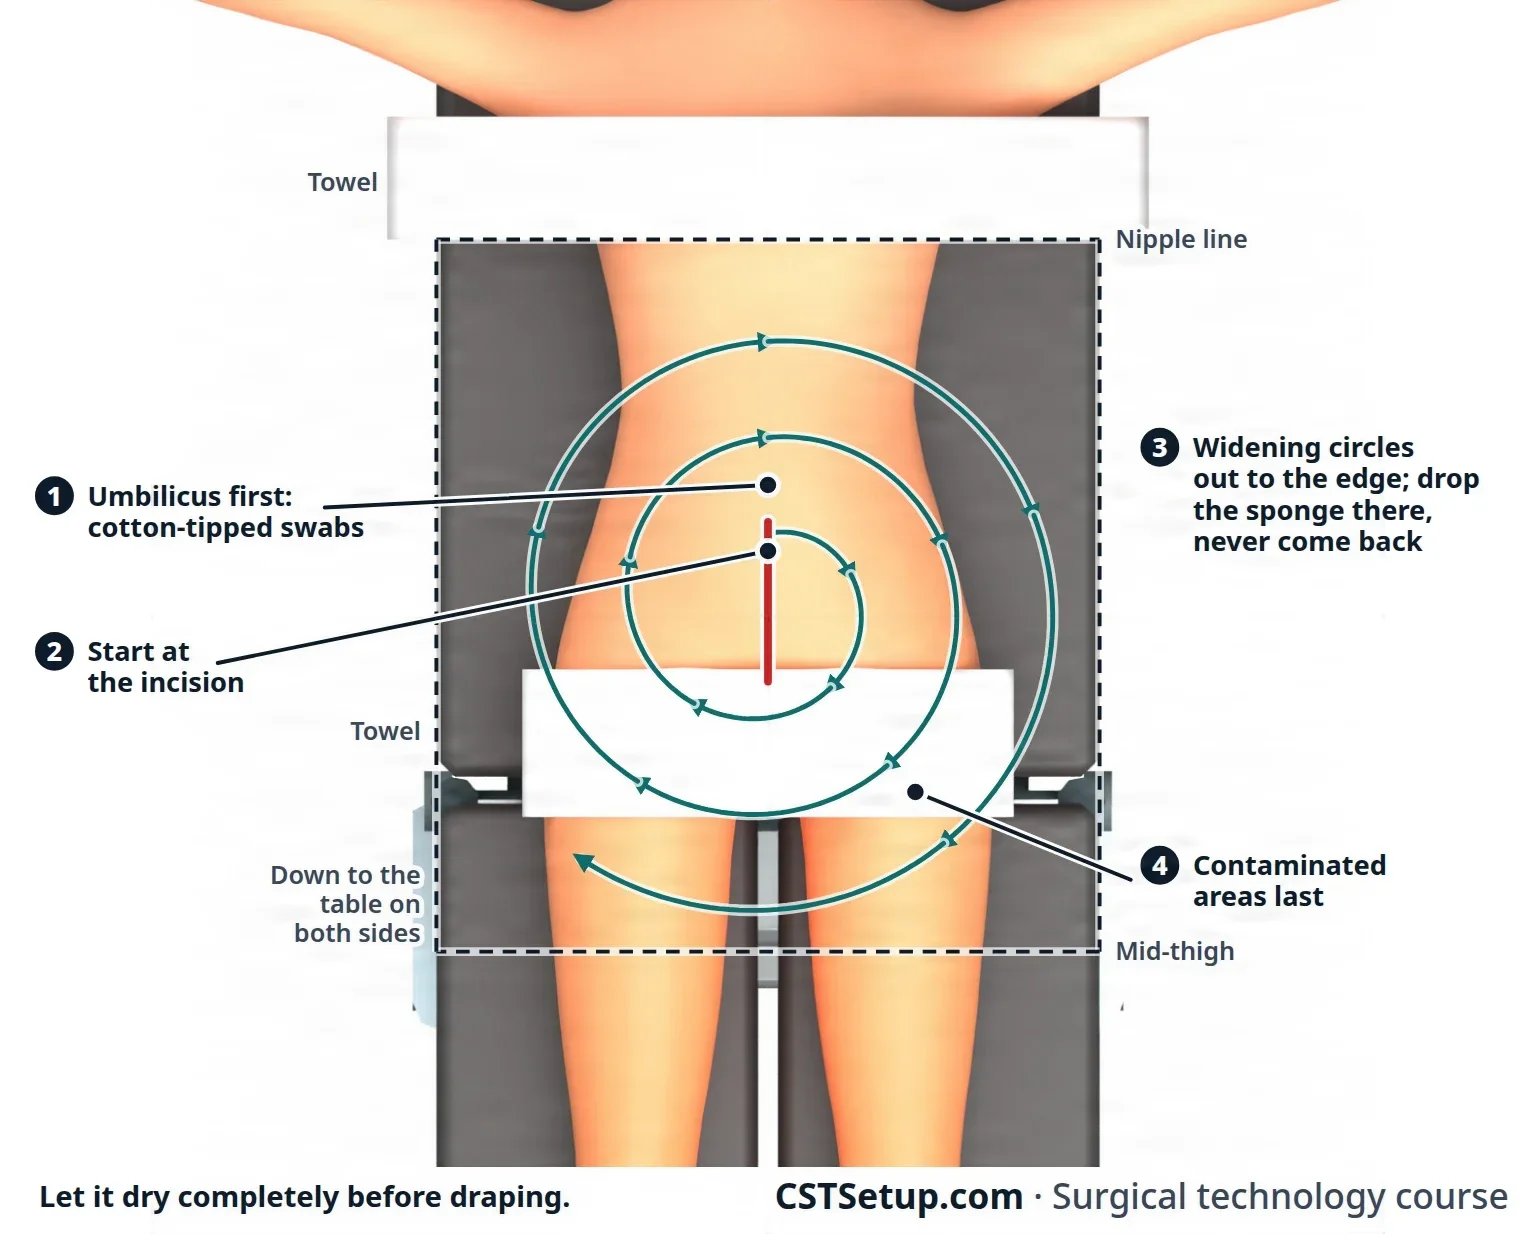
Clean to dirty, center to edge, and never back. Every sponge that reaches the edge is thrown away, and nobody drapes until the prep is completely dry.
Prepping an extremity
- An assistant lifts and holds the arm or leg, keeping it in line, while you prep it all the way around. Put a waterproof sheet under the limb and towels at the edges, and remove the sheet when the prep is dry.
- An arm is prepped all the way around: for the forearm, up to several inches above the elbow, and with a nerve block, usually the whole arm.
- For a hand, clean under the nails first with a nail cleaner, then include the spaces between the fingers and all four sides of each finger. The prep runs to a few inches above the elbow, or with a Bier block up to the tourniquet. Keep holding the hand up until the surgeon takes it for draping.
- With the leg raised, start at the highest point of the prep and work down. A leg prep usually runs from the ankle to the groin; for a knee, the whole leg is prepped and the foot wrapped in its own drape. A hip is prepped all the way around from the waist to the knee, often with the groin, with a towel at the groin fold and an impervious sheet over the table and the other leg.
- Use only a leg holder known to be safe, because a weak one can slip and injure the patient.
- With a tourniquet on, the cuff's lower edge is sealed with a self-adhesive plastic drape, and a towel may also be wrapped just above the cuff, to stop solution seeping under it. Check the cuff when the prep is done.
Prepping the perineum and vagina
The patient is in lithotomylih-THOT-uh-meeA position lying on the back with the hips and knees bent and the legs raised and spread apart, often in stirrups.lith/o stone-tomy cutting intoFull entry , with the foot of the table lowered.
- Set a kick bucket below the end of the table, where it catches run-off and used sponges. Place a waterproof drape under the buttocks, and an adhesive barrier drape across the perineumpair-ih-NEE-umThe area of skin and muscle between the genitals and the anus.perine/o perineumFull entry between the vagina and the anus, so solution cannot pool in the cleft of the buttocks.
- Prep the pubic area first with back-and-forth strokes, out to the iliacIL-ee-akHaving to do with the ilium, the large, wing-shaped upper part of the hip bone.Full entry crests.
- Prep the labia and perineum with downward strokes only, never going back over prepped skin.
- Prep the inner thighs from the labia outward, throwing away each sponge at the edge.
- Prep the vagina last, as its own stage, with sponges on sponge forceps, then blot the extra fluid. Doing the vagina separately keeps germs from the outer skin out of the vagina.
Use a solution without alcohol here, and with povidone-iodine, paint the vaginal mucosamyoo-KOH-suhThe moist lining of body passages that open to the outside, such as the mouth, nose, gut and bladder.Full entry rather than scrubbing it. A urinary catheter, if ordered, goes in after this prep.
For an operation through both the abdomen and the vagina or perineum, the two areas get separate preps with separate supplies. The vagina or perineum is prepped first, then covered with sterile towels, so nothing splashes from it onto the abdomen.
Prep areas by site
Every prep starts at the incision and works outward, but the area and the details change with the site.
| Site | The prep area | Points to remember |
|---|---|---|
| Eye | The eyelid, the inner and outer corners of the eye, the brow, and the face to the chin line on that side, up to about 1 inch from the hairline; both sides for both eyes | Dilute povidone-iodine as the surgeon orders, starting at the eyelid, at least three times with fresh sponges; then a warm saline rinse and the surgeon's solution to flush the eye. A cotton ball and a small adhesive drape keep solution out of the ear. The surgeon usually preps an injured eye. |
| Ear | The outer ear and its folds, and the skin around and behind it, out to the cheek, the temple and the upper neck | Cotton in the ear canal during the prep, taken out after; a plastic drape keeps the eye out, and hair is held back with drapes or towels. Clean the folds with cotton-tipped applicators. |
| Face | From the neck or chin up to the hairline, and the ears if ordered | A nonalcohol solution safe near the eyes, and makeup off. The hairline stays out of the prep: long hair is held back with elastic bands or water-soluble gel, never metal pins, and any sponge that touches the hairline is thrown away. Rinse with warm saline. |
| Neck | The neck and throat; for a radical dissectiondy-SEK-shunA tear in the inner layer of an artery wall that lets blood split the layers apart; also, the cutting apart of tissue in surgery.Full entry , down from the chin to the nipple line or the waist, and around both sides to the table | A towel drape can keep the face and airway out of the prep. |
| Breast | To remove a lump: the collarbone to the middle of the chest, and from the midlineMID-lineAn imaginary line down the center of the body; also, a type of IV catheter placed in a vein of the upper arm.Full entry around to the table on that side, into the armpit for a lump high on the outer side. If a mastectomyma-STEK-tuh-meeSurgery to remove all or part of a breast.mast/o breast-ectomy surgical removalFull entry may follow, much wider: the neck and shoulder on that side, the chest to the table, and down to the umbilicus or the middle of the pelvis | Prep gently, with as little friction as possible over a suspected cancer, and take care not to move a localization wire. If the shoulder is included, an assistant lifts the arm out so it can be prepped all the way around. |
| Shoulder | The neck, shoulder, upper arm and shoulder blade on that side | A gloved assistant lifts the arm, and an impervious sheet goes under the shoulder. The hand may be left out and wrapped afterward. Never pull the shoulder outward to reach the back of it. |
| Flank and back | Like the abdomen, down the sides to the table; the back from the neck to the sacrumSAY-krumThe large, triangle-shaped bone at the base of the spine, between the two hip bones.sacr/o sacrumFull entry | Go over the area at least twice, each time from the incision outward. |
| Male genitalia | The penis, scrotumSKROH-tumThe pouch of skin and muscle that holds the testicles.Full entry , thighs and groin; the pelvis from the pubic bone to the iliac crests | Towels and a barrier drape at the hips and under the scrotum. Pull back the foreskin, prep from the meatusmee-AY-tusAn opening or passage in the body, such as the urinary opening or the ear canal.Full entry to the base of the penis, then put the foreskin back so it cannot cut off the blood supply. Get the solution into every fold of the scrotum, then prep the thighs and groin outward. |
| Perianal | About 12 inches around the anus | Prone with a table break, the buttocks held apart with wide tape, and the legs and upper body kept covered. The skin around is prepped first and the anus last. |
| Heart surgery with a leg vein graftGRAFTTissue or a man-made material moved into place in surgery to replace or repair a damaged part.Full entry | The whole body, including both legs all the way around and the groins; the feet may be wrapped out after the prep | A whole-body prep chills the patient, so any saline or water used is warmed in an approved warmer and the room temperature is watched. |
Special areas
- Contaminated areas: the axilla, groin, perineum, anus and vagina are prepped last, as are stomaSTOH-muhAn opening on the surface of the body made by surgery, such as the end of bowel brought out through the belly wall.stoma mouth, openingFull entry , skin ulcerUL-serAn open sore where the skin or the lining of an organ has broken down.Full entry , sinusSY-nusA hollow space in the body, most often one of the air-filled spaces in the skull bones around the nose.Full entry tracts and open wounds. The umbilicus is the exception, done first. A stoma is best sealed off under a clear adhesive drape; if it is part of the prep, it is cleaned first, covered with a povidone-iodine-soaked sponge while the skin around it is prepped, and prepped last.
- Eyes, ears and face: CHG is never used in or around the eyes or ears or on the face, because it can badly injure the corneaKOR-nee-uhThe clear, dome-shaped layer at the front of the eye, over the iris and pupil.Full entry and damage hearing if it reaches the middle ear. Alcohol and alcohol-based solutions are never used near the eyes or ears or in the mouth. Of the approved skin antiseptics, only dilute povidone-iodine (5% or less, diluted as the surgeon orders) is approved for use around the eyes and ears; check for iodine sensitivitysen-sih-TIV-ih-teeHow strongly something responds; in lab work, which drugs stop a germ, or how well a test finds people who have a disease.Full entry first. Chloroxylenol (PCMX) is another option for ear, nose and throat surgery. During a face prep, an awake patient keeps the eyes closed, and under anesthesiaan-us-THEE-zhuhLoss of feeling or sensation, often brought on by drugs so that surgery or a procedure can be done without pain.an- withoutesthesi/o feeling, sensation-ia conditionFull entry the eyes are protected with a small sterile adhesive drape. Cotton balls in the ears keep solution out.
AST's 2008 skin prep standard rules out iodophors as well as CHG for eye and face preps, because both can injure the cornea and the inner earIN-er EERThe deepest part of the ear, inside the skull bone, which holds the organs of hearing and balance.Full entry , and suggests PCMX, triclosan or diluted solutions instead, rinsed off with warm sterile water.
- Multiple procedures: each site gets its own prep with its own supplies. Two people may prep at the same time, but never from the same supplies.
- Grafts: a graft of skin, bone or vessel taken from the patient's own body (an autograft) means two separate preps with separate supplies: one for the donor site, where the tissue is taken, and one for the recipient site, with a barrier kept between them. Prep the donor site first, using a solution with no color (usually CHG) so the surgeon can see the tissue clearly. Where the graft will go is often an open wound, a burnBURNAn injury to the skin or deeper tissues caused by heat, chemicals, electricity, radiation or friction.Full entry for example, so it is never prepped with alcohol, an alcohol-based solution or povidone-iodine, which can burn open tissue.
- Trauma: a traumatic wound is almost always contaminated, and the surgeon usually preps it. It may need to be irrigationeer-ih-GAY-shunWashing out a wound, body cavity, tube or eye with a steady flow of liquid.Full entry with warm sterile saline over a waterproof pad. The surgeon may first remove dirt, foreign material and dead tissue (debridementdih-BREED-muntThe removal of dead, damaged or infected tissue from a wound so it can heal.Full entry ), sometimes with a low-pressure water system and often in the emergency department; everything removed is kept as a specimen. The skin around the wound is prepped first, with the wound packed with sterile gauze, and the wound itself is prepped last. The prep area is larger than usual.
Prep safety
The Core Curriculum lists six safety points.
- Burns: prep solution that pools under the patient, under a tourniquet cuff or under the return electrode, or that is left on the skin after surgery, can cause a chemical burn. A warmed solution can cause a heat burn. Never warm a solution in a microwave or any other uncontrolled way, and never warm a flammable one. AST recommends warm antiseptics, because they keep the skin from cooling, but only when the maker's instructions say warming is safe, and never hot.
A 2022 textbook says antiseptic prep solutions are never warmed at all, because heat can change how they work.
- Flammability: alcohol-based solutions are highly flammable. Their vapors can collect under the drapes and ignite from the electrosurgeryee-LEK-troh-SUR-jer-eeUsing high-frequency electric current through a handheld tool to cut tissue or seal bleeding vessels during surgery.Full entry pencil or a laser, especially where there is extra oxygen. The skin, any soaked hair, the towels and the linens must be completely dry before draping. Chapter 20 covers fire safety.
- Allergy: check the chart and ask the patient about allergies to antiseptics, iodine and latexLAY-teksNatural rubber made from the sap of the rubber tree, used in some gloves, catheters and other medical supplies.Full entry before every prep.
- Pooling: towels at the edges of the prep area catch drips, and they come off before the drapes go on. In lithotomy, a waterproof drape under the buttocks is removed once the prep is dry. If prep solution soaks the return electrode, heart monitor leads or tourniquet, they are removed and replaced.
- The site mark: the surgeon's skin mark must still be visible after the prep. If it was not made with a markerMAR-kerSomething that can be measured, such as a substance in the blood, that shows a disease or body process is present.Full entry that stays on, take care not to wash it off. Chapter 28 covers how and when the site is marked.
- Removing the solution after surgery: once the drapes come off, wipe the prep solution off the skin with a soft, damp towel, iodophors included, so it cannot irritate or burn the skin.
Under Occupational Safety and Health AdministrationOH-shuh (said as a word)The US federal agency, part of the Department of Labor, that sets and enforces rules to keep workplaces safe.Full entry rules, the safety data sheet for every antiseptic the department uses must be easy for staff to find. Read it when you are unsure how to store or handle a product.
drape over a wet prep or a puddle of solution. Alcohol vapor trapped under a drape is fuel for a fire, and a puddle under the patient can burn the skin.
Documenting the prep
Record the condition of the skin before the prep, the area prepped, the time, any cleanser or degreaser used, the antiseptic, the name of each person who did the prep, and the condition of the skin after surgery. Jewelry removal and any hair removal are recorded too.
10During the case
Once the incision is made, the assistant circulator keeps the case running on the nonsterile side.
- Gowns: fasten the neck and inner back ties of the scrub's and the surgeons' gowns. To close the wraparound back, take the tab on the front tie from the scrub and walk around behind them while they stand still; they turn slightly and take the sterile tie as you pull the tab free. Chapter 28 shows the steps.
- Connections: the scrub secures the suction tubing and cords to the drape and passes their ends off the field. You attach the suction tubing to the canister and turn on and adjust the suction, and connect the other cords.
- Medications and irrigationeer-ih-GAY-shunWashing out a wound, body cavity, tube or eye with a steady flow of liquid.Full entry : verify each one with the scrub, then pour or deliver it to the field (chapter 28).
- Counts: count with the scrub at the first count and every closing count (chapters 28 and 29).
- Anticipate: follow the case, get supplies and equipment before they are asked for, adjust the lights and run nonsterile equipment.
- Traffic: keep the doors closed and the room quiet, with as few people coming and going as possible.
- The patient: watch the position during the case. A repositioning is directed by the anesthesia provideran-us-THEE-zhuh pruh-VY-derThe licensed professional who gives anesthesia and watches over the client's breathing and vital functions during a procedure.Full entry , the sterile team clears the instruments away from the patient first, and the return electrode is replaced afterward.
- Specimens: verify each one with the scrub, take it from the field and label it (chapter 29).
- Cell saver: when the team will collect and return the patient's own blood (chapter 12), you set up and run the cell saver by its maker's instructions, once you are trained on that machine. For a planned case, bring it in and set it up before the patient arrives; the cells are washed with sterile normal saline. Before the blood goes back, remove all the air from the reinfusion bag, look for fat or debris (if you see any, the blood is washed again) and disconnect the bag from the machine. Label it with the patient's name, identification number and date of birth, the date and time it was collected, the time it expires (6 hours after processing), your name and words such as "for autologous use only". The anesthesia provider gives it back and superviseSOO-per-vyzeTo guide, watch over and check the work of another staff member who is doing a task.Full entry .
- Records: document the case as your facility allows: the position and devices, the prep, the catheter, the tourniquet times and the urine output.
11After the case
- Disconnect equipment, except suction, which stays connected until the patient leaves the room.
- Remove the return electrode slowly, holding the skin flat at each end as you peel, then check the skin under it and record its condition.
- Wipe off the prep solution left on the skin.
- Secure dressings and drains: tape the dressings and connect the nonsterile ends of drains to their collection devices.
- Remove positioning devices: bring lithotomylih-THOT-uh-meeA position lying on the back with the hips and knees bent and the legs raised and spread apart, often in stirrups.lith/o stone-tomy cutting intoFull entry legs down together and slowly, and return the patient to supine slowly so the blood pressure can adjust.
- Check the skin for pressure injuryPRESH-er IN-juh-reeDamage to the skin and the tissue beneath it from pressure, or pressure with shear, usually over a bony area or under a device.Full entry and record anything you find, with what was done about it.
- Transfer to the stretcher: lock the stretcher beside the table, move the IV bags to its pole, and make sure the urine bag stays below the bladder and no tubing will pull. At least four people move the patient on a transfer device, with the anesthesia provideran-us-THEE-zhuh pruh-VY-derThe licensed professional who gives anesthesia and watches over the client's breathing and vital functions during a procedure.Full entry at the head giving the signal. Raise the side rails, keep the patient covered, with a warm blanket if needed, and release the locks.
- Transport: the anesthesia provider and the circulator usually take the patient to the recovery room (PACU) and give report there.
- Finish the records and sign everything before you leave the room. Then help turn over the room (chapter 30).
What to take from this chapter
- The assistant circulator is the surgical technologist working on the nonsterile side, helping the RN circulator, who must be immediately available. Your duties are set by your state and facility.
- Before the patient arrives, check the preparation: NPO, belongings and prosthetics, jewelry and nail polish off, bladder emptied, a way to communicate, and hair removed only if ordered, with clippers.
- Transport feet first (head first into an elevator), side rails up, brakes on at every stop, and never leave the patient alone. Transfer with everything locked, the patient lifted and never dragged, and the safety strap 2 inches above the knees with two fingers' room.
- A urinary catheter is placed only when needed, with strict sterile technique, the smallest size that drains, a balloon filled with sterile water after urine flows, the catheter secured to the thigh and the bag kept below the bladder.
- The anesthesia provider leads every position. Arms stay under 90 degrees, pressure points are padded, the eyes and fingers are protected, and the team checks the position before the prep and records it.
- Know the main positions and their dangers: supine and its tilts, lithotomy (both legs together, peroneal nerve), prone (chest rolls, eyes), Kraske, lateral (axillary roll), kidney and Sims.
- Apply the return electrode to clean, dry skin over a large muscle near the site, after positioning, with full contact; never tape it, and replace it after any repositioning.
- Prep from the incision outward, clean to dirty, the umbilicus first and contaminated areas last, with the right solution for the site, no pooling, and a completely dry prep before draping.
Check yourself5 quick questions
Free for everyone. Pick an answer for each, then check them all at once.
In the ORWhere you'll use this
The chapter's whole question pool in sets of 10, with the answer explained after each one.
Part of the educators programThe chapter's words on spaced cards: the ones you miss come back sooner.
Part of the educators programGiven by your class's teacher. Each class draws its own 25 from the chapter's pool.
Part of the educators program
Suggest a fix
Something wrong, unclear or out of date in this chapter? Tell us and we will fix it for everyone. Your email is only used to reply.